
Blob Stores
Configuration
Blob Stores allow you to host internally managed static asset stores to handle very large files. The Blob Stores configuration file allows you to configure stores for assets with the corresponding information required by the store being used.
To modify the Blob Stores configuration, click on ![]() from the bottom of the Sidebar, then click on Configuration and select Blob Stores from the list.
from the bottom of the Sidebar, then click on Configuration and select Blob Stores from the list.

Sample
Here’s a sample Blob Stores Configuration file (click on the triangle on the left to expand/collapse):
Sample "blob-stores-config.xml"
  1<?xml version="1.0" encoding="UTF-8"?>
  2<!--
  3  ~ Copyright (C) 2007-2024 Crafter Software Corporation. All Rights Reserved.
  4  ~
  5  ~ This program is free software: you can redistribute it and/or modify
  6  ~ it under the terms of the GNU General Public License as published by
  7  ~ the Free Software Foundation, either version 3 of the License, or
  8  ~ (at your option) any later version.
  9  ~
 10  ~ This program is distributed in the hope that it will be useful,
 11  ~ but WITHOUT ANY WARRANTY; without even the implied warranty of
 12  ~ MERCHANTABILITY or FITNESS FOR A PARTICULAR PURPOSE.  See the
 13  ~ GNU General Public License for more details.
 14  ~
 15  ~ You should have received a copy of the GNU General Public License
 16  ~ along with this program.  If not, see <http://www.gnu.org/licenses/>.
 17  -->
 18
 19<!--
 20    Blob stores configuration file.
 21
 22    For every store you need to specify:
 23    <blobStore>
 24        <id/>
 25        <type/>
 26        <pattern/>
 27        <mappings>
 28            <mapping>
 29                <publishingTarget/>
 30                <storeTarget/>
 31                <prefix/>
 32            </mapping>
 33        </mappings>
 34        <configuration/>
 35    </blobStore>
 36
 37    id:	a unique id for the store
 38    type: the type of store to use
 39    pattern: the regex to match file paths
 40    mappings.mapping.publishingTarget: the name of the publishing storeTarget (preview, staging, live)
 41    mappings.mapping.storeTarget: the name of the storeTarget inside the store
 42    mappings.mapping.prefix: the prefix to use for all paths (optional)
 43    configuration: configuration specific for the store type
 44
 45
 46   Every store can require additional properties.
 47-->
 48<blobStores>
 49    <!--
 50      AWS S3 Store
 51
 52      Configuration properties:
 53
 54        <credentials>
 55            <accessKey/>
 56            <secretKey/>
 57        </credentials>
 58        <region/>
 59        <endpoint/>
 60        <pathStyleAccess/>
 61
 62        credentials.accessKey: AWS access key (optional)
 63        credentials.secretKey: AWS secret key (optional)
 64        region: AWS region for the service (optional)
 65        pathStyleAccess: indicates if path style access should be used for all requests (defaults to false)
 66      -->
 67
 68    <blobStore>
 69        <id>s3-store</id>
 70        <type>s3BlobStore</type>
 71        <pattern>^/static-assets(?!/(app|css|js|fonts|tracking|seo)/)(.*)</pattern>
 72        <mappings>
 73            <!--
 74                Notice that default values are provided for storeTarget and prefix elements as environment variables.
 75                The value of those variables is expected to contain a "siteName" placeholder that will be replaced
 76                with the actual site name when this configuration is loaded.
 77                Both the bucket name and the root prefix can be configured. e.g.:
 78                A bucket per site configuration:
 79                    PREVIEW_BUCKET_NAME_PATTERN="sites-blobs-${siteName}"
 80                    PREVIEW_BUCKET_PREFIX_PATTERN=""
 81
 82                Single bucket name with site-specific prefix:
 83                    PREVIEW_BUCKET_NAME_PATTERN="sites-blobs-preview"
 84                    PREVIEW_BUCKET_PREFIX_PATTERN="sandbox-${siteName}"
 85
 86                By using this parameterized configuration, blob-stores can continue to seamlessly function after a site duplicate.
 87            -->
 88            <mapping>
 89                <publishingTarget>preview</publishingTarget>
 90                <storeTarget>${env:PREVIEW_BUCKET_NAME_PATTERN}</storeTarget>
 91                <prefix>${env:PREVIEW_BUCKET_PREFIX_PATTERN}</prefix>
 92            </mapping>
 93            <mapping>
 94                <publishingTarget>staging</publishingTarget>
 95                <storeTarget>${env:STAGING_BUCKET_NAME_PATTERN}</storeTarget>
 96                <prefix>${env:STAGING_BUCKET_PREFIX_PATTERN}</prefix>
 97            </mapping>
 98            <mapping>
 99                <publishingTarget>live</publishingTarget>
100                <storeTarget>${env:LIVE_BUCKET_NAME_PATTERN}</storeTarget>
101                <prefix>${env:LIVE_BUCKET_PREFIX_PATTERN}</prefix>
102            </mapping>
103        </mappings>
104        <configuration>
105            <region>us-east-1</region>
106            <pathStyleAccess>${env:AWS_S3_PATH_STYLE_ACCESS}</pathStyleAccess>
107            <endpoint>${env:AWS_S3_ENDPOINT}</endpoint>
108        </configuration>
109    </blobStore>
110
111</blobStores>
where:
The environment variables (env:VARIABLE_NAME) values are set in the
crafter-setenv.shfile. See here for more information on environment variables used in serverless deployments
Remember to encrypt your credentials. For more information on how to manage/encode your secrets such as AWS credentials, please see Managing Secrets
For better security and control, we recommend setting an AWS profile via the crafter-setenv.sh file instead of
configuring the encrypted credentials in the blob stores configuration file. This allows you to have an IAM user
per developer, which is a better approach than a single user whose credentials are included (encrypted) in the
configuration file. In this way, if you need to rotate or remove the credentials of a single user, the access of
other users won’t be affected.
To set an AWS profile, using your favorite editor, open CRAFTER_HOME/bin/crafter-setenv.sh and add the following:
export AWS_PROFILE=YOUR_AWS_PROFILE
where YOUR_AWS_PROFILE is the AWS profile you wish to use for the blob store. See here
for more information on configuring AWS profiles.
When using an AWS profile, you can now remove the <credentials /> section in your blob stores configuration file.
Remember to restart your CrafterCMS install for the changes you made to take effect.
Using AWS Service Roles
CrafterCMS supports AWS access without using access/secret keys, by setting AWS service roles on your machine
Simply follow the instructions here for attaching an IAM role to your instance: https://docs.aws.amazon.com/AWSEC2/latest/UserGuide/iam-roles-for-amazon-ec2.html#attach-iam-role
Remember to remove the <credentials /> section in your blob stores configuration file.
Publishing Assets from the Blob Stores
CrafterCMS supports managing assets in external storage through workflow and publishing mechanics. This allows uploading assets to an external storage for preview, that can then be published to either a live or a staging (depending on if staging is setup for your Crafter install) external storage, thus making the external assets available to delivery only after the assets have been published to the live external storage.
The external storage could be in the cloud, such as AWS S3 or some other storage solution that is outside of where CrafterCMS is installed.
Configuring the External Storage
First we’ll need to setup the external storage to be used by CrafterCMS.
To setup an external storage for assets, open the Sidebar, then click on ![]() -> Configurations. Select
-> Configurations. Select Blob Stores from the dropdown and fill in the required information.
<blobStore>
  <id/>
  <type/>
  <pattern/>
  <mappings>
    <mapping>
      <publishingTarget/>
      <storeTarget/>
      <prefix/>
    </mapping>
  </mappings>
  <configuration/>
</blobStore>
To see more information on the Blob Stores configuration, see above
After setting up the Blob Stores configuration, you may now use the external storage for uploading using the various upload methods provided by Crafter Studio, and publishing to live or staging if it’s setup.
Example
Let’s take a look at an example of setting up an external storage for preview, staging and live and then uploading and finally publishing assets to the external storage we setup. In the example, we will use AWS S3 as the external storage and the Website Editorial blueprint in Crafter Studio to create our project.
Prerequisites:
Project created using the Website Editorial blueprint.
AWS S3 bucket/s. A single bucket can be used as long as all the
publishingTargetuses a uniqueprefix, or a separate bucket can be created for eachpublishingTarget, or a combination of both.For our example, we will be using two buckets. One for authoring and another for delivery. The following buckets were setup in AWS S3: my-authoring-bucket for authoring (used by publishing target
previewwith the prefix sandbox and publishing targetstagingwith the prefix staging) and my-deli-bucket for delivery.
Here are the steps:
Enable staging (optional)
Setup the blob store
Upload files
Publish the files to staging (if setup)
Publish the files into live
Let’s begin:
1. Enable Staging (optional)
This step is optional but for our example, we wanted to be able to publish to staging, so in this step, we will first enable staging. In your Studio, click on ![]() -> Configuration -> Project Configuration and set
-> Configuration -> Project Configuration and set enable-staging-environment to true to enable staging
<published-repository>
    <enable-staging-environment>true</enable-staging-environment>
    <staging-environment>staging</staging-environment>
    <live-environment>live</live-environment>
</published-repository>
For more information on staging, see Configuring Publishing to Staging Target
2. Setup Blob Store
In your Studio, click on ![]() -> Configuration -> Blob Stores and fill in the required information to setup the S3 buckets for the preview, staging and live.
-> Configuration -> Blob Stores and fill in the required information to setup the S3 buckets for the preview, staging and live.
CRAFTER_HOME/data/repos/sites/sandbox/SITENAME/sandbox/config/studio/blob-stores-config.xml¶1<blobStores> 2 <blobStore> 3 <id>s3-default</id> 4 <type>s3BlobStore</type> 5 <pattern>/static-assets/item/.*</pattern> 6 <mappings> 7 <mapping> 8 <publishingTarget>preview</publishingTarget> 9 <storeTarget>my-authoring-bucket</storeTarget> 10 <prefix>sandbox</prefix> 11 </mapping> 12 <mapping> 13 <publishingTarget>staging</publishingTarget> 14 <storeTarget>my-authoring-bucket</storeTarget> 15 <prefix>staging</prefix> 16 </mapping> 17 <mapping> 18 <publishingTarget>live</publishingTarget> 19 <storeTarget>my-delivery-bucket</storeTarget> 20 </mapping> 21 </mappings> 22 <configuration> 23 <credentials> 24 <accessKey>xxxxxxxxx</accessKey> 25 <secretKey>xxxxxxxxx</secretKey> 26 </credentials> 27 <region>us-west-1</region> 28 <pathStyleAccess>true</pathStyleAccess> 29 </configuration> 30 </blobStore> 31</blobStores>
where the highlighted items above refers to:
pattern: the regex to match file paths (the path in Studio that when used will access the external storage,
/static-assets/item/.*for our example above)mappings.mapping.storeTarget: the name of the storeTarget inside the store (AWS S3 buckets,
my-authoring-bucketandmy-deli-bucketfor our example above)configuration: configuration specific for the store type (For AWS S3, it requires credentials to access the buckets)
Remember to encrypt your credentials. For more information on how to manage/encode your secrets such as AWS credentials, please see Managing Secrets
To see more information on the Blob Stores configuration, see above
3. Upload files
There are various ways to upload files in Crafter Studio. Here’s a few ways we can upload to the external storage:
Upload through a picker with corresponding data source setup in a content type
Upload using the
Bulk UploadorUploadright-click option
Let’s take a closer look:
One way of uploading files is through the use of a picker (image, video, item selector) with its corresponding data source with the
Repository Pathproperty set to thepatternwe defined in theBlob Storesconfiguration file.For our example, open the Page - Article content type by opening the Sidebar, then click on
 -> Content Types, then choose the template name
 Page - Article.In the Page - Article content type, notice that the
Repository Pathproperty of theUpload Imagedata source is set to:/static-assets/item/images/{yyyy}/{mm}/{dd}/, which falls into the file path pattern/static-assets/item/.*we setup in theBlob Storesconfiguration file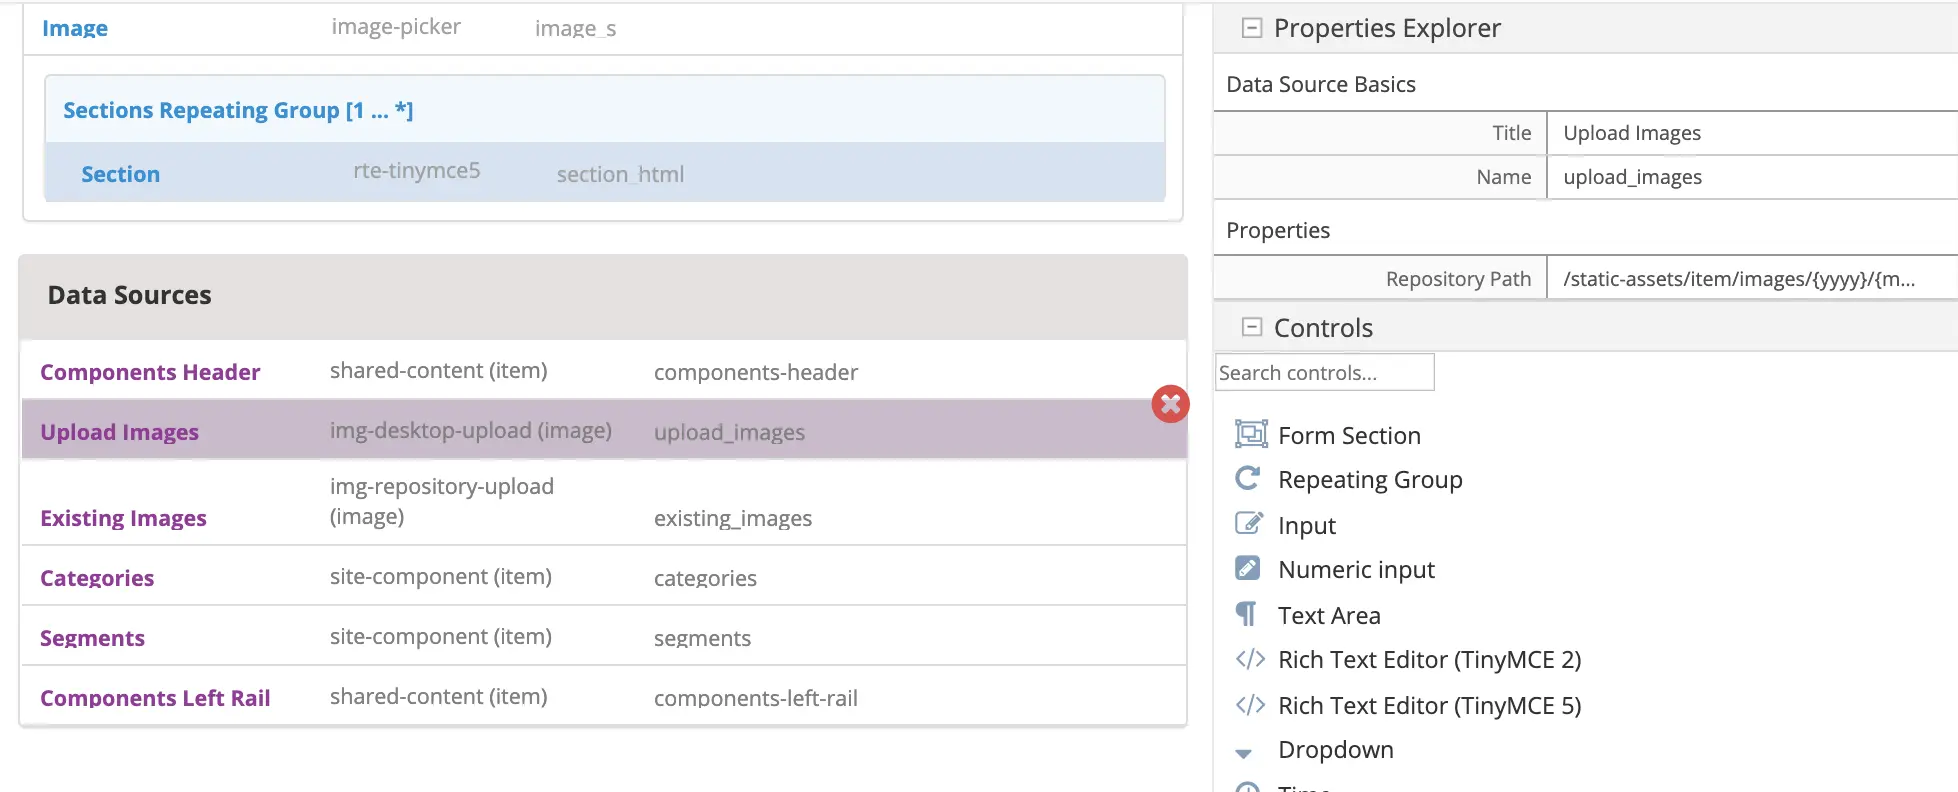
Let’s change the image used in one of the articles in the project.
From the Sidebar, navigate to
/articles/2016/6then right click onCoffee is Good for Your Healththen selectEdit.Scroll down to the
Contentsection, then click on theReplacebutton next to the Image field, then selectUpload Images. Select the file you want to upload. In our example, the filenew1.pngwill be uploaded tostatic-assets/item/images/2020/03/27.
After uploading the file, we should see it in the AWS S3 bucket for authoring
my-authoring-bucketin the sandbox: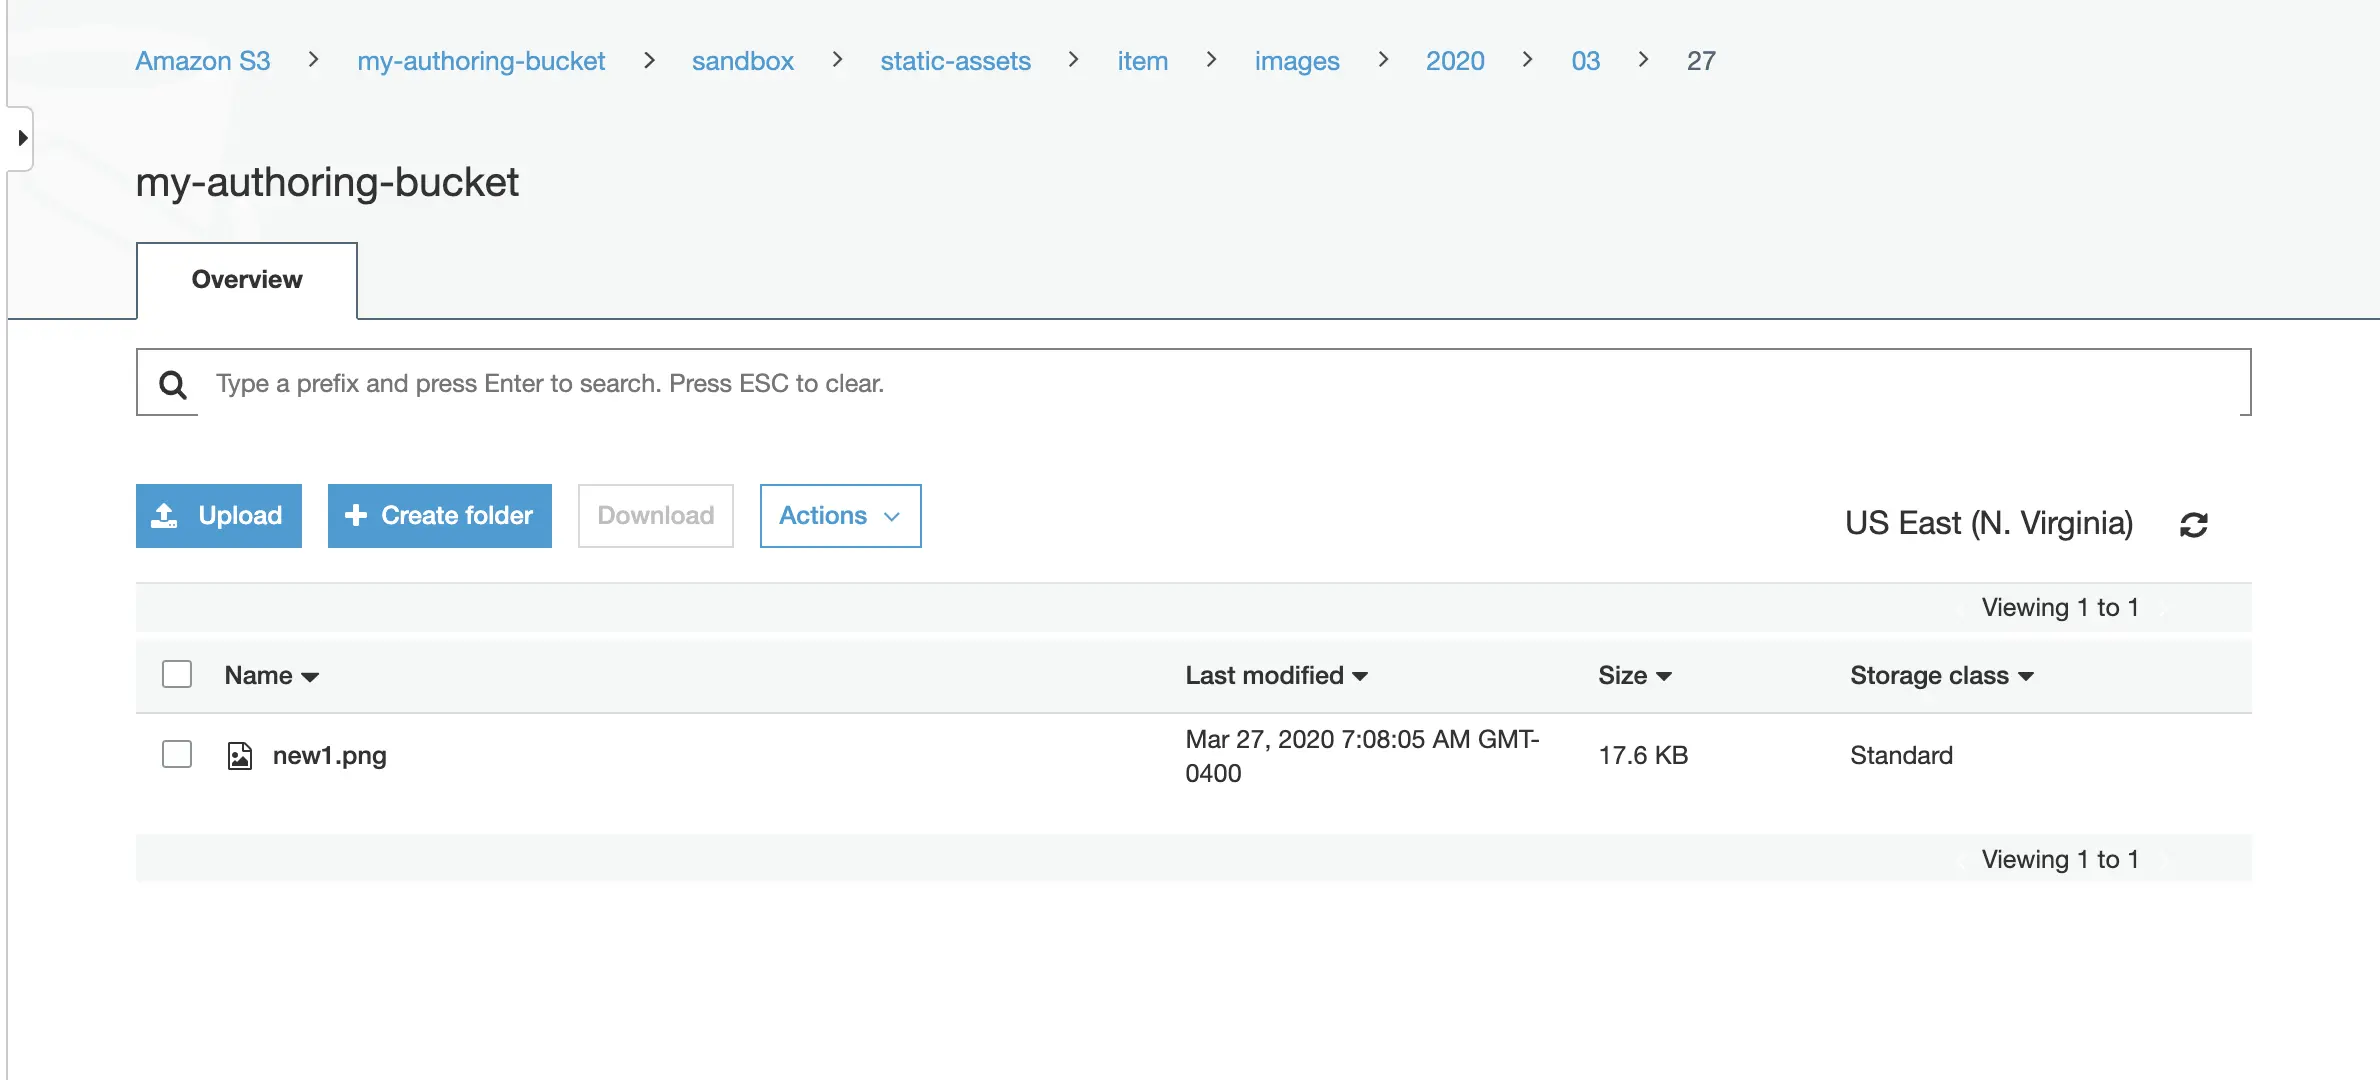
Next we’ll try uploading using the
Uploadright-click option.Open the Sidebar and navigate to
static-assets/item. Create a folder nameddocsunderitem. Right click on the newly created folder and selectUploadto upload a single file, orBulk Uploadto upload multiple filesIn the example below, two files were uploaded to the
docsfolder.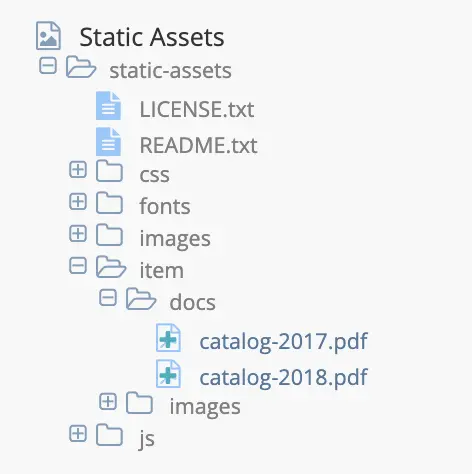
When you upload files to the
docsfolder, the files get uploaded to thesandboxof themy-authoring-bucketpreviously setup.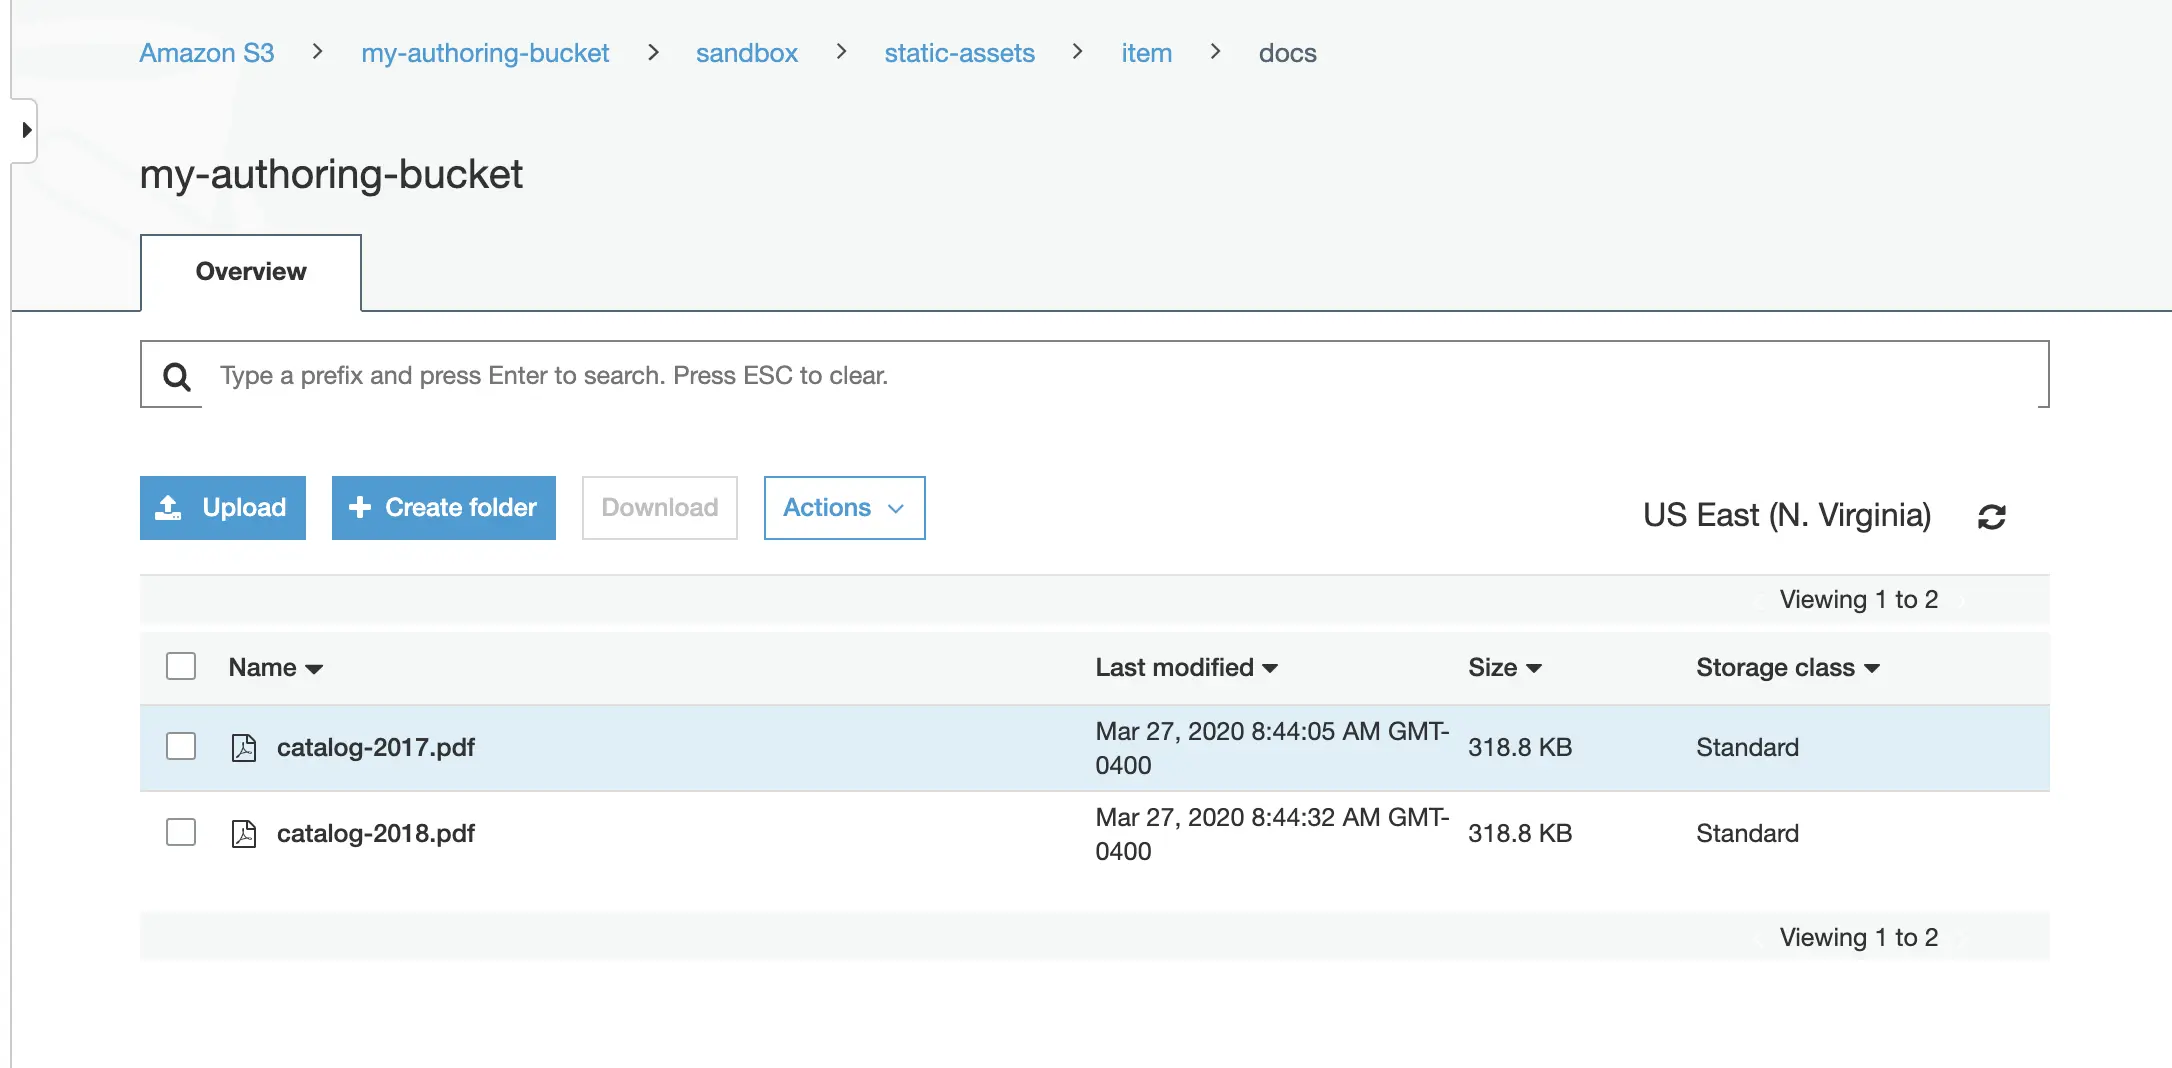
5. Publish the files to staging
The next step in our example is to publish the files to staging. To publish a file to staging, navigate to the file in the Sidebar then right click on the file, and select Publish or open the Dashboard and select the file/s you want to publish to staging in the Unpublished Work widget and click on Publish from the context nav.
The Publish dialog will come up. Remember to select staging for the Publishing Target
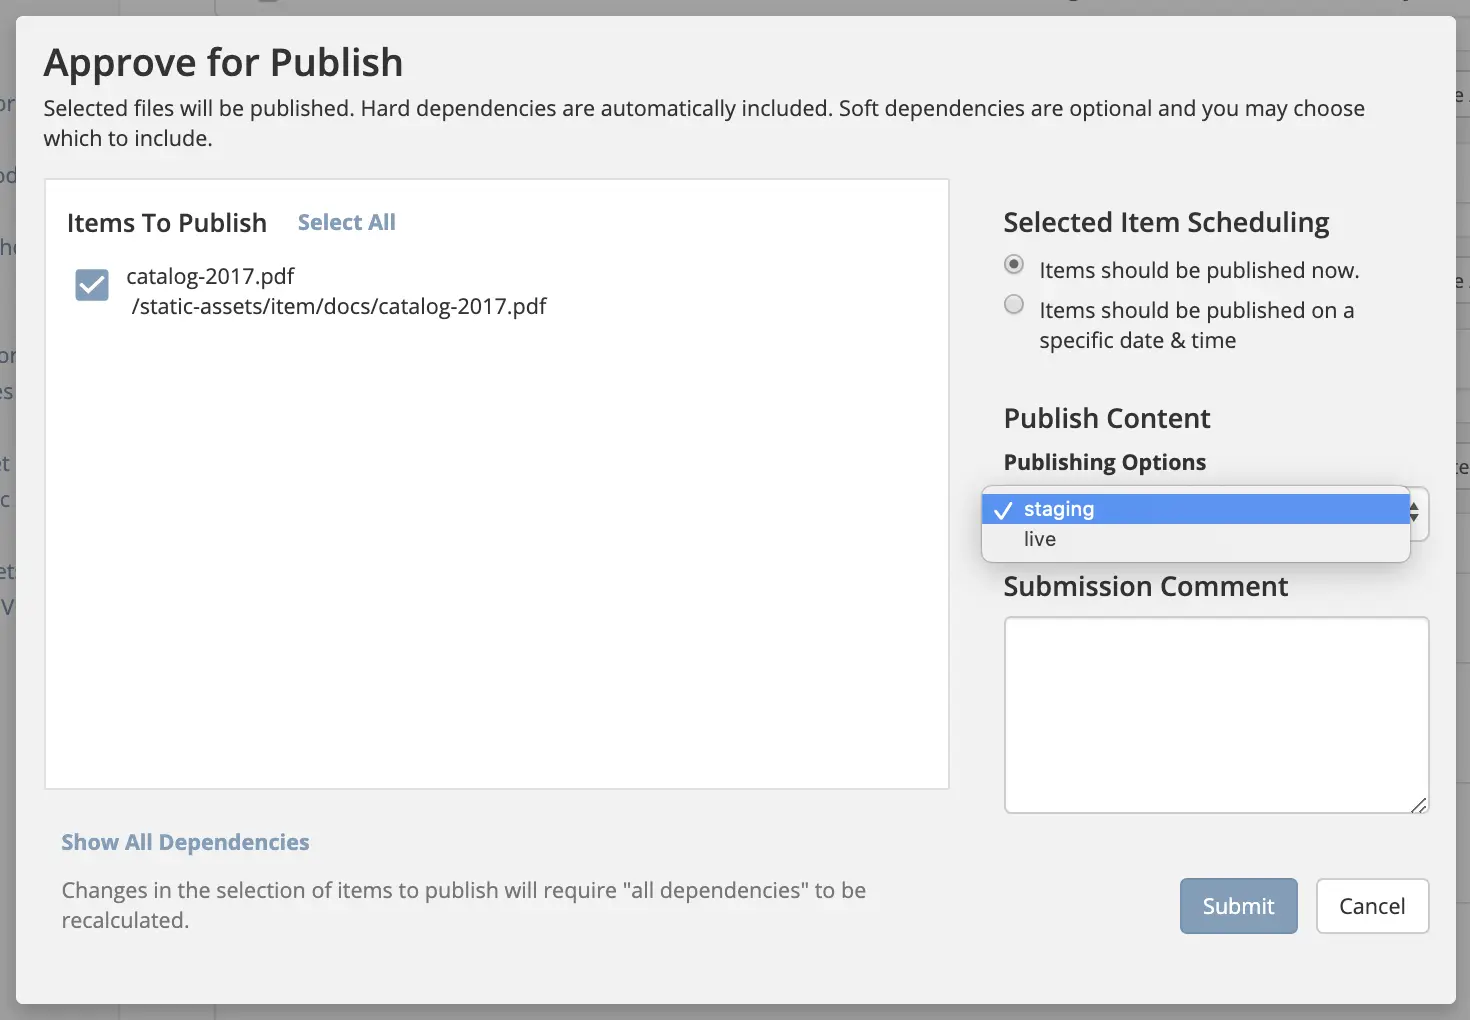
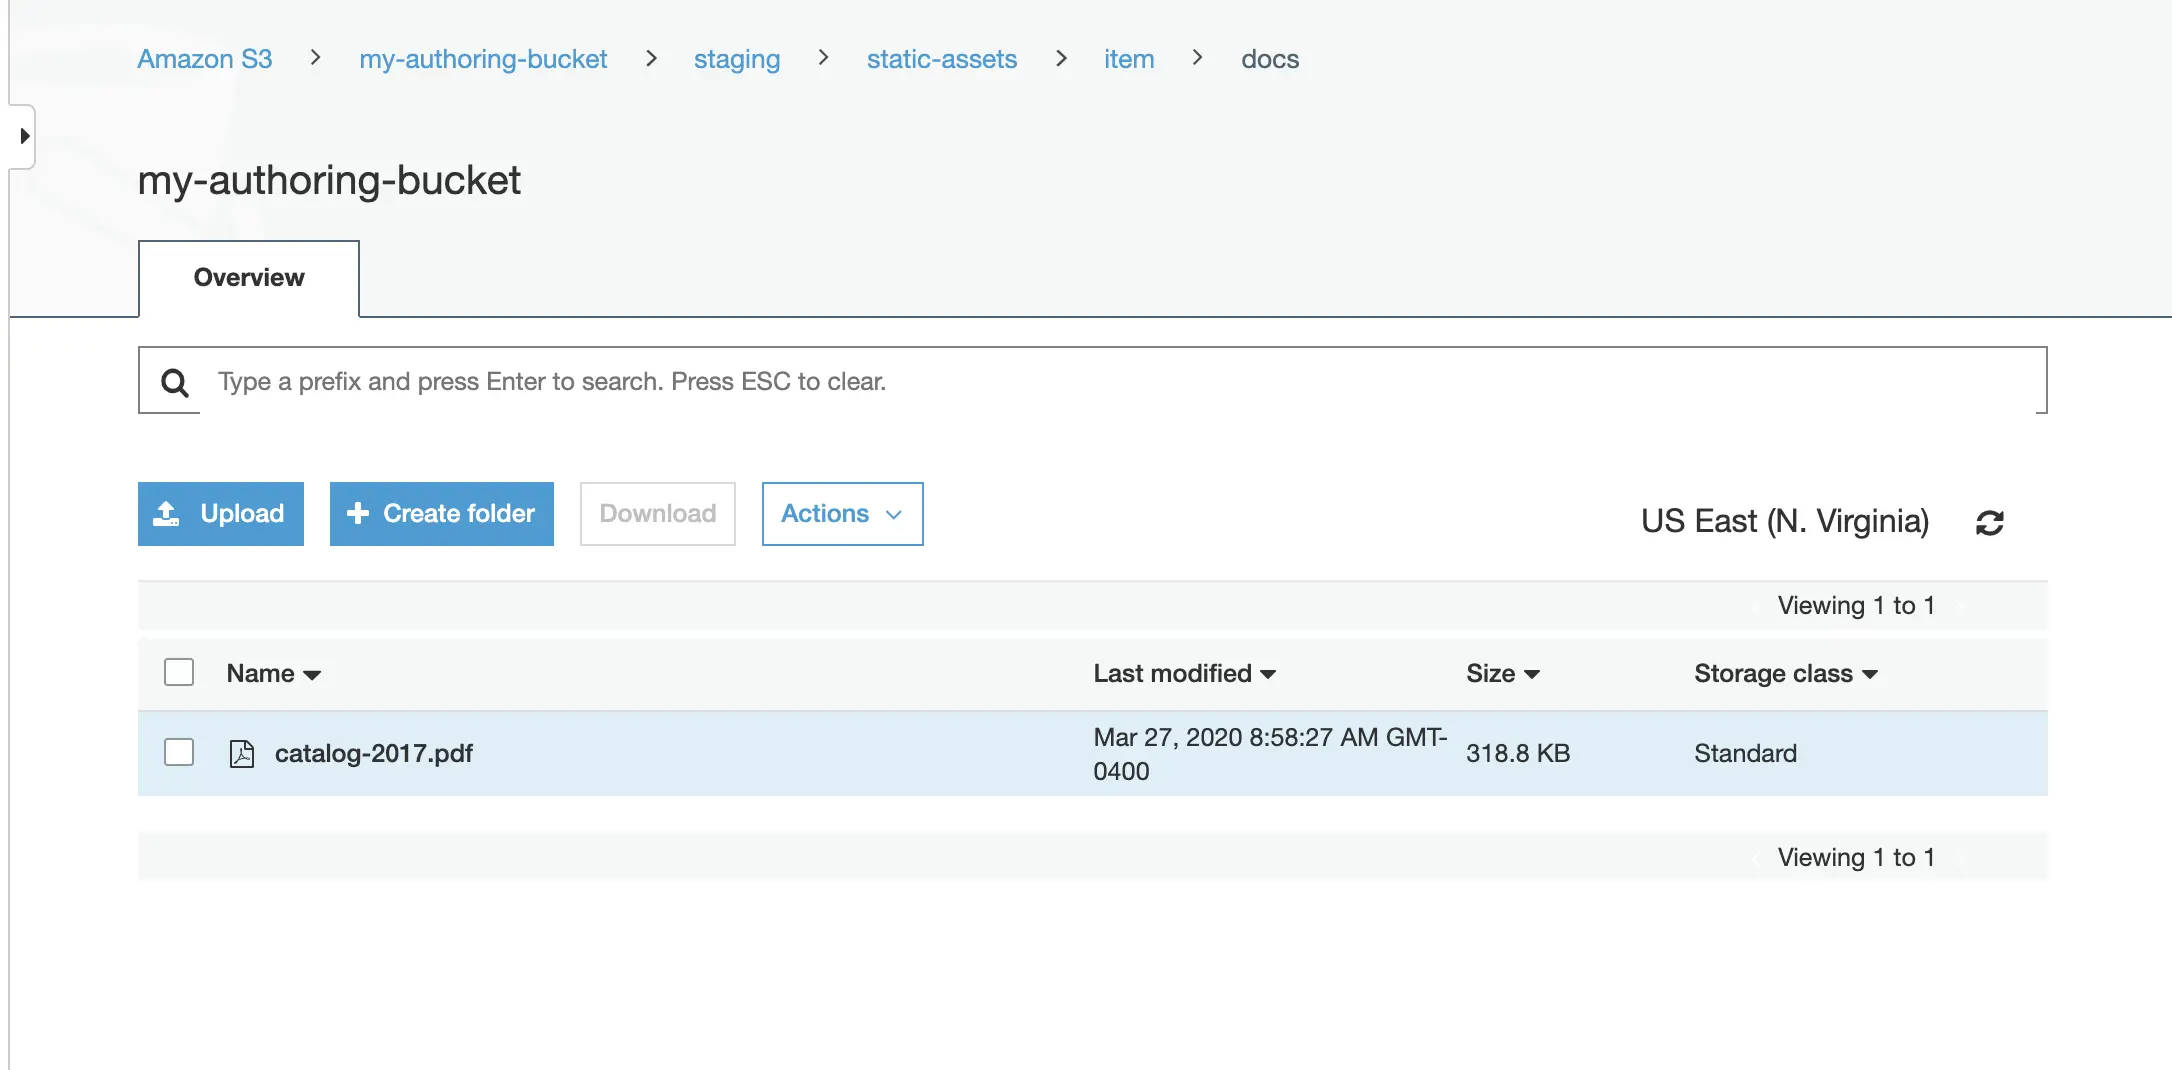
When the file/s are published to staging, the files get published to the staging branch of the my-authoring-bucket in s3.
6. Publish the files to delivery
Finally, we’ll publish the file/s to live. To publish a file to live, navigate to the file in the Sidebar then right click on the file, and select Publish or open the Dashboard and select the file/s you want to publish to live in the Unpublished Work widget and click on Approve & Publish from the context nav.
The Publish dialog will come up. Remember to select live for the Publishing Target
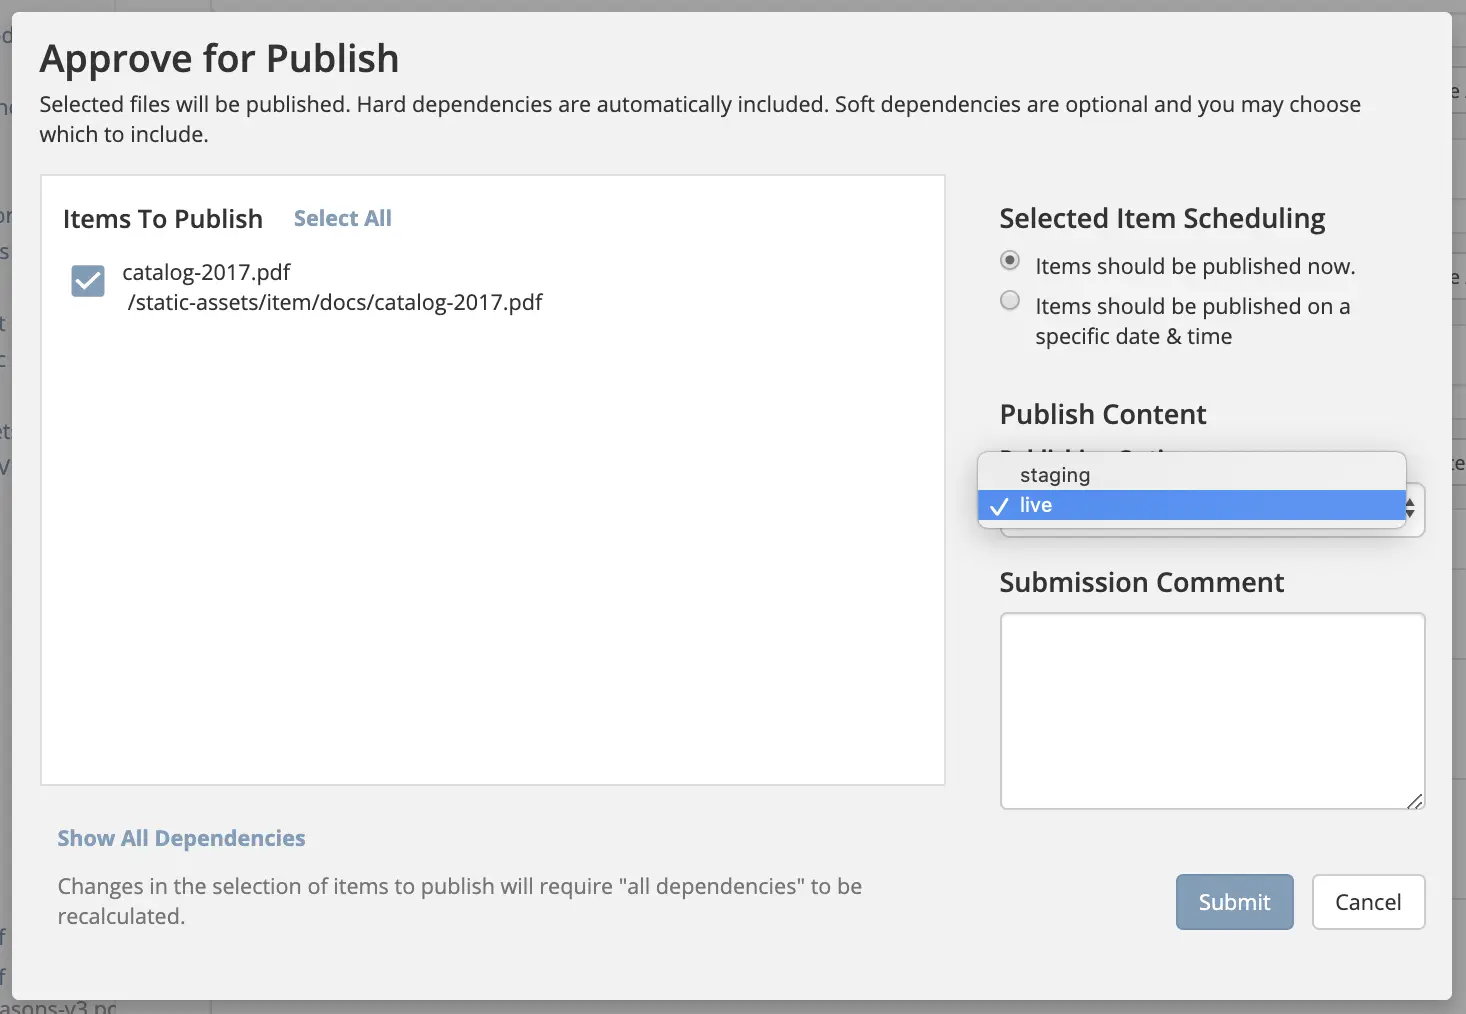
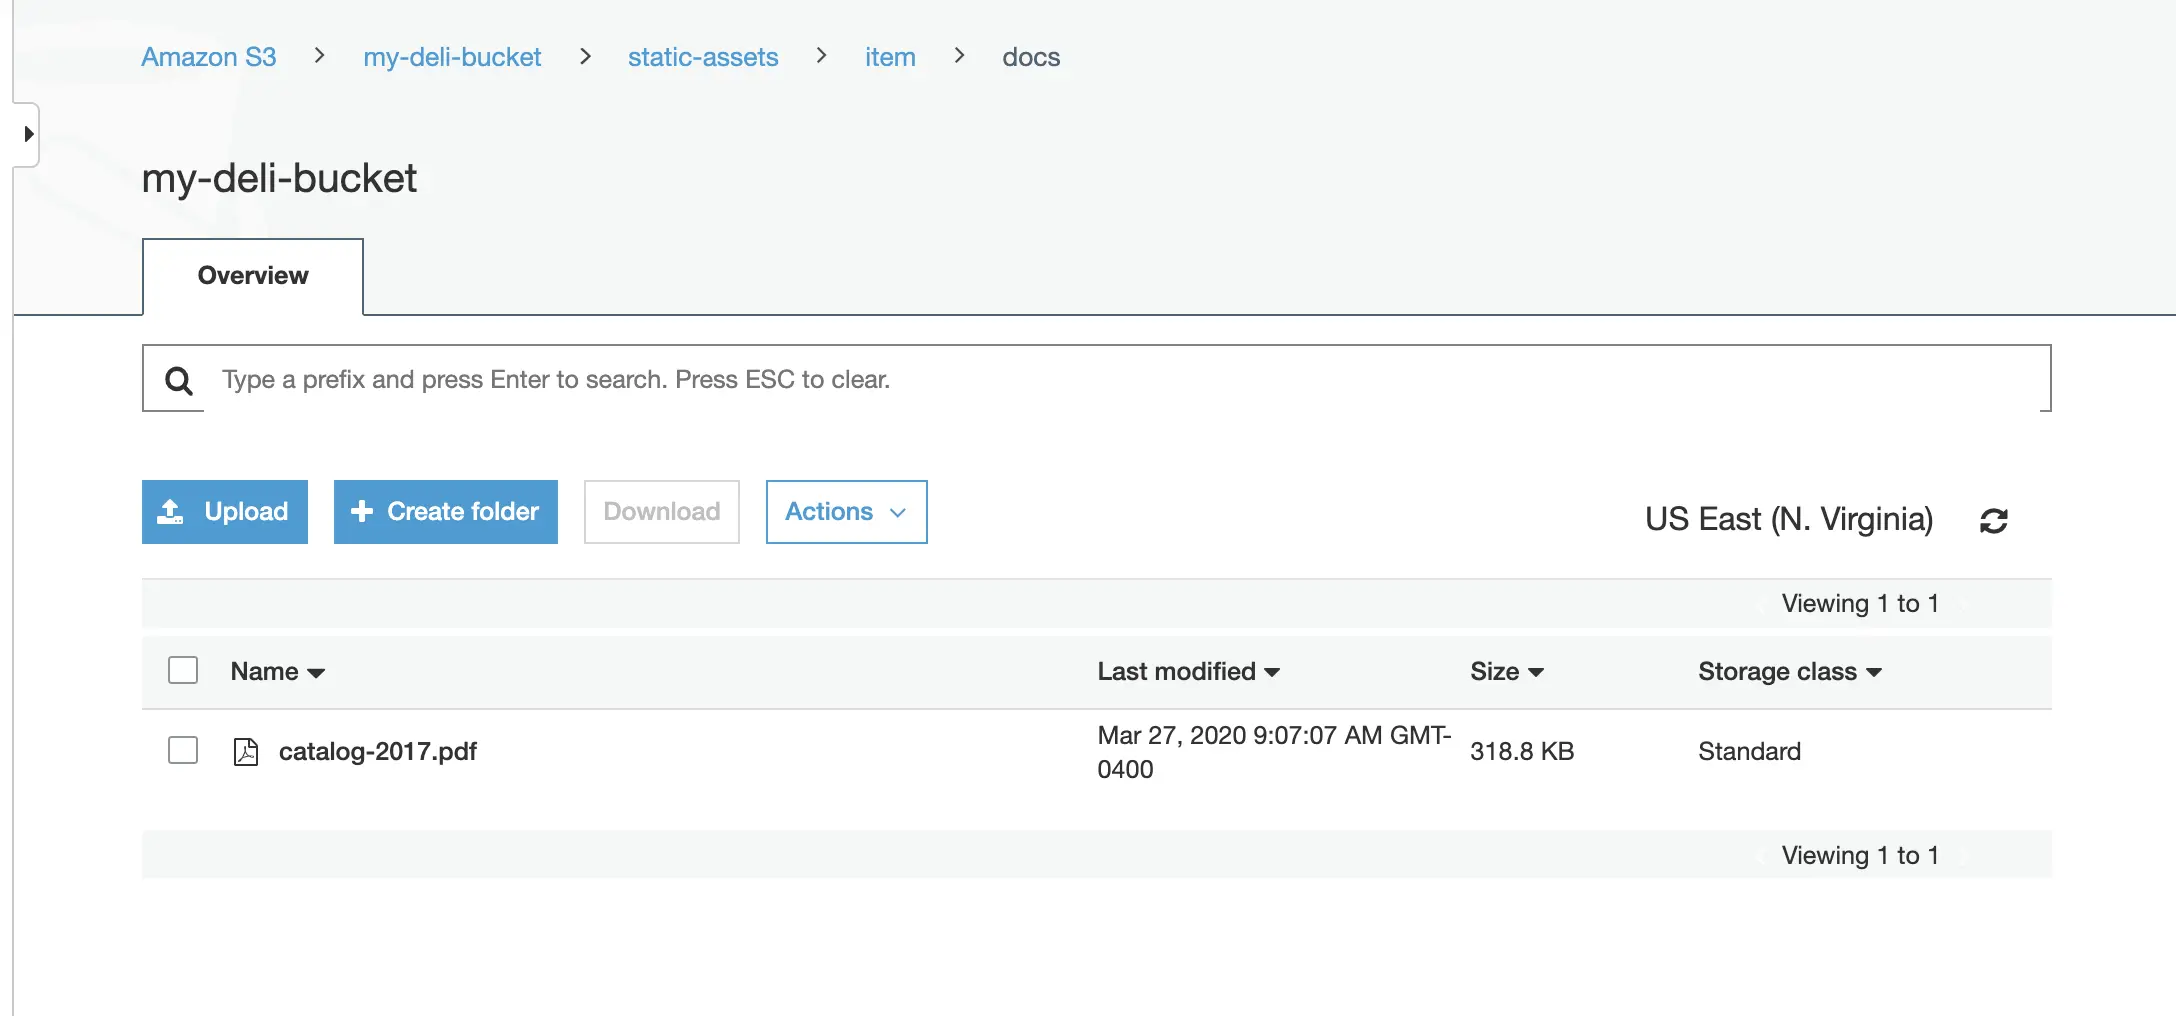
When the file/s are published to live, the file/s get published to the my-deli-bucket in s3.
Setting up Staging for Existing Projects
When adding the staging publishing target to an established project that uses external storage, Studio does not clone the assets in external storage for live into staging. Performing a bulk publish to staging also does not work at this time. This is because Studio does not publish to staging, assets in a LIVE, UNEDITED state.
To sync the external storage for staging with live, you must copy the assets in the live external storage to the staging external storage.
Let’s take a look at an example of adding staging to an existing project.
Prerequisites:
Project created using the Website Editorial blueprint with external storage setup for
liveand assets already published tolive(See example above for setting up external storage for a project. Remember to not setupstagingas we will be doing it in this example)AWS S3 bucket to be used by the
stagingpublishing target. For our example, we will be using the bucketmy-stagingsetup in AWS S3.
Here are the steps:
Enable staging in Studio
Setup the blob store in Studio
Copy assets in live to staging in external storage
Let’s begin:
Enable staging
In your Studio, click on
-> Configuration -> Project Configuration and set enable-staging-environmenttotrueto enable staging<published-repository> <enable-staging-environment>true</enable-staging-environment> <staging-environment>staging</staging-environment> <live-environment>live</live-environment> </published-repository>
For more information on staging, see Configuring Publishing to Staging Target
Setup Blob Store
Setup
stagingin the Blob Store by adding the following to yourBlob Storesconfiguration. In your Studio, click on -> Configuration -> Blob Stores and fill in the required information to setup the S3 bucket for staging.<mapping> <publishingTarget>staging</publishingTarget> <storeTarget>my-staging</storeTarget> </mapping>
To see more information on the Blob Stores configuration, see above
Copy assets in
livetostagingin external storageIn your AWS console, copy the contents of your delivery bucket

Paste the copied content into the staging bucket
my-staging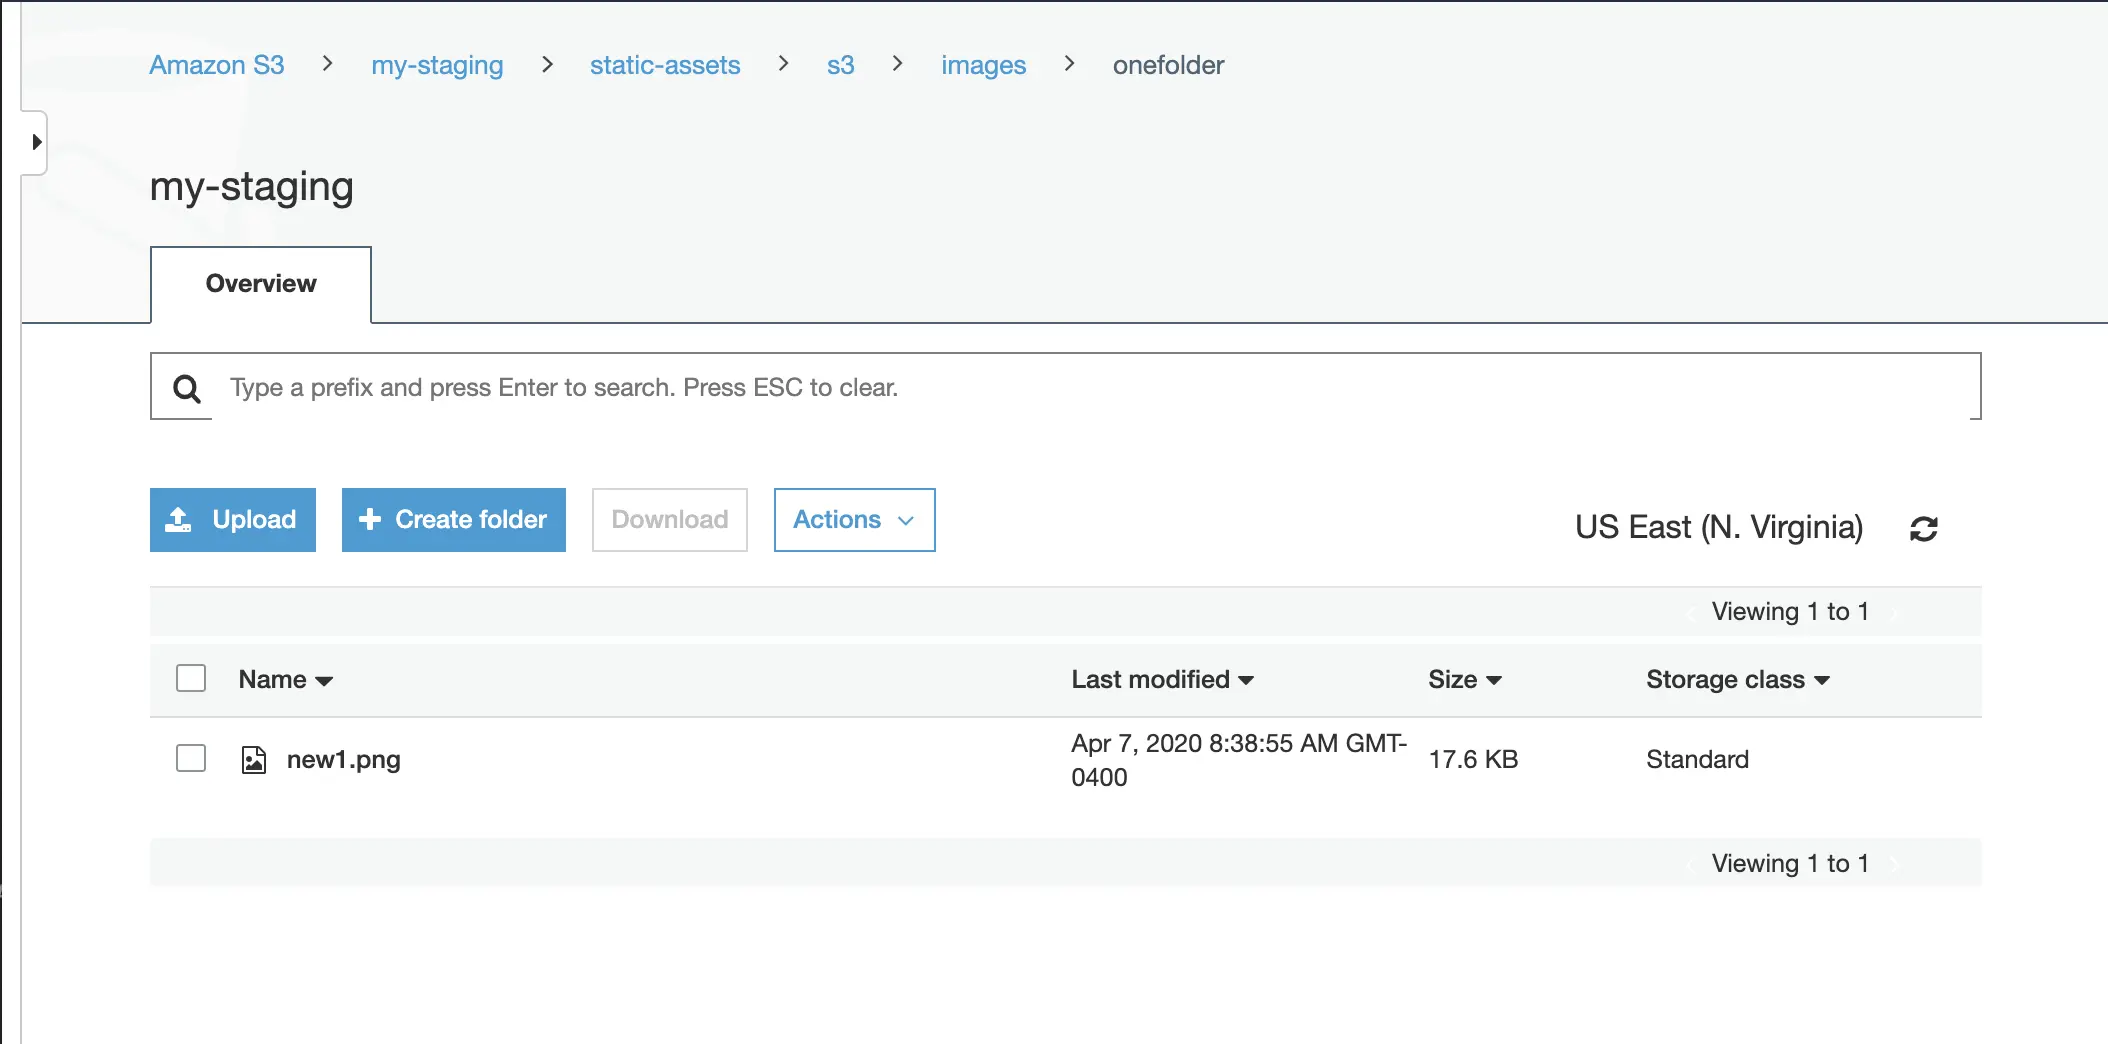
The
liveandstagingexternal storage is now synced.