Setup CrafterCMS Delivery Using Crafter’s AWS AMI
This section details how to setup CrafterCMS delivery using Crafter’s AWS AMI.
Step 1: Launch an AWS EC2 instance using a CrafterCMS Delivery AMI
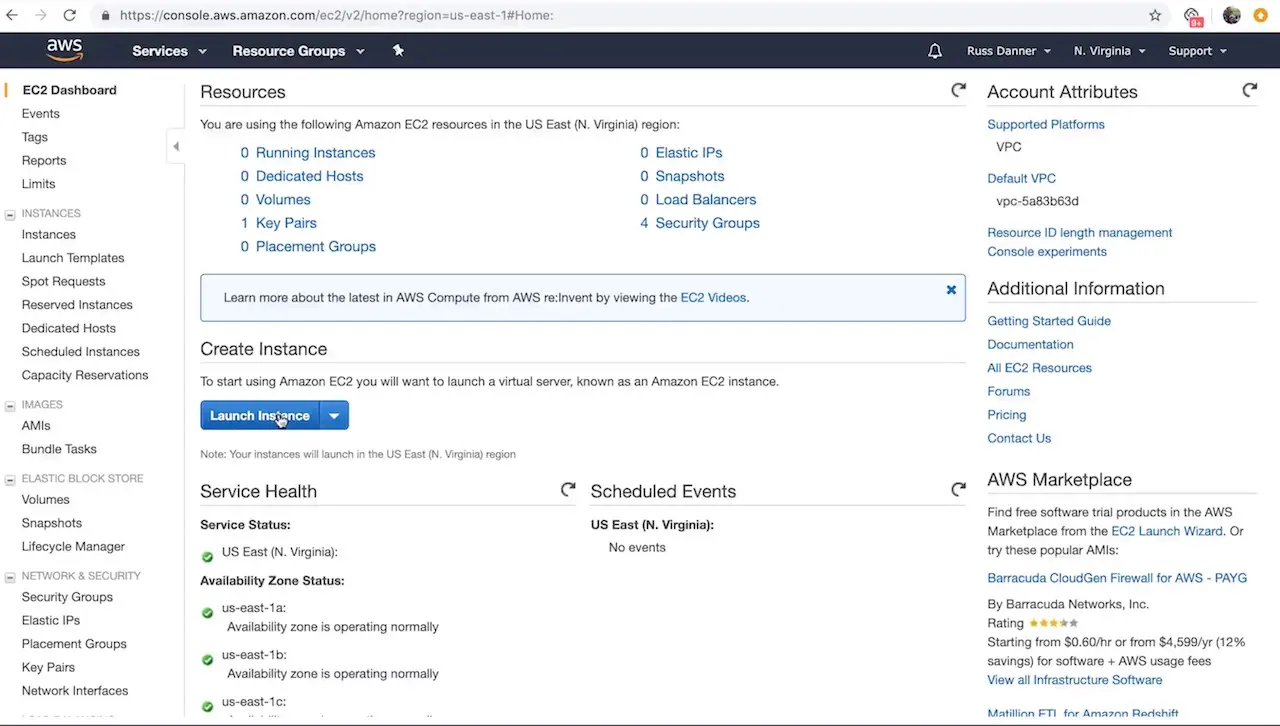
Crafter provides a prebuilt AMI(s) for Crafter Engine, the delivery component of CrafterCMS. In this step we’ll walk you through the initial launch of your instance. To get started, go to your EC2 dashboard and click Launch Instance AWS will prompt you to choose your AMI type/image.
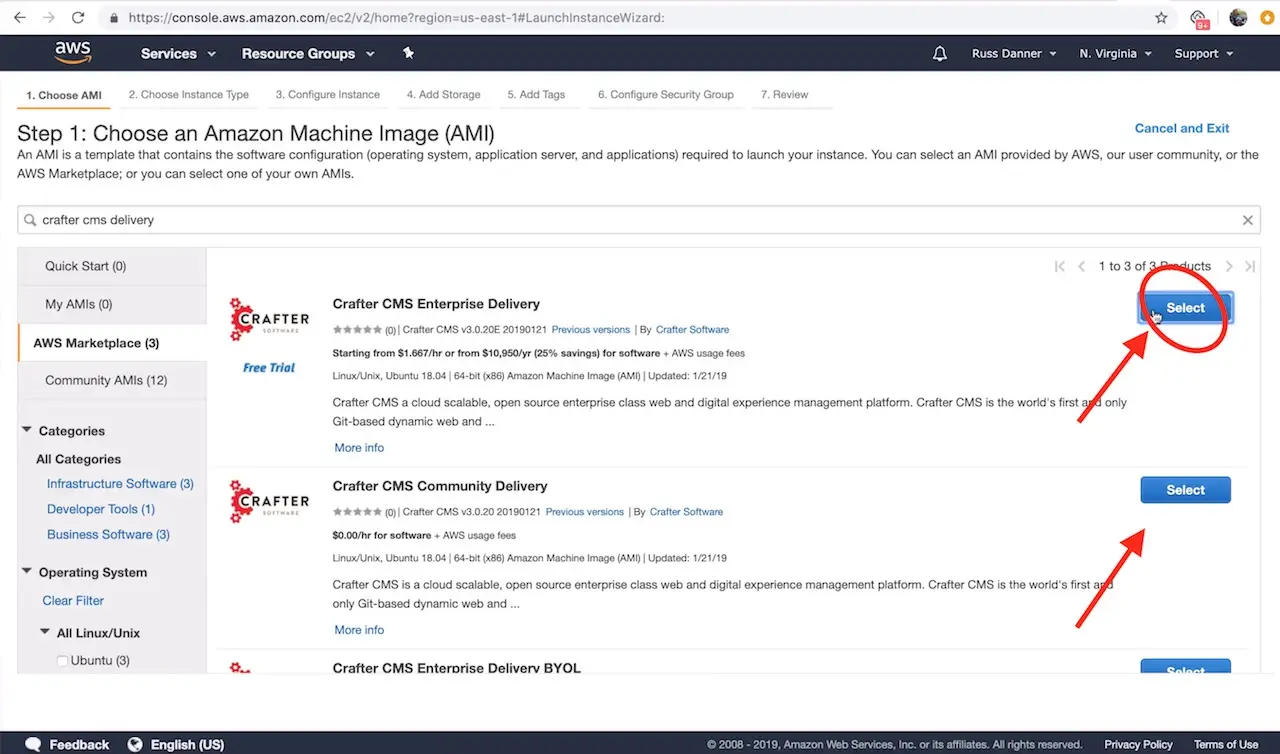
You can find CrafterCMS Delivery by entering the keywords CrafterCMS Delivery in the search box as shown below. You will find a number of options in the search results.
CrafterCMS Community Delivery is our open source version
CrafterCMS Enterprise Delivery is our supported enterprise version
Click Select on the AMI type you want to use and then follow the launch instance/configuration wizard to determine the sizing and networking details for your instance. Please note, we recommend “C” class machines for best results with typical production use.
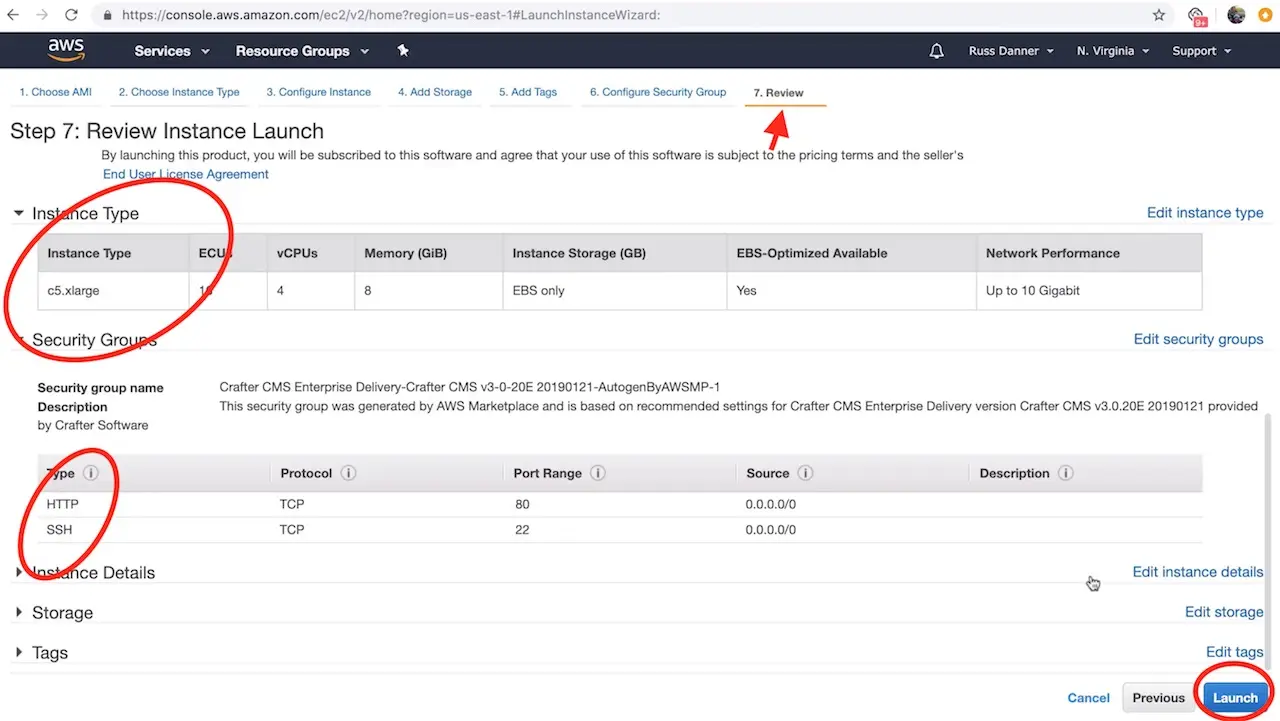
The launch instance wizard gives you the ability to tweak your instance’s configuration details. In the next step we will connect to the machine with SSH via a terminal/console inorder to acquire the administrators initial login password for the Crafter Studio web application. You will need to add SSH to your inbound security settings for the instance to complete the next step and acquire the password. To do so, click the Configure Security Group tab.
To add the rule for SSH, click the Inbound traffic tab and then Add Rule to configure SSH. You can restrict the inbound traffic for SSH in the source column. To allow SSH from anywhere you can enter a CIDR of 0.0.0.0/0. Use the ports and IP masks/policies that align with your needs.
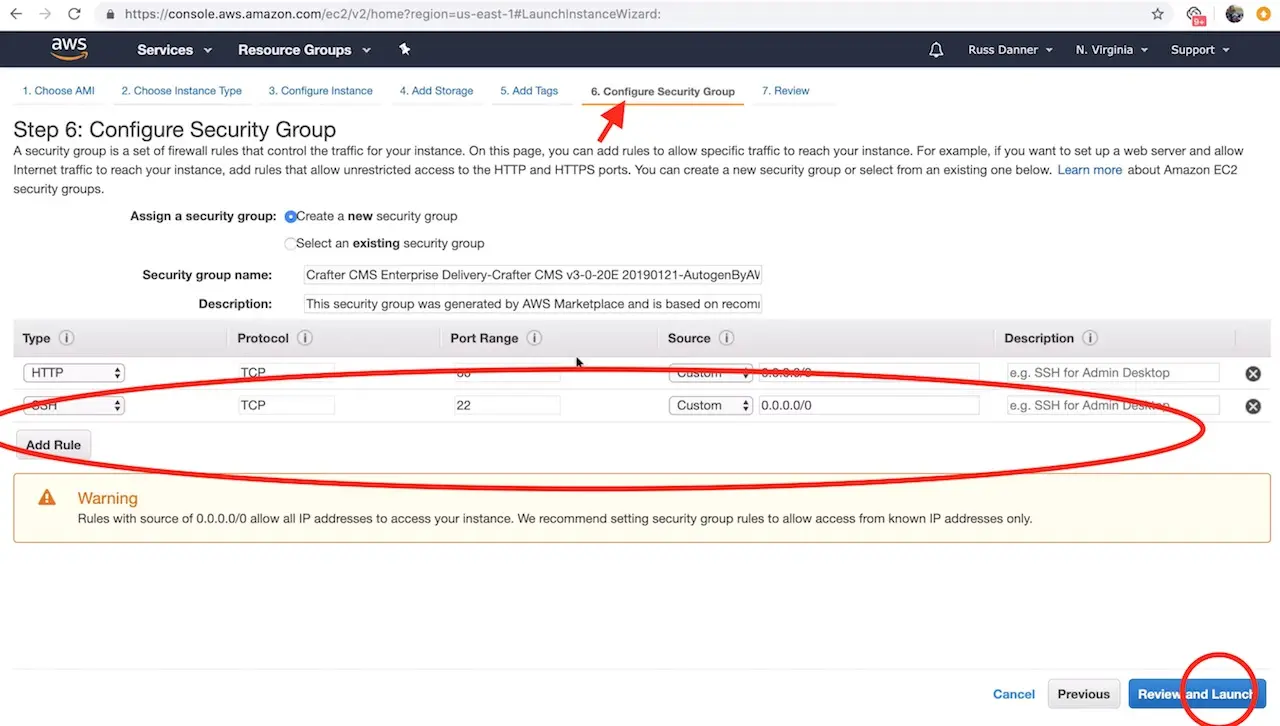
Once you have added SSH access and made any other tweaks you feel are necessary to your instance’s configuration, click the Review tab and then click the Launch button.
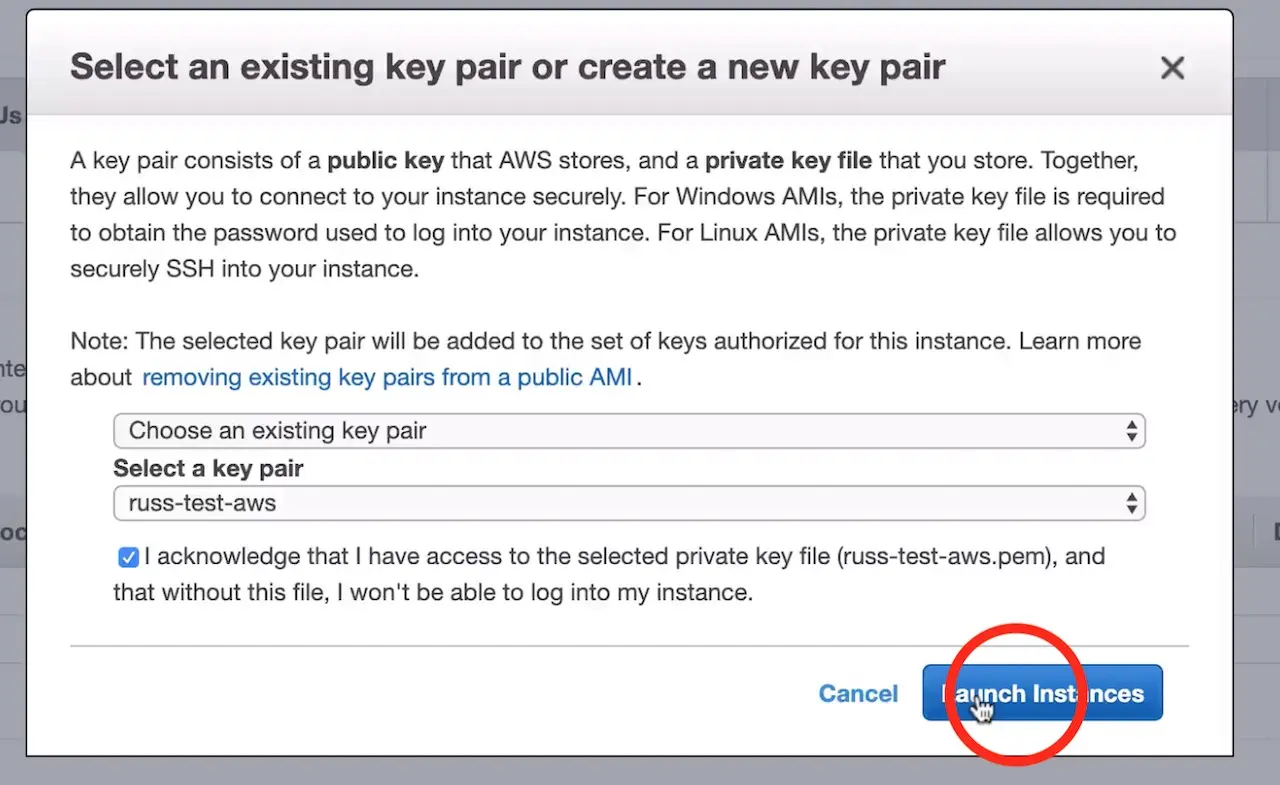
After clicking Launch, AWS will request that you select a public key for administrative console access to the machine. You will need access to this key in the next step in order to retrieve the administrator’s password for Crafter Studio. Create or choose an existing key and click Launch Instances
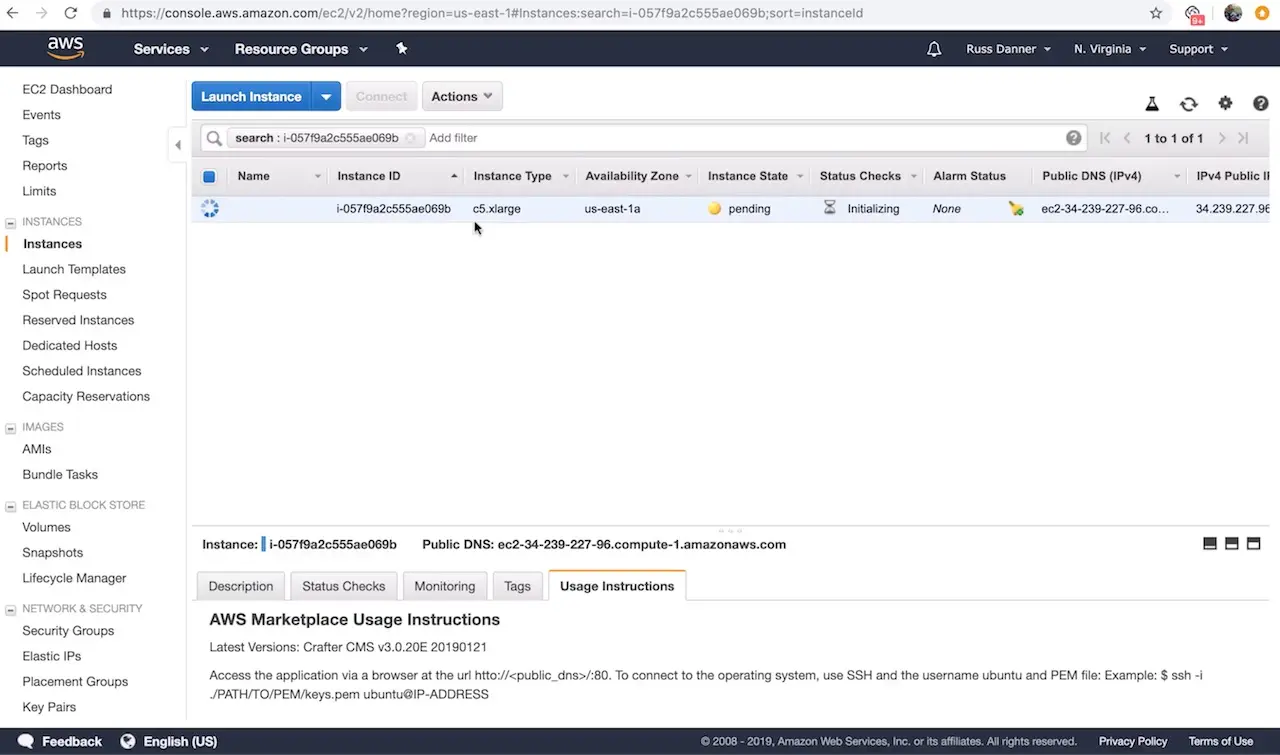
Once you click Launch instances AWS will start and initialize the instance. This may take a minute or two.
Step 2: Access the Crafter Engine via the Web
In this step we want to prove that the application is up and running now that our instance has started and initialized fully. To do this, we’re simply going to check that the application login screen shows up when we access it via a web browser.
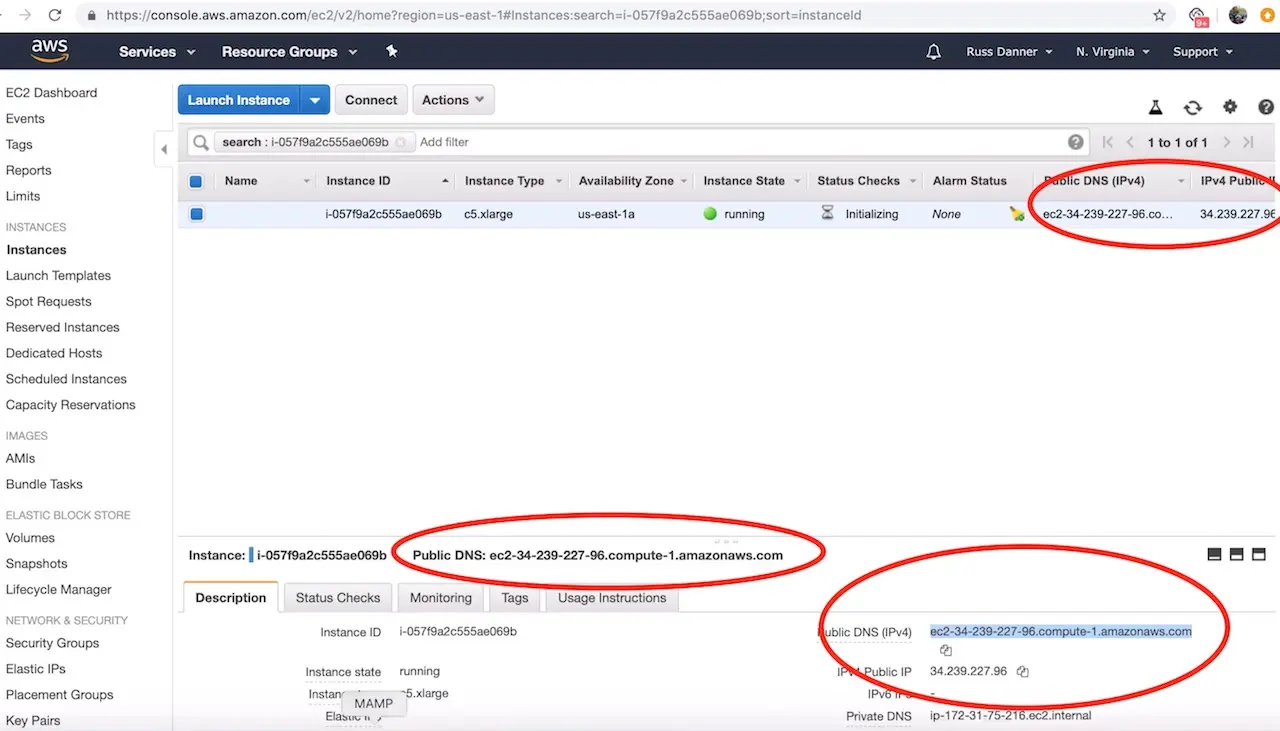
To access the login screen open a web browser and navigate to http://DNS_NAME_OR_IP_ADDRESS.
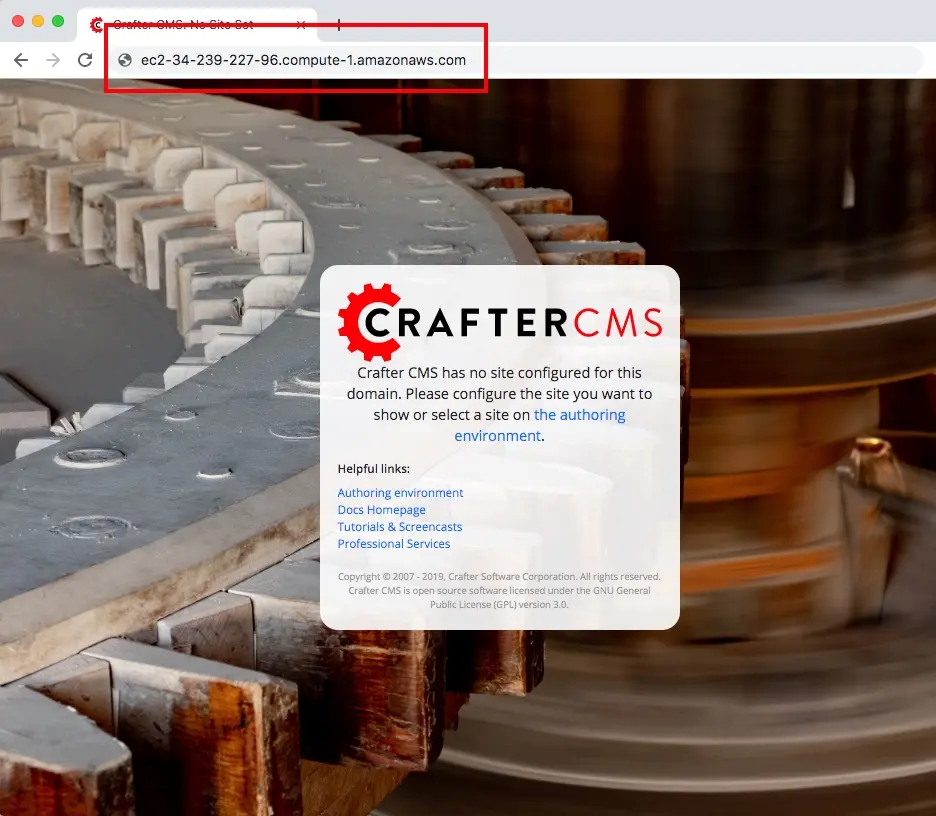
You can find the IP address and/or DNS name in several locations on your AWS administration console shown here:
Step 3: Configure Crafter Engine to deliver published projects
Crafter Engine is now up and running. However, in order to deliver content, its deployer must be configured to monitor a published repository for one or more projects. A delivery engine is multi-tenant and can deliver many projects. Each project must be configured or “initialized” such that the deployer monitors a Git repository for published updates. CrafterCMS’s delivery tier has a decoupled, shared-nothing architecture that makes it cloud native and elastically scalable. You can read more about this architecture here: CrafterCMS Architecture
In this section we’ll show you how to configure a Crafter Delivery instance to monitor a published Git repository and delivery content for a given project. The simplest topology for this is to directly monitor the published repository of a project on the authoring instance. This is what we will configure. Let’s get started.
Step 4: Initialize the project on the delivery server
Now that secure communication is established between the authoring and delivery instances, we can initialize any number of projects to be delivered by the delivery instance. It’s very simple to initialize a project on the delivery instance. To do so:
SSH to the delivery server and execute the following command in the /opt/crafter/bin directory as the crafter user:
1init-site.sh
When the init-site.sh command is executed without any parameters, parameter documentation will be presented.
Note
Remember that when using private key SSH authentication, the private key path must be set explicitly using
the -k option. Here’s an example:
init-site -k ~/.ssh/jdoe_key myeditorial ssh://myserver/opt/crater/sites/myeditorial
We’ll use the following parameters in our example based on our public/private key setup that we did in the previous steps:
1init-site.sh -b live [SITE_ID] ssh://crafter@[DNS_NAME_OF_AUTHORING_SERVER]:/opt/crafter/data/repos/sites/[SITE_ID]/published
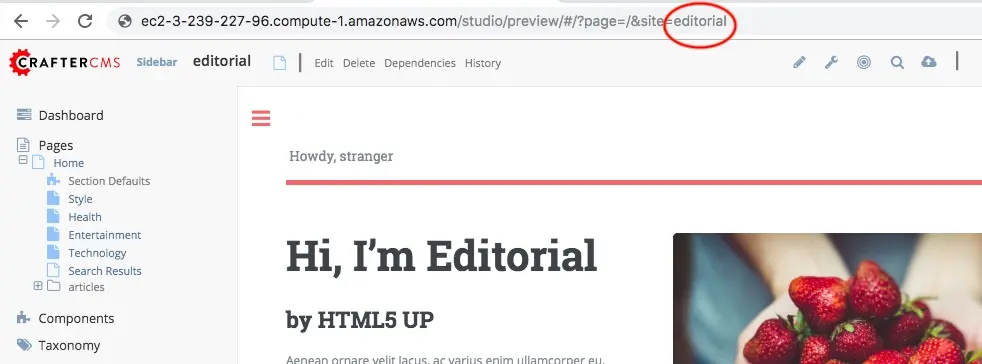
The SITE_ID parameter can be acquired from the authoring server. Log in to Crafter Studio and “Preview” the project you wish to initialize and you will find the SITE_ID in the URL.
Successful execution of this command will produce output similar to the following:
1Creating Deployer Target...
2Target created successfully
Example:
1init-site.sh -b live editorial ssh://crafter@ec2-3-93-34-40.compute-1.amazonaws.com:/opt/crafter/data/repos/sites/editorial/published

You can further verify that the deployment is working by watching the logs. To watch the logs use the following command:
1tail -n 1000 -f /opt/crafter/logs/deployer/crafter-deployer.out
Look for output that is similar to the following:
12019-04-17 21:39:00.001 INFO 4389 --- [pool-5-thread-1] o.c.d.impl.processors.GitPullProcessor : Cloning Git remote repository ssh://crafter@ec2-3-93-34-40.compute-1.amazonaws.com:/opt/crafter/data/repos/sites/editorial/published into /opt/crafter/data/repos/sites/editorial
22019-04-17 21:39:00.806 INFO 4389 --- [pool-5-thread-1] o.c.d.impl.processors.GitPullProcessor : Successfully cloned Git remote repository ssh://crafter@ec2-3-93-34-40.compute-1.amazonaws.com:/opt/crafter/data/repos/sites/editorial/published into /opt/crafter/data/repos/sites/editorial
Step 5: View the project on the delivery server from a web browser
Now that project has deployed it can be viewed via web browser. As previously mentioned, Crafter’s delivery tier is multi-tenant. A SITE_ID is used on the URL to indicate which tenant is to be displayed. To preview the project you initialized, open a browser and navigate to the following URL:
http://[DELIVERY_DNS_NAME]?crafterSite=[SITE_ID]
Example:
http://ec2-34-239-227-96.compute-1.amazonaws.com?crafterSite=editorial

Note
The SITE_ID parameter is typically added automatically to all requests for a given project by a webserver “virtual host” configured for each project/tenant that sits in front of Crafter Engine. You can learn more about this here
This configuration and other advanced topology topics such as load balancing are outside the scope of a basic installation.
Step 7: Setup complete!
Your setup and configuration of your CrafterCMS Delivery on AWS is now complete!
