
Use Box to store assets
Box is a great option when you need to store media and documents that are quite large. The following guide explains how to:
Configure Studio to use Box.
Upload documents to Box using the
box-file-uploadcontrol in Studio.Generate public links in Engine that users can use to access these documents.
Prerequisites
Create a Box profile to upload the assets.
Create a site based on the Editorial blueprint.
Step 1: Add the Box configuration in Studio
Go to ![]() >
> Configurations and in the dropdown select Box Profiles. If you click on View Sample, you’ll see the available configuration profiles. In particular, the configuration for a Box profile is the following:
 1<profile>
 2    <id/>
 3    <clientId/>
 4    <clientSecret/>
 5    <enterpriseId/>
 6    <publicKeyId/>
 7    <privateKey/>
 8    <privateKeyPassword/>
 9    <uploadFolder/>
10</profile>
where:
id: the ID that
box-file-uploadcontrols will use to refer to this profile.clientId: Box client id
clientSecret: Box client secret
enterpriseId: Box enterprise id
publicKeyId: Box public key id
privateKey: Actual private key text in a CDATA
privateKeyPassword: Password used to decrypt the private key (passphrase)
uploadFolder: Name of the folder where files will be uploaded in Box
For this guide, the Box Profiles should look like this (replace the ...’s for actual Box credentials and videos for the actual upload folder where you’re storing the documents):
 1<box>
 2  <box>
 3    <profile>
 4      <id>box-default</id>
 5      <clientId>...</clientId>
 6      <clientSecret>...</clientSecret>
 7      <enterpriseId>...</enterpriseId>
 8      <publicKeyId>...</publicKeyId>
 9      <privateKey>
10<![CDATA[...]]>
11      </privateKey>
12      <privateKeyPassword>...</privateKeyPassword>
13      <uploadFolder>videos</uploadFolder>
14    </profile>
15  </box>
16</box>
Step 2: Enable the Box File Upload Control
In ![]() > Configurations > Site Config Tools, in the <controls> section, enable the Box File Upload by adding the following lines:
> Configurations > Site Config Tools, in the <controls> section, enable the Box File Upload by adding the following lines:
1<control>
2  <name>box-file-upload</name>
3  <icon>
4    <class>fa-square-o</class>
5    <stackedclass>fa-upload</stackedclass>
6  </icon>
7</control>
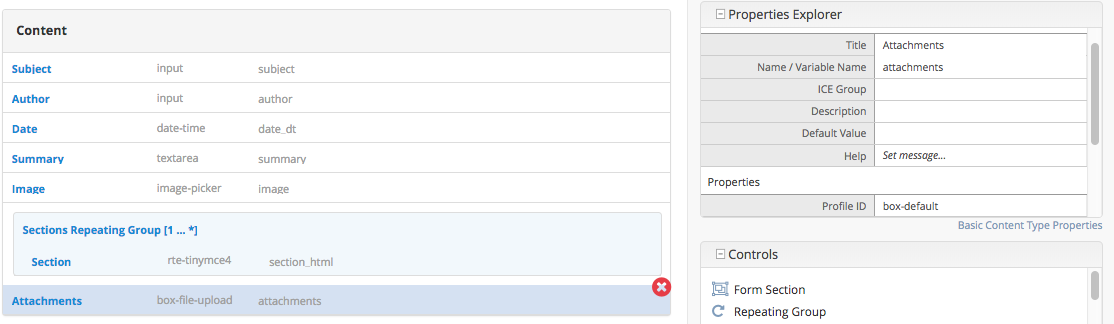
Step 3: Add the Box File Upload Control to the content type
For our example, we’ll add an Attachments field, which is of type box-file-upload, to the Page - Article
content type. To do this:
Go to
Site Configand open thePage - Articlecontent type definition.At the end of the Content section, add a
Box File Uploadcontrol with Title Attachments and Name attachments (the control has a property called Profile ID. If you changed the name ofprofile.idin step 1, you need to change it in the property too). Remember to put a check mark on theEnable UploadandEnable Multiple Selectionproperties of the Box File Upload control so the users will be able to upload assets to Box and be able to select multiple assets.
Step 4: Add Freemarker code to render the URLs
We need to add the Freemarker code that will render the URLs. In the Templates > web > pages > article.ftl, add the following lines after the <#list contentModel.sections.item as item>...</#list> lines:
<#if contentModel.attachments??>
   <h2>Attachments</h2>
   <ul>
     <#list contentModel.attachments.item as a>
       <li><a href="${a.url}">${a.name}</a></li>
     </#list>
   </ul>
</#if>
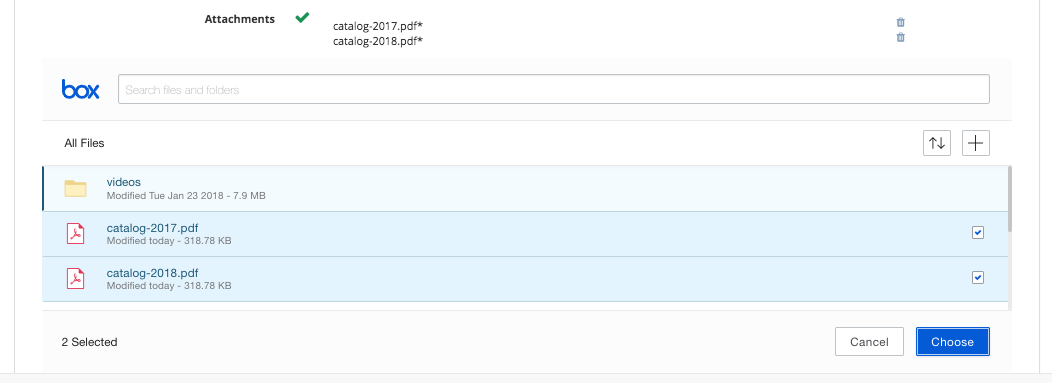
Step 5: Add some attachments and test the changes
If all the previous steps have been done correctly, you should be able to add any number of attachments and they
should appear underneath the last content sections when the page is rendered. To upload files to Box, click on the + button in the Box widget and select Upload, then drag or browse for the files you want to upload. Click on the Upload button after selecting the files you want to upload. After the upload finishes, click on the Close button on the left side of the Box widget and you’ll be able to see the files you just uploaded to Box. You’d then put a check mark next to the files that you want to add as attachment for the page, then click on the Choose button.
For example, after adding a couple of PDF catalogs in the Men Styles For Winter article:
The bottom of the page looks like this when you preview your page:

Step 6: Publish the changes
The next step is to publish the changes. Remember to publish not just the page where we added the Box assets,
but also the article.ftl and the box.xml files too.
