Multi-Environment Configuration
Users may want multiple environments setup with different configurations for each environment, e.g. QA, Prod, Dev, etc. To setup an environment, do the following:
Create a folder under
CRAFTER_HOME/data/repos/site/mysite/sandbox/config/studiocalledenvInside the folder, create a directory called
myenv(or whatever you want to call the environment)Copy the configuration file you want to override in the new environment you are setting up, inside your
myenvfolder following the folder structure underconfig/studio.Remember to commit the files copied so Studio will pick it up.
In the
crafter-setenv.shfile inTOMCAT/binset the following property to desired environment:CRAFTER_HOME/bin/crafter-setenv.sh¶# -------------------- Configuration variables -------------------- export CRAFTER_ENVIRONMENT=${CRAFTER_ENVIRONMENT:=myenv}
Restart Studio
Example
Let’s take a look at an example of creating a new environment, called mycustomenv with the rte-setup-tinymce5.xml file overridden in the new environment:
We’ll create a folder called
envunderCRAFTER_HOME/data/repos/site/mysite/sandbox/config/studio1data/ 2 repos/ 3 sites/ 4 mysite/ 5 sandbox/ 6 config/ 7 studio/ 8 administration/ 9 code-editor-config.xml 10 content-types/ 11 context-nav/ 12 data-sources/ 13 dependency/ 14 env/ 15 form-control-config/ 16 mime-type.xml 17 permission-mappings-config.xml 18 preview-tools/ 19 role-mappings-config.xml 20 site-config.xml 21 studio_version.xml 22 targeting/ 23 workflow/
Inside the
envfolder, create a directory calledmycustomenvWe will now copy the configuration file for the
rte-setup-tinymce5.xmlthat we want to override in the new environment we are setting up, inside ourmycustomenvfolder, following the folder structure underconfig/studio. For our example, therte-setup-tinymce5.xmlfile is underconfig/studio/form-control-config/rte:env/ mycustomenv/ form-control-config/ rte/ rte-setup-tinymce5.xmlRemember to commit the files copied so Studio will pick it up.
➜  sandbox git:(master) ✗ git add .
➜  sandbox git:(master) ✗ git commit -m "Add updated rte-setup-tinymce5.xml file for mycustomenv"
Open the
crafter-setenv.shfile inTOMCAT/binand set the value ofCRAFTER_ENVIRONMENTto the environment we setup above to make it the active environment:CRAFTER_HOME/bin/crafter-setenv.sh¶# -------------------- Configuration variables -------------------- export CRAFTER_ENVIRONMENT=${CRAFTER_ENVIRONMENT:=mycustomenv}
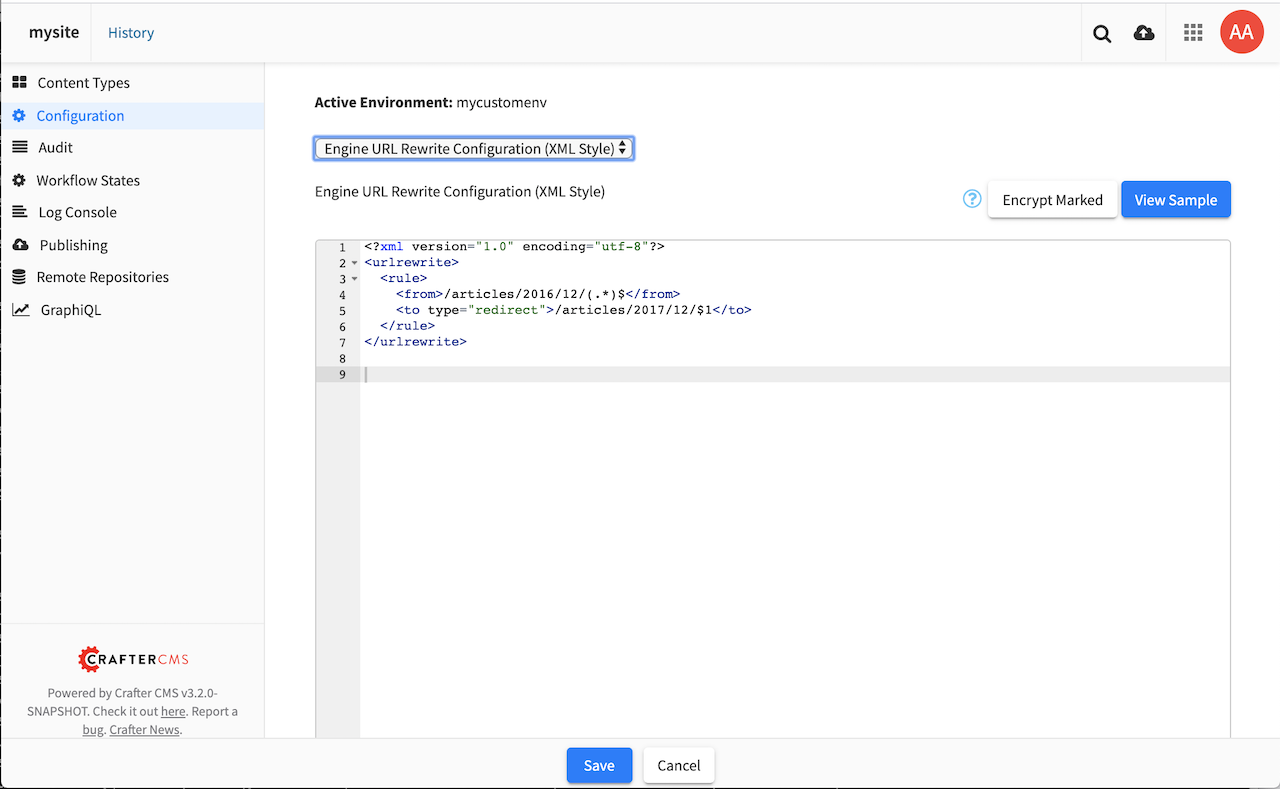
Restart Studio. To verify our newly setup environment, open the
Sidebarand click on , then select
 Configuration. Notice that the active environmentmycustomenvwill be displayed on top of the configurations drop-down box: