
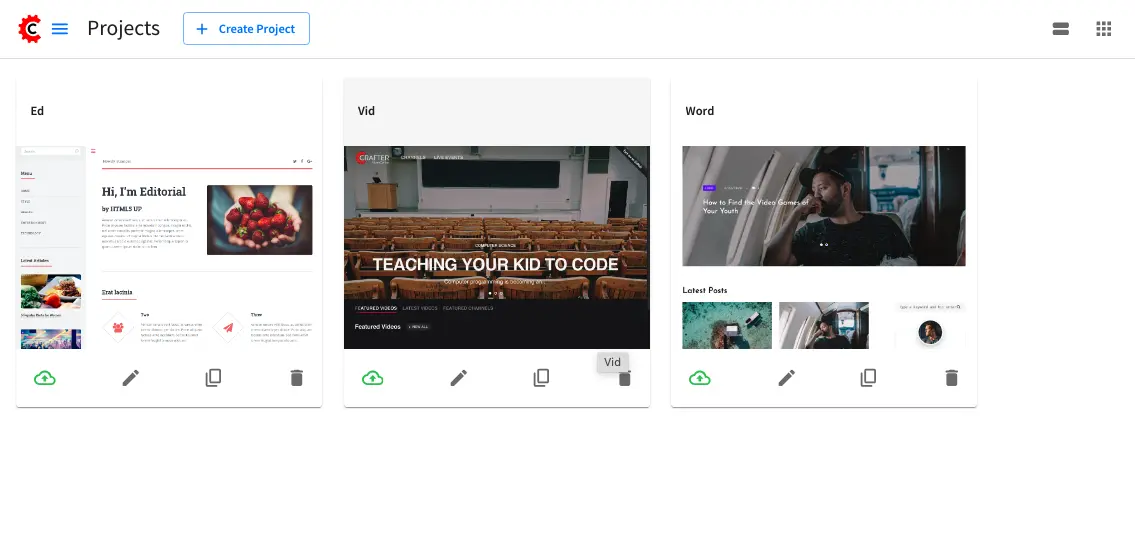
Adding a Default Screenshot to a Project/Site
CrafterCMS uses a default path (YOUR_SANDBOX/.crafter/screenshots/default.png), to look for a default representative
image of a project/site, as seen in the Projects screen:
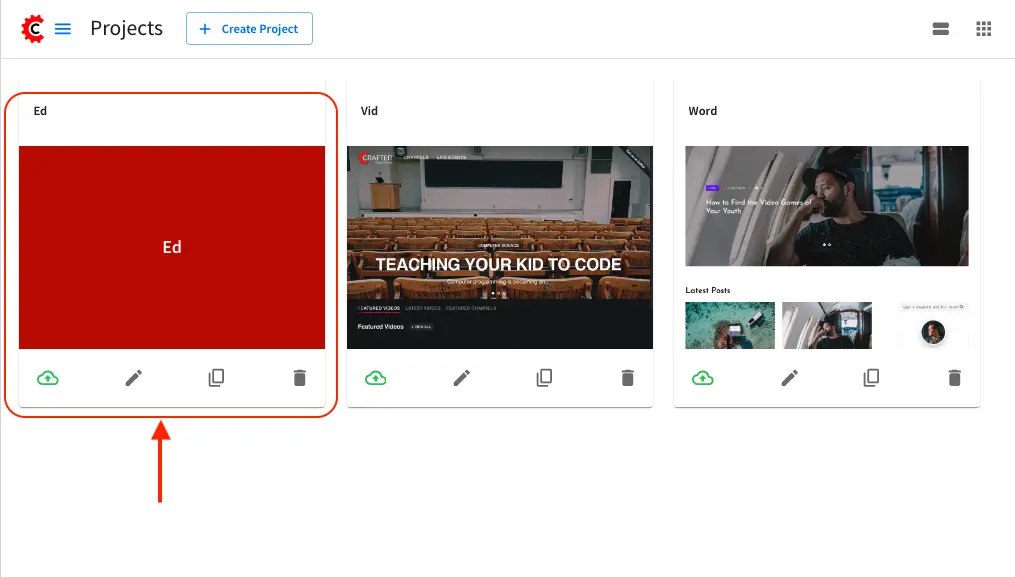
Projects/sites without a default screenshot are displayed in the Projects screen with just the project name and a
red background like below for the project named Ed:
To add or change the default screenshot of your project/site, there are two options:
Directly accessing the sandbox folder to create the default file location and then committing it using
gitFirst, you’ll need to create the folder structure/path that CrafterCMS uses to check for a default screenshot,
/host/path/to/projects/repos/sites/SITENAME/sandbox/.crafter/screenshots/, if it doesn’t exist yet. Next, you’ll need to add your default screenshot nameddefault.png.After adding
default.pngunder the directory structure you just created, you’ll need to add and commit your changes by using git so Studio is aware of the changes made. To commit your changes , head to/host/path/to/projects/repos/sites/SITENAME/sandboxto git add your default screenshot file, then commit your changes like below:cd /host/path/to/projects/repos/sites/SITENAME/sandbox/ git add .crafter/screenshots/default.png git commit -m "<the commit’s description>"
Refresh your browser and you should now be able to see the default image you just committed in the
Projectsscreen.Pushing the project/site into a remote repository and create the default image file in remote, committing it, and then pulling it back to Studio, using Studio’s Git project tool.
To push your project into a remote repository using Studio’s Git project tool, follow the instructions for adding a remote bare git repository in the Studio Administration section. Your project should now have a remote repository listed in the
Remote Repositorytab of the Git project tool screen. The next step is to push the project to the remote repository by clicking on thePushbutton (button with the up arrow) next to the remote repository. In the remote repository, create the file.crafter/screenshots/default.pngand commit the change. Finally, back in Studio’s Git project tool, pull the changes in to Studio from the remote repository by clicking on thePullbutton (button with the down arrow).Refresh your browser and you should now be able to see the default image you committed in the remote repository in the
Projectsscreen.