
Crafter Studio

Crafter Studio provides all the content management services and enables authoring, version control, workflow, and publishing of content.
Configuration
Crafter Studio is primarily configured via a single configuration file, studio-config.yaml, and 2 override files that can be used to override the settings in the core configuration file.
The core configuration file for Crafter Studio studio-config.yaml is located under CRAFTER_HOME/bin/apache-tomcat/webapps/studio/WEB-INF/classes/crafter/studio and contains pre-configured settings.
Warning
Do not change the studio-config.yaml file directly; override the settings you want to change in one of the override files.
The override files are:
Studio Configuration Override file studio-config-override.yaml located under
CRAFTER_HOME/bin/apache-tomcat/shared/classes/crafter/studio/extensioncan be accessed by opening the file using your favorite editorGlobal Studio Configuration Override file studio-config-override.yaml located under
CRAFTER_HOME/data/repos/global/configurationcan be accessed from Studio from theNavigation MenuunderGlobal Config
The configuration loading order is as follows:
studio-config.yamlfrom the WAR file is loaded firststudio-config-override.yamlfrom the shared folder is loaded next (if it exists)studio-config-override.yamlfrom the global configuration folder is loaded last (if it exists)
If the same property is present in multiple files, the value from the last configuration file will be used.
You’ll note that the first override file from the CRAFTER_HOME/bin/apache-tomcat/shared/classes/crafter/studio/extension folder resides on the local file system. This makes it easy for system admins but will not replicate across a cluster. The second override file from the CRAFTER_HOME/data/repos/global/configuration folder is a repository item and will replicate across a cluster. Furthermore, the second override file can be managed from Studio without the need to access the file system. See Global Config for more information on how to access the global configuration file from Studio.
Note
Changing the configuration files requires a restart of Crafter Studio for the changes to take effect.
Note
Environment variables can be used to override any property defined as ${env:ENVIRONMENT_VARIABLE} in the configuration files. This allows you to inject these properties into a vanilla installation without modifying any actual files, which is especially useful when using Docker or Kubernetes. See here for a list of environment variables used by CrafterCMS.
Studio Configuration Properties
In this section, we will highlight some of the more commonly used properties in the configuration of Crafter Studio. For a complete list of all the properties, see the studio-config.yaml file.
Property |
Purpose |
|---|---|
Configure the SMTP server to be used by Crafter Studio when sending emails |
|
Configure CORS |
|
Configure internally managed static asset stores to handle very large files |
|
Configure constraints for content being added to the project |
|
Configure the MIME-types that are editable directly in Crafter Studio |
|
Configure your project/site configuration |
|
Configure the Studio UI |
|
Configure the default RTE |
|
Configure your deployer URLs |
|
Configure your search URLs |
|
Configure Studio search |
|
Configure the cache control settings for templates and assets |
|
Configure forwarded headers |
|
Configure policy headers |
|
Configure the |
|
Configure timeout for Deployer HTTP requests |
|
Configure serverless delivery |
|
Configure capabilities for CloudFormation stack |
|
Configure the regex used for validating various inputs |
|
Configure the disk monitoring notifications and thresholds |
|
Configure the workflow notifications |
|
Configure the commit messages used by Crafter Studio |
|
Configure whether to enable/disable the Studio audit log job for operations not performed through Crafter Studio |
|
Configure the publishing blacklist |
|
Configure the maximum length of configuration content |
|
Configure Git properties |
|
Configure the content types |
|
Configure the dependency resolver |
|
Configure the project tools |
|
Configure asset processing |
|
Configure AWS integration |
|
| Until 4.2 | Configure Box integration |
Configure WebDAV integration |
SMTP Configuration (Email)
This section allows the user to set up a mail client by configuring the SMTP server to send emails from Crafter Studio, such as when authors request to publish content or when a request to publish has been approved.
 1##################################################
 2##        SMTP Configuration (Email)            ##
 3##################################################
 4# Default value for from header when sending emails.
 5# studio.mail.from.default: admin@example.com
 6# SMTP server name to send emails.
 7# studio.mail.host: ${env:MAIL_HOST}
 8# SMTP port number to send emails.
 9# studio.mail.port: ${env:MAIL_PORT}
10# SMTP username for authenticated access when sending emails.
11# studio.mail.username:
12# SMTP password for authenticated access when sending emails.
13# studio.mail.password:
14# Turn on/off (value true/false) SMTP authenaticated access protocol.
15# studio.mail.smtp.auth: false
16# Enable/disable (value true/false) SMTP TLS protocol when sending emails.
17# studio.mail.smtp.starttls.enable: false
18# Enable/disable (value true/false) SMTP EHLO protocol when sending emails.
19# studio.mail.smtp.ehlo: true
20# Enable/disable (value true/false) debug mode for email service. Enabling debug mode allows tracking/debugging communication between email service and SMTP server.
21# studio.mail.debug: false
Cross-Origin Resource Sharing (CORS)
Cross-Origin Resource Sharing (CORS) is an HTTP-header based mechanism that allows a web page to access resources from a different domain.
The following section of Studio’s configuration overrides allows you to set CORS
 1################################################################
 2##                             CORS                           ##
 3################################################################
 4# This is configured as permissive by default for ease of deployment
 5# Remember to tighten this up for production
 6
 7# Disable CORS headers completely
 8# studio.cors.disable: false
 9# Value for the Access-Control-Allow-Origin header
10# studio.cors.origins: '*'
11# Value for the Access-Control-Allow-Headers header
12# studio.cors.headers: '*'
13# Value for the Access-Control-Allow-Methods header
14# studio.cors.methods: '*'
15# Value for the Access-Control-Allow-Credentials header
16# studio.cors.credentials: true
17# Value for the Access-Control-Max-Age header
18# studio.cors.maxage: -1
The CORS origins accept regex patterns. Values are split using ,. Remember that commas inside
patterns need to be escaped with a \ like:
studio.cors.origins: 'http://localhost:[8000\,3000],http://*.other.domain'
Blob Stores
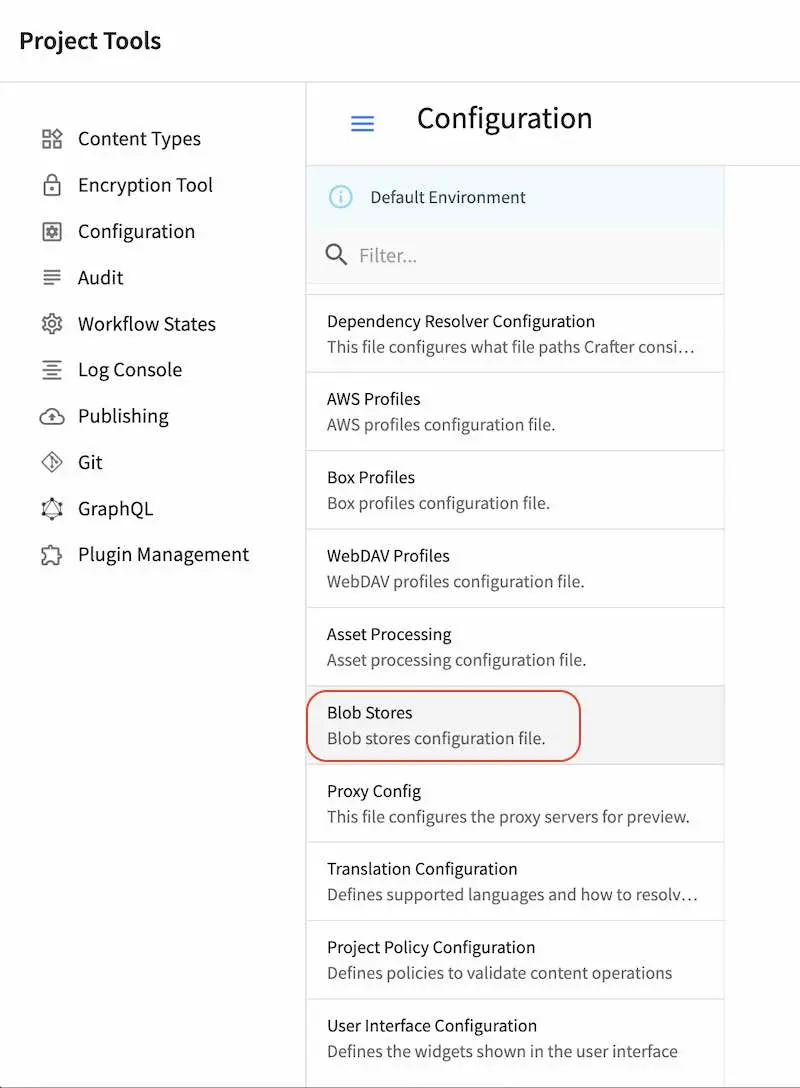
Blob Stores allow you to host internally managed static asset stores to handle very large files. The Blob Stores configuration file allows you to configure stores for assets with the corresponding information required by the store being used.
To modify the Blob Stores configuration, click on ![]() from the bottom of the Sidebar, then click on Configuration and select Blob Stores from the list.
from the bottom of the Sidebar, then click on Configuration and select Blob Stores from the list.
Sample
Here’s a sample Blob Stores Configuration file (click on the triangle on the left to expand/collapse):
Sample "blob-stores-config.xml"
 1<?xml version="1.0" encoding="UTF-8"?>
 2<!--
 3  ~ Copyright (C) 2007-2024 Crafter Software Corporation. All Rights Reserved.
 4  ~
 5  ~ This program is free software: you can redistribute it and/or modify
 6  ~ it under the terms of the GNU General Public License as published by
 7  ~ the Free Software Foundation, either version 3 of the License, or
 8  ~ (at your option) any later version.
 9  ~
10  ~ This program is distributed in the hope that it will be useful,
11  ~ but WITHOUT ANY WARRANTY; without even the implied warranty of
12  ~ MERCHANTABILITY or FITNESS FOR A PARTICULAR PURPOSE.  See the
13  ~ GNU General Public License for more details.
14  ~
15  ~ You should have received a copy of the GNU General Public License
16  ~ along with this program.  If not, see <http://www.gnu.org/licenses/>.
17  -->
18
19<!--
20    Blob stores configuration file.
21
22    For every store you need to specify:
23    <blobStore>
24        <id/>
25        <type/>
26        <pattern/>
27        <mappings>
28            <mapping>
29                <publishingTarget/>
30                <storeTarget/>
31                <prefix/>
32            </mapping>
33        </mappings>
34        <configuration/>
35    </blobStore>
36
37    id:	a unique id for the store
38    type: the type of store to use
39    pattern: the regex to match file paths
40    mappings.mapping.publishingTarget: the name of the publishing storeTarget (preview, staging, live)
41    mappings.mapping.storeTarget: the name of the storeTarget inside the store
42    mappings.mapping.prefix: the prefix to use for all paths (optional)
43    configuration: configuration specific for the store type
44
45   Every store can require additional properties.
46-->
47<blobStores>
48    <!--
49      AWS S3 Store
50
51      Configuration properties:
52
53        <credentials>
54            <accessKey/>
55            <secretKey/>
56        </credentials>
57        <region/>
58        <endpoint/>
59        <pathStyleAccess/>
60
61        credentials.accessKey: AWS access key (optional)
62        credentials.secretKey: AWS secret key (optional)
63        region: AWS region for the service (optional)
64        pathStyleAccess: indicates if path style access should be used for all requests (defaults to false)
65      -->
66
67    <blobStore>
68        <id>s3-store</id>
69        <type>s3BlobStore</type>
70        <pattern>^/static-assets(?!/(app|css|js|fonts|tracking|seo)/)(.*)</pattern>
71        <mappings>
72            <mapping>
73                <publishingTarget>preview</publishingTarget>
74                <storeTarget>${env:PREVIEW_BUCKET_NAME_PATTERN}</storeTarget>
75                <prefix>${env:PREVIEW_BUCKET_PREFIX_PATTERN}</prefix>
76            </mapping>
77            <mapping>
78                <publishingTarget>staging</publishingTarget>
79                <storeTarget>${env:STAGING_BUCKET_NAME_PATTERN}</storeTarget>
80                <prefix>${env:STAGING_BUCKET_PREFIX_PATTERN}</prefix>
81            </mapping>
82            <mapping>
83                <publishingTarget>live</publishingTarget>
84                <storeTarget>${env:LIVE_BUCKET_NAME_PATTERN}</storeTarget>
85                <prefix>${env:LIVE_BUCKET_PREFIX_PATTERN}</prefix>
86            </mapping>
87        </mappings>
88        <configuration>
89            <region>us-east-1</region>
90            <pathStyleAccess>${env:AWS_S3_PATH_STYLE_ACCESS}</pathStyleAccess>
91            <endpoint>${env:AWS_S3_ENDPOINT}</endpoint>
92        </configuration>
93    </blobStore>
94
95</blobStores>
where:
The environment variables (env:VARIABLE_NAME) values are set in the
crafter-setenv.shfile. See here for more information on environment variables used in serverless deployments
Remember to encrypt your credentials. For more information on how to manage/encode your secrets such as AWS credentials, please see Managing Secrets
For better security and control, we recommend setting an AWS profile via the crafter-setenv.sh file instead of
configuring the encrypted credentials in the blob stores configuration file. This allows you to have an IAM user
per developer, which is a better approach than a single user whose credentials are included (encrypted) in the
configuration file. In this way, if you need to rotate or remove the credentials of a single user, the access of
other users won’t be affected.
To set an AWS profile, using your favorite editor, open CRAFTER_HOME/bin/crafter-setenv.sh and add the following:
export AWS_PROFILE=YOUR_AWS_PROFILE
where YOUR_AWS_PROFILE is the AWS profile you wish to use for the blob store. See here
for more information on configuring AWS profiles.
When using an AWS profile, you can now remove the <credentials /> section in your blob stores configuration file.
Remember to restart your CrafterCMS install for the changes you made to take effect.
Using AWS Service Roles
CrafterCMS supports AWS access without using access/secret keys, by setting AWS service roles on your machine
Simply follow the instructions here for attaching an IAM role to your instance: https://docs.aws.amazon.com/AWSEC2/latest/UserGuide/iam-roles-for-amazon-ec2.html#attach-iam-role
Remember to remove the <credentials /> section in your blob stores configuration file.
Publishing Assets from the Blob Stores
CrafterCMS supports managing assets in external storage through workflow and publishing mechanics. This allows uploading assets to an external storage for preview, that can then be published to either a live or a staging (depending on if staging is setup for your Crafter install) external storage, thus making the external assets available to delivery only after the assets have been published to the live external storage.
The external storage could be in the cloud, such as AWS S3 or some other storage solution that is outside of where CrafterCMS is installed.
Configuring the External Storage
First we’ll need to setup the external storage to be used by CrafterCMS.
To setup an external storage for assets, open the Sidebar, then click on ![]() -> Configurations. Select
-> Configurations. Select Blob Stores from the dropdown and fill in the required information.
<blobStore>
  <id/>
  <type/>
  <pattern/>
  <mappings>
    <mapping>
      <publishingTarget/>
      <storeTarget/>
      <prefix/>
    </mapping>
  </mappings>
  <configuration/>
</blobStore>
To see more information on the Blob Stores configuration, see above
After setting up the Blob Stores configuration, you may now use the external storage for uploading using the various upload methods provided by Crafter Studio, and publishing to live or staging if it’s setup.
Example
Let’s take a look at an example of setting up an external storage for preview, staging and live and then uploading and finally publishing assets to the external storage we setup. In the example, we will use AWS S3 as the external storage and the Website Editorial blueprint in Crafter Studio to create our project.
Prerequisites:
Project created using the Website Editorial blueprint.
AWS S3 bucket/s. A single bucket can be used as long as all the
publishingTargetuses a uniqueprefix, or a separate bucket can be created for eachpublishingTarget, or a combination of both.For our example, we will be using two buckets. One for authoring and another for delivery. The following buckets were setup in AWS S3: my-authoring-bucket for authoring (used by publishing target
previewwith the prefix sandbox and publishing targetstagingwith the prefix staging) and my-deli-bucket for delivery.
Here are the steps:
Enable staging (optional)
Setup the blob store
Upload files
Publish the files to staging (if setup)
Publish the files into live
Let’s begin:
1. Enable Staging (optional)
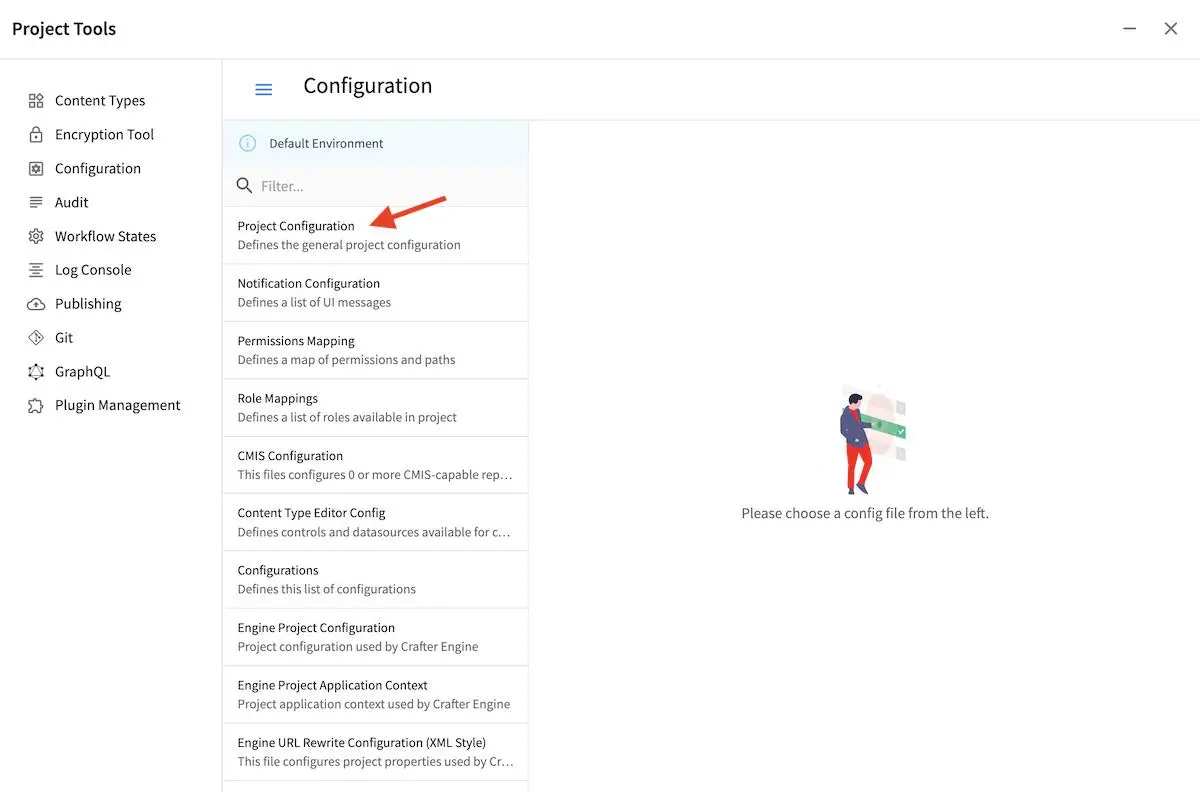
This step is optional but for our example, we wanted to be able to publish to staging, so in this step, we will first enable staging. In your Studio, click on ![]() -> Configuration -> Project Configuration and set
-> Configuration -> Project Configuration and set enable-staging-environment to true to enable staging
<published-repository>
    <enable-staging-environment>true</enable-staging-environment>
    <staging-environment>staging</staging-environment>
    <live-environment>live</live-environment>
</published-repository>
For more information on staging, see Configuring Publishing to Staging Target
2. Setup Blob Store
In your Studio, click on ![]() -> Configuration -> Blob Stores and fill in the required information to setup the S3 buckets for the preview, staging and live.
-> Configuration -> Blob Stores and fill in the required information to setup the S3 buckets for the preview, staging and live.
CRAFTER_HOME/data/repos/sites/sandbox/SITENAME/sandbox/config/studio/blob-stores-config.xml¶1<blobStores> 2 <blobStore> 3 <id>s3-default</id> 4 <type>s3BlobStore</type> 5 <pattern>/static-assets/item/.*</pattern> 6 <mappings> 7 <mapping> 8 <publishingTarget>preview</publishingTarget> 9 <storeTarget>my-authoring-bucket</storeTarget> 10 <prefix>sandbox</prefix> 11 </mapping> 12 <mapping> 13 <publishingTarget>staging</publishingTarget> 14 <storeTarget>my-authoring-bucket</storeTarget> 15 <prefix>staging</prefix> 16 </mapping> 17 <mapping> 18 <publishingTarget>live</publishingTarget> 19 <storeTarget>my-delivery-bucket</storeTarget> 20 </mapping> 21 </mappings> 22 <configuration> 23 <credentials> 24 <accessKey>xxxxxxxxx</accessKey> 25 <secretKey>xxxxxxxxx</secretKey> 26 </credentials> 27 <region>us-west-1</region> 28 <pathStyleAccess>true</pathStyleAccess> 29 </configuration> 30 </blobStore> 31</blobStores>
where the highlighted items above refers to:
pattern: the regex to match file paths (the path in Studio that when used will access the external storage,
/static-assets/item/.*for our example above)mappings.mapping.storeTarget: the name of the storeTarget inside the store (AWS S3 buckets,
my-authoring-bucketandmy-deli-bucketfor our example above)configuration: configuration specific for the store type (For AWS S3, it requires credentials to access the buckets)
Remember to encrypt your credentials. For more information on how to manage/encode your secrets such as AWS credentials, please see Managing Secrets
To see more information on the Blob Stores configuration, see above
3. Upload files
There are various ways to upload files in Crafter Studio. Here’s a few ways we can upload to the external storage:
Upload through a picker with corresponding data source setup in a content type
Upload using the
Bulk UploadorUploadright-click option
Let’s take a closer look:
One way of uploading files is through the use of a picker (image, video, item selector) with its corresponding data source with the
Repository Pathproperty set to thepatternwe defined in theBlob Storesconfiguration file.For our example, open the Page - Article content type by opening the Sidebar, then click on
 -> Content Types, then choose the template name
 Page - Article.In the Page - Article content type, notice that the
Repository Pathproperty of theUpload Imagedata source is set to:/static-assets/item/images/{yyyy}/{mm}/{dd}/, which falls into the file path pattern/static-assets/item/.*we setup in theBlob Storesconfiguration file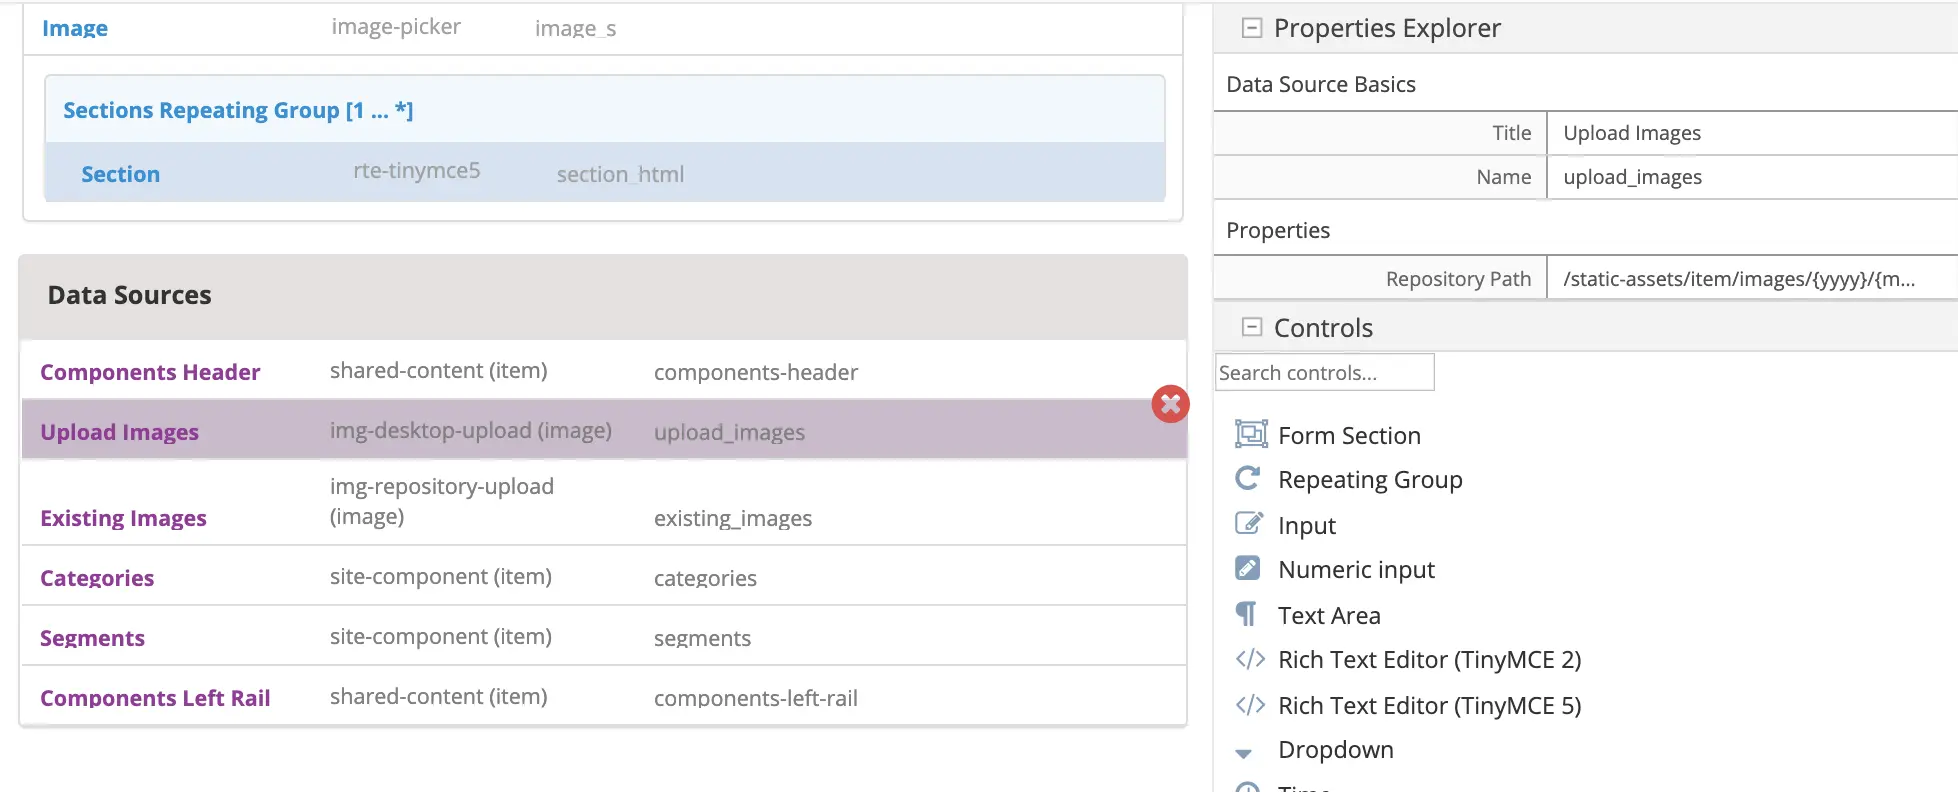
Let’s change the image used in one of the articles in the project.
From the Sidebar, navigate to
/articles/2016/6then right click onCoffee is Good for Your Healththen selectEdit.Scroll down to the
Contentsection, then click on theReplacebutton next to the Image field, then selectUpload Images. Select the file you want to upload. In our example, the filenew1.pngwill be uploaded tostatic-assets/item/images/2020/03/27.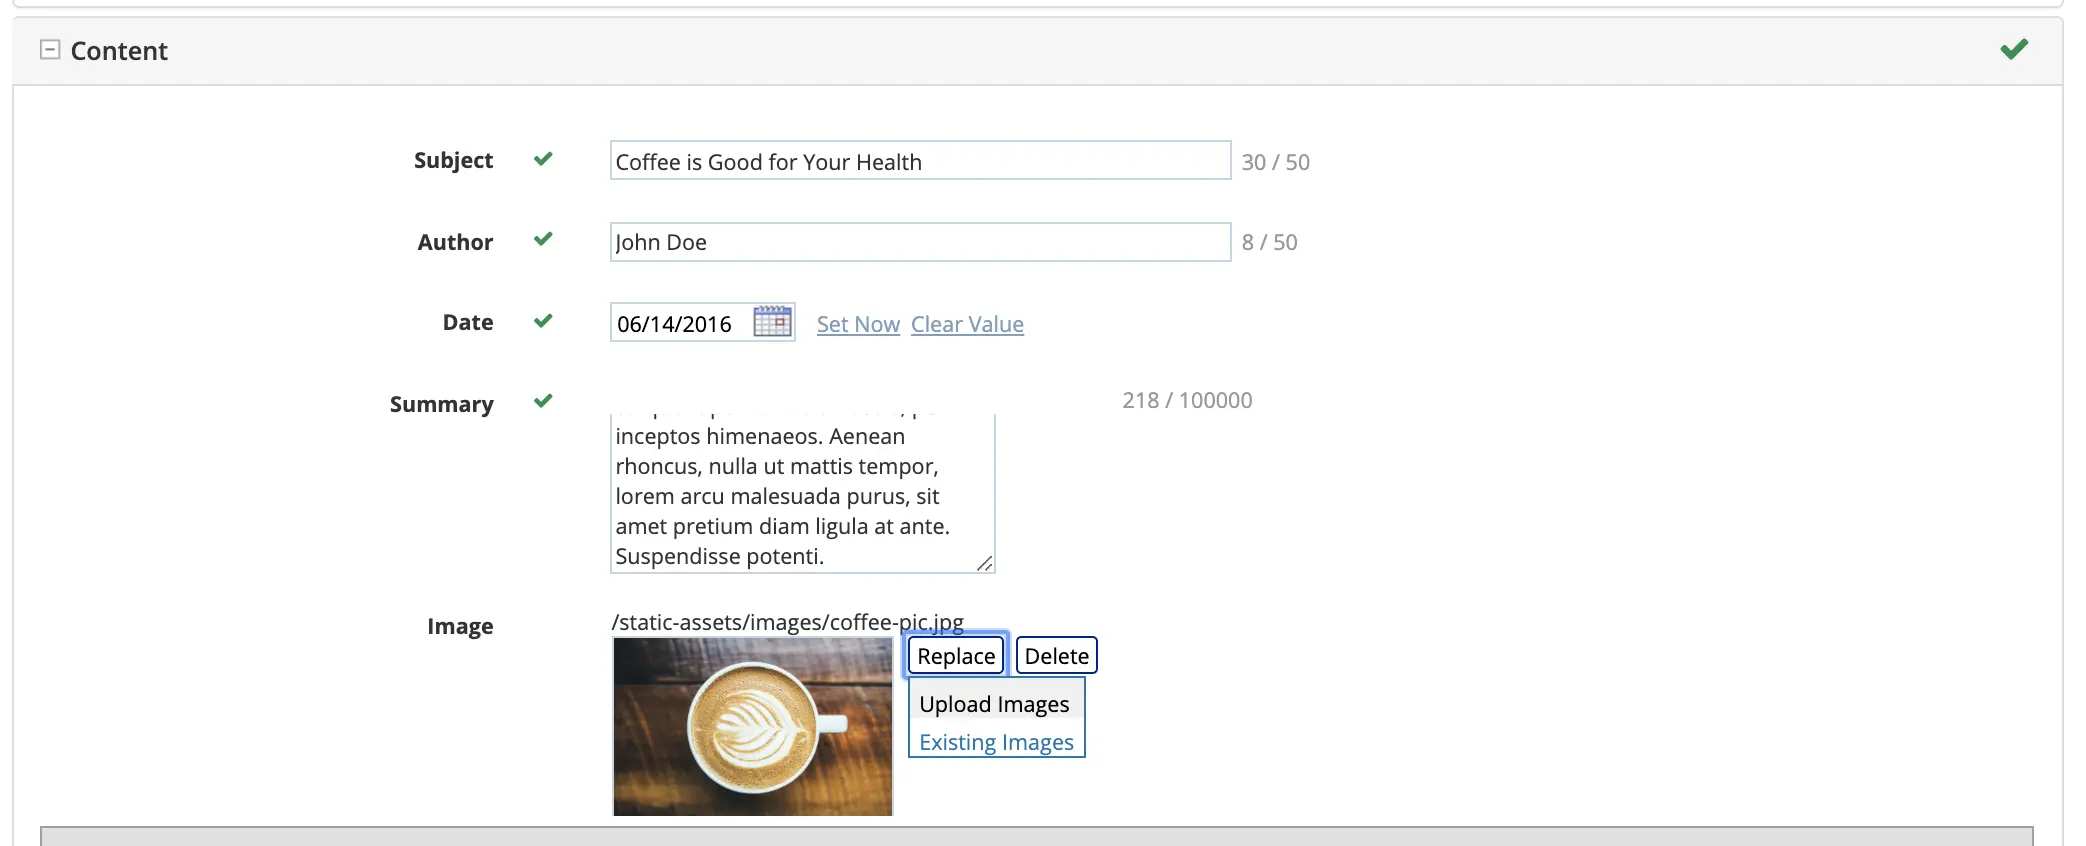
After uploading the file, we should see it in the AWS S3 bucket for authoring
my-authoring-bucketin the sandbox: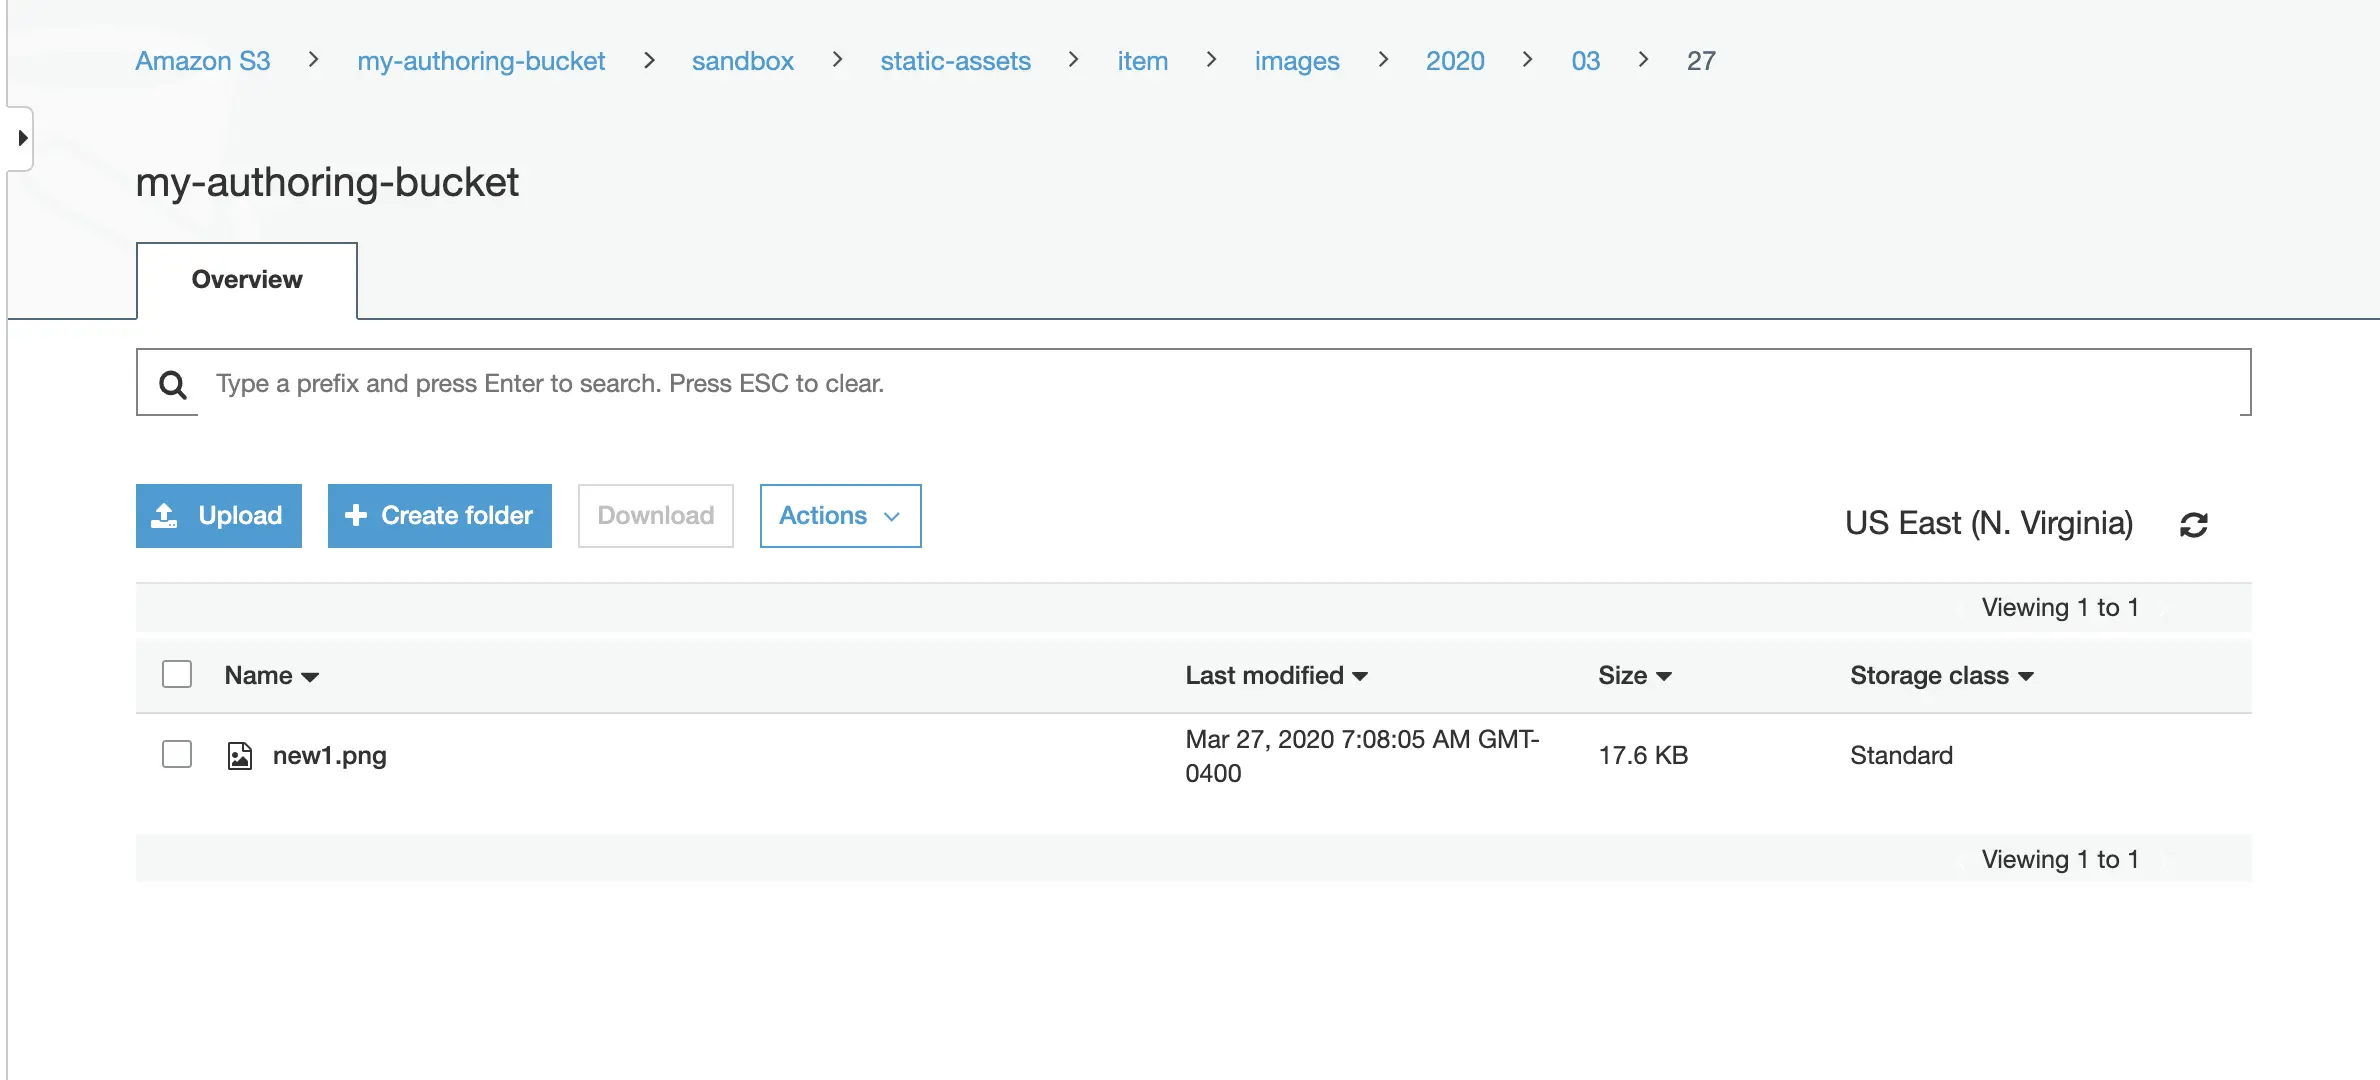
Next we’ll try uploading using the
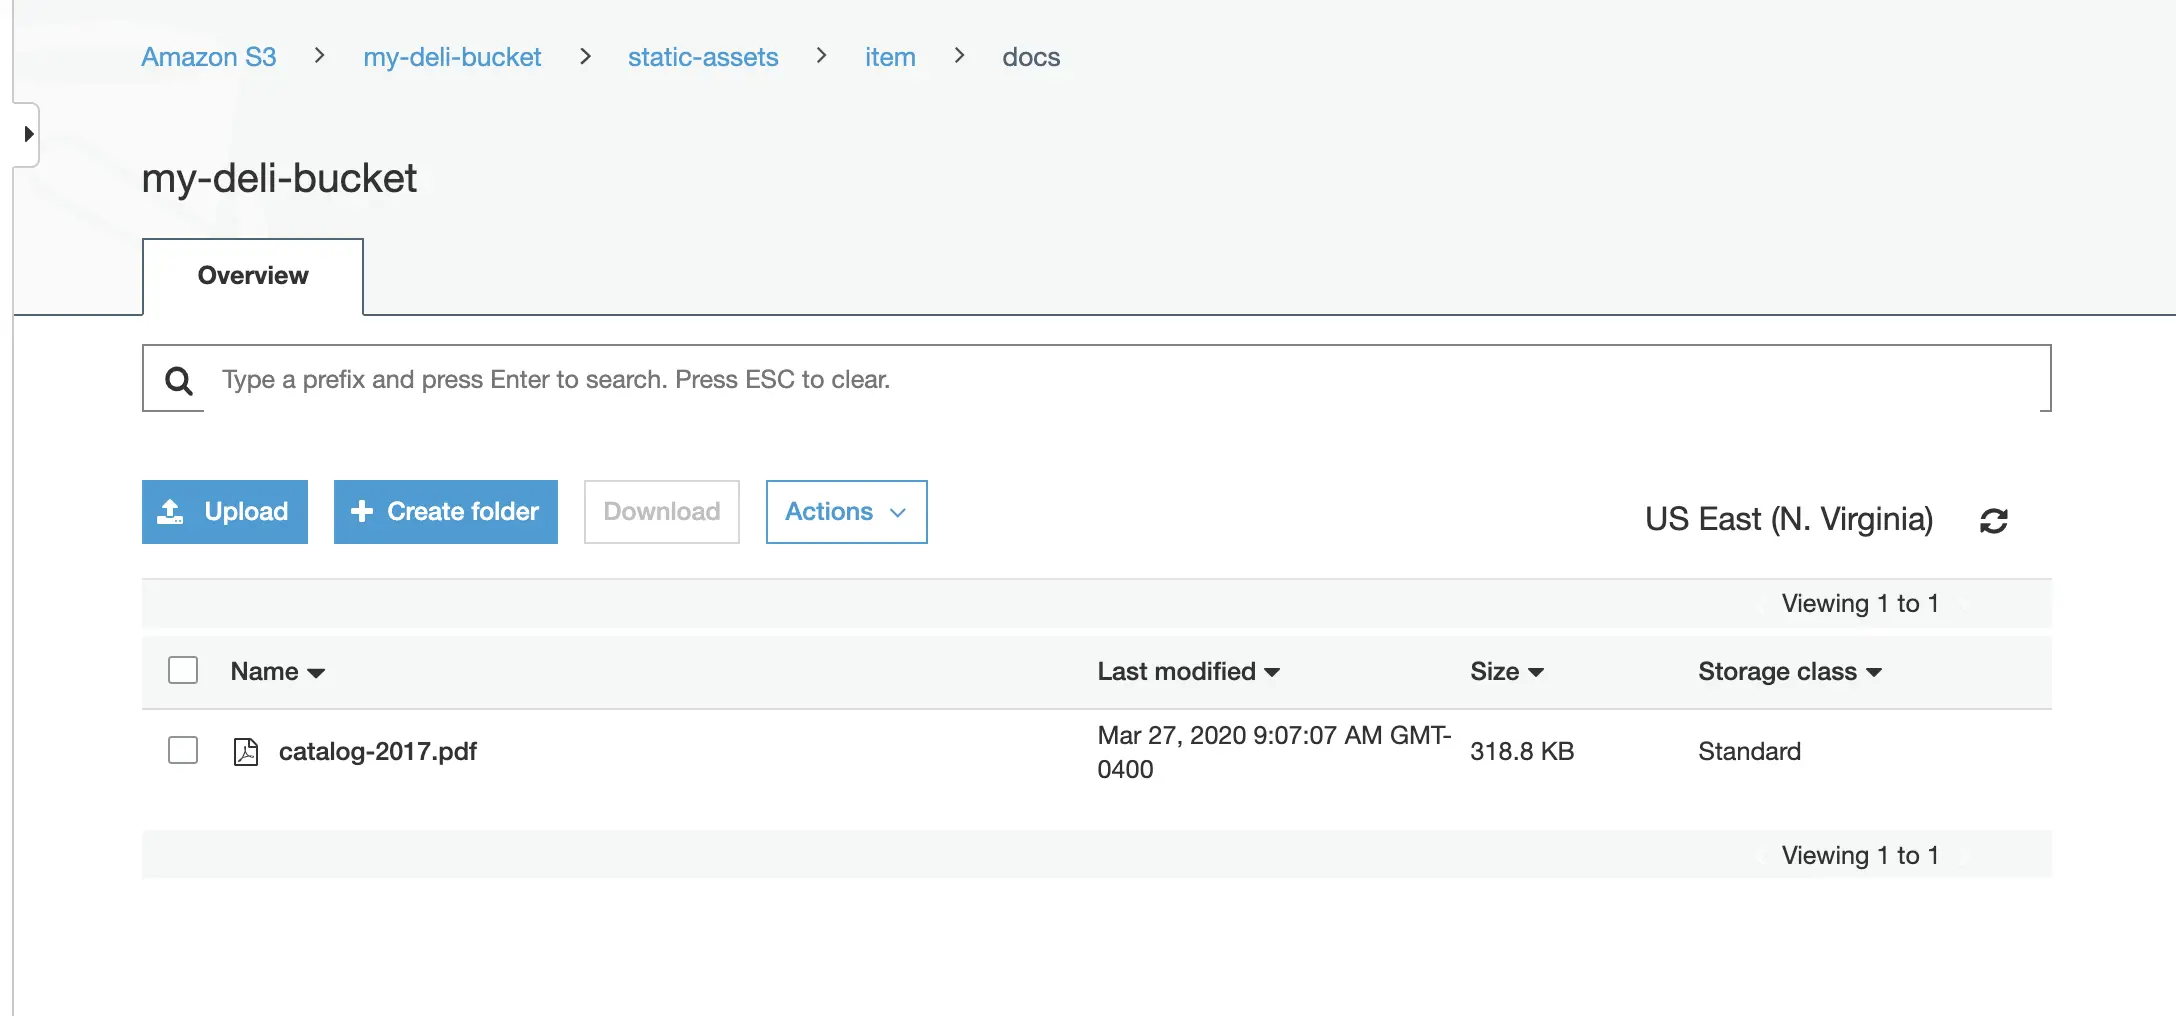
Uploadright-click option.Open the Sidebar and navigate to
static-assets/item. Create a folder nameddocsunderitem. Right click on the newly created folder and selectUploadto upload a single file, orBulk Uploadto upload multiple filesIn the example below, two files were uploaded to the
docsfolder.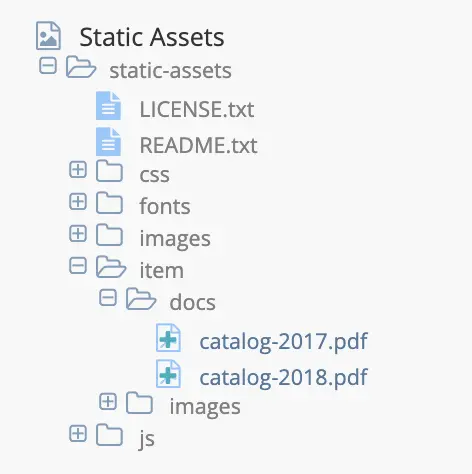
When you upload files to the
docsfolder, the files get uploaded to thesandboxof themy-authoring-bucketpreviously setup.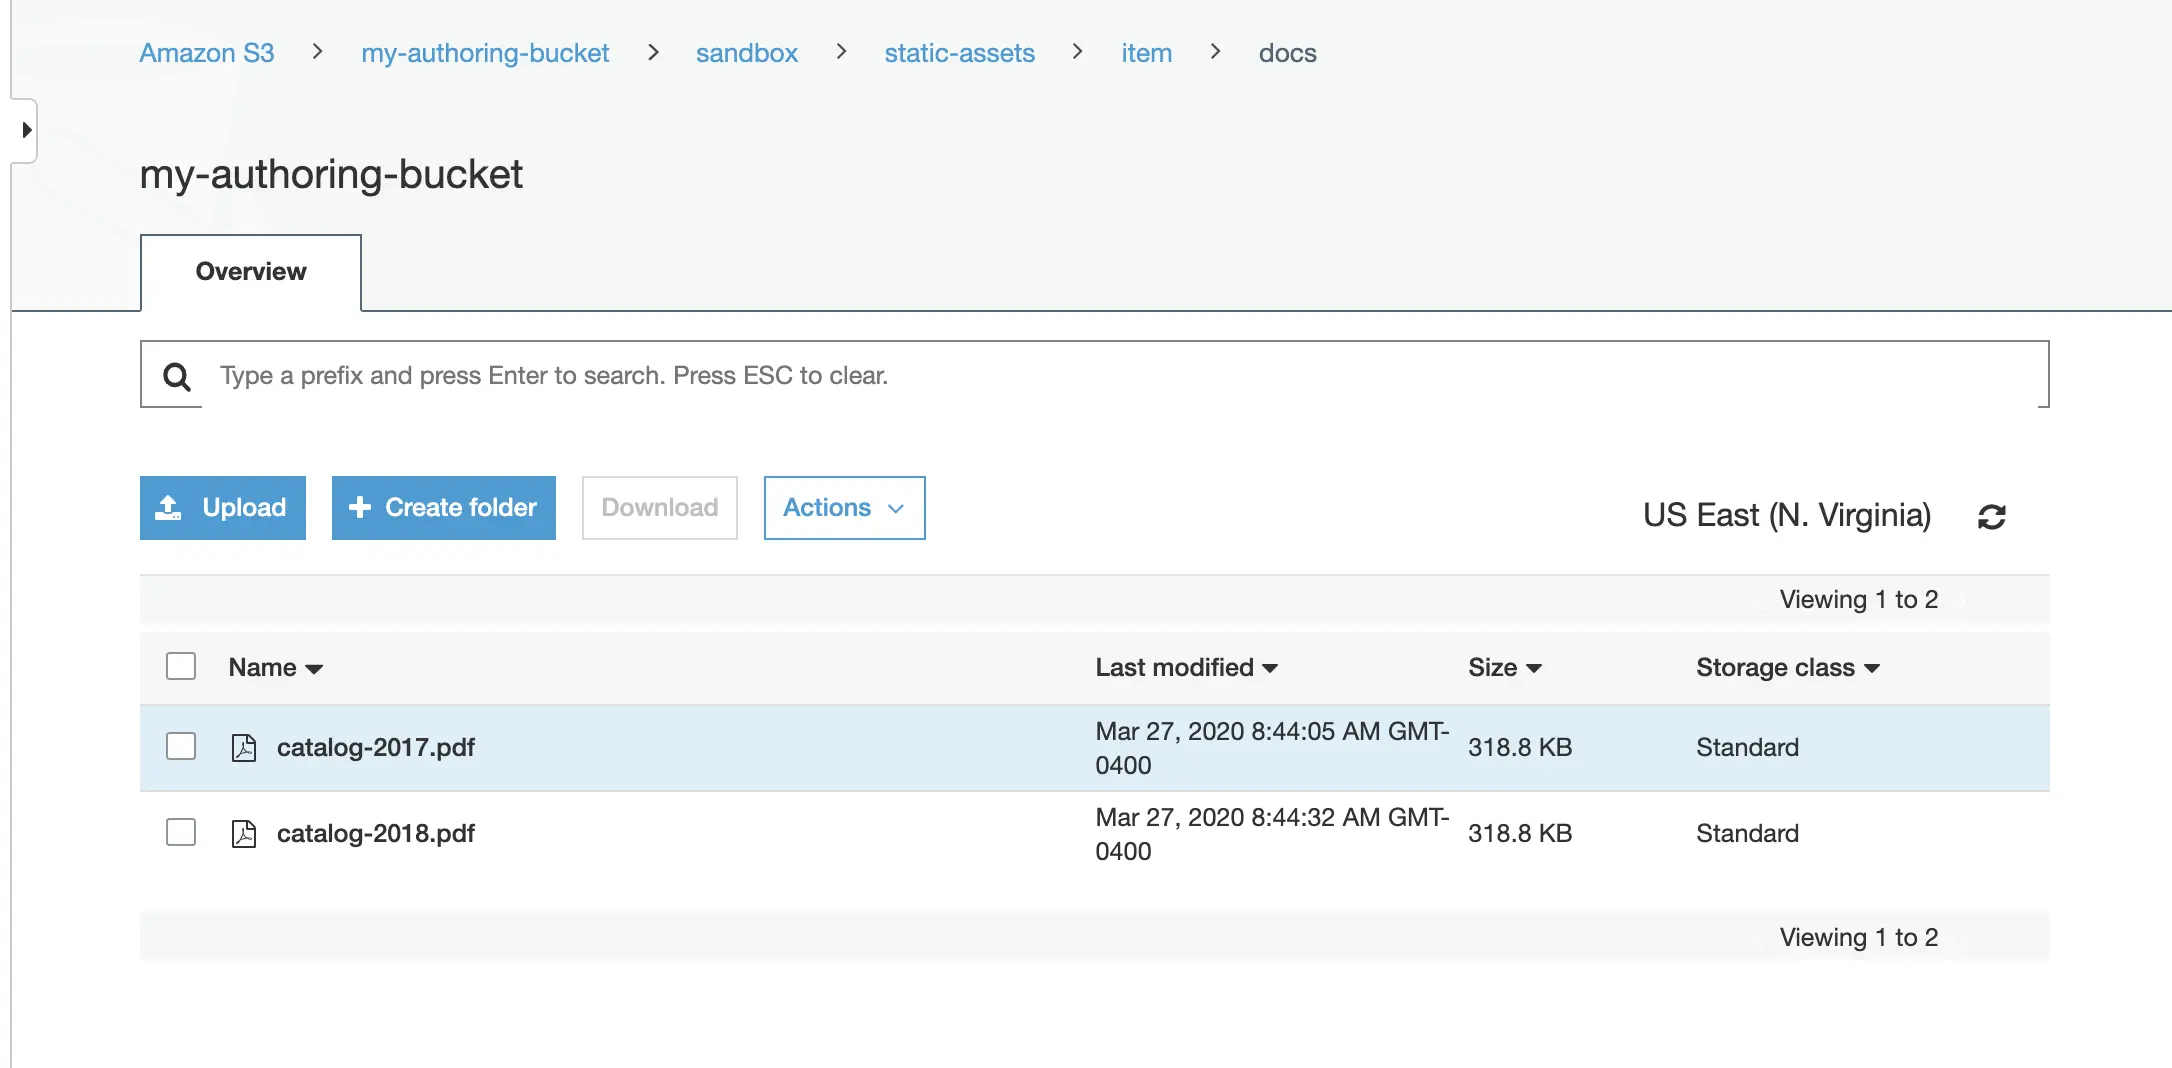
5. Publish the files to staging
The next step in our example is to publish the files to staging. To publish a file to staging, navigate to the file in the Sidebar then right click on the file, and select Publish or open the Dashboard and select the file/s you want to publish to staging in the Unpublished Work widget and click on Publish from the context nav.
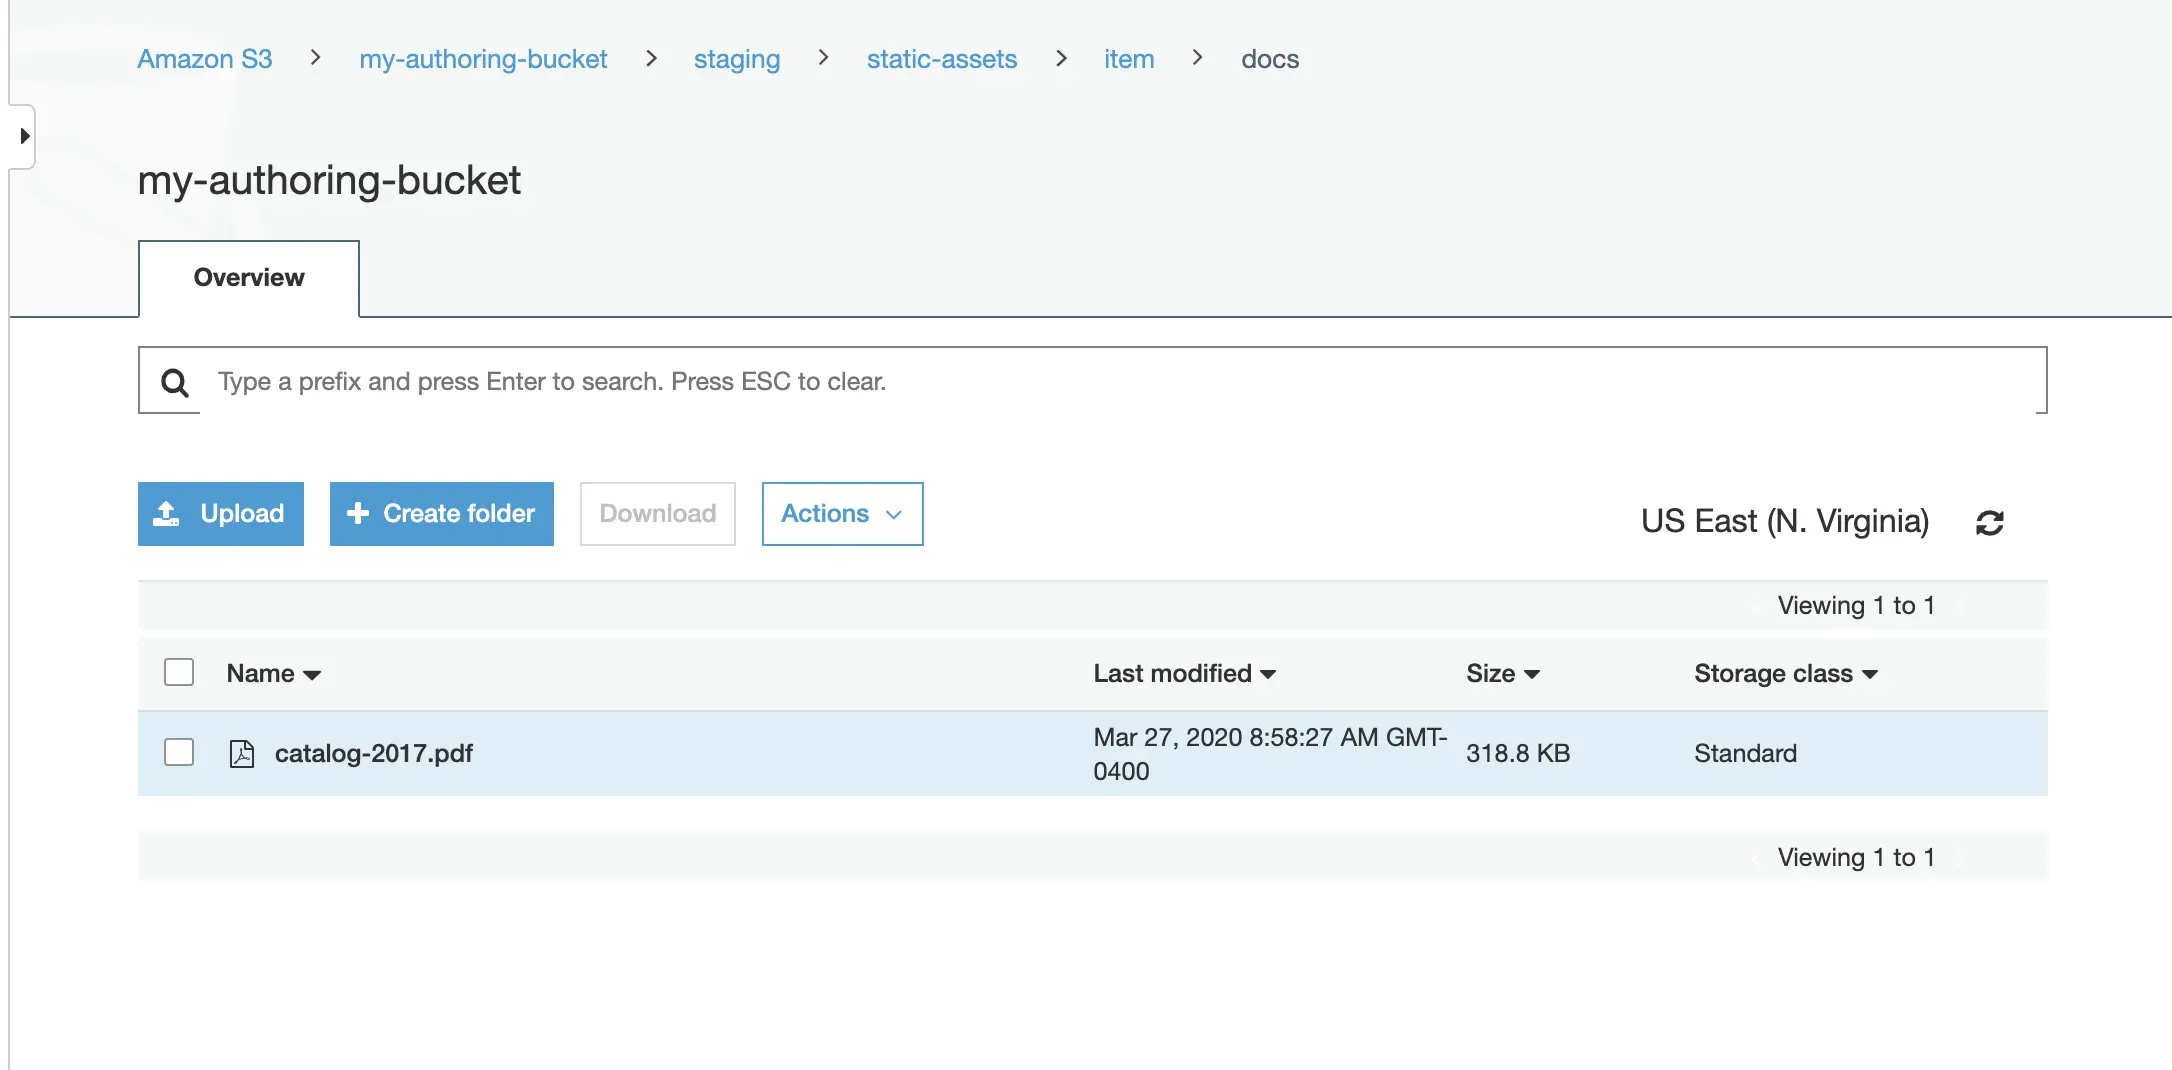
The Publish dialog will come up. Remember to select staging for the Publishing Target
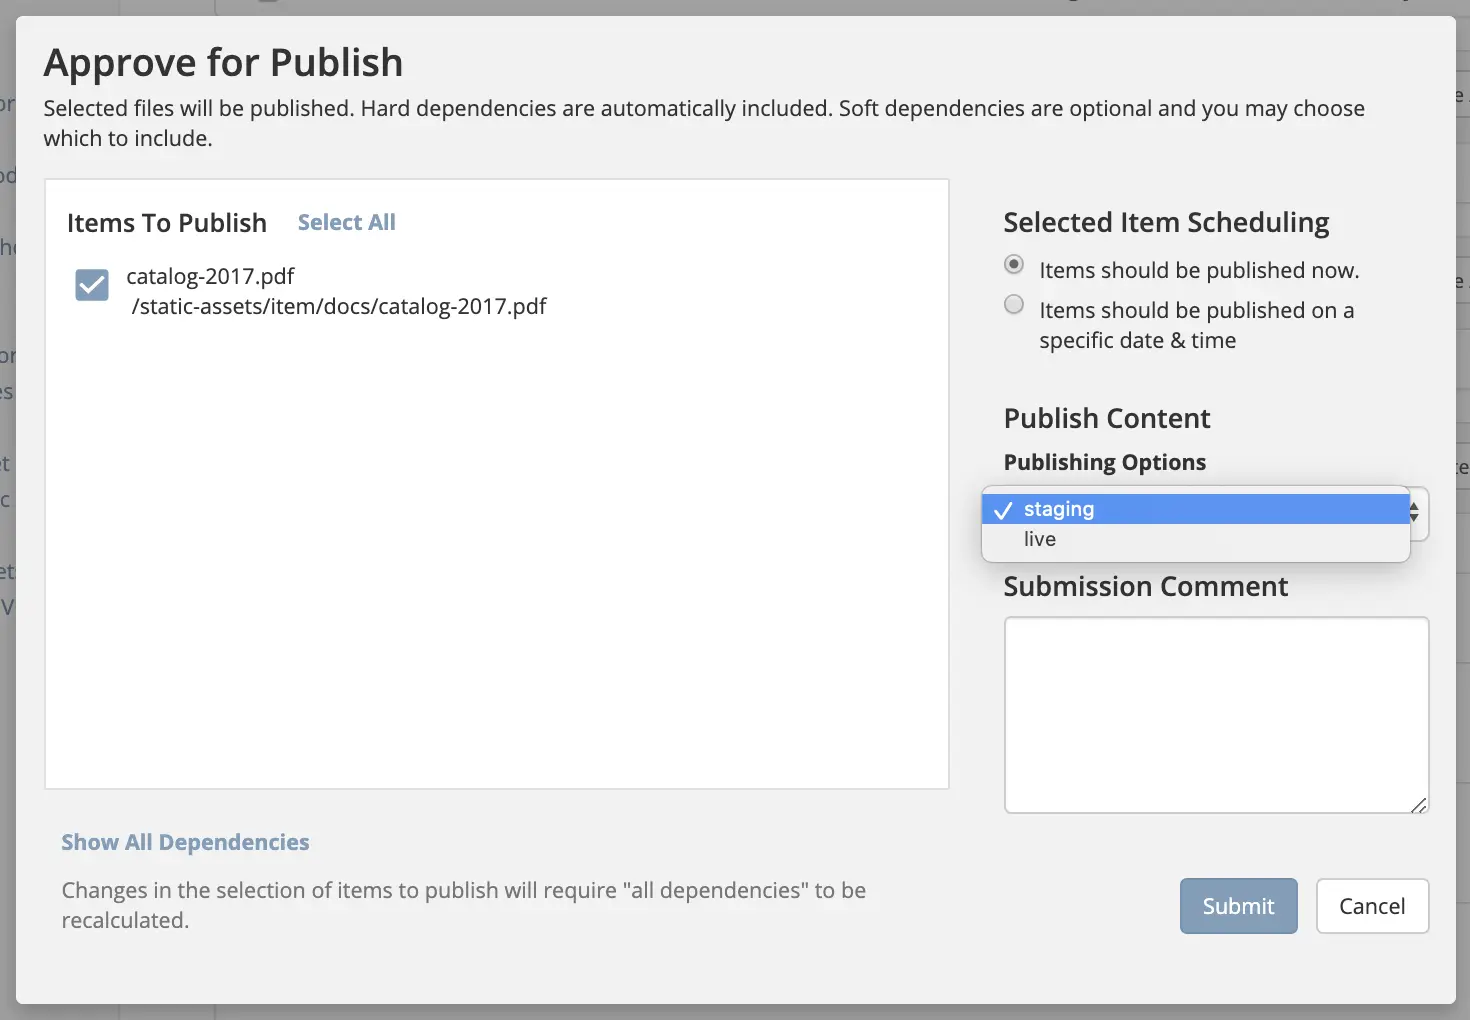
When the file/s are published to staging, the files get published to the staging branch of the my-authoring-bucket in s3.
6. Publish the files to delivery
Finally, we’ll publish the file/s to live. To publish a file to live, navigate to the file in the Sidebar then right click on the file, and select Publish or open the Dashboard and select the file/s you want to publish to live in the Unpublished Work widget and click on Approve & Publish from the context nav.
The Publish dialog will come up. Remember to select live for the Publishing Target

When the file/s are published to live, the file/s get published to the my-deli-bucket in s3.
Setting up Staging for Existing Projects
When adding the staging publishing target to an established project that uses external storage, Studio does not clone the assets in external storage for live into staging. Performing a bulk publish to staging also does not work at this time. This is because Studio does not publish to staging, assets in a LIVE, UNEDITED state.
To sync the external storage for staging with live, you must copy the assets in the live external storage to the staging external storage.
Let’s take a look at an example of adding staging to an existing project.
Prerequisites:
Project created using the Website Editorial blueprint with external storage setup for
liveand assets already published tolive(See example above for setting up external storage for a project. Remember to not setupstagingas we will be doing it in this example)AWS S3 bucket to be used by the
stagingpublishing target. For our example, we will be using the bucketmy-stagingsetup in AWS S3.
Here are the steps:
Enable staging in Studio
Setup the blob store in Studio
Copy assets in live to staging in external storage
Let’s begin:
Enable staging
In your Studio, click on
-> Configuration -> Project Configuration and set enable-staging-environmenttotrueto enable staging<published-repository> <enable-staging-environment>true</enable-staging-environment> <staging-environment>staging</staging-environment> <live-environment>live</live-environment> </published-repository>
For more information on staging, see Configuring Publishing to Staging Target
Setup Blob Store
Setup
stagingin the Blob Store by adding the following to yourBlob Storesconfiguration. In your Studio, click on -> Configuration -> Blob Stores and fill in the required information to setup the S3 bucket for staging.<mapping> <publishingTarget>staging</publishingTarget> <storeTarget>my-staging</storeTarget> </mapping>
To see more information on the Blob Stores configuration, see above
Copy assets in
livetostagingin external storageIn your AWS console, copy the contents of your delivery bucket
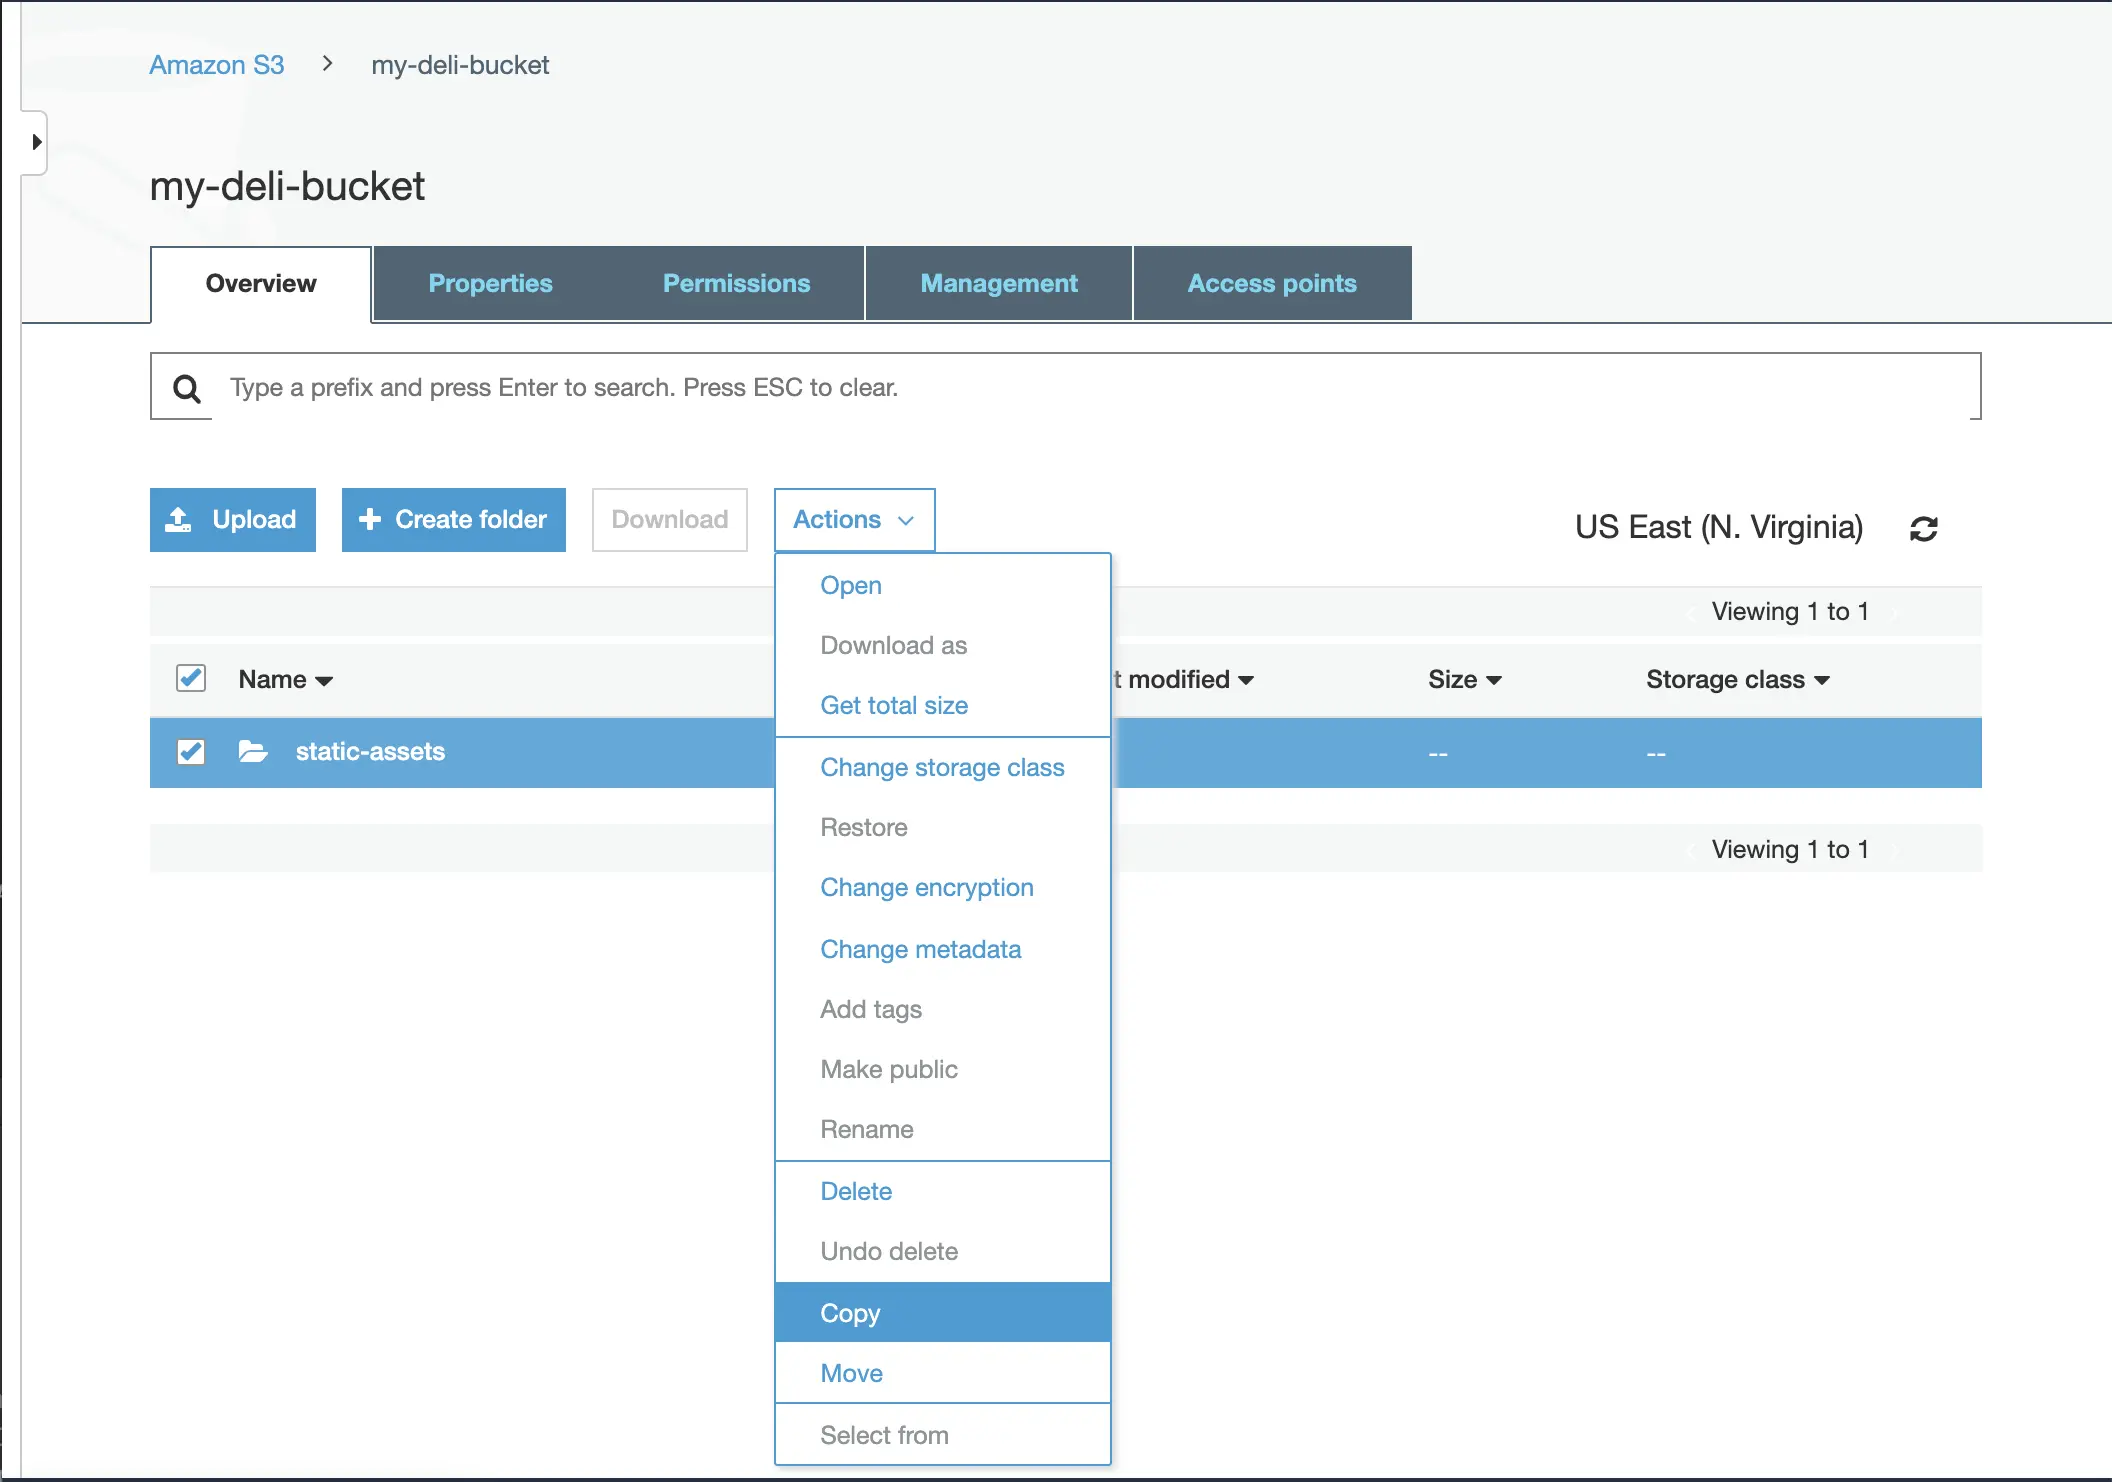
Paste the copied content into the staging bucket
my-staging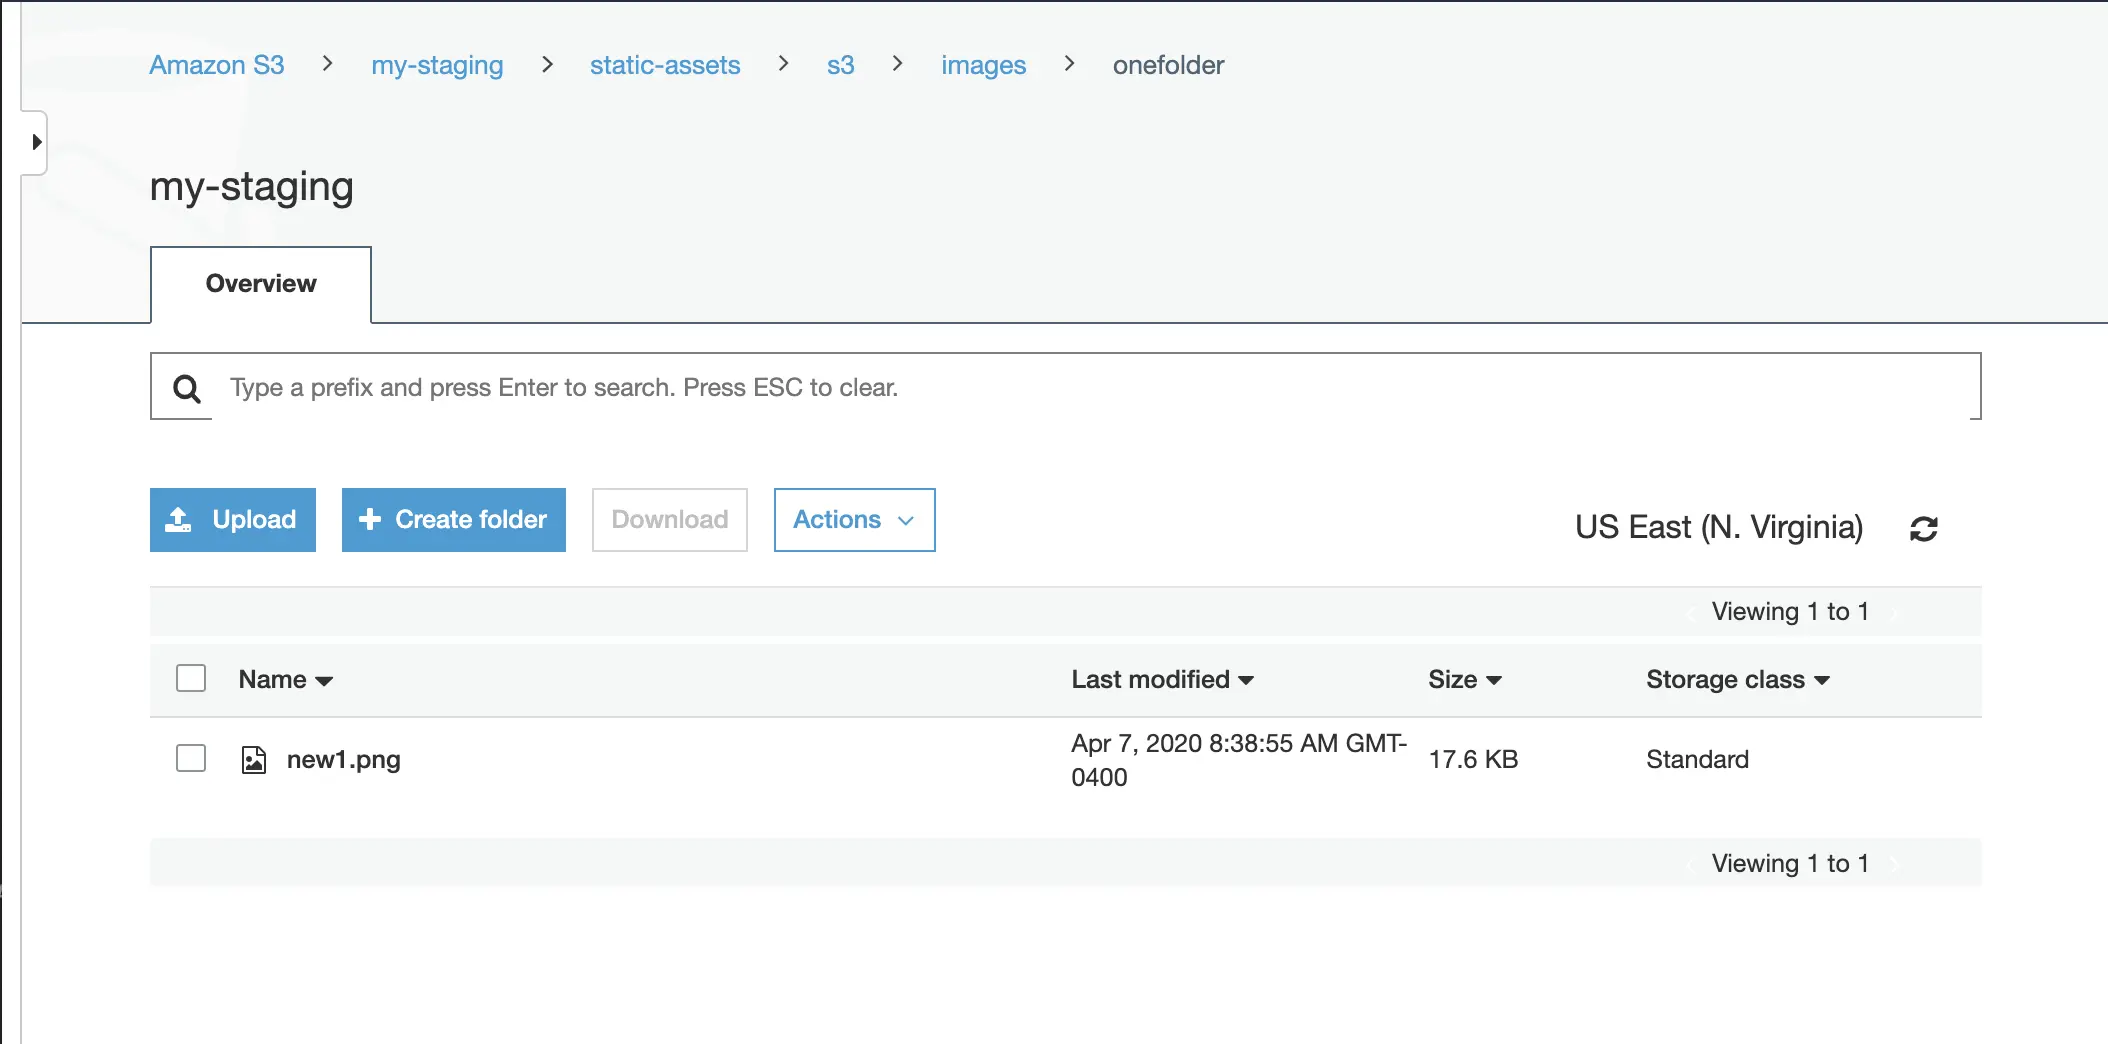
The
liveandstagingexternal storage is now synced.
Project Policy
Since 4.0.0The project policy configuration file allows the administrator to configure constraints for content being added to the project (via uploads), such as filename/item name constraints, minimum/maximum size of files, permitted content types or file types (MIME-types), etc.
Note that the project policy does not apply to content created directly on disk via the Git or APIs.
CrafterCMS supports the following project policies:
Filename allowed patterns and automatic renaming rules
File size limits
MIME-type limits
Content-type limits
Note
Since 4.1.4The default policy for filenames and automatic renaming rules is to lowercase everything except items under: /scripts, /templates, and /static-assets/app
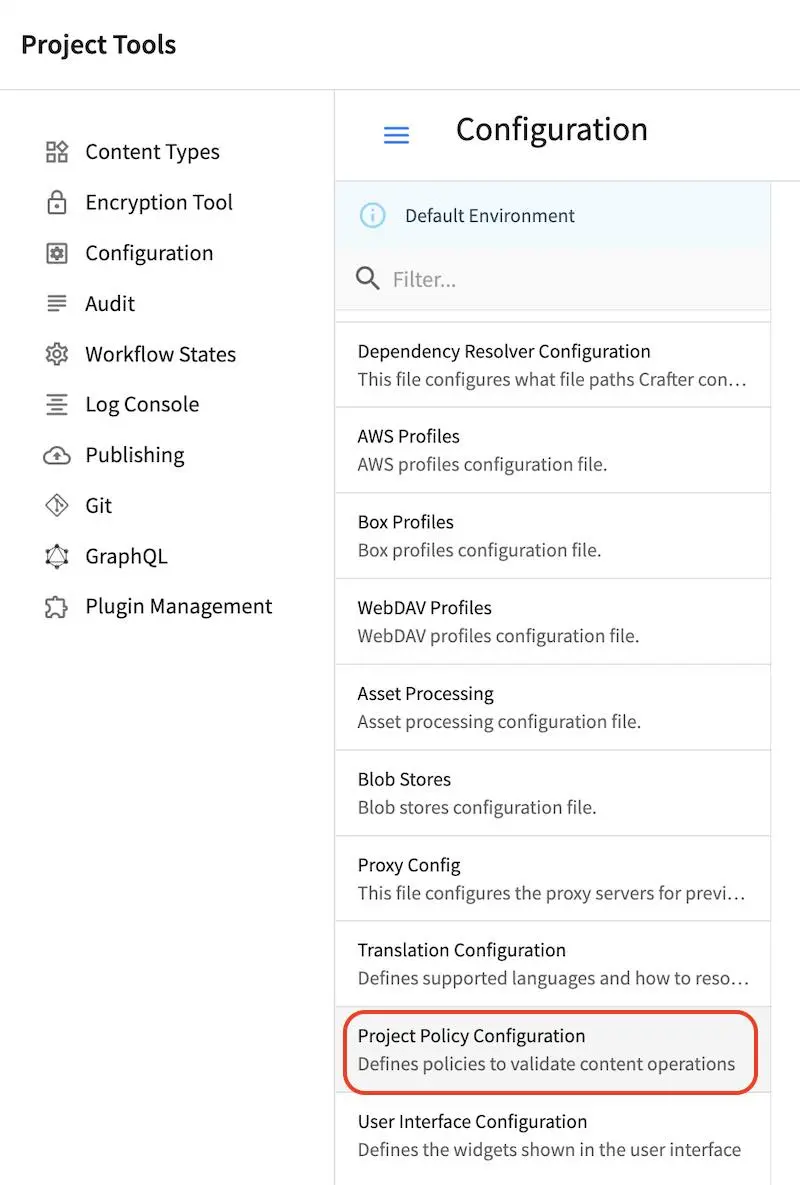
To modify the project policy configuration, click on ![]() from the Sidebar, then click on Configuration and
select Project Policy Configuration from the list.
from the Sidebar, then click on Configuration and
select Project Policy Configuration from the list.
Note
The Project Policy Configuration file (site-policy-config.xml) is not overridden by environment. Learn more about Studio multi-environment support in Studio Multi-environment Support.
Sample
Here’s a sample Project Policy Configuration file (click on the triangle on the left to expand/collapse):
Sample project policy configuration
 1<?xml version="1.0" encoding="UTF-8" ?>
 2
 3<!--
 4  ~ Copyright (C) 2007-2022 Crafter Software Corporation. All Rights Reserved.
 5  ~
 6  ~ This program is free software: you can redistribute it and/or modify
 7  ~ it under the terms of the GNU General Public License version 3 as published by
 8  ~ the Free Software Foundation.
 9  ~
10  ~ This program is distributed in the hope that it will be useful,
11  ~ but WITHOUT ANY WARRANTY; without even the implied warranty of
12  ~ MERCHANTABILITY or FITNESS FOR A PARTICULAR PURPOSE.  See the
13  ~ GNU General Public License for more details.
14  ~
15  ~ You should have received a copy of the GNU General Public License
16  ~ along with this program.  If not, see <http://www.gnu.org/licenses/>.
17  -->
18
19<site-policy>
20
21    <!--
22        This file can contain any number of statements to control the content added to the site:
23
24        <statement>
25            <target-path-pattern/> (Regular expression that will be compared against the path of the content)
26
27            <permitted>
28                (All elements in this section are optional and can be used in any combination)
29
30                <minimum-file-size/> (Minimum size of the file in bytes)
31                <maximum-file-size/> (Maximum size of the file in bytes)
32
33                <mime-types/> (Comma separated list of MIME types, also support wildcards)
34
35                <content-types/> (Comma separated list of content-types)
36
37                <path> (Apply to CREATE action)
38                    <source-regex/> (Regular expression to validate the file name or folder name)
39                    <target-regex caseTransform="lowercase"/> (Expression to transform the file name or folder name)
40                </path>
41
42            </permitted>
43            <denied>
44                (mime-types or content-types are available)
45                <mime-types/> (Comma separated list of MIME types, also support wildcards)
46                <content-types/> (Comma separated list of content-types)
47            </denied>
48        </statement>
49    -->
50
51    <!-- Example: only allow images of less than 1 MB -->
52    <!-- disable svg files -->
53    <statement>
54        <target-path-pattern>/static-assets/images/.*</target-path-pattern>
55        <permitted>
56            <maximum-file-size>1000000</maximum-file-size>
57            <mime-types>image/*</mime-types>
58        </permitted>
59        <denied>
60            <mime-types>image/svg+xml</mime-types>
61        </denied>
62    </statement>
63
64</site-policy>
Examples
Let’s take a look at some example project policy configurations.
Mime Types
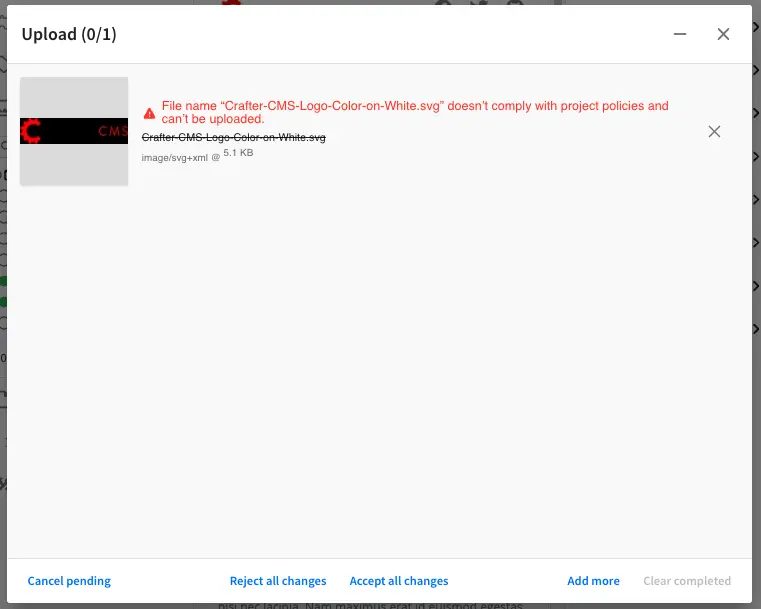
The example configuration below (as seen in the default project policy configuration) disallows svg image file uploads:
   <!-- disable svg files -->
   <statement>
     <target-path-pattern>/.*</target-path-pattern>
     <permitted>
       <mime-types>*/*</mime-types>
     </permitted>
     <denied>
       <mime-types>image/svg+xml</mime-types>
     </denied>
   </statement>
Whenever a user tries to upload an svg image, the user will see a message on the screen informing them that it doesn’t comply with the project policies and can’t be uploaded like below:
File Size Limits
Limiting file size of uploads is supported. Simply add <minimum-file-size/> and/or <maximum-file-size/>
under <permitted> where the minimum and maximum file sizes are in bytes
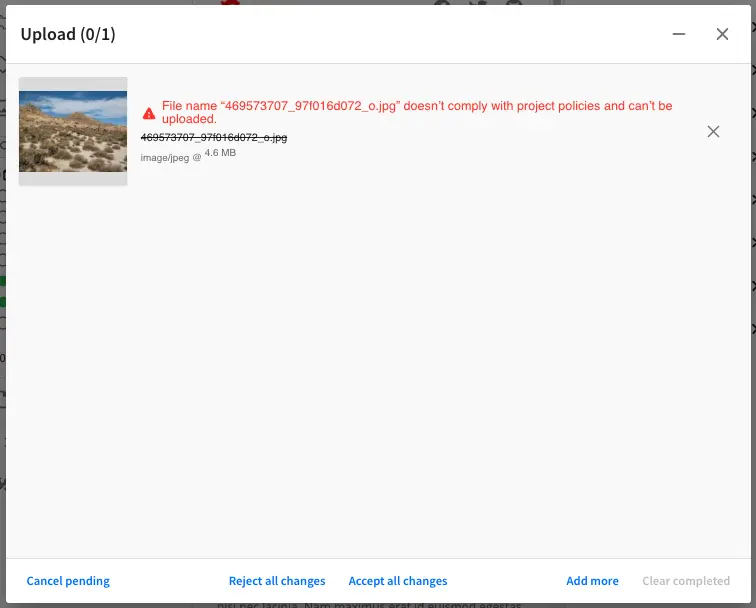
The example configuration below limits image uploads to less than 1MB in folder /static-assets/images/.
<!-- Example: only allow images of less than 1 MB -->
<statement>
  <target-path-pattern>/static-assets/images/.*</target-path-pattern>
  <permitted>
    <maximum-file-size>1000000</maximum-file-size>
    <mime-types>image/*</mime-types>
  </permitted>
</statement>
Whenever a user tries to upload an image that is larger than 1 MB in the /static-assets/images/ folder, the user
will see a message on the screen informing them that it doesn’t comply with project policies and can’t be uploaded like below:
Transform File Names
CrafterCMS supports transforming filenames of uploaded files and convert the filenames to lower case or upper case.
Simply set caseTransform to either lowercase or uppercase in target-regex to convert to your required case.
The example configuration below (as seen in the default project policy configuration) converts
parenthesis ( ( and ) ) and spaces in filenames to a dash ( - )
and lower cases all the letters in filenames for files uploaded to the /static-assets/ folder .
<statement>
  <target-path-pattern>/static-assets/.*</target-path-pattern>
  <permitted>
    <path>
      <source-regex>[\(\)\s]</source-regex>
      <target-regex caseTransform="lowercase">-</target-regex>
    </path>
  </permitted>
</statement>
Whenever a user uploads a file with upper case letters or spaces and parenthesis in the filename, in the
/static-assets/ folder, the user will see a message on the screen informing them that it doesn’t comply
with project policies and will be asked if they would like to continue upload with the suggested name like below:

Editable Mime Types
Here’s the default list of MIME-types editable in Studio:
# Item MIME-types that are editable directly in Crafter Studio
studio.content.item.editableTypes:
- text/plain
- text/html
- text/css
- text/x-freemarker
- application/javascript
- application/json
- application/xml
- application/xhtml+xml
These can be updated as needed by overriding the property in one of the override files.
Project/Site Configuration
Crafter Studio allows to configure many aspects of a project/site. The project configuration file contains the primary configuration for Crafter Studio’s behavior. Each project has its own project configuration file that controls its behavior independently of other projects.
To modify the project configuration, click on ![]() from the Sidebar, then click on Configuration
and select Project Configuration from the list.
from the Sidebar, then click on Configuration
and select Project Configuration from the list.
Sample
Here’s a sample Project Configuration file (click on the triangle on the left to expand/collapse):
Sample Project Configuration
1<?xml version="1.0" encoding="UTF-8"?>
2<!--
3 ~ Copyright (C) 2007-2022 Crafter Software Corporation. All Rights Reserved.
4 ~
5 ~ This program is free software: you can redistribute it and/or modify
6 ~ it under the terms of the GNU General Public License version 3 as published by
7 ~ the Free Software Foundation.
8 ~
9 ~ This program is distributed in the hope that it will be useful,
10 ~ but WITHOUT ANY WARRANTY; without even the implied warranty of
11 ~ MERCHANTABILITY or FITNESS FOR A PARTICULAR PURPOSE. See the
12 ~ GNU General Public License for more details.
13 ~
14 ~ You should have received a copy of the GNU General Public License
15 ~ along with this program. If not, see <http://www.gnu.org/licenses/>.
16 -->
17
18<site-config>
19 <wem-project>{siteName}</wem-project>
20 <display-name>{siteName}</display-name>
21
22 <!-- Site URLs. Default to http://localhost:8080 if blank -->
23 <site-urls>
24 <authoring-url></authoring-url>
25 <staging-url></staging-url>
26 <live-url></live-url>
27 </site-urls>
28
29 <locale>
30 <!--
31 BCP 47 language tag (e.g. en-US) or unicode extension (e.g. "en-US-u-ca-buddhist").
32 Leave empty for using the user's browser locale (i.e. dates/times will be displayed in each users's system locale).
33 Specifying a locale code will apply those localization settings to *all* users regardless of their system settings
34 or location. For example, if "en-US", is specified, all users will see dates as month/day/year instead of day/month/year
35 regardless of their system (i.e. OS) locale preference.
36 -->
37 <localeCode/>
38 <!--
39 Use `dateTimeFormatOptions` to customize how dates & times get displayed on Studio UI.
40 For full list of options and docs, visit: https://developer.mozilla.org/en-US/docs/Web/JavaScript/Reference/Global_Objects/Intl/DateTimeFormat/DateTimeFormat
41 -->
42 <dateTimeFormatOptions>
43 <!--
44 Specifying a time zone (i.e. `timeZone` element) will express dates/times across the UI in the time zone you specify
45 here. Leaving it unspecified, will display dates/times to each user in their own system time zone.
46 -->
47 <!--<timeZone>EST5EDT</timeZone>-->
48 <day>numeric</day>
49 <month>numeric</month>
50 <year>numeric</year>
51 <hour>numeric</hour>
52 <minute>numeric</minute>
53 <!--
54 Set `hour12` to "false" to show times in 24 hour format.
55 -->
56 <hour12>true</hour12>
57 </dateTimeFormatOptions>
58 </locale>
59
60 <!--
61 Specifies the regular expression patterns to match content type field
62 names that require CDATA escaping.
63 -->
64 <cdata-escaped-field-patterns>
65 <pattern>(_html|_t|_s|_smv|_mvs)$</pattern>
66 <pattern>internal-name</pattern>
67 </cdata-escaped-field-patterns>
68
69 <published-repository>
70 <enable-staging-environment>false</enable-staging-environment>
71 </published-repository>
72
73 <publishing>
74 <comments>
75 <!-- Global setting would apply to all -->
76 <required>false</required>
77 <!-- Additional (also optional) specific overrides -->
78 <!-- <delete-required/> -->
79 <!-- <bulk-publish-required/> -->
80 <!-- <publish-by-commit-required/> -->
81 <!-- <publish-required/> -->
82 <!-- <publish-everything-required/> -->
83 </comments>
84 </publishing>
85
86 <form-engine>
87 <!-- Indicates if postfixes should be required for all fields -->
88 <field-name-postfix>true</field-name-postfix>
89 <!-- List of field names that should not have a postfix -->
90 <ignore-postfix-fields>
91 <field>internal-name</field>
92 <field>file-name</field>
93 <field>placeInNav</field>
94 <field>scripts</field>
95 <field>mime-type</field>
96 <field>force-https</field>
97 <field>navLabel</field>
98 <field>expired</field>
99 <field>key</field>
100 <field>value</field>
101 <field>items</field>
102 <field>redirect-url</field>
103 <field>authorizedRoles</field>
104 <field>role</field>
105 <field>disabled</field>
106 </ignore-postfix-fields>
107 </form-engine>
108
109 <!--
110 Pattern that Studio will use to load plugin from the site repository
111 Required placeholders: ${type}, ${name}
112 -->
113 <plugin-folder-pattern>/config/studio/plugins/${type}/${name}</plugin-folder-pattern>
114
115 <!--
116 This workflow parameter disallows users with _Publish_ permission from publishing their own work.
117 Work performed by a user must be approved by a different reviewer before it can be published.
118 Set the value to true to enable this feature.
119 <workflow>
120 <publisher>
121 <requirePeerReview>false</requirePeerReview>
122 </publisher>
123 </workflow>
124 -->
125
126 <!--
127 Prevent deleting, renaming or cutting root folders of sidebar
128 -->
129 <protected-folders-patterns>
130 <pattern>^/([^ !$`&*()/+]|(\\[ !$`&*()+]))+$</pattern>
131 </protected-folders-patterns>
132
133 <repository rootPrefix="/site">
134
135 <level-descriptor>crafter-level-descriptor.level.xml</level-descriptor>
136
137 <!-- The section below classifies items into folders for two dashboard widgets:
138 - Items Waiting For Approval
139 - Approved Scheduled Items
140
141 Items that match the paths specified will be grouped together in the dashboard widget
142 -->
143 <folders>
144 <folder name="Pages" path="/website" read-direct-children="false" attach-root-prefix="true"/>
145 <folder name="Components" path="/components" read-direct-children="false" attach-root-prefix="true"/>
146 <folder name="Assets" path="/static-assets" read-direct-children="false" attach-root-prefix="false"/>
147 <folder name="Templates" path="/templates" read-direct-children="false" attach-root-prefix="false"/>
148 </folders>
149
150 <!-- Item Patterns -->
151 <patterns>
152 <!-- The section below helps determine the type of content based on regex. This shows up in two places:
153 - The activity audit log.
154 - The UI icon used for the item
155 -->
156
157 <pattern-group name="page">
158 <pattern>/site/website/([^<]+)\.xml</pattern>
159 </pattern-group>
160
161 <pattern-group name="component">
162 <pattern>/site/components/([^<]+)\.xml</pattern>
163 <pattern>/site/system/page-components/([^<]+)\.xml</pattern>
164 <pattern>/site/component-bindings/([^<]+)\.xml</pattern>
165 <pattern>/site/indexes/([^<]+)\.xml</pattern>
166 <pattern>/site/resources/([^<]+)\.xml</pattern>
167 </pattern-group>
168
169 <pattern-group name="asset">
170 <pattern>/static-assets/([^<"']+)</pattern>
171 </pattern-group>
172
173 <pattern-group name="rendering-template">
174 <pattern>/templates/([^<"]+)\.ftl</pattern>
175 </pattern-group>
176
177 <!-- The section below enumerates the mime-types we can preview -->
178 <pattern-group name="previewable-mimetypes">
179 <pattern>image/(.*)</pattern>
180 <pattern>application/pdf</pattern>
181 <pattern>video/(.*)</pattern>
182 <pattern>application/msword</pattern>
183 <pattern>application/vnd.openxmlformats-officedocument.wordprocessingml.document</pattern>
184 <pattern>application/vnd.ms-excel</pattern>
185 <pattern>application/vnd.openxmlformats-officedocument.spreadsheetml.sheet</pattern>
186 <pattern>application/vnd.ms-powerpoint</pattern>
187 </pattern-group>
188 </patterns>
189
190 <!-- The patterns below identify what is allowed to show up in the Dashboard widgets -->
191 <display-in-widget-patterns>
192 <display-in-widget-pattern>.*</display-in-widget-pattern>
193 </display-in-widget-patterns>
194
195 </repository>
196</site-config>
Enabling Staging
The staging publishing target is an intermediate publishing target where the project can be fully exercised.
To enable the staging publishing target, set the following to true:
<published-repository>
  <enable-staging-environment>false</enable-staging-environment>
</published-repository>
See Configuring Publishing to Staging Target for more information on how to setup the staging publishing target
Escaping Content Fields
To add/remove escaped content fields, modify the following:
<!--
Specifies the regular expression patterns to match content type field
names that require CDATA escaping.
-->
<cdata-escaped-field-patterns>
  <pattern>(_html|_t|_s|_smv|mvs)$</pattern>
  <pattern>internal-name</pattern>
</cdata-escaped-field-patterns>
For more information on escaping content fields, see the notes under Variable Names and Search Indexing
Publishing Comments
To make comments mandatory for different publishing methods, simply set to true any applicable methods the
site administrators want to require comments when publishing.
<publishing>
  <comments>
    <!-- Global setting would apply to all -->
    <required>false</required>
    <!-- Additional (also optional) specific overrides -->
    <!-- <delete-required/> -->
    <!-- <bulk-publish-required/> -->
    <!-- <publish-by-commit-required/> -->
    <!-- <publish-required/> -->
  </comments>
</publishing>
See Publishing Status for more information on the different publishing methods available from Project Tools
Requiring Peer Review for Publishing
Since 4.0.0A publisher review workflow option is available to make approval of a publish request mandatory for users with
publish permission. To enable the publisher review workflow option, set requirePeerReview to true.
<!--
     This workflow parameter disallows users with _Publish_ permission from publishing their own work.
     Work performed by a user must be approved by a different reviewer before it can be published.
     Set the value to true to enable this feature.
-->
<workflow>
  <publisher>
    <requirePeerReview>true</requirePeerReview>
  </publisher>
</workflow>
Content Monitoring
Content monitoring allows you to configure watches and notifications on your project. To add content monitors, add the following:
<contentMonitoring>
  <monitor>
    <name>Content Expiring Tomorrow</name>
    <query>expired_dt:[now+1d/d TO now+2d/d]</query>
    <paths>
      <path>
        <name>All Site</name>
        <pattern>/site/.*</pattern>
        <emailTemplate>contentExpiringSoon</emailTemplate>
        <emails>admin@example.com</emails>
        <locale>en</locale>
      </path>
    </paths>
  </monitor>
</contentMonitoring>
See Content Monitoring for more information on configuring content monitoring.
Protected Folders
The protected folders settings allows you to configure paths that can’t be deleted, renamed or moved in addition to the following paths that are protected by default:
/site/website/index.xml/site/components/site/taxonomy/static-assets/templates/scripts/sources
To add protected folder/s in your project, add your folder path/s like below:
<protected-folders-patterns>
  <pattern>/YOUR/FOLDER/PATH/PATTERN</pattern>
  <pattern>/MORE/FOLDER/PATH/PATTERN</pattern>
  ...
</protected-folders-patterns>
Remember to replace /YOUR/FOLDER/PATH/PATTERN and /MORE/FOLDER/PATH/PATTERN with the actual folder path
pattern/s that you would like to be protected.
To see an example of configured protected folders, create a project using the Video Center blueprint from the
Public Marketplace in the Create Project dialog then open the
Sidebar -> ![]() ->
-> Configuration -> Project Configuration. Scroll down to the
<protected-folders-patterns> tag:
<!--
Prevent deleting, renaming or cutting root folders of sidebar
-->
<protected-folders-patterns>
  <pattern>/site/streams</pattern>
  <pattern>/site/videos</pattern>
  <pattern>/site/origins</pattern>
</protected-folders-patterns>
UI Configuration
Crafter Studio’s UI is highly configurable and allows you to customize the look and feel of the UI per project to suit your needs.
The user interface configuration file defines the widgets shown in the user interface. It allows the user to configure the items available for interaction in Studio.
It shows different projections of the content in addition to other tools to assist in content authoring and site administration.
The UI is made up of configurable widgets and can be extended or modified by adding/removing/configuring widgets. Plugins can make use of this by adding themselves to the UI where required. See CrafterCMS Plugin Descriptor for more information on how a plugin can be wired in the user interface configuration.
Here’s a screenshot of Studio showing some of the widgets in the UI in red circles that are defined in the user interface configuration.

Here’s an annotated version of some of the widgets in the user interface shown in the image above.
 1<siteUI>
 2  <widget id="craftercms.components.ToolsPanel">...</widget>     Sidebar widget
 3  <widget id="craftercms.components.ICEToolsPanel">...</widget>  Experience Builder widget
 4  <widget id="craftercms.components.Launcher">...</widget>       Navigation Menu widget
 5  <widget id="craftercms.components.PreviewToolbar">...</widget> Toolbar widget
 6  <widget id="craftercms.components.Dashboard">...</widget>      Dashboard widget
 7  <widget id="craftercms.components.TinyMCE">...</widget>        TinyMCE widget
 8  <references>
 9     <reference id="craftercms.siteTools">...</reference>
10     <reference id="craftercms.freemarkerCodeSnippets">...</reference>
11     <reference id="craftercms.groovyCodeSnippets">...</reference>
12  </references>
13</siteUI>
 1<widget id="craftercms.components.ToolsPanel">
 2  <configuration>
 3    <widgets>
 4      <widget id="craftercms.components.ToolsPanelEmbeddedAppViewButton">
 5        <configuration>
 6          <title id="words.dashboard" defaultMessage="Dashboard"/>
 7          <icon id="@mui/icons-material/DashboardRounded"/>
 8          <widget id="craftercms.components.SiteDashboard"/>
 9        </configuration>
10      </widget>
11      <widget id="craftercms.components.PathNavigator">
12        <configuration>
13          <id>Pages</id>
14          <label>Pages</label>
15          <icon id="@mui/icons-material/DescriptionOutlined"/>
16          <rootPath>/site/website</rootPath>
17          <locale>en</locale>
18        </configuration>
19      </widget>
20      <widget id="craftercms.components.PathNavigator">
21        <configuration>
22          <id>Components</id>
23          <label>Components</label>
24          <icon id="craftercms.icons.Component"/>
25          <rootPath>/site/components</rootPath>
26          <locale>en</locale>
27        </configuration>
28      </widget>
29      <widget id="craftercms.components.PathNavigator">
30        <configuration>
31          <id>Taxonomy</id>
32          <label>Taxonomy</label>
33          <icon id="@mui/icons-material/LocalOfferOutlined"/>
34          <rootPath>/site/taxonomy</rootPath>
35          <locale>en</locale>
36        </configuration>
37      </widget>
38      ...
39      <widget id="craftercms.components.ToolsPanelEmbeddedAppViewButton">
40        <permittedRoles>
41          <role>admin</role>
42          <role>developer</role>
43        </permittedRoles>
44        <configuration>
45          <title id="siteTools.title" defaultMessage="Project Tools"/>
46          <icon id="@mui/icons-material/ConstructionRounded"/>
47          <widget id="craftercms.components.EmbeddedSiteTools"/>
48        </configuration>
49      </widget>
50    </widgets>
51  </configuration>
52</widget>
53...
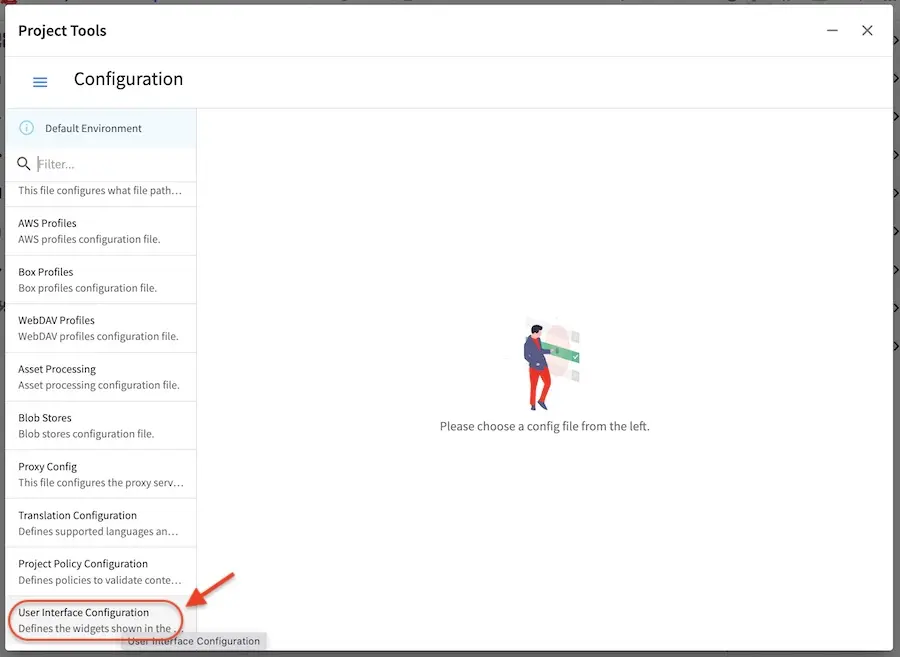
To modify the user interface configuration, click on ![]() from the Sidebar, then click on Configuration
and select User Interface Configuration from the list.
from the Sidebar, then click on Configuration
and select User Interface Configuration from the list.
Sample
Here’s a sample User Interface Configuration file (click on the triangle on the left to expand/collapse):
Sample "ui.xml"
1<?xml version="1.0" encoding="UTF-8" ?>
2<!--
3 ~ Copyright (C) 2007-2022 Crafter Software Corporation. All Rights Reserved.
4 ~
5 ~ This program is free software: you can redistribute it and/or modify
6 ~ it under the terms of the GNU General Public License version 3 as published by
7 ~ the Free Software Foundation.
8 ~
9 ~ This program is distributed in the hope that it will be useful,
10 ~ but WITHOUT ANY WARRANTY; without even the implied warranty of
11 ~ MERCHANTABILITY or FITNESS FOR A PARTICULAR PURPOSE. See the
12 ~ GNU General Public License for more details.
13 ~
14 ~ You should have received a copy of the GNU General Public License
15 ~ along with this program. If not, see <http://www.gnu.org/licenses/>.
16 -->
17<siteUi>
18 <widget
19 id="craftercms.components.Preview"
20 initialEditModeOn="true"
21 initialHighlightMode="all"
22 />
23 <widget id="craftercms.components.ToolsPanel">
24 <configuration>
25 <widgets>
26 <widget id="craftercms.components.ToolsPanelEmbeddedAppViewButton">
27 <configuration>
28 <title id="words.dashboard" defaultMessage="Dashboard"/>
29 <icon id="@mui/icons-material/DashboardRounded"/>
30 <widget id="craftercms.components.SiteDashboard"/>
31 </configuration>
32 </widget>
33 <widget id="craftercms.components.ToolsPanelPageButton">
34 <configuration>
35 <title id="previewSiteExplorerPanel.title" defaultMessage="Site Explorer"/>
36 <icon id="craftercms.icons.SiteExplorer"/>
37 <widgets>
38 <widget id="craftercms.components.PathNavigatorTree">
39 <configuration>
40 <id>Pages</id>
41 <label id="pathNavigatorTree.pages" defaultMessage="Pages"/>
42 <icon id="@mui/icons-material/DescriptionOutlined" />
43 <rootPath>/site/website</rootPath>
44 <locale>en</locale>
45 </configuration>
46 </widget>
47 <widget id="craftercms.components.PathNavigatorTree">
48 <configuration>
49 <id>Components</id>
50 <label id="pathNavigatorTree.components" defaultMessage="Components"/>
51 <icon id="craftercms.icons.Component"/>
52 <rootPath>/site/components</rootPath>
53 <locale>en</locale>
54 </configuration>
55 </widget>
56 <widget id="craftercms.components.PathNavigatorTree">
57 <configuration>
58 <id>Taxonomy</id>
59 <label id="pathNavigatorTree.taxonomy" defaultMessage="Taxonomy"/>
60 <icon id="@mui/icons-material/LocalOfferOutlined"/>
61 <rootPath>/site/taxonomy</rootPath>
62 <locale>en</locale>
63 </configuration>
64 </widget>
65 <widget id="craftercms.components.PathNavigatorTree">
66 <configuration>
67 <id>StaticAssets</id>
68 <label id="pathNavigatorTree.staticAssets" defaultMessage="Static Assets"/>
69 <icon id="@mui/icons-material/ImageOutlined"/>
70 <rootPath>/static-assets</rootPath>
71 <locale>en</locale>
72 </configuration>
73 </widget>
74 <widget id="craftercms.components.PathNavigatorTree">
75 <configuration>
76 <label id="pathNavigatorTree.templates" defaultMessage="Templates"/>
77 <icon id="@mui/icons-material/InsertDriveFileOutlined"/>
78 <rootPath>/templates</rootPath>
79 <locale>en</locale>
80 </configuration>
81 </widget>
82 <widget id="craftercms.components.PathNavigatorTree">
83 <configuration>
84 <label id="pathNavigatorTree.scripts" defaultMessage="Scripts"/>
85 <icon id="@mui/icons-material/CodeRounded"/>
86 <rootPath>/scripts</rootPath>
87 <locale>en</locale>
88 </configuration>
89 </widget>
90 </widgets>
91 </configuration>
92 </widget>
93 <widget id="craftercms.components.ToolsPanelPageButton">
94 <permittedRoles>
95 <role>admin</role>
96 <role>developer</role>
97 </permittedRoles>
98 <configuration>
99 <title id="siteTools.title" defaultMessage="Project Tools"/>
100 <icon id="@mui/icons-material/ConstructionRounded"/>
101 <widgets>
102 <widget id="craftercms.components.SiteToolsPanel"/>
103 </widgets>
104 </configuration>
105 </widget>
106 </widgets>
107 </configuration>
108 </widget>
109 <widget id="craftercms.components.ICEToolsPanel">
110 <configuration>
111 <widgets>
112 <widget id="craftercms.components.ToolsPanelPageButton">
113 <configuration>
114 <target id="icePanel"/>
115 <title id="previewSearchPanel.title" defaultMessage="Search"/>
116 <icon id="@mui/icons-material/SearchRounded"/>
117 <widgets>
118 <widget id="craftercms.components.PreviewSearchPanel"/>
119 </widgets>
120 </configuration>
121 </widget>
122 <widget id="craftercms.components.ToolsPanelPageButton">
123 <configuration>
124 <target id="icePanel"/>
125 <title id="previewComponentsPanel.title" defaultMessage="Add Components"/>
126 <icon id="@mui/icons-material/ExtensionOutlined"/>
127 <widgets>
128 <widget id="craftercms.components.PreviewComponentsPanel"/>
129 </widgets>
130 </configuration>
131 </widget>
132 <widget id="craftercms.components.ToolsPanelPageButton">
133 <configuration>
134 <target id="icePanel"/>
135 <title id="previewBrowseComponentsPanel.title" defaultMessage="Browse Components"/>
136 <icon id="@mui/icons-material/ExtensionOutlined"/>
137 <widgets>
138 <widget id="craftercms.components.PreviewBrowseComponentsPanel"/>
139 </widgets>
140 </configuration>
141 </widget>
142 <widget id="craftercms.components.ToolsPanelPageButton">
143 <configuration>
144 <target id="icePanel"/>
145 <title id="previewDropTargetsPanel.title" defaultMessage="Component Drop Targets"/>
146 <icon id="@mui/icons-material/ExtensionOutlined"/>
147 <widgets>
148 <widget id="craftercms.components.PreviewDropTargetsPanel"/>
149 </widgets>
150 </configuration>
151 </widget>
152 <widget id="craftercms.components.ToolsPanelPageButton">
153 <configuration>
154 <target id="icePanel"/>
155 <title id="previewAssetsPanel.title" defaultMessage="Assets"/>
156 <icon id="@mui/icons-material/ImageOutlined"/>
157 <widgets>
158 <widget id="craftercms.components.PreviewAssetsPanel"/>
159 </widgets>
160 </configuration>
161 </widget>
162 <widget id="craftercms.components.ToolsPanelPageButton">
163 <configuration>
164 <target id="icePanel"/>
165 <title id="previewAudiencesPanel.title" defaultMessage="Audience Targeting"/>
166 <icon id="@mui/icons-material/EmojiPeopleRounded"/>
167 <widgets>
168 <widget id="craftercms.components.PreviewAudiencesPanel">
169 <configuration>
170 <fields>
171 <segment>
172 <id>segment</id>
173 <name id="previewAudiencesPanel.segmentLabel" defaultMessage="Segment"/>
174 <description>User segment.</description>
175 <type>dropdown</type>
176 <defaultValue>anonymous</defaultValue>
177 <values>
178 <value>
179 <label id="previewAudiencesPanel.guyValueLabel" defaultMessage="Guy"/>
180 <value>guy</value>
181 </value>
182 <value>
183 <label id="previewAudiencesPanel.galValueLabel" defaultMessage="Gal"/>
184 <value>gal</value>
185 </value>
186 <value>
187 <label id="previewAudiencesPanel.anonymousValueLabel" defaultMessage="Anonymous"/>
188 <value>anonymous</value>
189 </value>
190 </values>
191 <helpText id="previewAudiencesPanel.segmentHelpText" defaultMessage="Setting the segment will change content targeting to the audience selected"/>
192 </segment>
193 <name>
194 <id>name</id>
195 <name id="previewAudiencesPanel.nameLabel" defaultMessage="Name"/>
196 <description>User's first and last name.</description>
197 <type>input</type>
198 <helpText id="previewAudiencesPanel.nameHelpText" defaultMessage="Enter user's first and last name"/>
199 </name>
200 </fields>
201 </configuration>
202 </widget>
203 </widgets>
204 </configuration>
205 </widget>
206 <widget id="craftercms.components.ToolsPanelPageButton">
207 <configuration>
208 <target id="icePanel"/>
209 <title id="previewPageExplorerPanel.title" defaultMessage="Page Explorer"/>
210 <icon id="craftercms.icons.PageExplorer"/>
211 <widgets>
212 <widget id="craftercms.components.PreviewPageExplorerPanel"/>
213 </widgets>
214 </configuration>
215 </widget>
216 <widget id="craftercms.components.ToolsPanelPageButton">
217 <configuration>
218 <target id="icePanel"/>
219 <title id="previewSimulatorPanel.title" defaultMessage="Device Simulator"/>
220 <icon id="@mui/icons-material/DevicesRounded"/>
221 <widgets>
222 <widget id="craftercms.components.PreviewSimulatorPanel">
223 <configuration>
224 <devices>
225 <device>
226 <title>smartPhone</title>
227 <width>375</width>
228 <height>667</height>
229 </device>
230 <device>
231 <title>tablet</title>
232 <width>768</width>
233 <height>1024</height>
234 </device>
235 </devices>
236 </configuration>
237 </widget>
238 </widgets>
239 </configuration>
240 </widget>
241 <widget id="craftercms.components.ToolsPanelPageButton">
242 <configuration>
243 <target id="icePanel"/>
244 <title id="words.settings" defaultMessage="Settings"/>
245 <icon id="@mui/icons-material/SettingsOutlined"/>
246 <widgets>
247 <widget id="craftercms.components.PreviewSettingsPanel"/>
248 </widgets>
249 </configuration>
250 </widget>
251 </widgets>
252 </configuration>
253 </widget>
254 <widget id="craftercms.components.Launcher">
255 <configuration>
256 <widgets>
257 <widget id="craftercms.components.LauncherSection">
258 <configuration>
259 <title id="launcher.siteSectionTitle">
260 <defaultMessage><![CDATA[Project <muted>• {siteName}</muted>]]></defaultMessage>
261 </title>
262 <widgets>
263 <widget id="craftercms.components.LauncherLinkTile">
264 <configuration>
265 <title id="words.dashboard" defaultMessage="Dashboard"/>
266 <systemLinkId>siteDashboardDialog</systemLinkId>
267 <icon id="@mui/icons-material/DashboardRounded"/>
268 </configuration>
269 </widget>
270 <widget id="craftercms.components.LauncherLinkTile">
271 <configuration>
272 <title id="words.preview" defaultMessage="Preview"/>
273 <systemLinkId>preview</systemLinkId>
274 <icon id="craftercms.icons.Preview"/>
275 </configuration>
276 </widget>
277 <widget id="craftercms.components.LauncherLinkTile">
278 <permittedRoles>
279 <role>admin</role>
280 <role>developer</role>
281 </permittedRoles>
282 <configuration>
283 <title id="siteTools.title" defaultMessage="Project Tools"/>
284 <systemLinkId>siteToolsDialog</systemLinkId>
285 <icon id="@mui/icons-material/ConstructionRounded"/>
286 </configuration>
287 </widget>
288 <widget id="craftercms.components.LauncherLinkTile">
289 <configuration>
290 <title id="words.search" defaultMessage="Search"/>
291 <systemLinkId>siteSearchDialog</systemLinkId>
292 <icon id="@mui/icons-material/SearchRounded"/>
293 </configuration>
294 </widget>
295 <widget id="craftercms.components.LauncherPublishingStatusTile"/>
296 </widgets>
297 </configuration>
298 </widget>
299 </widgets>
300 </configuration>
301 </widget>
302 <widget id="craftercms.components.PreviewToolbar">
303 <configuration>
304 <leftSection>
305 <widgets>
306 <widget id="craftercms.components.SiteSwitcherSelect"/>
307 <widget id="craftercms.components.QuickCreate"/>
308 </widgets>
309 </leftSection>
310 <middleSection>
311 <widgets>
312 <widget id="craftercms.components.PreviewAddressBar"/>
313 </widgets>
314 </middleSection>
315 <rightSection>
316 <widgets>
317 <widget id="craftercms.components.EditModesSwitcher"/>
318 <widget id="craftercms.components.PublishingStatusButton">
319 <configuration>
320 <variant>icon</variant>
321 </configuration>
322 </widget>
323 <widget id="craftercms.components.WidgetDialogIconButton">
324 <configuration>
325 <title id="words.search" defaultMessage="Search"/>
326 <icon id="@mui/icons-material/SearchRounded"/>
327 <widget id="craftercms.components.Search">
328 <configuration>
329 <embedded>true</embedded>
330 </configuration>
331 </widget>
332 </configuration>
333 </widget>
334 </widgets>
335 </rightSection>
336 </configuration>
337 </widget>
338 <widget id="craftercms.components.Dashboard">
339 <configuration>
340 <mainSection>
341 <widgets>
342 <widget id="craftercms.components.MyRecentActivityDashlet">
343 <permittedRoles>
344 <role>admin</role>
345 <role>developer</role>
346 <role>publisher</role>
347 </permittedRoles>
348 </widget>
349 <widget id="craftercms.components.UnpublishedDashlet">
350 <permittedRoles>
351 <role>admin</role>
352 <role>developer</role>
353 <role>publisher</role>
354 </permittedRoles>
355 </widget>
356 <widget id="craftercms.components.PendingApprovalDashlet">
357 <permittedRoles>
358 <role>admin</role>
359 <role>developer</role>
360 <role>publisher</role>
361 </permittedRoles>
362 </widget>
363 <widget id="craftercms.components.ScheduledDashlet">
364 <permittedRoles>
365 <role>admin</role>
366 <role>developer</role>
367 <role>publisher</role>
368 </permittedRoles>
369 </widget>
370 <widget id="craftercms.components.RecentlyPublishedDashlet">
371 <permittedRoles>
372 <role>admin</role>
373 <role>developer</role>
374 <role>publisher</role>
375 </permittedRoles>
376 </widget>
377 <widget id="craftercms.components.ExpiringDashlet">
378 <permittedRoles>
379 <role>admin</role>
380 <role>developer</role>
381 <role>publisher</role>
382 </permittedRoles>
383 </widget>
384 </widgets>
385 </mainSection>
386 </configuration>
387 </widget>
388 <widget id="craftercms.components.TinyMCE">
389 <configuration>
390 <setups>
391 <setup id="generic">
392 <!-- Configuration options: https://www.tiny.cloud/docs/configure/ -->
393 <!-- Plugins: https://www.tiny.cloud/docs/plugins/opensource/ -->
394 <tinymceOptions>
395 <![CDATA[
396 {
397 "menubar": true,
398 "theme": "silver",
399 "plugins": "preview searchreplace autolink directionality visualblocks visualchars fullscreen image link media template codesample table charmap pagebreak nonbreaking anchor insertdatetime advlist lists wordcount help acecode",
400 "extended_valid_elements": "",
401 "valid_children": "",
402 "toolbar1": "formatselect | bold italic strikethrough forecolor backcolor | link | alignleft aligncenter alignright alignjustify | numlist bullist outdent indent | removeformat",
403 "code_editor_wrap": false,
404 "toolbar_sticky": true,
405 "image_advtab": true,
406 "encoding": "xml",
407 "relative_urls": false,
408 "remove_script_host": false,
409 "convert_urls": false,
410 "remove_trailing_brs": false,
411 "media_live_embeds": true,
412 "autoresize_on_init": false,
413 "autoresize_bottom_margin": 0,
414 "menu": {
415 "tools": { "title": "Tools", "items": "tinymcespellchecker code acecode wordcount" }
416 },
417 "automatic_uploads": true,
418 "file_picker_types": "image media file",
419 "paste_data_images": true,
420 "templates": [],
421 "content_css": [],
422 "content_style": "body {}",
423 "contextmenu": false
424 }
425 ]]>
426 </tinymceOptions>
427 </setup>
428 </setups>
429 </configuration>
430 </widget>
431 <references>
432 <reference id="craftercms.siteTools">
433 <tools>
434 <tool>
435 <title id="dropTargetsMessages.contentTypes" defaultMessage="Content Types"/>
436 <icon id="@mui/icons-material/WidgetsOutlined"/>
437 <url>content-types</url>
438 <widget id="craftercms.components.ContentTypeManagement" />
439 </tool>
440 <tool>
441 <title id="GlobalMenu.EncryptionToolEntryLabel" defaultMessage="Encryption Tool"/>
442 <icon id="@mui/icons-material/LockOutlined"/>
443 <url>encrypt-tool</url>
444 <widget id="craftercms.components.SiteEncryptTool" />
445 </tool>
446 <tool>
447 <title id="words.configuration" defaultMessage="Configuration"/>
448 <icon id="@mui/icons-material/SettingsApplicationsOutlined"/>
449 <url>configuration</url>
450 <widget id="craftercms.components.SiteConfigurationManagement" />
451 </tool>
452 <tool>
453 <title id="GlobalMenu.AuditEntryLabel" defaultMessage="Audit"/>
454 <icon id="@mui/icons-material/SubjectRounded" />
455 <url>audit</url>
456 <widget id="craftercms.components.SiteAuditManagement" />
457 </tool>
458 <tool>
459 <title id="workflowStates.title" defaultMessage="Workflow States"/>
460 <icon id="@mui/icons-material/SettingsOutlined"/>
461 <url>item-states</url>
462 <widget id="craftercms.components.ItemStatesManagement" />
463 </tool>
464 <tool>
465 <title id="GlobalMenu.LogConsoleEntryLabel" defaultMessage="Log Console"/>
466 <icon id="@mui/icons-material/FormatAlignCenterRounded"/>
467 <url>log</url>
468 <widget id="craftercms.components.LogConsole">
469 <configuration>
470 <logType>preview</logType>
471 </configuration>
472 </widget>
473 </tool>
474 <tool>
475 <title id="words.publishing" defaultMessage="Publishing"/>
476 <icon id="@mui/icons-material/CloudUploadOutlined"/>
477 <url>publishing</url>
478 <widget id="craftercms.components.PublishingDashboard" />
479 </tool>
480 <tool>
481 <title id="remoteRepositories.title" defaultMessage="Remote Repositories"/>
482 <icon id="@mui/icons-material/StorageRounded"/>
483 <url>remote-repositories</url>
484 <widget id="craftercms.components.RemoteRepositoriesManagement" />
485 </tool>
486 <tool>
487 <title>GraphQL</title>
488 <icon id="craftercms.icons.GraphQL"/>
489 <url>graphiql</url>
490 <widget id="craftercms.components.SiteGraphiQL"/>
491 </tool>
492 <tool>
493 <title id="PluginManagement.title" defaultMessage="Plugin Management"/>
494 <icon id="@mui/icons-material/ExtensionOutlined"/>
495 <url>plugins</url>
496 <widget id="craftercms.components.PluginManagement" />
497 </tool>
498 </tools>
499 </reference>
500 <reference id="craftercms.freemarkerCodeSnippets">
501 <contentVariable label="Content variable">
502 <value><![CDATA[${contentModel.VARIABLE_NAME}]]></value>
503 </contentVariable>
504 <requestParameter label="Request parameter">
505 <value><![CDATA[${RequestParameters["PARAM_NAME"]!"DEFAULT"}]]></value>
506 </requestParameter>
507 <crafterSupportMacros label="Crafter support macros">
508 <value><![CDATA[<#import "/templates/system/common/crafter.ftl" as crafter />]]></value>
509 </crafterSupportMacros>
510 <transformPathToUrl label="Transform PATH to URL">
511 <value><![CDATA[${urlTransformationService.transform('storeUrlToRenderUrl', STORE_URL)}]]></value>
512 </transformPathToUrl>
513 <renderComponentsList label="Render list of components">
514 <value><![CDATA[<#list contentModel.VARIABLE_NAME.item as module>
515 <@renderComponent component=module />
516</#list>]]></value>
517 </renderComponentsList>
518 <iterateItemsListLoadContentItem label="Iterate over a list of items and load content item">
519 <value><![CDATA[<#list contentModel.VARIABLE_NAME.item as myItem>
520 <#assign myContentItem = siteItemService.getSiteItem(myItem.key) />
521 ${myContentItem.variableName}
522</#list>]]></value>
523 </iterateItemsListLoadContentItem>
524 <iterateRepeatGroup label="Iterate over repeat group">
525 <value><![CDATA[<#list contentModel.VARIABLE_NAME.item as row>
526 ${row.VARIABLE_NAME}
527</#list>]]></value>
528 </iterateRepeatGroup>
529 <fremarkerValueAssignment label="Freemarker value assignment">
530 <value><![CDATA[<#assign imageSource = contentModel.image!"" />]]></value>
531 </fremarkerValueAssignment>
532 <freemarkerIf label="Freemarker value IF">
533 <value><![CDATA[<#if CONDITION>
534 ...
535</#if>]]></value>
536 </freemarkerIf>
537 <freemarkerLoop label="Freemarker value LOOP">
538 <value><![CDATA[<#list ARRAY as value>
539 ${value_index}: ${value}
540</#list>]]></value>
541 </freemarkerLoop>
542 <freemarkerFragmentInclude label="Freemarker Fragment include">
543 <value><![CDATA[<#include "/templates/PATH" />]]></value>
544 </freemarkerFragmentInclude>
545 <freemarkerLibraryImport label="Freemarker Library import">
546 <value><![CDATA[<#import "/templates/PATH" as NAMESPACE />]]></value>
547 </freemarkerLibraryImport>
548 <htmlPage label="HTML Page">
549 <value><![CDATA[<#import "/templates/system/common/crafter.ftl" as crafter />
550<!doctype html>
551<html lang="en">
552 <head>
553 <#-- Insert your head markup here -->
554 <@crafter.head />
555 </head>
556 <body>
557 <@crafter.body_top />
558 <#-- Insert your body markup here -->
559 <@crafter.body_bottom />
560 </body>
561</html>]]></value>
562 </htmlPage>
563 <specificHTMLTag label="Field (Specific HTML Tag)">
564 <value><![CDATA[<@crafter.DESIRED_TAG $field="FIELD_ID">${contentModel.FIELD_ID}</@crafter.DESIRED_TAG>]]></value>
565 </specificHTMLTag>
566 <renderComponentCollection label="Render Component Collection">
567 <value><![CDATA[<#-- Macro docs @ https://craftercms.com/docs/current/search.html?q=renderComponentCollection&check_keywords=yes&area=default -->
568<@crafter.renderComponentCollection $field="features_o" $containerAttributes={ "class": "features-container" } $itemAttributes={ "data-custom-attribute": "true" } />]]></value>
569 </renderComponentCollection>
570 <renderRepeatGroup label="Render Repeat Group">
571 <value><![CDATA[<#-- Macro docs @ https://craftercms.com/docs/current/search.html?q=renderRepeatCollection&check_keywords=yes&area=default -->
572<@crafter.renderRepeatGroup
573 $field="VARIABLE_NAME"
574 $containerAttributes={'attr': 'value'};
575 item, index
576>
577 <@crafter.div
578 $field="sections_o.section_html"
579 $index=index
580 >
581 ${item.itemField}
582 </@crafter.div>
583</@crafter.renderRepeatGroup>]]></value>
584 </renderRepeatGroup>
585 <navigation label="Navigation">
586 <value><![CDATA[<#-- Macro docs @ https://craftercms.com/docs/current/search.html?q=crafter.navigation&check_keywords=yes&area=default -->
587 <@crafter.navigation
588 showNavElement=false
589 url="NAVIGATION_URL"
590 containerElementClass="container-class"
591 itemWrapperClass="item-wrapper-class"
592 itemClass="item-class"
593 depth=2
594 />]]></value>
595 </navigation>
596 <breadcrumb label="Breadcrumb">
597 <value><![CDATA[<#-- Macro docs @ https://craftercms.com/docs/current/search.html?q=crafter.breadcrumb&check_keywords=yes&area=default -->
598 <@crafter.breadcrumb
599 url=contentModel.storeUrl
600 containerElementClass="container-element-class"
601 itemWrapperClass="item-wrapper-class"
602 navElementAttributes={ "data-custom-attribute": "true" }
603 />]]></value>
604 </breadcrumb>
605 </reference>
606 <reference id="craftercms.groovyCodeSnippets">
607 <accessContentModel label="Access Content variable">
608 <value><![CDATA[contentModel.VARIABLE_NAME]]></value>
609 </accessContentModel>
610 <accessTemplateodel label="Access Template variable">
611 <value><![CDATA[templateModel]]></value>
612 </accessTemplateodel>
613 <currentSiteId label="Current Site ID">
614 <value><![CDATA[siteContext.siteName]]></value>
615 </currentSiteId>
616 <requestParameters label="Request Parameters">
617 <value><![CDATA[params]]></value>
618 </requestParameters>
619 <cookies label="Cookies">
620 <value><![CDATA[cookies]]></value>
621 </cookies>
622 <httpRequest label="HTTP Request">
623 <value><![CDATA[request]]></value>
624 </httpRequest>
625 <httpResponse label="HTTP Response">
626 <value><![CDATA[response]]></value>
627 </httpResponse>
628 <session label="Session">
629 <value><![CDATA[session]]></value>
630 </session>
631 <transformPathToUrl label="Transform PATH to URL">
632 <value><![CDATA[urlTransformationService.transform('storeUrlToRenderUrl', STORE_URL)]]></value>
633 </transformPathToUrl>
634 <userProfile label="User Profile">
635 <value><![CDATA[profile]]></value>
636 </userProfile>
637 <currentAuthentication label="Current Authentication">
638 <value><![CDATA[authentication]]></value>
639 </currentAuthentication>
640 <logInfo label="Log an INFO">
641 <value><![CDATA[logger.info('MY MESSAGE')]]></value>
642 </logInfo>
643 <logError label="Log an ERROR">
644 <value><![CDATA[logger.error('MY MESSAGE')]]></value>
645 </logError>
646 <searchService label="Search Service">
647 <value><![CDATA[searchService]]></value>
648 </searchService>
649 <siteItemService label="Site Item Service">
650 <value><![CDATA[siteItemService]]></value>
651 </siteItemService>
652 <profileService label="Profile Service">
653 <value><![CDATA[profileService]]></value>
654 </profileService>
655 <getSpringBean label="Get Spring Bean">
656 <value><![CDATA[applicationContext.get("SPRING_BEAN_NAME")]]></value>
657 </getSpringBean>
658 </reference>
659 </references>
660</siteUi>
Widget Permissions
Limiting who can access a widget via roles is through permittedRoles in the user interface configuration.
Simply add the following to the widget you want available only to users with the permitted role(s)
1<permittedRoles>
2  <role>ALLOWED_ROLE</role>
3  ...
4</permittedRoles>
where ALLOWED ROLE is a role defined in Studio that is allowed to access the widget. See Roles and Permissions for a list of default roles in Crafter Studio
Let’s take a look at an example in the configuration where access to the Project Tools widget is limited to users with the roles admin and developer.
 1<widget id="craftercms.components.ToolsPanelPageButton">
 2  <permittedRoles>
 3    <role>admin</role>
 4    <role>developer</role>
 5  </permittedRoles>
 6  <configuration>
 7    <title id="siteTools.title" defaultMessage="Site Tools"/>
 8    <icon id="@mui/icons-material/TuneRounded"/>
 9    <widgets>
10      <widget id="craftercms.components.SiteToolsPanel"/>
11    </widgets>
12  </configuration>
13</widget>
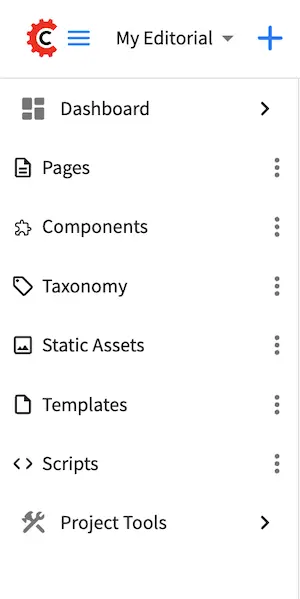
Here’s the sidebar when a user with role admin is logged in. Notice that Project Tools is available in the sidebar
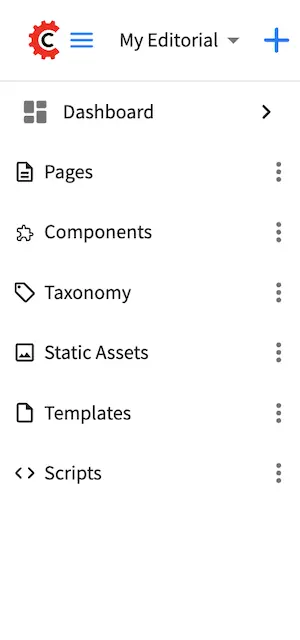
Here’s the sidebar when a user with role author is logged in. Notice that Project Tools is not available in the sidebar
Sidebar Excludes
To hide items (exclude) in the Sidebar such as path navigators and path navigator trees, use
   ...
   <excludes>
     <exclude PATTERN_TO_EXCLUDE/>
     ...
   </excludes>
where:
PATTERN_TO_EXCLUDE is a prefix of items to hide from the Sidebar
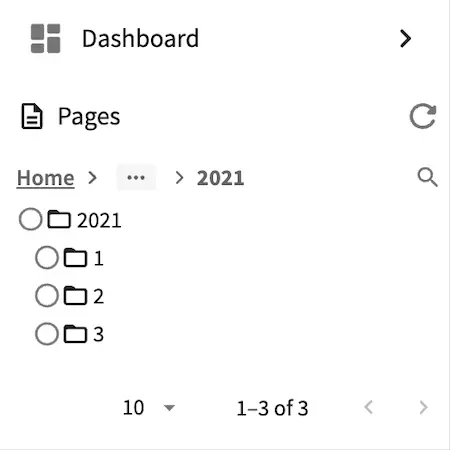
Let’s take a look at an example using a project created from the Website Editorial blueprint, to hide the folder /site/website/articles/2021/3.
Here’s the Sidebar before the 2021/3 folder is hidden
Here’s the configuration to hide the folder:
 1<widget id="craftercms.components.PathNavigator">
 2  <configuration>
 3    <id>Pages</id>
 4    <label>Pages</label>
 5    <icon id="@mui/icons-material/DescriptionOutlined"/>
 6    <rootPath>/site/website</rootPath>
 7    <locale>en</locale>
 8    <excludes>
 9      <exclude>/site/website/articles/2021/3</exclude>
10    </excludes>
11  </configuration>
12</widget>
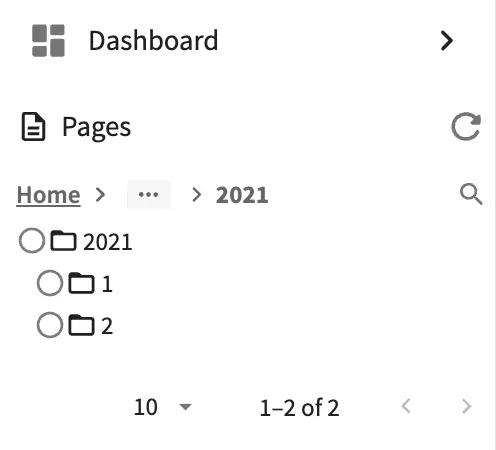
Here’s the Sidebar with the folder 2021/3 hidden:
Navigator Widgets Styling Options
Several styling options are available for the navigator widgets. Both the widget’s container element and the icon element can receive CSS classes and targeted base styles, collapsed styles and expanded styles. Custom css style sheets may be loaded into Studio via Plugins.
Colors, background colors, borders (css properties) etc can be added to widgets in the Sidebar when expanding/collapsing a widget via the icon and container properties.
Let’s take a look at an example of putting a red border when Taxonomy is expanded and for Templates, a red font color when expanded and a blue font color when collapsed
Here’s the default colors of widgets in the Sidebar
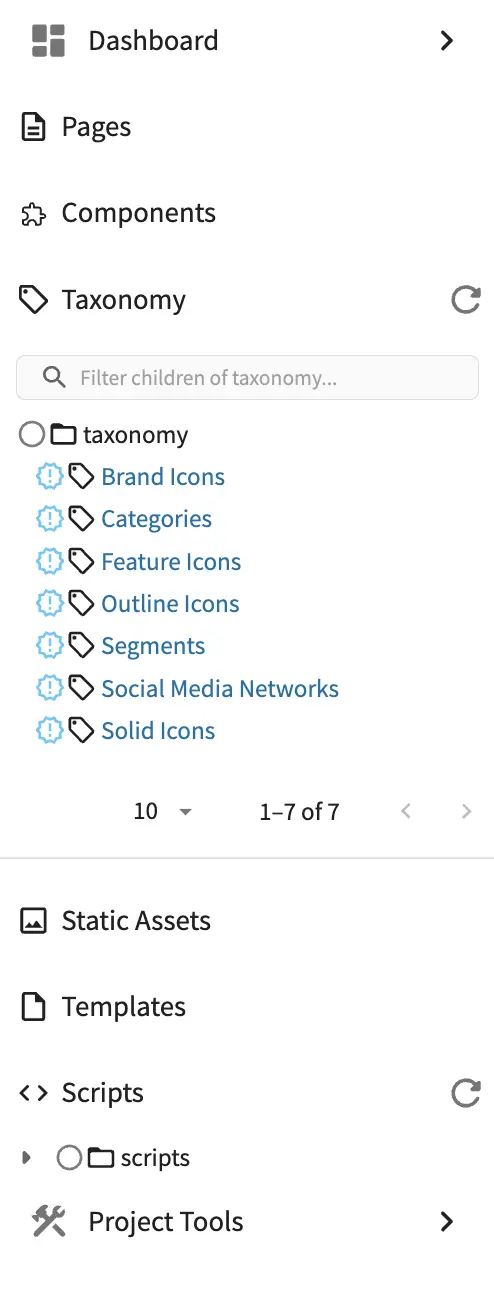
Here’s the configuration for putting a red border when Taxonomy is expanded and for Templates, a red font color when expanded and a blue font color when collapsed
 1<widget id="craftercms.components.PathNavigator">
 2  <configuration>
 3    <id>Taxonomy</id>
 4    <label>Taxonomy</label>
 5    <icon id="@mui/icons-material/LocalOfferOutlined"/>
 6    <container>
 7      <expandedStyle>
 8        <border>solid</border>
 9        <borderColor>red</borderColor>
10      </expandedStyle>
11    </container>
12    <rootPath>/site/taxonomy</rootPath>
13    <locale>en</locale>
14  </configuration>
15</widget>
16<widget id="craftercms.components.PathNavigatorTree">
17  <configuration>
18    <label>Templates</label>
19    <icon id="@mui/icons-material/InsertDriveFileOutlined">
20      <expandedStyle>
21        <color>red</color>
22      </expandedStyle>
23      <collapsedStyle>
24        <color>blue</color>
25      </collapsedStyle>
26    </icon>
27    <rootPath>/templates</rootPath>
28    <locale>en</locale>
29  </configuration>
30</widget>
31...
Remember that children of expandedStyle & collapsedStyle should be camelCased standard css properties.
Here’s the Sidebar with the colors and border added:
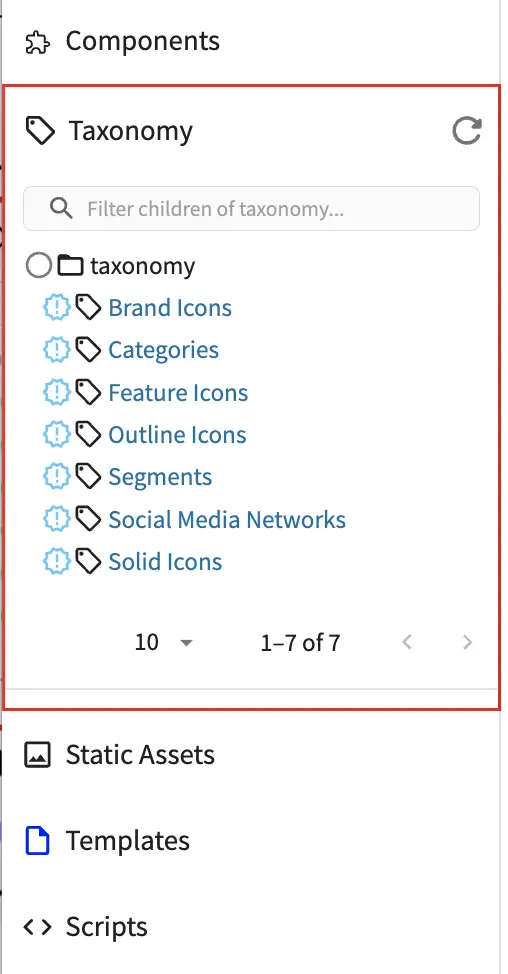

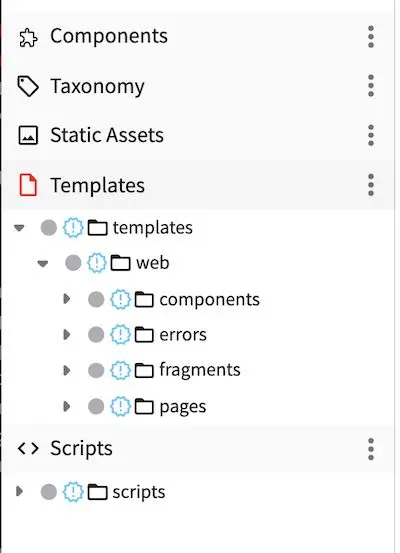
Container Options
baseClass: a class name (string) applied to the container regardless of stateexpandedClass: a class name (string) applied to the container when expandedcollapsedClass: a class name (string) applied to the container when collapsedbaseStyle: a set of CSS rules applied to the container regardless of state (e.g.<baseStyles><backgroundColor>red</backgroundColor></baseStyles>)expandedStyle: a set of CSS rules applied to the container when expandedcollapsedStyle: a set of CSS rules applied to the container when collapsed
Icon Options
class: a class name (string) applied to the icon regardless of statestyle: a set of CSS rules applied to the icon regardless of state (e.g.<baseStyles><backgroundColor>red</backgroundColor></baseStyles>)content: inner content of the icon to use in case you’re using a font icon library that uses content to render the iconexpandedStyle: a set of CSS rules applied to the icon when expandedcollapsedStyle: a set of CSS rules applied to the icon when collapsed
SPA Sources Sidebar Cabinet
Users may want to manage (edit/view) SPA sources in their projects through Studio.
To view/edit SPA sources, simply add another PathNavigatorTree or PathNavigator widget, named sources,
in the Sidebar widget like below:
 1<siteUI>
 2  <widget id="craftercms.components.ToolsPanel">
 3    <configuration>
 4      <widgets>
 5        ...
 6        <widget id="craftercms.components.PathNavigatorTree">
 7          <configuration>
 8            <id>Sources</id>
 9            <label>Sources</label>
10            <icon id="@mui/icons-material/InsertDriveFileOutlined"/>
11            <rootPath>/sources/</rootPath>
12            <locale>en</locale>
13          </configuration>
14        </widget>
15        ...
Note
Adding SPA sources in top folders other than /sources is not supported. Also note that
items under /sources are excluded from search.
The Video Center blueprint from the marketplace contains an example of SPA sources managed in Studio
(/sources added to the sidebar).
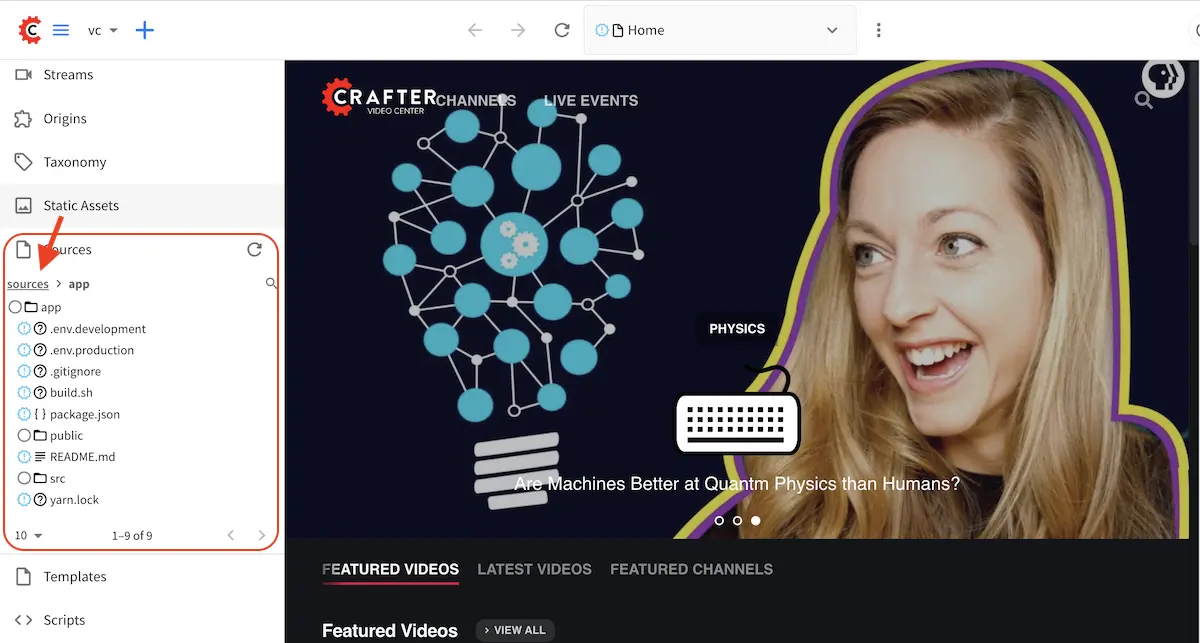
PathNavigatorTree and PathNavigator Sidebar Widget
The PathNavigatorTree sidebar widget allows the display of trees with the ability to expand/collapse containers. It shows elements (children) in a level and allows the container children to be further expanded without navigating to the child, allowing many children to be open at the same time. Also, each container child allows filtering/searching via keywords allowing users to find items faster.
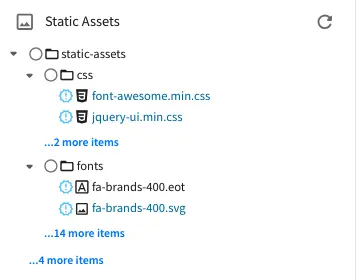
PathNavigatorTree widget
The PathNavigator sidebar widget shows elements (children) of a level and allows filtering/searching via keywords allowing users to find items faster. It doesn’t provide an overview like the PathNavigatorTree, but, the PathNavigator is the recommended widget if your project contains thousands of pages where a tree becomes unresponsive due to painting a massive number of items.
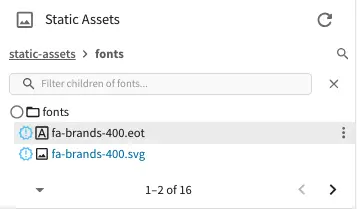
PathNavigator widget
Here are some options on displaying elements (children) of navigator widgets:
Limit
The number of children displayed at a time when expanding a container can be limited via the limit property like below:
<widget id="craftercms.components.PathNavigatorTree">
  <configuration>
    <id>StaticAssets</id>
    <label>Static Assets</label>
    <icon id="@mui/icons-material/ImageOutlined"/>
    <rootPath>/static-assets</rootPath>
    <locale>en</locale>
    <limit>5</limit>
  </configuration>
</widget>
In the example above, the Static Assets path navigator tree limits the children displayed to 5 items when opening
a container like in the image on the left below:
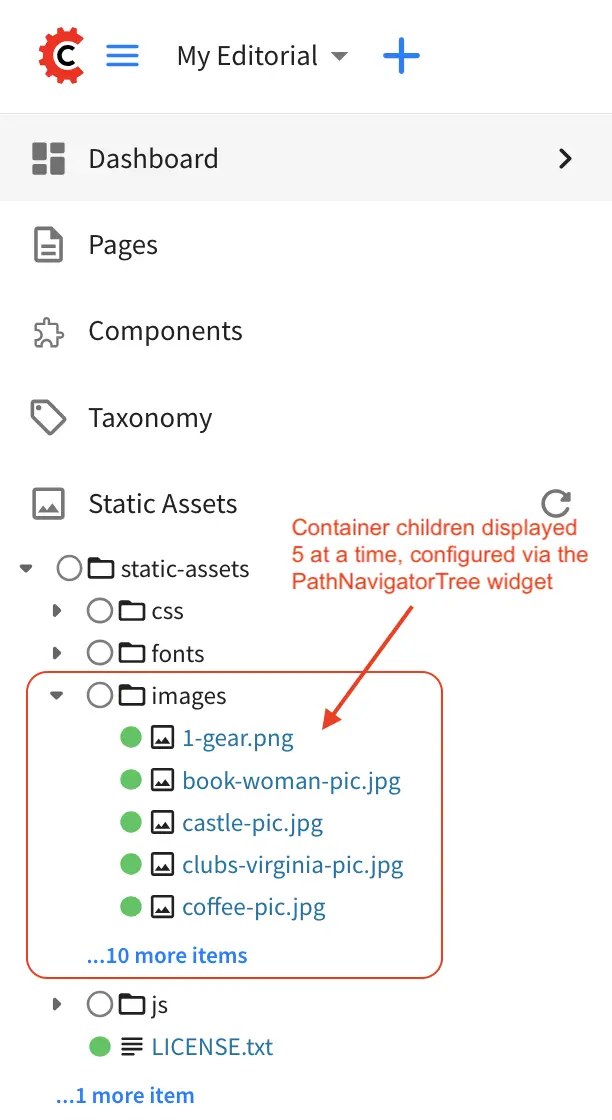

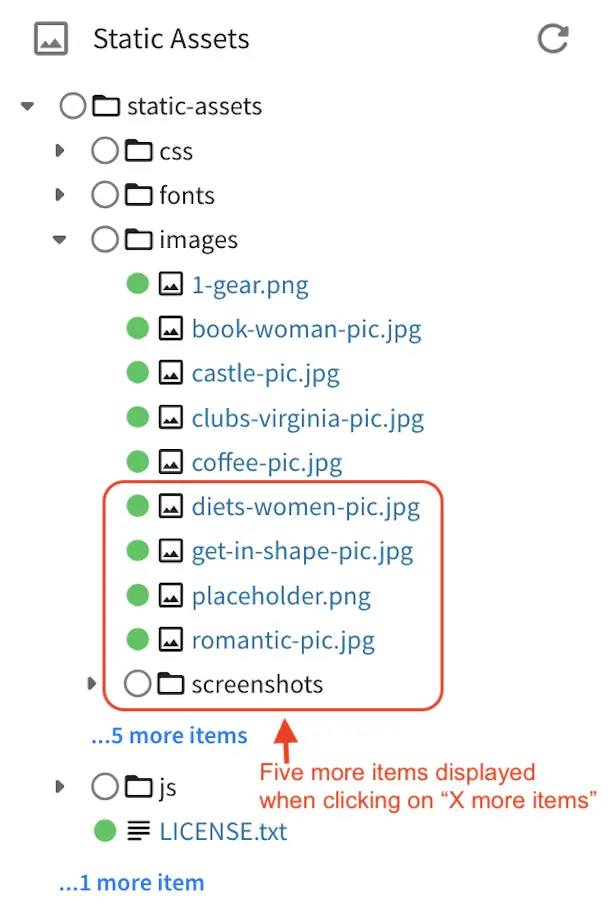
Notice also that when the user clicks on 10 more items displayed on the image on the left, an additional 5 more
items will be displayed as shown on the image on the right.
Remember to do a refresh of your browser after making the limit changes and saving your configuration in order to see the changes you’ve made in action.
Sorting
The order of children displayed may be sorted via the sortStrategy and order property like below:
<widget id="craftercms.components.PathNavigatorTree">
  <configuration>
    <id>Pages</id>
    <label>Pages</label>
    <icon id="@mui/icons-material/DescriptionOutlined"/>
    <rootPath>/site/website/index.xml</rootPath>
    <locale>en</locale>
    <sortStrategy>lastUpdate</sortStrategy>
    <order>DESC</order>
  </configuration>
</widget>
The following sortStrategy property options are available:
alphabetical: sort in alphabetical orderfoldersFirst: sort in alphabetical order, listing folders firstlastUpdate: sort using the last modified date
The following order property options are available:
ASC: display children in ascending orderDESC: display children in descending order
In the example configuration above, the children of the Pages folder will be sorted using the last modified
date in descending order. Let’s take a look on how the example configuration above affects the order of children
displayed in the Pages folder. The image on the left is a baseline screenshot of the /articles/2021/3 folder
under Pages for our example. The image on the right is a screenshot of the the same folder after editing and saving
changes to the Top Books For Young Women article, where we expect our edited article to be the first one listed:
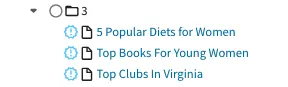


Audience Targeting
Audience Targeting allows an author to see what the project would look like if it were being browsed by a user with a given set of attributes.
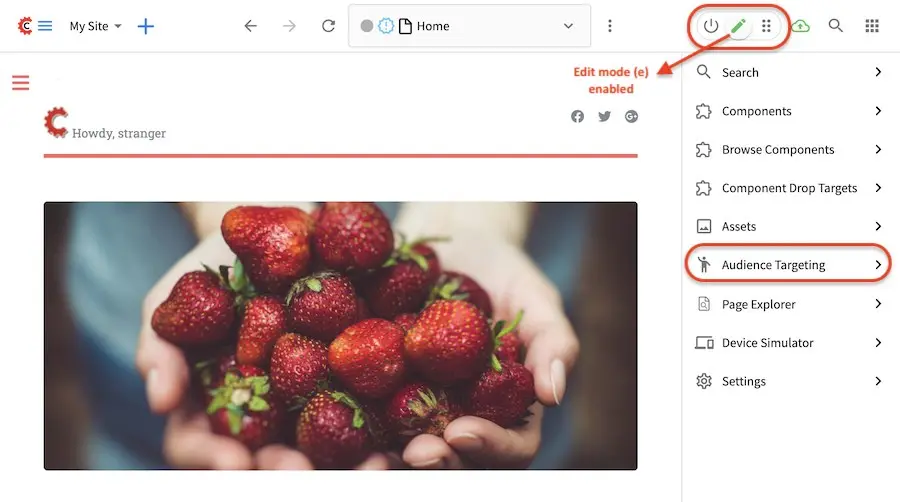
Here’s the Audience Targeting configuration out of the box for a project created using the Website Editorial blueprint:
 1<widget id="craftercms.components.ICEToolsPanel">
 2  <configuration>
 3    <widgets>
 4      <widget id="craftercms.components.ToolsPanelPageButton">
 5      ...
 6      <widget id="craftercms.components.ToolsPanelPageButton">
 7        <configuration>
 8          <target id="icePanel"/>
 9          <title id="previewAudiencesPanel.title" defaultMessage="Audience Targeting"/>
10          <icon id="@mui/icons-material/EmojiPeopleRounded"/>
11          <widgets>
12            <widget id="craftercms.components.PreviewAudiencesPanel">
13              <configuration>
14                <fields>
15                  <segment>
16                    <id>segment</id>
17                    <name>Segment</name>
18                    <description>User segment.</description>
19                    <type>dropdown</type>
20                    <defaultValue>anonymous</defaultValue>
21                    <values>
22                      <value>
23                        <label>Guy</label>
24                        <value>guy</value>
25                      </value>
26                      <value>
27                        <label>Gal</label>
28                        <value>gal</value>
29                      </value>
30                      <value>
31                        <label>Anonymous</label>
32                        <value>anonymous</value>
33                      </value>
34                    </values>
35                    <helpText>Setting the segment will change content targeting to the audience selected.</helpText>
36                  </segment>
37                  <name>
38                    <id>name</id>
39                    <name>Name</name>
40                    <description>User's first and last name.</description>
41                    <type>input</type>
42                    <helpText>Enter user's first and last name.</helpText>
43                  </name>
44                </fields>
45              </configuration>
46            </widget>
47            ...
Here’s how the above configuration looks like in the Experience Builder Panel in Studio:
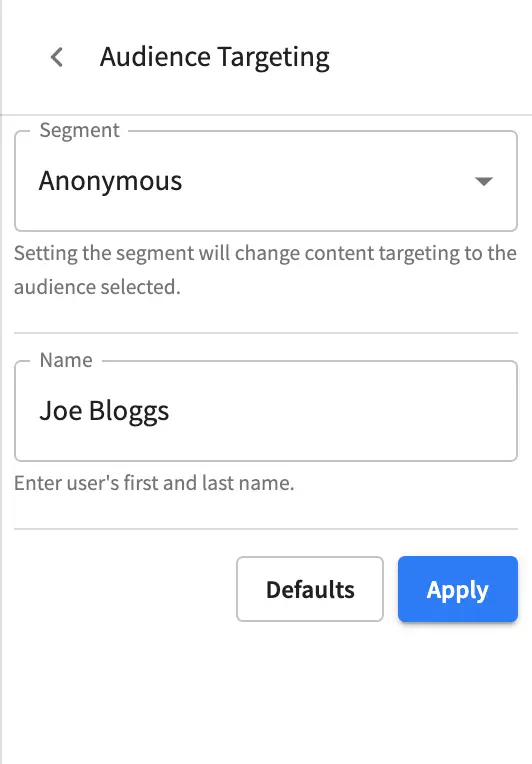
See Targeting for more information on configuring the targeting system of Crafter Studio to help provide Crafter Engine with fake user properties that help drive the targeting system, such as configuring targeting based on roles, etc. and Audience Targeting for more information on how content authors use the audience targeting system configured.
RTE
Rich Text Editors (RTEs) allow the users to edit, arrange and style content however they like, without needing to know HTML.
There are two ways of editing content in Studio: (1) form-based editing and (2) In-context editing (ICE). Form-based editing is done by clicking on Options (three dots next to the preview address bar at the top of the page, or the three dots next to the page in the Sidebar), then selecting Edit. In-context editing is done by enabling the Edit mode by clicking on the pencil at the top right of the page (which turns green when enabled), then clicking on the section of the page you want to edit.
To configure the RTE, add/edit the widget craftercms.components.TinyMCE:
Example RTE configuration
 1<widget id="craftercms.components.TinyMCE">
 2  <configuration>
 3    <setups>
 4      <setup id="generic">
 5        <!-- Configuration options: https://www.tiny.cloud/docs/configure/ -->
 6        <!-- Plugins: https://www.tiny.cloud/docs/plugins/opensource/ -->
 7        <tinymceOptions>{
 8          "menubar": true,
 9          "theme": "silver",
10          "plugins": "print preview searchreplace autolink directionality visualblocks visualchars fullscreen image link media template codesample table charmap hr pagebreak nonbreaking anchor toc insertdatetime advlist lists wordcount textpattern help acecode paste editform",
11          "extended_valid_elements": "",
12          "valid_children": "",
13          "toolbar1": "formatselect | bold italic strikethrough forecolor backcolor | link | alignleft aligncenter alignright alignjustify | numlist bullist outdent indent | removeformat | editform",
14          "code_editor_wrap": false,
15          "toolbar_sticky": true,
16          "image_advtab": true,
17          "encoding": "xml",
18          "relative_urls": false,
19          "remove_script_host": false,
20          "convert_urls": false,
21          "remove_trailing_brs": false,
22          "media_live_embeds": true,
23          "autoresize_on_init": false,
24          "autoresize_bottom_margin": 0,
25          "menu": { "tools": { "title": "Tools", "items": "tinymcespellchecker code acecode wordcount" } },
26          "automatic_uploads": true,
27          "file_picker_types": "image media file",
28          "paste_data_images": true,
29          "templates": [],
30          "content_css": [],
31          "content_style": "body {}",
32          "contextmenu": false }
33        </tinymceOptions>
34      </setup>
35    </setups>
36  </configuration>
37</widget>
Our RTE is based on TinyMCE (https://www.tiny.cloud/) and can leverage all configurations and plugins designed for the TinyMCE editor.
To learn more about configuring the RTE, see here
Project Tools Configuration
The Project Config tools configuration section defines what modules are available for administration use when
clicking on ![]() from the Sidebar.
from the Sidebar.
 1<references>
 2             <reference id="craftercms.siteTools">
 3                     <tools>
 4                             <tool>
 5                                     <title id="dropTargetsMessages.contentTypes" defaultMessage="Content Types"/>
 6                                     <icon id="@mui/icons-material/WidgetsOutlined"/>
 7                                     <url>content-types</url>
 8                                     <widget id="craftercms.components.ContentTypeManagement"/>
 9                             </tool>
10                             <tool>
11                                     <title id="GlobalMenu.EncryptionToolEntryLabel"
12                                            defaultMessage="Encryption Tool"/>
13                                     <icon id="@mui/icons-material/LockOutlined"/>
14                                     <url>encrypt-tool</url>
15                                     <widget id="craftercms.components.SiteEncryptTool"/>
16                             </tool>
17                             <tool>
18                                     <title id="words.configuration" defaultMessage="Configuration"/>
19                                     <icon id="@mui/icons-material/SettingsApplicationsOutlined"/>
20                                     <url>configuration</url>
21                                     <widget id="craftercms.components.SiteConfigurationManagement"/>
22                             </tool>
23                             ...
List of available tools
Here’s a list of available tools defined in the Website_Editorial blueprint.
Tool |
Description |
|---|---|
Content Types |
Allows you to create/modify content types |
Encryption Tool |
Allows the user to encrypt sensitive data such as access keys and passwords |
Configuration |
Contains all the configuration files managed through Crafter Studio |
Audit |
Allows you to view your project activity log |
Workflow States |
Contains a list of all files in the project with its corresponding state |
Log Console |
Allows you to tail logs depending on what logging levels are set |
Publishing |
Allows the user to view the publishing status, perform a bulk publish or to publish content using commit ID(s) |
Git |
Allows the user to perform Git operations |
GraphQL |
Allows the user run GraphQL queries and explore the schema documentation for a project without the need of any other tool |
Plugin Management |
Allows the user to install and to view currently installed, project plugins |
See Navigating Project Tools for more information on the available tools in Project Tools.
Preview Edit Mode Defaults
Since 4.1.2To configure defaults for Preview edit mode, set the following attributes of the
craftercms.components.Preview widget:
1<widget
2        id="craftercms.components.Preview"
3        initialEditModeOn="true"
4        initialHighlightMode="all"
5        xbDetectionTimeoutMs="5000"
6/>
RTE Configuration
Rich Text Editors (RTEs) are more effective/productive for authors when they are configured properly for the specific type of content the author is managing. A properly and effectively configured RTE has the right styles, menu options and so on. Every RTE in the system can have a different look and feel, different editing/menu options, available styles, components and other configurations. You can also SHARE setups between similar RTEs in your project.
This section describes how to configure various configuration options and plugins for the RTE in the User Interface Configuration file.
Common Configurations for Effective RTEs
Here are some things to consider for setting up effective RTEs:
The rich text editor’s width should be set to the same width as the region it is intended to edit
Project style sheet of your project is imported so it can be applied to the RTE
Project styles are being applied appropriately to the markup in the RTE. Note that sometimes styles in CSS are so aggressively specified that the RTE cannot pick them up.
Formats and styles are configured to match the part of the project being edited
Toolbar is configured with only what is required for the specific use case (reducing options makes it easier for editors)
If plugins like
insert layoutand so on are enabled it should be fully configured.
What Out-of-the-Box Functionality Does Crafter Studio’s RTE Support?
Our RTE is based on TinyMCE 7 (https://www.tiny.cloud/) and can leverage all configurations and plugins designed for the TinyMCE editor. You can find the documentation for these TinyMCE configurations and settings here: https://www.tiny.cloud/docs/
TinyMCE plugins
Crafter Studio uses standard TinyMCE plugins. To see the list of TinyMCE plugins available in Studio,
look for plugins in the configuration:
<widget id="craftercms.components.TinyMCE">
<configuration>
<setups>
<setup id="generic">
<!-- Configuration options: https://www.tiny.cloud/docs/tinymce/latest/initial-configuration/ -->
<!-- Plugins: https://www.tiny.cloud/docs/plugins/#open-source-plugins -->
<tinymceOptions>
< will now be available for users of the RTE.
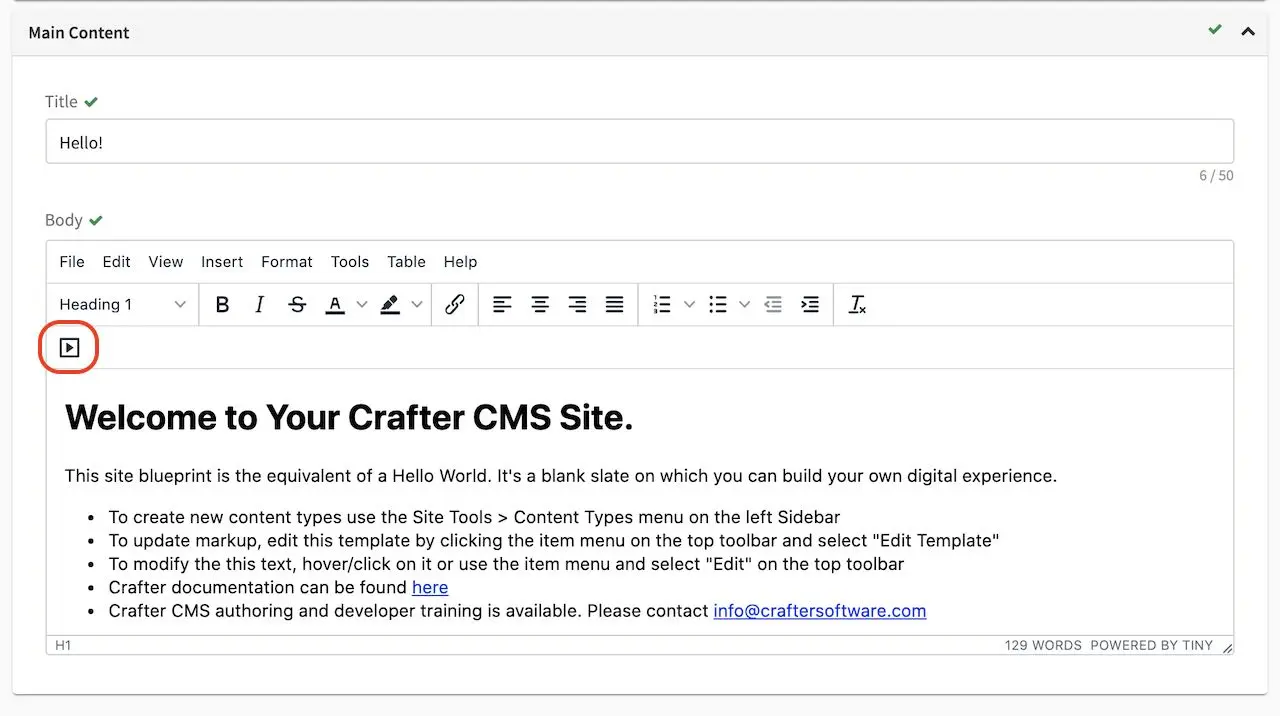
Click on the
button to add the link to the YouTube video you’d like to embed in the RTE and to setup other parameters. In the General tab, fill in the Source field with the URL of the YouTube video you’d like to embed and finally, fill in the Dimensions field to the size desired. Click on the Ok button.
Save your changes, and your video should now be embedded in your page
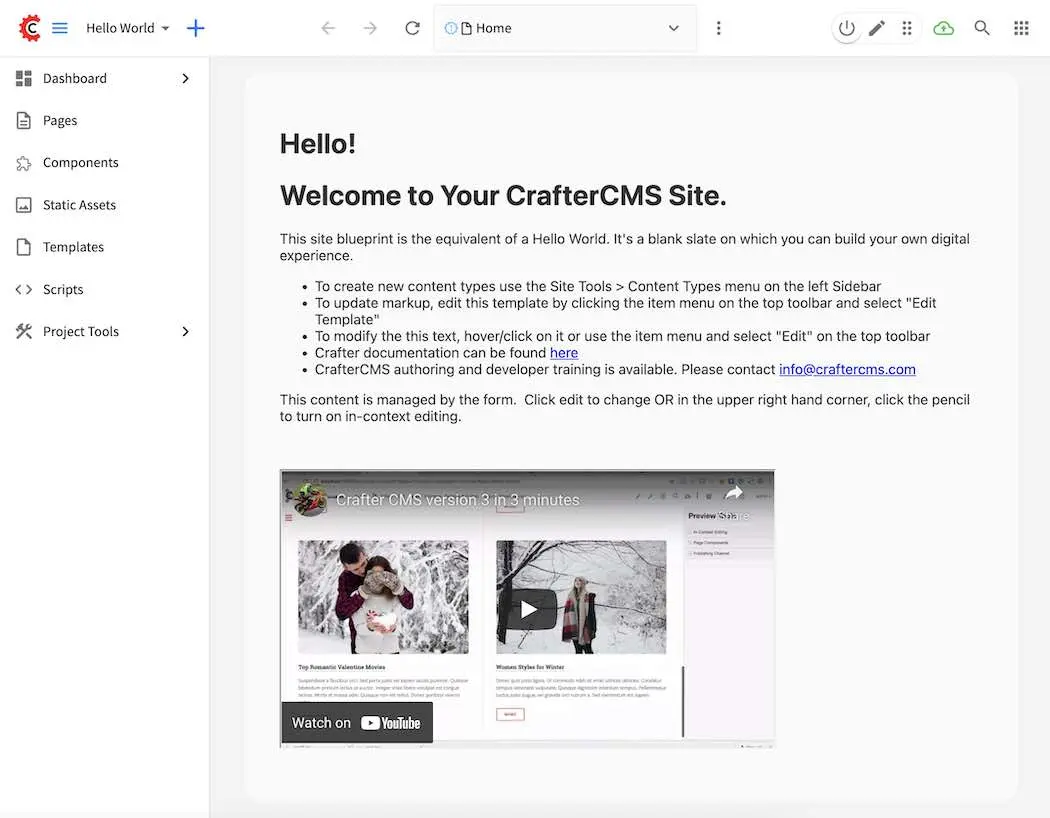
TinyMCE Plugin Template Example
Let’s take a look at another example of using the TinyMCE plugin, template.
The template plugin adds support for custom templates. The default editor instance only adds the menu item Insert template... under the Insert menu in the menubar. On TinyMCE, it adds a menu item Insert template under the Insert menu and a toolbar button.
Note that the open-source template plugin and associated config options have been removed in TinyMCE 7. To achieve
an equivalent TinyMCE config before the version 7 upgrade, the insert menu needs to be added/customised to the config as shown below:
"menu": {
  "tools": { "title": "Tools", "items": "tinymcespellchecker code acecode wordcount" },
  "insert": { "title": "Insert", "items": "image link media template codesample inserttable | charmap hr | pagebreak nonbreaking anchor | insertdatetime" }
},
To add a template to the RTE, simply add templates under setup in the RTE configuration.
Under templates, add title, description and content
 1<widget id="craftercms.components.TinyMCE">
 2<configuration>
 3  <setups>
 4    <setup id="...">
 5       <tinymceOptions>
 6         <![CDATA[
 7           {
 8             "menubar": true,
 9             ...
10             "menu": {
11               "tools": { "title": "Tools", "items": "tinymcespellchecker code acecode wordcount" },
12               "insert": { "title": "Insert", "items": "image link media template codesample inserttable | charmap hr | pagebreak nonbreaking anchor | insertdatetime" }
13             },
14             "templates" : [
15               {
16                 "title": "Your Template Title",
17                 "content": "Your template content",
18                 "description": "Your Template Description "
19                },
20             ]
21          }
22     ]]>
23     ...
Let us take a look at an example of adding two templates to the RTE configuration
Open the RTE configuration file in your project by opening the Sidebar, then click on
-> Configuration -> User Interface ConfigurationScroll down to the TinyMCE section and add in the following templates under
<setup />:CRAFTER_HOME/data/repos/sites/SITENAME/sandbox/config/studio/ui.xml¶1"templates" : [ 2 { 3 "title": "Test template 1", 4 "content": "Test 1", 5 "description": "Test1 Description " 6 }, 7 { 8 "title": "Test template 2", 9 "content": "<div class='test'><h1>This is a title</h1><p>Look at this paragraph!</p></div>", 10 "description": "Test 2 description" 11 } 12]
Save your changes. The configured templates should now be available under
Insert templatesof theInsertmenu.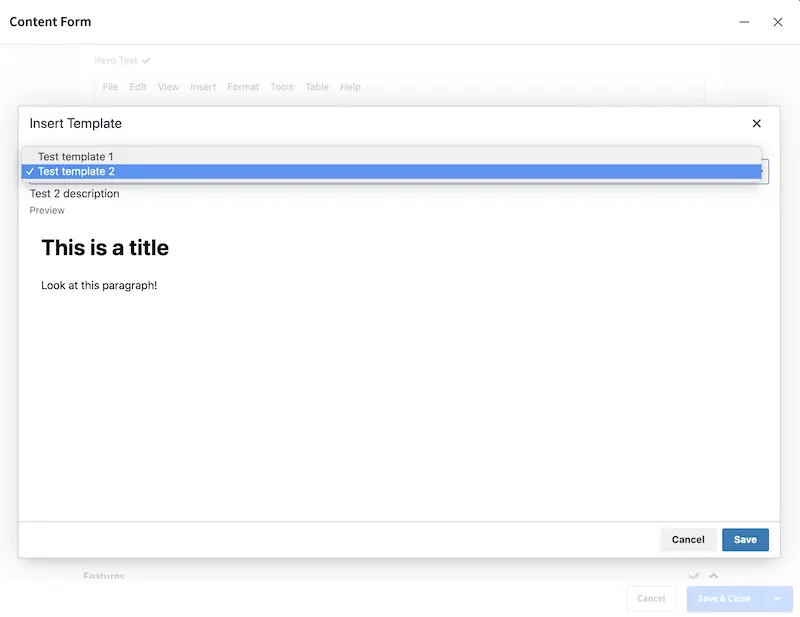
See https://www.tiny.cloud/docs/tinymce/6/template/ for more information on the template plugin.
TinyMCE paste plugin callback hooks
The TinyMCE paste plugin enables you to modify the pasted content before it gets inserted into the editor (paste_preprocess) and before it gets inserted into the editor but after it’s been parsed into a DOM structure (paste_postprocess). For more information on these options, see https://www.tiny.cloud/docs/tinymce/latest/copy-and-paste/#paste_preprocess.
In order to hook into the callback (paste_preprocess and paste_postprocess), do the following in the RTE configuration:
Add the default
pasteplugin inpluginsif not already includedCRAFTER_HOME/data/repos/sites/SITENAME/sandbox/config/studio/ui.xml¶"plugins": "print preview searchreplace autolink directionality visualblocks visualchars fullscreen image link media template codesample table charmap hr pagebreak nonbreaking anchor toc insertdatetime advlist lists wordcount textpattern help acecode paste"
Create an external plugin by following the structure of the example plugin here. To modify the pasted content, add your code under
paste_preprocess()orpaste_postprocess()depending on your needs.Add the plugin created in the previous step as an external plugin under the
craftercms_tinymce_hookstag.CRAFTER_HOME/data/repos/sites/SITENAME/sandbox/config/studio/ui.xml¶"external_plugins": { "craftercms_tinymce_hooks": "/studio/1/plugin/file?siteId={site}&pluginId=craftercms&type=tinymce&name=craftercms_paste_extension&filename=samplepasteplugin.js" }
For more information on
craftercms_tinymce_hooks, see here
Note
When Tiny’s paste plugin is included, craftercms_paste_cleanup extension is also enabled. CrafterCMS’ extension performs some additional paste cleanup from what Tiny’s plugin does. To disable these additional processing of the paste input, you may add <craftercms_paste_cleanup>false</craftercms_paste_cleanup> to the RTE configuration
Adding Allowable Elements
Tiny MCE allows only a certain set of elements (HTML tags) as valid (rule set) by default in the code editor and will strip elements not in the allowable list when it outputs its HTML. For example, if you try adding in the <script /> element , or the <iframe /> element, it will be stripped out of the HTML output. To add specific elements that should also be valid, in addition to the existing rule set, we use the extended_valid_elements in the RTE configuration. Simply add the elements you would like added to the existing rule set in the <extended_valid_elements /> tag in RTE Configuration file.
"extended_valid_elements": "script mycustomtag", <!-- elements whitelist (won't be stripped out) -->
Example allowing script element
Let’s take a look at an example of adding <script /> to the allowable elements (rule set). We’ll be using a project created using the Website Editorial blueprint.
Open the RTE configuration file in Studio by opening the Sidebar, then click on
-> Configuration -> User Interface Configuration then scroll down to the craftercms.components.TinyMCEwidget sectionScroll down to
extended_valid_elementsand addscriptand save."extended_valid_elements": "script" <!-- elements whitelist (won't be stripped out) -->
We’ll now add
<script />in the RTE to verify it works.Open the Sidebar and edit one of the articles. Navigate to
/articles/2020/7/then right click onNew ACME Phone Released Todayand selectEdit.Scroll down to the
Contentpart of the form and UnderSections, click onAdd AnotherClick on the newly added section, then click on
Tools->Code Editorfrom the RTE menubar.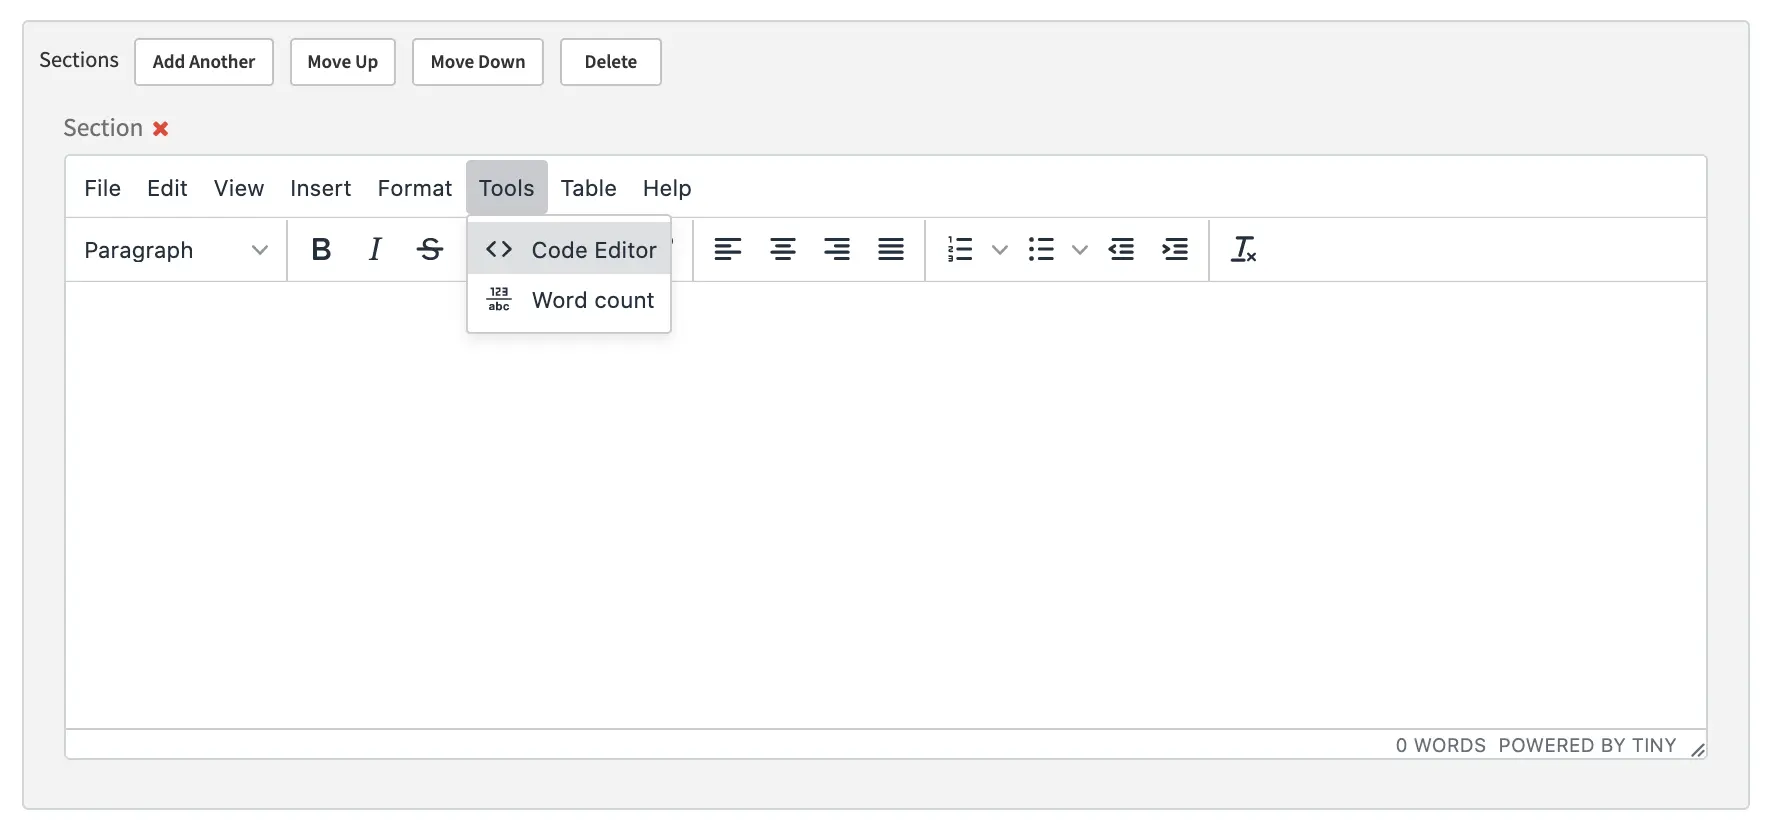
Add a script in the code editor then save the changes. This will display a dialog saying
Hellowhen you preview the articleNew ACME Phone Released Today<script>alert('Hello!')</script>
Preview the page. A dialog saying
Helloshould pop up before the page is displayed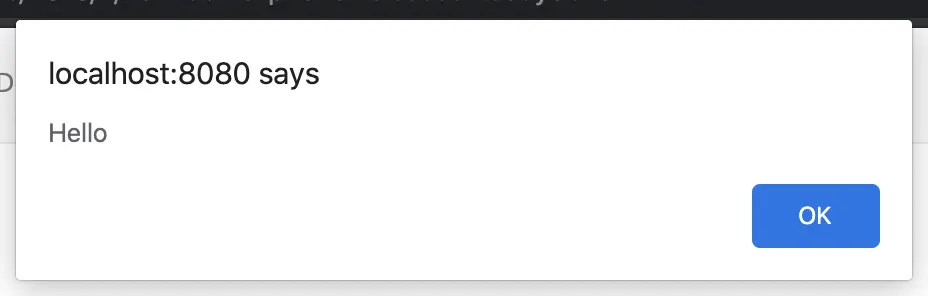
Please note that TinyMCE gives this warning when allowing script elements (<script />):
Warning
Allowing script elements (<script>) in TinyMCE exposes users to cross-site scripting (XSS) attacks.
Example allowing a custom element
You can also add custom elements to the rule set and can be done by simply adding the custom tag to extended_valid_elements. Let’s take a look at an example of adding the tag mycustomtag to the rule set.
Note
Case sensitive custom elements are not supported in TinyMCE 5. Remember to use only lowercase for custom elements (e.g. myattr is supported but myAttr is not supported).
Open the RTE configuration file in Studio by opening the Sidebar, then click on
-> Configuration -> User Interface Configuration then scroll down to the craftercms.components.TinyMCEwidget sectionScroll down to
extended_valid_elementsand addmycustomtagand save."extended_valid_elements": [ "script", "mycustomtag"]
We’ll now add the
<mycustomtag />in the RTE to verify it works.Open the Sidebar and edit one of the articles. Navigate to
/articles/2020/7/then right click onNew ACME Phone Released Todayand selectEdit.Scroll down to the
Contentpart of the form and UnderSections, click on one of the section, then click onTools->Code Editorfrom the RTE menubar, then use<mycustomtag /><mycustomtag>my custom tag</mycustomtag>
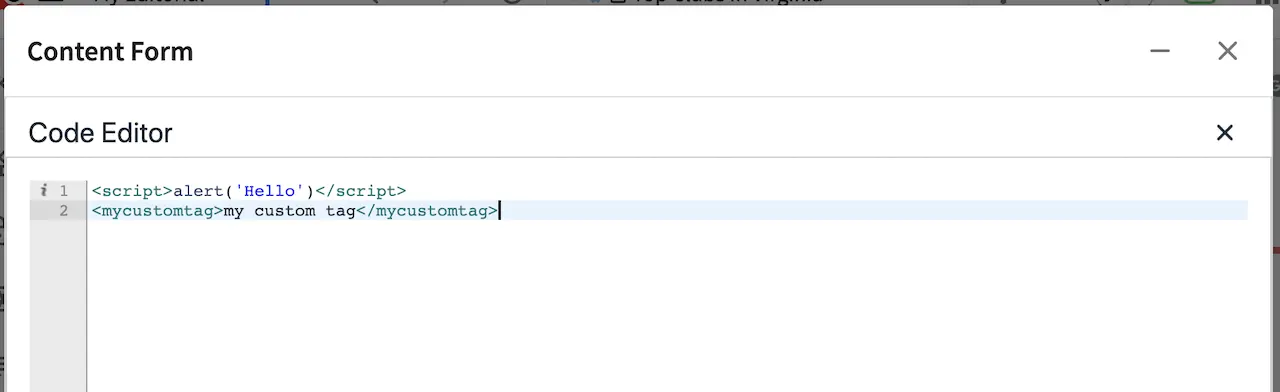
Adding External Plugins
TinyMCE provides an option to specify URLS to plugins outside the tinymce plugins directory. These external plugins allow the user to extend TinyMCE. For example, you can create custom dialogs, buttons, menu items, etc.
For more information on the Tiny MCE external_plugins option, see https://www.tiny.cloud/docs/tinymce/latest/editor-important-options/#external_plugins
The Crafter Studio developer does not have full control of the tinymce initialization. To add a custom button to the toolbar in Crafter Studio, it would be done using the external plugin route since, what TinyMCE docs advise – i.e. using the setup function to add the button – is not viable in Studio without creating a form control plugin where they’d have full control of tinymce initialization.
To add an external plugin, use external_plugins in the RTE configuration.
Use the Crafter Studio API that gets a file for a given plugin, the getPluginFile API found here getPluginFile to get the Tiny MCE external plugin file to pass to the RTE.
Example External Plugin
Let’s take a look at an example of a simple external plugin that creates a custom button which inserts text in the RTE.
We’ll load our external plugin (a custom button) and add it to the RTE’s toolbar. For our example, we’ll be using a site created using the empty blueprint named hello.
Open the RTE configuration file in Studio by opening the Sidebar, then click on
-> Configuration -> User Interface Configuration then scroll down to the craftercms.components.TinyMCEwidget sectionWe’ll add the configuration for TinyMCE to load the plugin using Crafter Studio’s getPluginFile API. We achieve this by using
external_pluginsand adding child tags with the id of the plugin as tag name and the target URL as the tag’s content"external_plugins": { "my_button": "/studio/1/plugin/file?siteId={site}&pluginId=my_button&type=tinymce&name=my_button&filename=plugin.js" }
where:
{site}: a macro that inserts the current siteId
Add the custom button we’re creating to the toolbar of the RTE. Scroll to the
toolbar(n)tag and add the custom button we are creatingmy_buttontotoolbar2"toolbar2": "my_button"Finally, we’ll create our plugin file and add it in to Studio. See Plugins for more information on creating a Crafter Studio plugin.
Using information from step 2 for our external plugin, create the required directory structure for the plugin file, then create our plugin file named
plugin.js$CRAFTER_HOME/data/repos/sites/SITE_NAME/sandbox/config/studio/plugins/tinymce/my_button/plugin.js¶1(function () { 2 3 'use strict'; 4 5 tinymce.PluginManager.add("my_button", function (editor, url) { 6 7 function _onAction() 8 { 9 // Write something in the RTE when the plugin is triggered 10 editor.insertContent("<p>Content added from my button.</p>") 11 } 12 13 // Define the Toolbar button 14 editor.ui.registry.addButton('my_button', { 15 text: "My Button", 16 onAction: _onAction 17 }); 18 }); 19 20 // Return details to be displayed in TinyMCE's "Help" plugin, if you use it 21 // This is optional. 22 return { 23 getMetadata: function () { 24 return { 25 name: "My Button example", 26 url: "http://exampleplugindocsurl.com" 27 }; 28 } 29 }; 30})();
We recommend minimizing the
plugin.jsfile. If your plugin is minimized, remember to change the external_plugins > my_button URL in the RTE configuration to load the minified version.Remember to commit the new file so Studio will pick it up by doing a
git addthen agit commit. Whenever you edit directly in the filesystem, you need to commit your changes to ensure they are properly reflected.
Let’s see the TinyMCE external plugin we created in action.
Edit the
Homepage by opening theSidebarthen underPages, right-click onHome, then select edit.
Scroll down to theMain Contentsection of the form to view the RTE. Notice that the button we created is in the toolbar.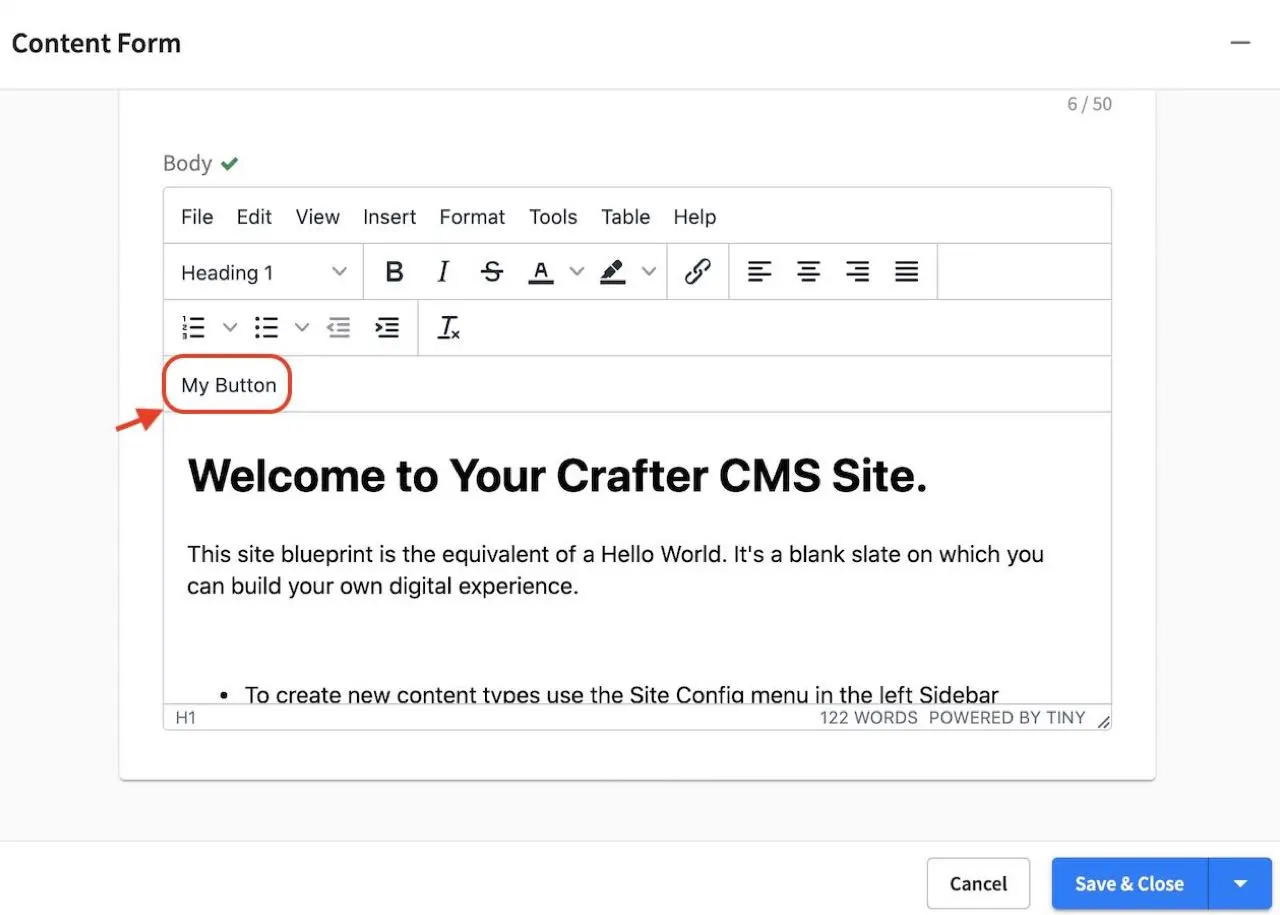
Click on our custom button in the RTE
My Button, and the line Content added from my button. will be inserted into the RTE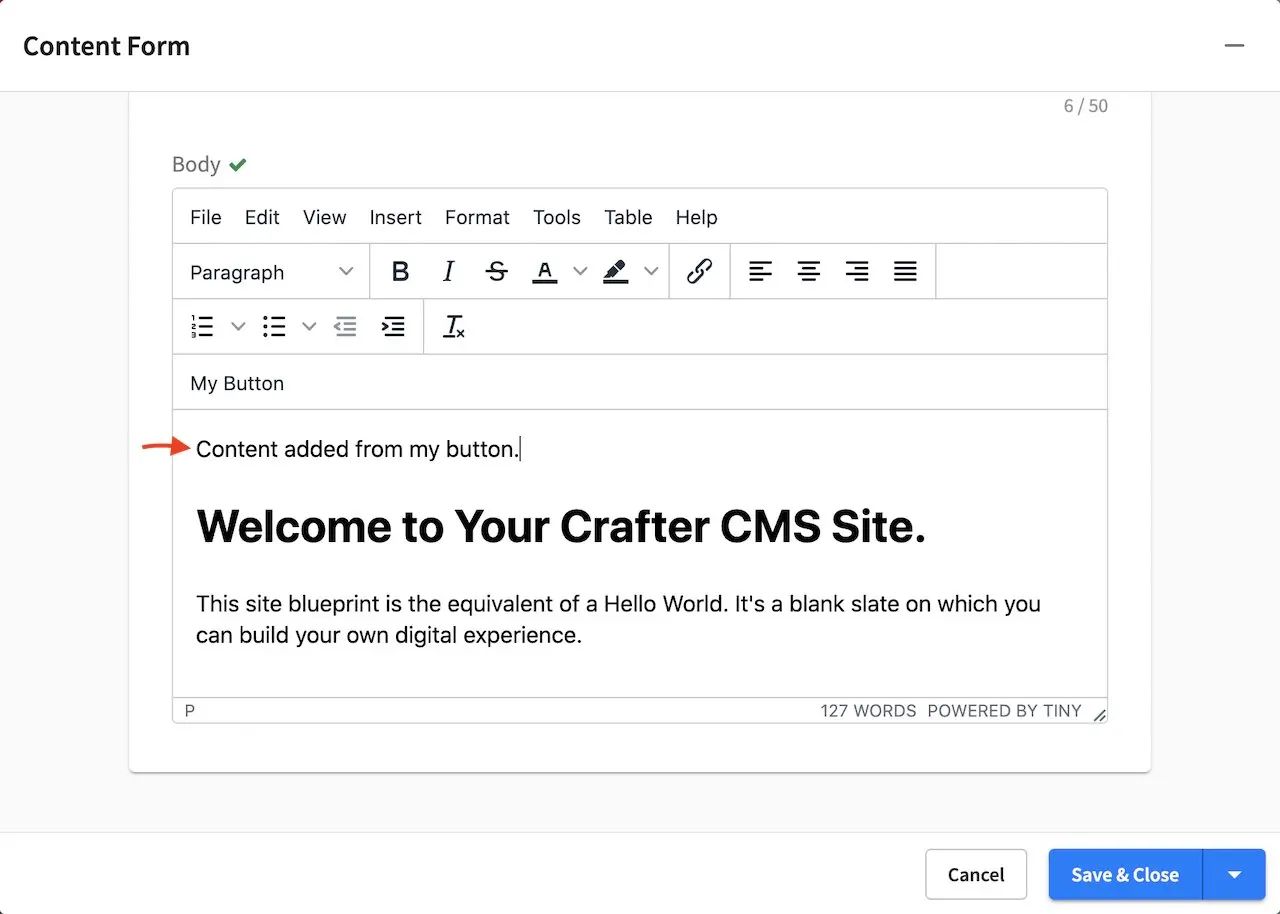
Adding support for valid child elements within a parent element
TinyMCE provides an option to control what child elements can exist within specified parent elements. By adding/removing child elements that can exist within a parent element, you can force which elements are valid children of the parent element.
To add/remove child elements to the list of valid child elements, add/remove the element in the valid_children tag in the RTE Configuration file. To add a child element to a parent element, use a + before the parent element then enclose in square brackets the child element/s you want to add e.g. +a[div|p]. To remove a child element, use a - before the parent element then enclose in square brackets the child element/s you want to remove, e.g. -a[img]. You can add multiple parent elements by using a comma separated list of parents with elements that should be added/removed as valid children
Example adding/removing elements for the specified parent¶"valid_children" : "+body[style],-body[div],p[strong|a|#text]"
The example above shows you how to add style as a valid child of body and remove div as a valid child. It also forces only strong and a and text contents to be valid children of p.
For more information on the TinyMCE valid_children option, see https://www.tiny.cloud/docs/tinymce/latest/content-filtering/#valid_children
Example adding valid child elements to parent element
Let’s take a look at an example of how to add div and text content as valid children of a (html anchor) using the website editorial blueprint.
Open the RTE configuration file in Studio by opening the Sidebar, then click on
-> Configuration -> User Interface Configuration then scroll down to the craftercms.components.TinyMCEwidget sectionAdd
valid_childrenand add div and text contents as child elements of a and save.RTE Configuration File¶"valid_children": "+a[div|#text]"We’ll now disable
Force Root Block p TagandForce p tags New Linesso that markup we enter in the RTE code editor will remain unchanged after saving your changes. Setting theForce Root Block p Tagoption to false will never produce p tags on enter, or, automatically it will instead produce br elements and Shift+Enter will produce a p.Open the Article content type by opening the Sidebar, then click on
-> Content Types -> Article -> Open Type.
Scroll down to the Sections Repeating Groupfield, then click on thesection_htmlfield, which is an RTE.In the
Properties Exploreron the right, remove the check mark on the propertyForce Root Block p TagandForce p tags New Lines.We’ll now add markup in the RTE to test that div is now allowed to be a child element (nested) of parent element a.
Open the Sidebar then click on Site Explorer and edit one of the articles. Navigate to
/articles/2020/7/then right click onNew ACME Phone Released Todayand selectEdit.Scroll down to the
Contentpart of the form and underSections, click onAdd Another.Click on the newly added section, then click on
Tools->Code Editorfrom the RTE menubar, then add the following:<a href="#"> <div class="nesting_test_div"> <img src="/static-assets/images/castle-pic.jpg" alt="" /> <div class="nesting_test" title="Testing nesting elements">This is a test for nesting elements</div> </div> </a>
After saving your changes, preview the page and it should now display an image and text that’s a link. Re-open the RTE code editor and verify that the markup you inputted is unchanged.
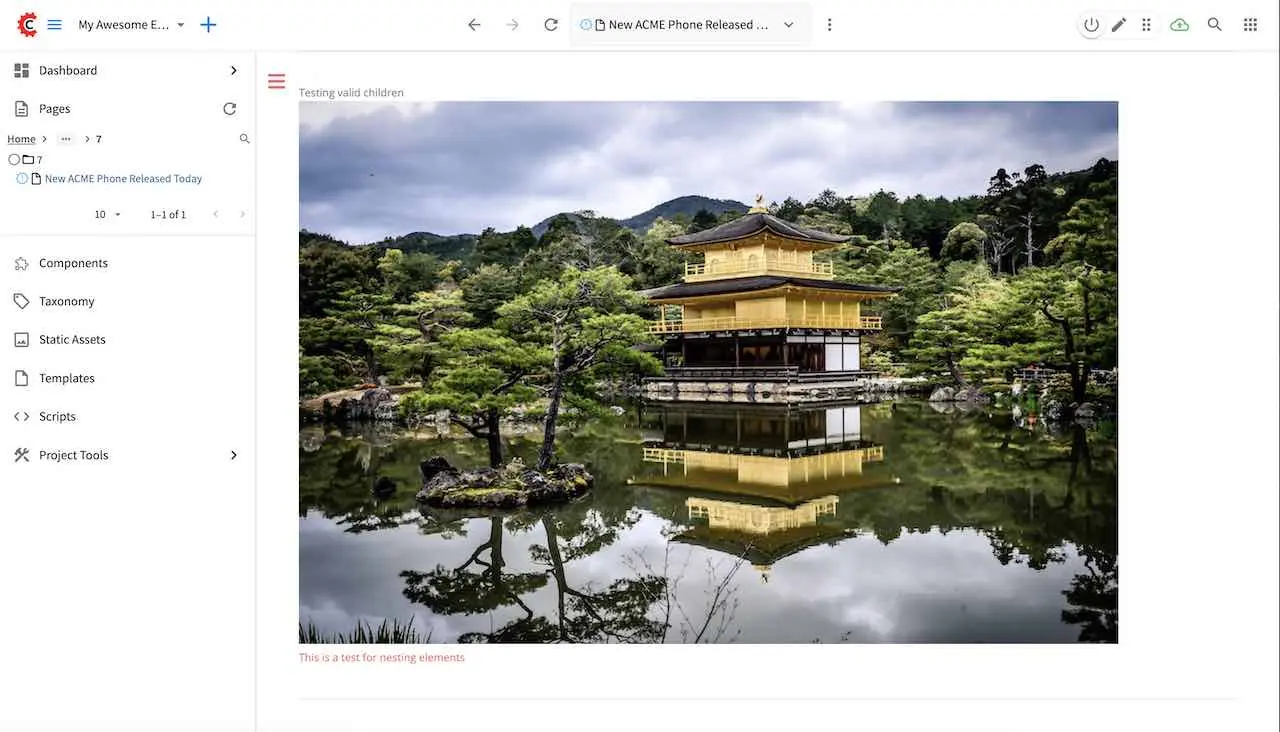
Creating an RTE Setup
The RTE’s configuration file looks like this:
 1<?xml version="1.0" encoding="UTF-8"?>
 2<siteUi>
 3  ...
 4  <widget id="craftercms.components.TinyMCE">
 5     <configuration>
 6       <setups>
 7         <setup id="generic">
 8           <!-- Configuration options: https://www.tiny.cloud/docs/tinymce/latest/initial-configuration/ -->
 9           <!-- Plugins: https://www.tiny.cloud/docs/tinymce/latest/plugins/#open-source-plugins -->
10           <tinymceOptions>
11             <![CDATA[
12               {
13                 "menubar": true,
14                 "theme": "silver",
15                 "plugins": "print preview searchreplace autolink directionality visualblocks visualchars fullscreen image link media template codesample table charmap hr pagebreak nonbreaking anchor toc insertdatetime advlist lists wordcount textpattern help acecode paste",
16                 "extended_valid_elements": "",
17                 "valid_children": "",
18                 "toolbar1": "formatselect | bold italic strikethrough forecolor backcolor | link | alignleft aligncenter alignright alignjustify | numlist bullist outdent indent | removeformat",
19                 "code_editor_wrap": false,
20                 "toolbar_sticky": true,
21                 "image_advtab": true,
22                 "encoding": "xml",
23                 "relative_urls": false,
24                 "remove_script_host": false,
25                 "convert_urls": false,
26                 "remove_trailing_brs": false,
27                 "media_live_embeds": true,
28                 "autoresize_on_init": false,
29                 "autoresize_bottom_margin": 0,
30                 "menu": {
31                   "tools": { "title": "Tools", "items": "tinymcespellchecker code acecode wordcount" },
32                   "insert": { "title": "Insert", "items": "image link media template codesample inserttable | charmap hr | pagebreak nonbreaking anchor | insertdatetime" }
33                   },
34                   "automatic_uploads": true,
35                   "file_picker_types":  "image media file",
36                   "paste_data_images": true,
37                   "templates": [],
38                   "content_css": [],
39                   "content_style": "body {}",
40                   "contextmenu": false
41                 }
42               ]]>
43             </tinymceOptions>
44           </setup>
45         </setups>
46       </configuration>
47     </widget>
48     ...
You can access the RTE Configuration file by going to the Sidebar then clicking on ![]() . In the Project Tools, click on Configuration, then from the list, select
. In the Project Tools, click on Configuration, then from the list, select User Interface Configuration. Scroll down to the craftercms.components.TinyMCE widget section.
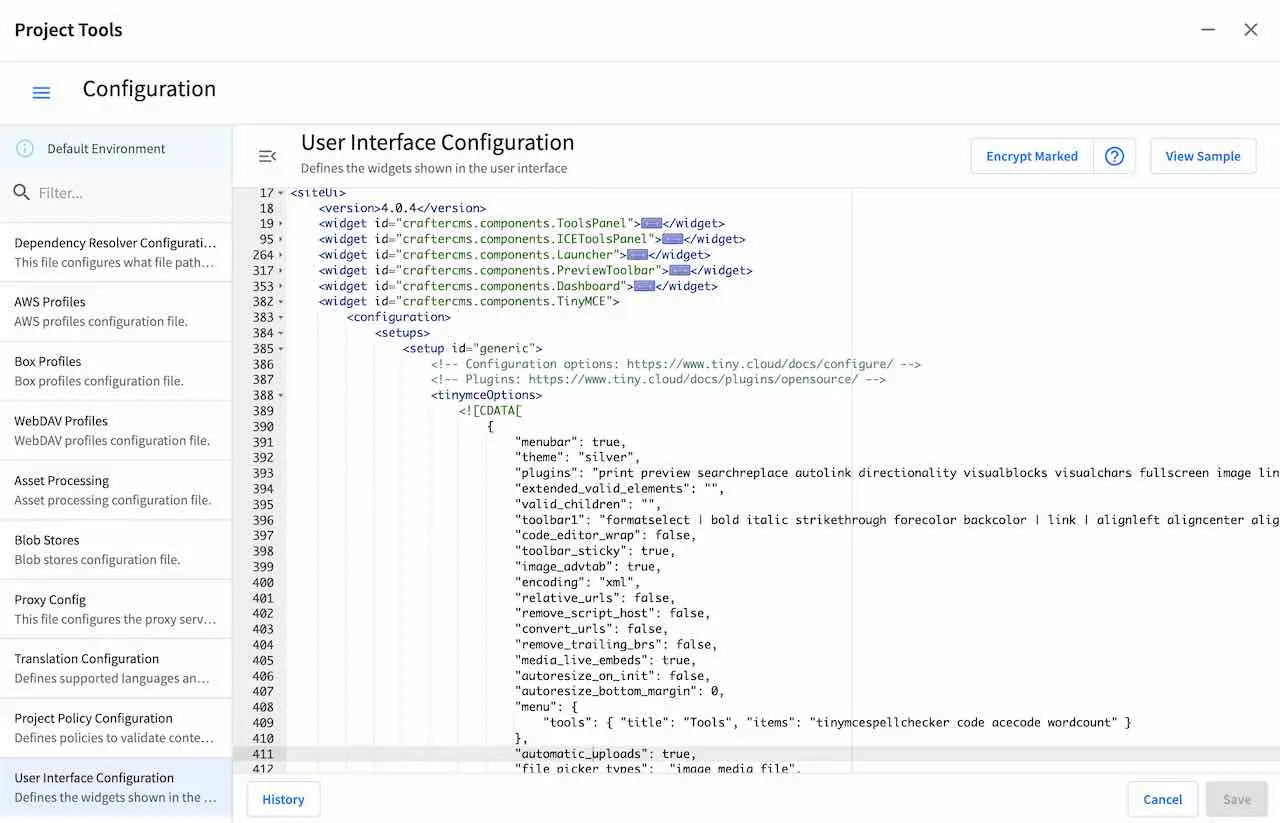
Inside the <setups> tag, there can be multiple <setup> tags. Each setup represents a possible RTE configuration that can be specified to be used by a RTE control. To add your own configuration, create a new <setup> tag. Each <setup> tag contains:
An
<id>tag with the name that must be specified for an RTE control to use this configuration.An
<tinymceOptions>tag containing TinyMCE Configuration options (see https://www.tiny.cloud/docs/tinymce/latest/initial-configuration/ for more information) and plugins (see https://www.tiny.cloud/docs/tinymce/latest/plugins/#open-source-plugins for more information)
Attaching an RTE in a Form to an RTE Setup
To attach an RTE setup to an RTE in a form, open the content type that you want to add an RTE to, then go to the Properties Explorer and click on RTE Configuration and type in an RTE setup name.

In the image above, the RTE setup name used is generic. Please see the section above on how to create an RTE Setup, where the example shows an RTE Setup named generic.
Inserting Links to Pages in the Rich Text Editor (RTE)
Users sometimes need to link to a page in the site to selected text in their document. This section details how to setup the Rich Text Editor (RTE) to allow a user to browse or search for pages and insert links to them.
Basic Setup and Configuration
Open the content type with the Rich Text Editor (RTE) to be setup. Open the Sidebar and click on
and select Content Types. Select the content type with the RTE you’d like to setup, then click on the Open Type button.Setup the data source to select a page from the site. From the content model definition, go to the Data Sources panel and drag
File Browseto the theData Sourcessection of the form and fill in the following properties:Title : Data source title to show on the form e.g.
PagesName : Name of variable to store the final result in e.g.
pagesRepository Path : Path where to browse the pages from e.g.
/site/website
Bind the data source setup above to the RTE. From the content model definition, click on the RTE you want to be able to browse or search for pages and insert links to them. Next, go to the Properties Explorer panel and scroll to the
File Managerproperty. Put a check mark on the box next to the data source previously setup to bind it to the RTE.Click on the Save button to save your changes. The RTE is now setup to allow a user to browse or search for pages and insert links to them.
Example
Let’s take a look at an example using a site created using the Website Editorial blueprint. We will setup the RTE in the Article content type to allow a user to browse or search for pages and insert links to them. We will first setup the RTE, then see it in action.
Open the content type with the Rich Text Editor (RTE) to be setup. Open the Sidebar and click on
and select Content Types. Click on Open Existing Type, and select the content type Articlethen click on the Open Type button.Setup the data source to select a page from the site. From the content model definition, go to the Data Sources panel and drag
File Browseto theData Sourcessection of the form.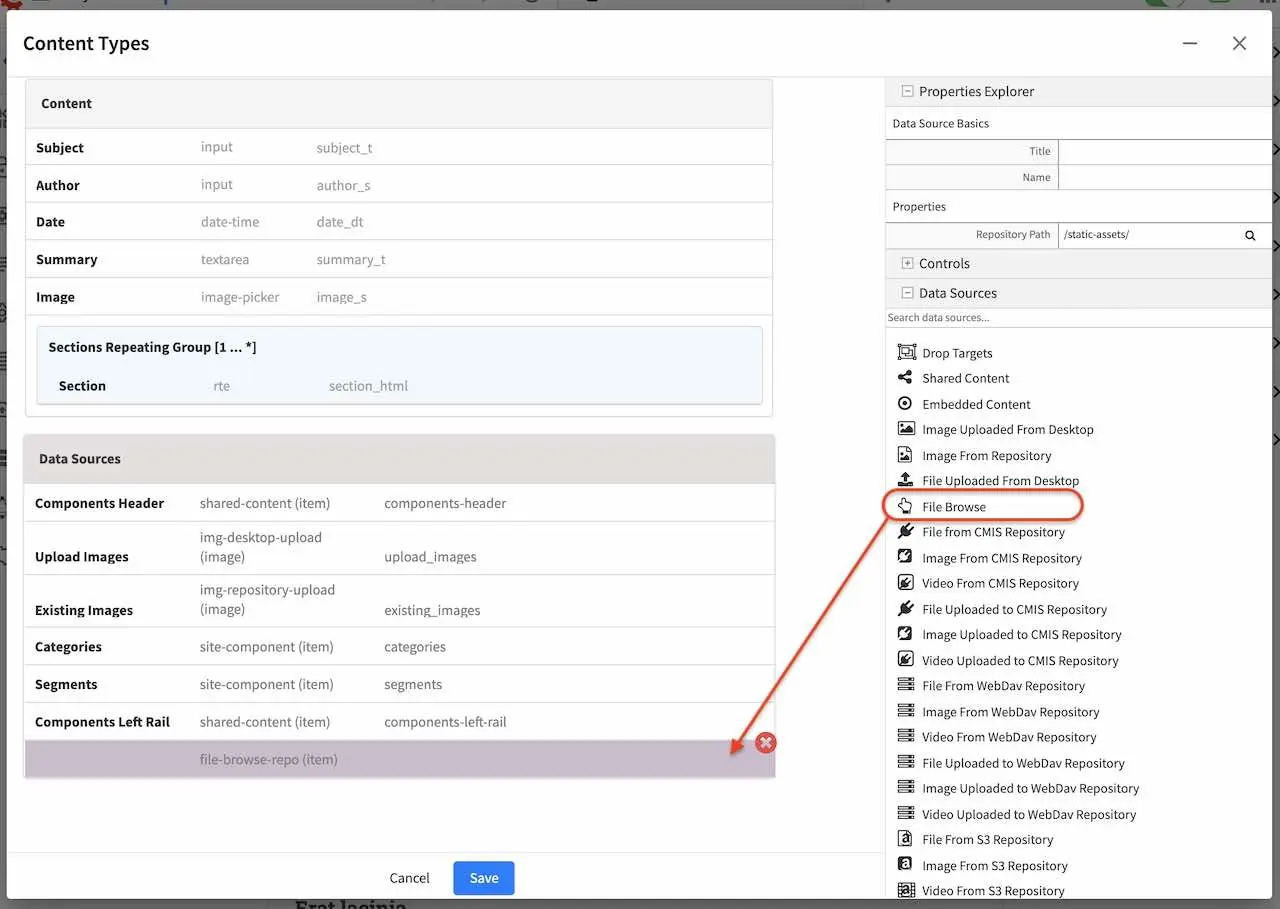
Fill in the following properties:
Title : Pages
Name : pages
Repository Path : /site/website
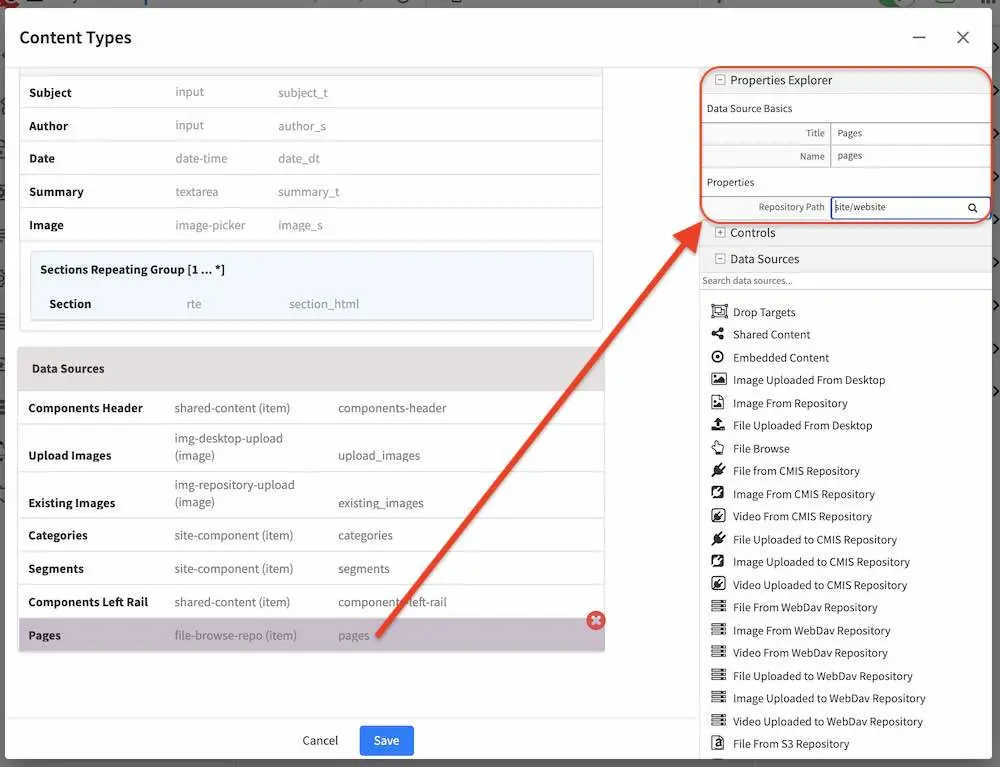
Bind the data source setup above to the RTE. From the content model definition, click on the RTE
Section. Next, go to the Properties Explorer panel and scroll to theFile Managerproperty. Put a check mark on the box next toPages, the data source previously setup, to bind it to the RTE.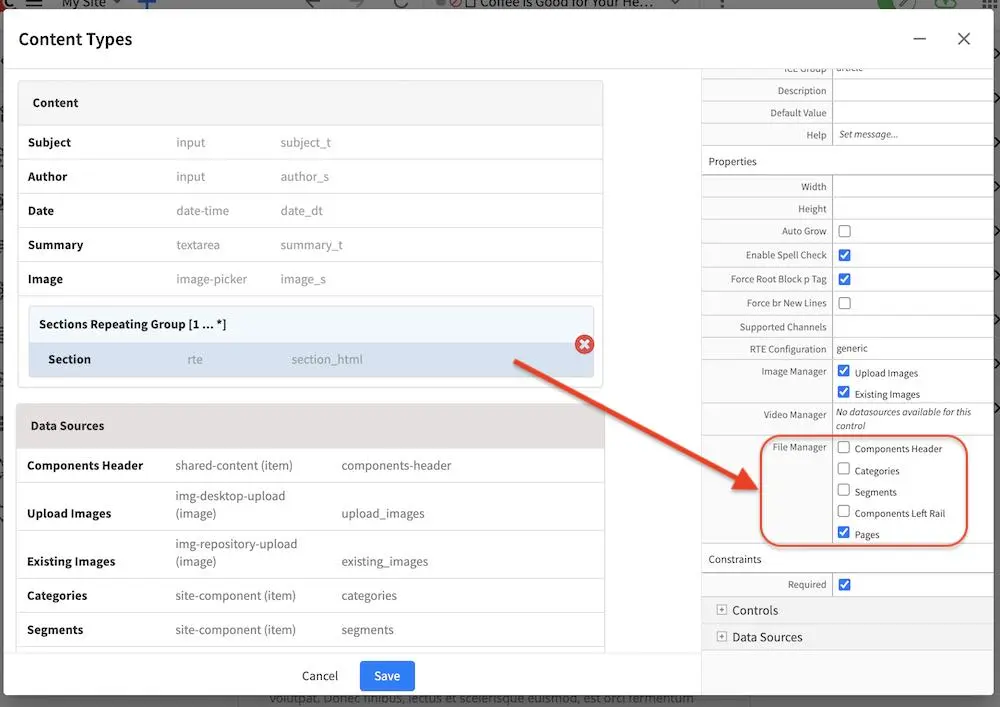
Click on the
Savebutton.
Let’s now take a look at the data source we setup and bound to the RTE in action.
Preview the article
Coffee is Good for Your Healthby either opening the Sidebar and navigating to/articles/2016/6/coffee-is-good-for-your-healthor, from theHomepage, click on theHealthcategory, then click onCoffee is Good for Your HealthEdit the article, then scroll down to the
SectionSelect a word in the RTE. For our example, let’s highlight the first word,
Class, then click onInsert/edit linkfrom the toolbar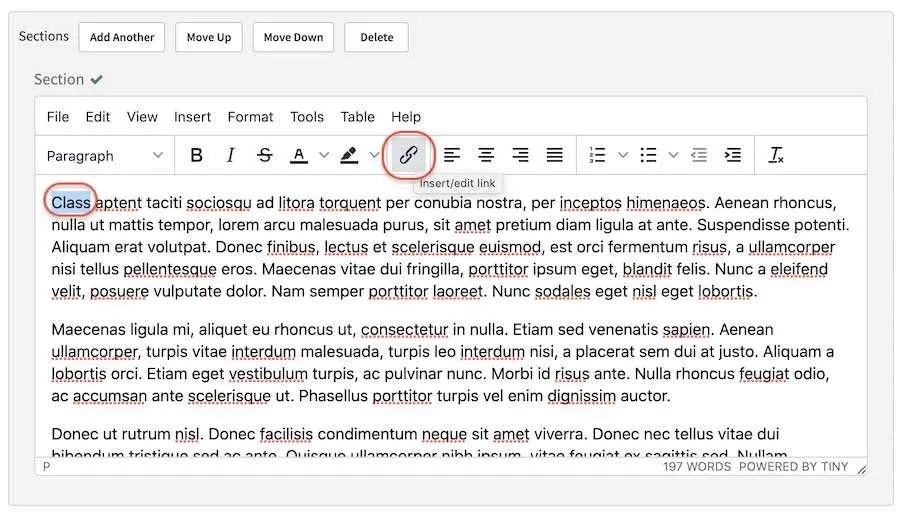
Click on the button next to
URLthen selectPages. This is the data source we setup.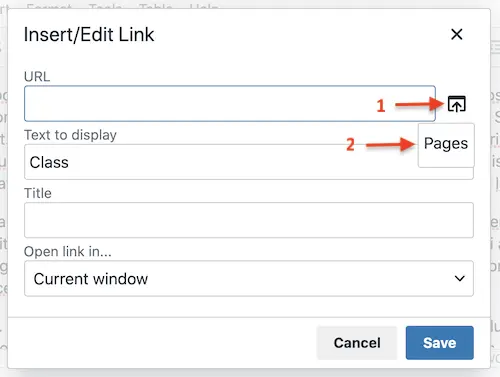
Select a page to link to. We will link the page
/article/2017/2/top-romantic-valentine-moviesto the selected text in our RTE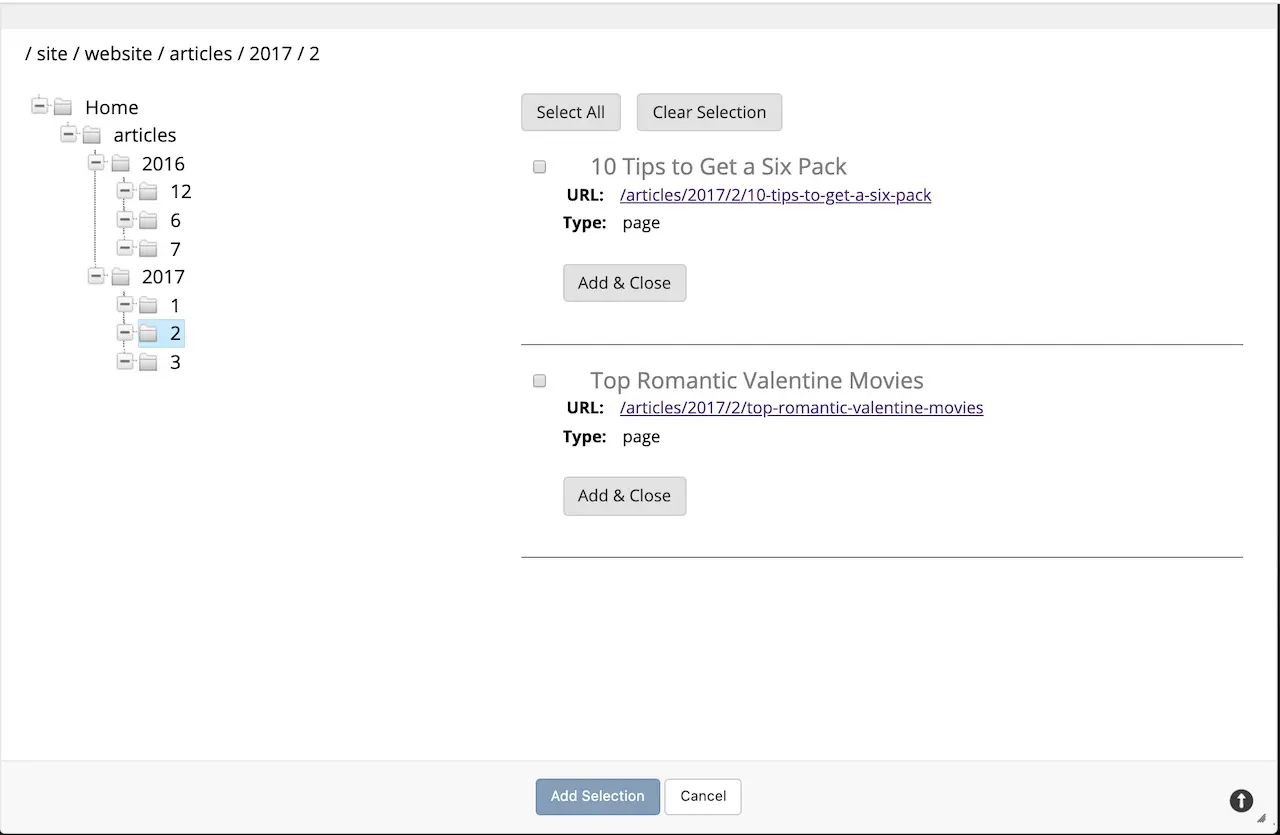
Save the link.
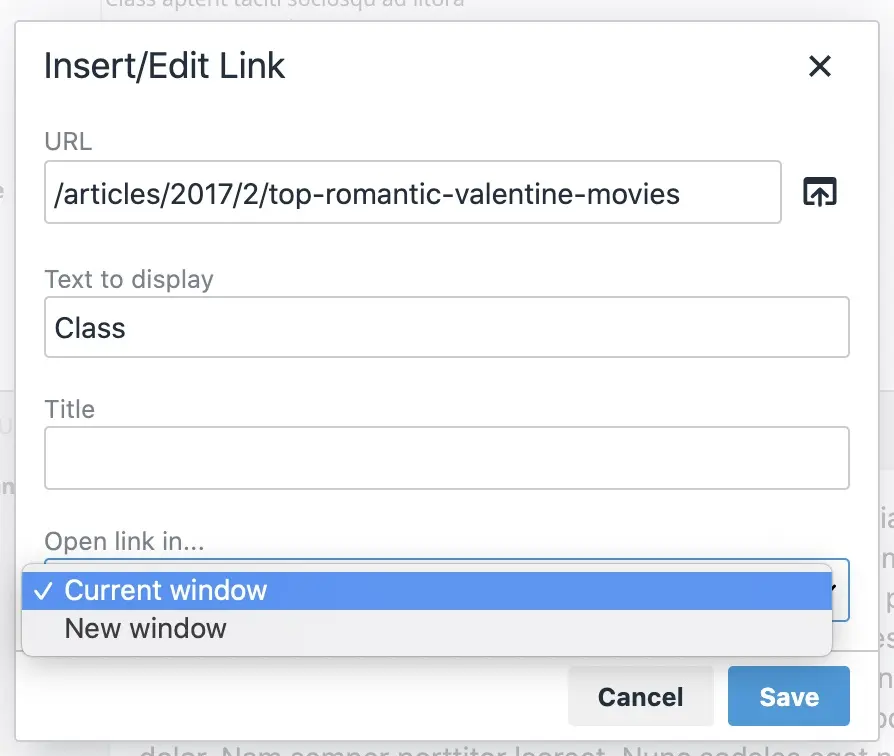
The link is now setup.
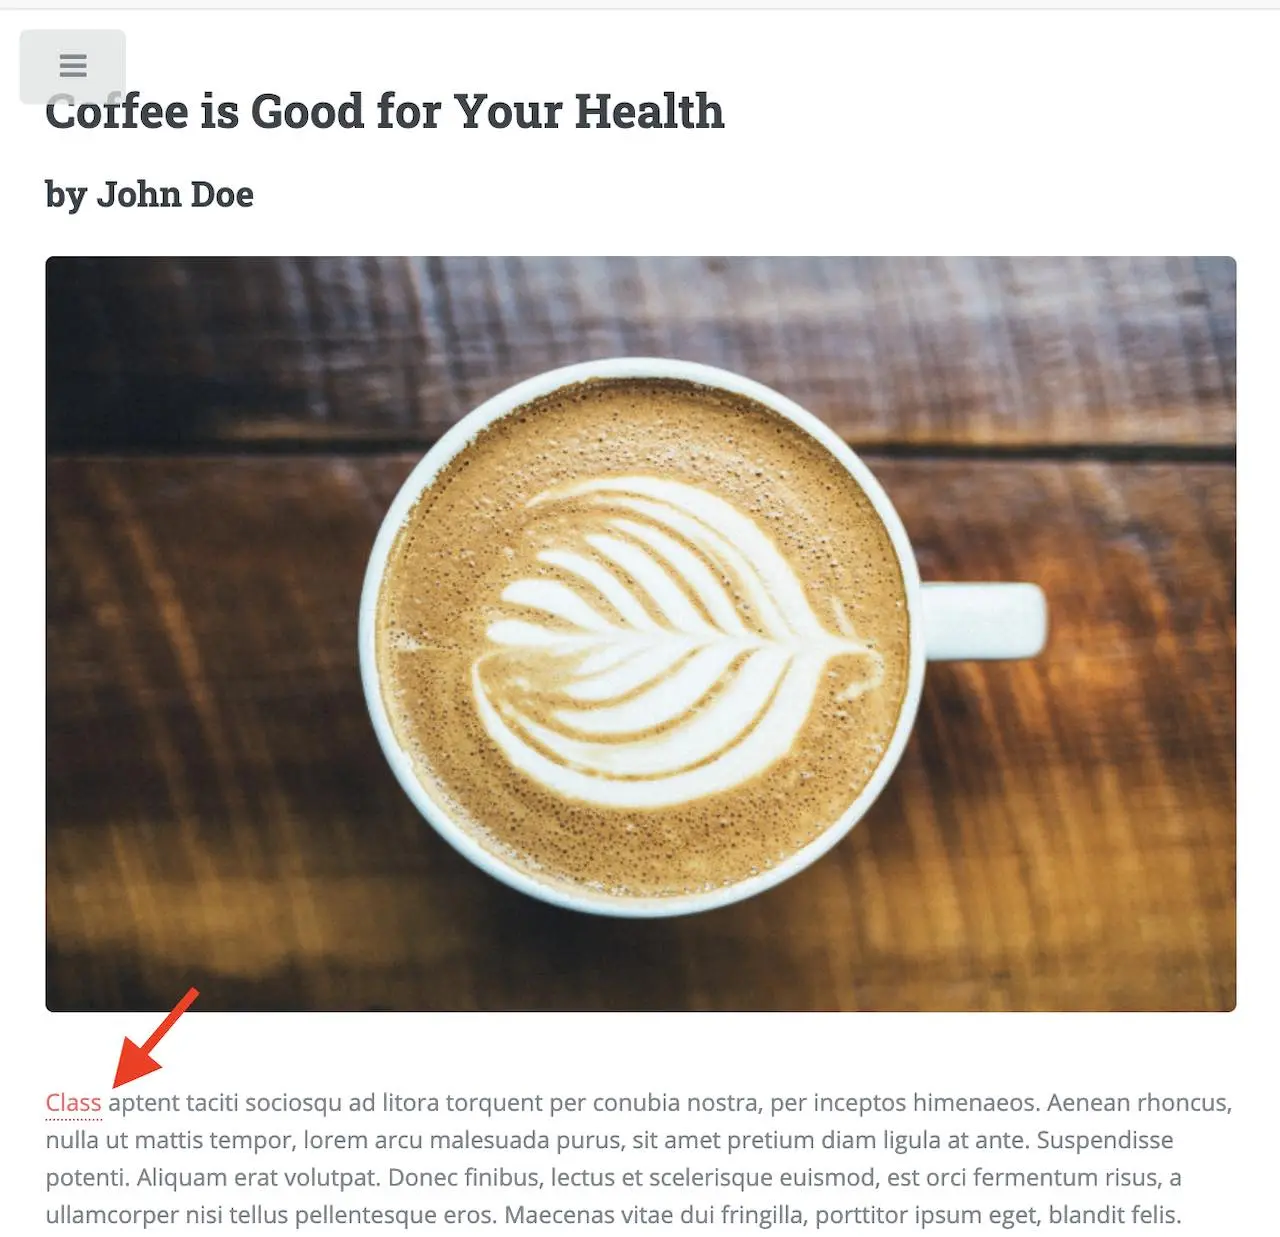
Extending TinyMCE
CrafterCMS provides a general tool for extending TinyMCE via the craftercms_tinymce_hooks. It currently allows for hooking into the following (as shown by the example here):
paste_preprocesscallbackpaste_postprocesscallbacksetupfunction
To hook into the paste pre/post process of TinyMCE, see here.
Preview Deployer Configuration
The following section of Studio’s configuration overrides allows you to setup your deployer URLs
 1############################################################
 2##                    Preview Deployer                    ##
 3############################################################
 4
 5# Default preview deployer URL (can be overridden per site)
 6studio.preview.defaultPreviewDeployerUrl: ${env:DEPLOYER_URL}/api/1/target/deploy/{siteEnv}/{siteName}
 7# Default preview create target URL (can be overridden per site)
 8studio.preview.createTargetUrl: ${env:DEPLOYER_URL}/api/1/target/create_if_not_exists
 9# Default preview create target URL (can be overridden per site)
10studio.preview.deleteTargetUrl: ${env:DEPLOYER_URL}/api/1/target/delete-if-exists/{siteEnv}/{siteName}
11# URL to the preview repository (aka Sandbox) where authors save work-in-progress
12studio.preview.repoUrl: ${env:CRAFTER_DATA_DIR}/repos/sites/{siteName}/sandbox
Preview Search Configuration
The following section of Studio’s configuration overrides allows you to set URLs for search in preview.
1############################################################
2##                   Preview Search                       ##
3############################################################
4
5studio.preview.search.createUrl: ${env:SEARCH_URL}/api/2/admin/index/create
6studio.preview.search.deleteUrl: ${env:SEARCH_URL}/api/2/admin/index/delete/{siteName}
Search
The following section of Studio’s configuration overrides allows you to setup the url for search
 1################################################################
 2##                           Search                           ##
 3################################################################
 4# URLs to connect to Search
 5studio.search.urls: ${env:SEARCH_URL}
 6# The username for Search
 7studio.search.username: ${env:SEARCH_USERNAME}
 8# The password for Search
 9studio.search.password: ${env:SEARCH_PASSWORD}
10# The connection timeout in milliseconds, if set to -1 the default will be used
11studio.search.timeout.connect: -1
12# The socket timeout in milliseconds, if set to -1 the default will be used
13studio.search.timeout.socket: -1
14# The number of threads to use, if set to -1 the default will be used
15studio.search.threads: -1
16# Indicates if keep alive should be enabled for sockets used by the search client, defaults to false
17studio.search.keepAlive: false
The following properties allow you to configure the search connection pool max values for total connections and connections per route:
Since 4.5.01# The max total connections, if set to -1 the default will be used
2studio.search.maxTotalConnections: -1
3# The max connections per route, if set to -1 the default will be used
4studio.search.maxConnectionsPerRoute: -1
The default max connections per route is set to 2 and max total connections is set to 20.
Cache Settings
Here are the cache control settings for templates and assets:
# If Studio should cache its FreeMarker templates
studio.cache.templates: true
# Indicates if the browser should cache responses for static-assets
studio.cache.assets.enabled: true
# The max age in seconds that the browser should cache responses for requests matching `studio.cache.assets.maxAge.includeUrls`
studio.cache.assets.maxAge: 3600
# The urls that should include max-age=<studio.cache.assets.maxAge> in Cache-Control header. Other urls will be set to default max-age=0, must-revalidate
studio.cache.assets.maxAge.includeUrls: /static-assets/**,/1/plugin/file/**
Forwarded Headers
The following section of Studio’s configuration overrides allows you to configure forwarded headers to resolve the actual hostname and protocol when it is behind a load balancer or reverse proxy. This is especially useful when setting up Studio behind a load balancer in AWS.
1##################################################
2##             Forwarded Headers                ##
3##################################################
4# Indicates if Forwarded or X-Forwarded headers should be used when resolving the client-originated protocol and
5# address. Enable when Studio is behind a reverse proxy or load balancer that sends these.
6studio.forwarded.headers.enabled: false
Policy Headers
Content Security Policy (CSP) Header
Since 4.1.2The following allows you to configure which resources can be loaded (e.g. JavaScript, CSS, Images, etc.) and the URLs that they can be loaded from.
1# Value for the Content-Security-Policy header
2studio.security.headers.contentSecurityPolicy.value: default-src 'unsafe-inline'
3# Set to true to enable the Content-Security-Policy-Report-Only header (this will report in the user agent console instead of actually blocking the requests)
4studio.security.headers.contentSecurityPolicy.reportOnly: true
To block offending requests, set studio.security.headers.contentSecurityPolicy.reportOnly to false.
This property is set to true by default
X-Permitted-Cross-Domain-Policies Header
The following allows you to configure what other domains you want to allow access to your domain.
The X-PERMITTED-CROSS-DOMAIN-POLICIES header is set to none (do not allow any embedding) by default.
1# Value for the X-PERMITTED-CROSS-DOMAIN-POLICIES header
2studio.security.headers.permittedCrossDomainPolicies.value: none
Referrer Policy Header
Since 4.3.1The following allows you to limit the information available in the Referer header or to not send the Referer header.
The referrer policy header is set to NO_REFERRER (Never send the Referer header) by default.
1# Value for Referrer-Policy header.
2# Possible values are defined in org.springframework.security.web.header.writers.ReferrerPolicyHeaderWriter.ReferrerPolicy
3studio.security.headers.referrerPolicy.value: NO_REFERRER
Note
Possible referrer policy values are defined in org.springframework.security.web.header.writers.ReferrerPolicyHeaderWriter.ReferrerPolicy
Deployer HTTP Requests
Since 4.2.0The following section of Studio’s configuration overrides allows you to set the timeout for Deployer HTTP requests. The default timeout is 5 minutes.
1# Response timeout in seconds for deployer http requests
2studio.deployer.request.timeoutSeconds: 300
Serverless Delivery Targets
The following section of Studio’s configuration overrides allows you to set up serverless delivery.
 1##########################################################
 2##                 Serverless Delivery                  ##
 3##########################################################
 4# Indicates if serverless delivery is enabled
 5# studio.serverless.delivery.enabled: false
 6# The URL for the serverless delivery deployer create URL
 7# studio.serverless.delivery.deployer.target.createUrl: ${studio.preview.createTargetUrl}
 8# The URL for the serverless delivery deployer delete URL
 9# studio.serverless.delivery.deployer.target.deleteUrl: ${studio.preview.deleteTargetUrl}
10# The template name for serverless deployer targets
11# studio.serverless.delivery.deployer.target.template: aws-cloudformed-s3
12# Replace existing target configuration if one exists?
13# studio.serverless.delivery.deployer.target.replace: false
14# The URL the deployer will use to clone/pull the site's published repo. When the deployer is in a separate node
15# (because of clustering), this URL should be an SSH/HTTP URL to the load balancer in front of the Studios
16# studio.serverless.delivery.deployer.target.remoteRepoUrl: ${env:CRAFTER_DATA_DIR}/repos/sites/{siteName}/published
17# The deployer's local path where it will store the clone of the published site. This property is not needed if
18# the deployer is not the preview deployer, so you can leave an empty string ('') instead
19# studio.serverless.delivery.deployer.target.localRepoPath: ${env:CRAFTER_DATA_DIR}/repos/aws/{siteName}
20# Parameters for the target template. Please check the deployer template documentation for the possible parameters.
21# The following parameters will be sent automatically, and you don't need to specify them: env, site_name, replace,
22# disable_deploy_cron, local_repo_path, repo_url, use_crafter_search
23# studio.serverless.delivery.deployer.target.template.params:
24#   # The delivery search endpoint (optional is authoring is using the same one, specified in the SEARCH_URL env variable)
25#   search_url:
26#   aws:
27#     # AWS region (optional if specified through default AWS chain)
28#     region: us-east-1
29#     # AWS access key (optional if specified through default AWS chain)
30#     default_access_key:
31#     # AWS secret key (optional if specified through default AWS chain)
32#     default_secret_key:
33#     cloudformation:
34#       # AWS access key (optional if aws.accessKey is specified)
35#       access_key:
36#       # AWS secret key (optional if aws.secretKey is specified)
37#       secret_key:
38#       # Namespace to use for CloudFormation resources (required when target template is aws-cloudformed-s3)
39#       namespace: myorganization
40#       # The domain name of the serverless delivery LB (required when target template is aws-cloudformed-s3)
41#       deliveryLBDomainName:
42#       # The SSL certificate ARN the CloudFront CDN should use (optional when target template is aws-cloudformed-s3)
43#       cloudfrontCertificateArn:
44#       # The alternate domains names (besides *.cloudfront.net) for the CloudFront CDN (optional when target template is aws-cloudformed-s3)
45#       alternateCloudFrontDomainNames:
CloudFormation Capabilities
Since 4.2.0The following section of Studio’s configuration overrides allows you to configure CloudFormation capabilities.
This allows users to pass in the capabilities from the Deployer target configuration in custom-serverless-site-stack.yaml
See AWS CloudFormation Target for more information.
1# # A comma-separated string listing the required capabilities for the CloudFormation stack. Ex: CAPABILITY_IAM,CAPABILITY_NAMED_IAM,CAPABILITY_AUTO_EXPAND (optional)
2# stackCapabilities:
Here’s an example of configuring the CAPABILITY_IAM, CAPABILITY_NAMED_IAM and CAPABILITY_AUTO_EXPAND stack
capabilities:
studio.serverless.delivery.deployer.target.template.params:
  aws:
    ...
    cloudformation:
    ...
      stackCapabilities: CAPABILITY_IAM,CAPABILITY_NAMED_IAM,CAPABILITY_AUTO_EXPAND
Workflow Notifications Configuration
Crafter Studio provides a simple workflow option that includes submission, review/reject and approve and publish immediate / publish on a schedule options. This document covers the configuration of the HTML notifications that can be sent at each point in the workflow. To setup your email server, please see SMTP Configuration (Email)
Basics
All configuration for the notification system is done by a site admin (on a per site basis) in the following configuration file:
Where
<notificationConfig>
    ...
</notificationConfig>
This can be modified/accessed through Crafter Studio, by going to the Sidebar, then clicking on ![]() -> Configuration -> Notification Configuration
-> Configuration -> Notification Configuration
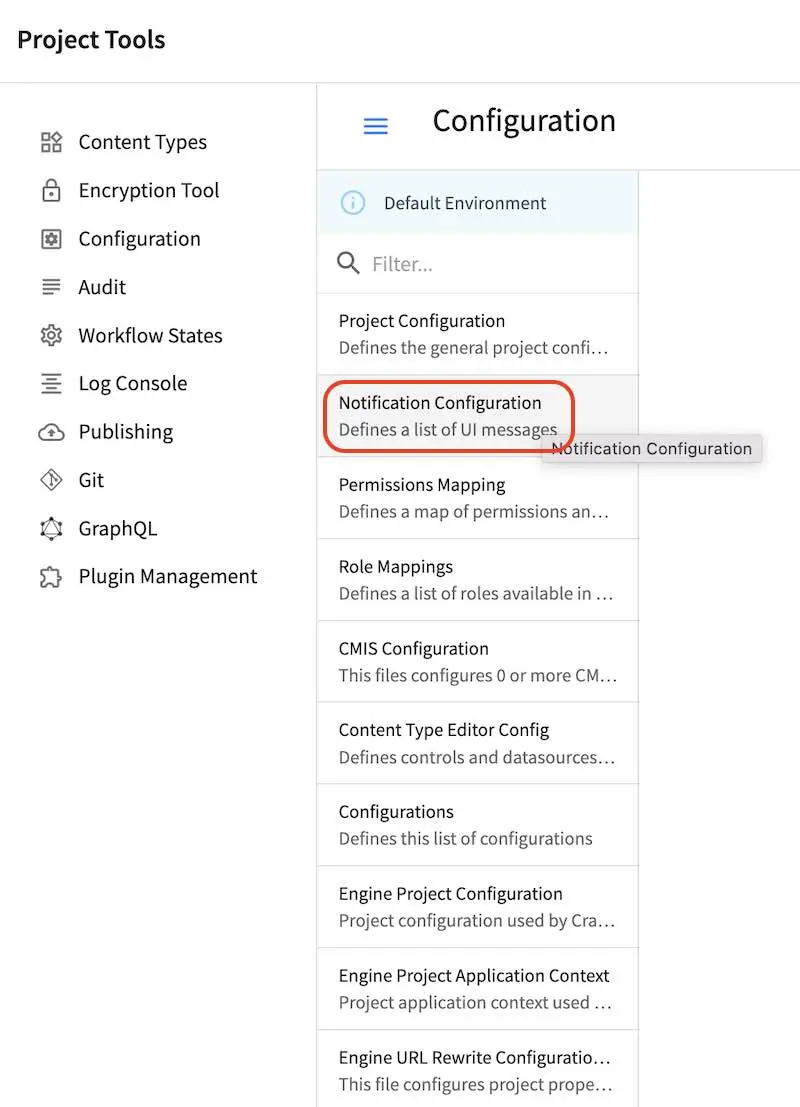
Templates
Templates are used for the email messages sent for workflow states in the configuration file mentioned above. The template used is Freemarker (also known as FTL). Variables are referenced in the template like ${VARIABLE} or as part of a Freemarker statement like <#list files as file>…</#list> Dates can be formatted like so: scheduleDate?string[“MMMMM dd, yyyy ‘at’ hh:mm a”]}
A full guide to FTL can be found here: http://freemarker.org/
Template Variables
Here are some template variables used in CrafterCMS:
Common Variables
Variable Name
|
Description
|
|---|---|
date
|
Date for submission
|
files
|
Collection of file objects in submission.
Usually iterated over <#list files as file>…</#list>
|
file.name
|
File name including full repository path
|
file.internalName
|
File internal CMS label
|
submitter
|
Content submitter object, has sub properties
|
submitter.firstName
|
First name
|
submitter.lastName
|
Last Name
|
submitter.username
|
Authoring User Name / ID
|
submissionComments
|
String containing submission comments
|
scheduleDate
|
Date content is scheduled for
|
siteName
|
ID of the site
|
liveUrl
|
Live Server URL base
|
authoringUrl
|
Authoring Server URL base
|
Deployment Error Notice Variable
Variable Name
|
Description
|
|---|---|
deploymentError
|
Error message on deployment. Currently must be
addressed as ${deploymentError.toString()}
|
Configure Who Gets Notifications
Configure who gets notifications by entering the email addresses of the people you want to send notifications to, in between the tags <deploymentFailureNotification> and/or <approverEmails>
 1<notificationConfig>
 2  <lang name="en">
 3    <deploymentFailureNotification>
 4      <email>EMAIL ADDRESS TO NOTIFY ON FAILURE</email>
 5    </deploymentFailureNotification>
 6    <approverEmails>
 7      <email>EMAIL ADDRESS TO NOTIFY SUBMISSION</email>
 8      <email>EMAIL ADDRESS TO NOTIFY SUBMISSION</email>
 9    </approverEmails>
10
11        ...
12  </lang>
13</notificationConfig>
Configure Studio Workflow Dialog Messages
Below is a sample of Studio workflow dialog messages defined in our notifications configuration file.
1 <notificationConfig>
2 <lang name="en">
3 ...
4
5 <generalMessages>
6 <content key="scheduling-policy"><![CDATA[The {siteName} processes all publishing requests each business day, between 4PM EST and 6PM EST, unless a specific date/time is requested.<br/><br/>All requests received after 4PM EST may not be processed until the next business day.<br/><br/>If you have any questions about this policy or need a publish request processed immediately, please email the administrator.]]>
7 </content>
8 </generalMessages>
9
10 <cannedMessages>
11 <content title="Not Approved" key="NotApproved"><![CDATA[Please make the following revisions and resubmit.]]></content>
12 <content title="Typos" key="Typos"><![CDATA[This content has multiple misspellings and/or grammatical errors. Please correct and re-submit.]]></content>
13 <content title="Incorrect Branding" key="IB"><![CDATA[This content uses incorrect or outdated terms, images, and/or colors. Please correct and re-submit.]]></content>
14 <content title="Broken Links" key="BrokenLinks"><![CDATA[This content has non-working links that may be due to incomplete and/or misspelled URLs. Any links directing users to websites without the Acme.com primary navigation, or directing users to a document must open in a new browser window. Please correct and re-submit.]]></content>
15 <content title="Needs Section Owner's Approval" key="NSOA"><![CDATA[This content needs the approval of its section's owner to insure there is no negative impact on other pages/areas of section, etc. Once you have their approval please email the Web Marketing Operations Team and re-submit this publish request.]]></content>
16 </cannedMessages>
17
18 <completeMessages>
19 <content key="submitToGoLive"><![CDATA[An email notification has been sent to the team. Your content will be reviewed and (if approved) pushed live between 4PM EST and 6PM EST of the business day that the request was received. If this request is sent after business hours, it will be reviewed and (if approved) pushed live as soon as possible, the next business day.<br/><br/>If you need to make further revisions to this item, please re-submit this publish request after making them.<br/><br/>If this request needs immediate attention, please email the administrator.]]></content>
20 <content key="delete">
21 Item(s) has been pushed for delete. It will be deleted shortly.
22 </content>
23 <content key="go-live">Item(s) has been pushed live. It will be visible on the live site shortly.</content>
24 <content key="schedule-to-go-live">The scheduled item(s) will go live on: ${date}.<br/><br/></content>
25 <content key="reject">Rejection has been sent. Item(s) have NOT been pushed live and have returned to draft state.</content>
26 <content key="delete">Item(s) has been pushed for delete. It will be deleted shortly.</content>
27 <content key="schedule-to-go-live">Item(s) have been scheduled to go live.</content>
28 </completeMessages>
29
30 ...
31 </lang>
32 </notificationConfig>
Configure Templates
Below is an example of a configured email messages for each point in the workflow, found in between the tag <emailTemplates> in the notifications configuration file.
  1<notificationConfig>
  2  <lang name="en">
  3    ...
  4    <emailTemplates>
  5      <emailTemplate key="deploymentError">
  6        <subject>Deployment error on site ${siteName}</subject>
  7        <body><![CDATA[
  8                <html>
  9                  <head>
 10                    <meta charset="utf-8"/>
 11                  </head>
 12                  <body style=" font-size: 12pt;">
 13                    <p>
 14                      The following content was unable to deploy:
 15                      <ul>
 16                        <#list files as file>
 17                          <li>${file.internalName!file.name}</li>
 18                        </#list>
 19                      </ul>
 20                      Error:<br/>
 21                      ${deploymentError.toString()}
 22                      <br/><br/>
 23                      <a href="${liveUrl}" >
 24                        <img style="max-width: 350px;  max-height: 350px;" src="${liveUrl}/static-assets/images/workflow-email-footer.png" alt="" />
 25                      </a>
 26                    </p>
 27                  </body>
 28                </html>
 29        ]]></body>
 30      </emailTemplate>
 31
 32      <emailTemplate key="contentApproval">
 33        <subject><![CDATA[<#if scheduleDate??>Content Scheduled <#else>Content Approved</#if>]]></subject>
 34        <!-- Timezone can/is being overwritten in the following template -->
 35        <body><![CDATA[
 36                 <#setting time_zone='EST'>
 37                 <html>
 38                   <head>
 39                     <meta charset="utf-8"/>
 40                   </head>
 41                   <body style=" font-size: 12pt;">
 42                     <p>
 43                       <#if scheduleDate??>
 44                         The following content has been scheduled for publishing on ${scheduleDate?string["MMM dd, yyyy 'at' hh:mm a"]} Eastern Time.
 45                       <#else>
 46                         The following content has been reviewed and approved by ${approver.firstName!approver.username} ${approver.lastName!""}:
 47                       </#if>
 48                       <ul>
 49                         <#list files as file>
 50                           <#if file.page>
 51                             <a href="${liveUrl}/${file.browserUri!""}">
 52                           </#if>
 53                           <li>${file.internalName!file.name}</li>
 54                             <#if file.page>
 55                               </a>
 56                             </#if>
 57                         </#list>
 58                       </ul><br/>
 59                       <#if scheduleDate??>
 60                         <a href="${liveUrl}">Click Here to View Your Published Content</a>
 61                         <br/>
 62                       </#if>
 63                       <a href="${authoringUrl}/site-dashboard" >
 64                         <img style="max-width: 350px;  max-height: 350px;" src="${liveUrl}/static-assets/images/workflow-email-footer.png" alt="" />
 65                       </a>
 66                     </p>
 67                   </body>
 68                 </html>
 69                 ]]></body>
 70      </emailTemplate>
 71
 72      <emailTemplate key="submitToApproval">
 73        <subject>Content Review</subject>
 74        <body><![CDATA[
 75                 <#setting time_zone='EST'>
 76                 <html>
 77                   <head>
 78                     <meta charset="utf-8"/>
 79                   </head>
 80                   <body style=" font-size: 12pt">
 81                     <p>
 82                       ${submitter.firstName!submitter.username} ${submitter.lastName} has submitted items for your review:
 83                       <ul>
 84                         <#list files as file>
 85                           <#if file.page>
 86                             <a href="${authoringUrl}/preview/#/?page=${file.browserUri!""}&site=${siteName}">
 87                           </#if>
 88                           <li>${file.internalName!file.name}</li>
 89                           <#if file.page>
 90                                 </a>
 91                           </#if>
 92                         </#list>
 93                       </ul>
 94                       <#if submissionComments?has_content>
 95                         Comments:<br/>
 96                         ${submissionComments!""}
 97                         <br/>
 98                       </#if><br/>
 99                       <a href="${previewUrl}/site-dashboard">Click Here to View Content Waiting for Approval</a>
100                       <br/><br/>
101                       <a href="${liveUrl}" >
102                         <img style="max-width: 350px;  max-height: 350px;" src="${liveUrl}/static-assets/images/workflow-email-footer.png" alt="" />
103                       </a>
104                     </p>
105                   </body>
106                 </html>
107                 ]]></body>
108      </emailTemplate>
109
110      <emailTemplate key="contentRejected">
111        <subject>Content Requires Revision</subject>
112        <body><![CDATA[
113                             <#setting time_zone='EST'>
114                 <html>
115                   <head>
116                     <meta charset="utf-8"/>
117                   </head>
118                   <body style=" font-size: 12pt;">
119                     <p>
120                       The following content has been reviewed and requires some revision before it can be approved:
121                       <ul>
122                         <#list files as file>
123                           <#if file.page>
124                             <a href="${authoringUrl}/preview/#/?page=${file.browserUri!""}&site=${siteName}">
125                           </#if>
126                           <li>${file.internalName!file.name}</li>
127                           <#if file.page>
128                             </a>
129                           </#if>
130                         </#list>
131                       </ul>
132                       Reason:<br/>
133                       ${rejectionReason!""}
134                       <br/><br/>
135                       <a href="${authoringUrl}/site-dashboard" >
136                         <img style="max-width: 350px;  max-height: 350px;" src="${liveUrl}/static-assets/images/workflow-email-footer.png" alt="" />
137                       </a>
138                     </p>
139                   </body>
140                 </html>
141                 ]]></body>
142      </emailTemplate>
143    </emailTemplates>
144  </lang>
145</notificationConfig>
Validations Regex
Since 4.0.3CrafterCMS validates API requests related to users and groups through regex restrictions to avoid malicious payloads.
The following section of Studio’s configuration overrides allows you to configure the regex used for validating user names and group names to suit your needs.
##########################################################
##                  Input Validations                   ##
##########################################################
# These properties override default validation regex patterns
# from crafter common validations.
# Key should have the form `studio.validation.regex.KEY_NAME`
# Value should be a valid java regex.
#
# studio.validation.regex.HTTPParameterName: "^[a-zA-Z0-9_\\-]{1,32}$"
# studio.validation.regex.SITEID: "^[a-z0-9\-_]*$"
# studio.validation.regex.EMAIL: "^([\\w\\d._\\-#])+@([\\w\\d._\\-#]+[.][\\w\\d._\\-#]+)+$"
# studio.validation.regex.USERNAME: "^[a-zA-Z][\\w.\\-@+]+$"
# studio.validation.regex.GROUP_NAME: "^[a-zA-Z][\\w.\\-]*$"
# studio.validation.regex.ALPHANUMERIC: "^[a-zA-Z0-9]*$"
# studio.validation.regex.SEARCH_KEYWORDS: "^[\\w\\s\\-\\\"\\'\\.!@#$%&\\*\\/\\(\\)\\[\\]\\p{IsLatin}]*$"
# studio.validation.regex.CONTENT_PATH_WRITE: "^/?([\\w\\- ]+/?)*(((crafter\\-level\\-descriptor\\.level)|([\\w\\- ]))+\\.[\\w]+)?$"
# studio.validation.regex.CONTENT_PATH_READ: "^/?([\\w\\p{IsLatin}@$%^&{}\\[\\]()+\\-=,.:~'`]+(\\s*[\\w\\p{IsLatin}/@$%^&{}\\[\\]()+\\-=,.:~'`])*(/?))*$"
# studio.validation.regex.CONTENT_FILE_NAME_WRITE: "^((crafter\\-level\\-descriptor\\.level)|([a-z0-9_\\-])+)\\.xml$"
# studio.validation.regex.CONFIGURATION_PATH: "^([a-z0-9\\-_/]+([.]*[a-z0-9\\-_])+)*(\\.[\w]+)?/?$"
Disk Monitoring
Since 4.4.3Crafter Studio watches disk utilization for the data/repos directory and takes action when a threshold is reached.
The following section of Studio’s configuration overrides allows you to configure the thresholds, notification email and webhook when a threshold is reached.
##################################################
##               Disk monitoring                ##
##################################################
studio.monitoring.disk.highWaterMark: 90
studio.monitoring.disk.lowWaterMark: 85
studio.monitoring.disk.cron: '0 0/15 * * * ?'

studio.monitoring.disk.notifications.encoding: UTF-8
studio.monitoring.disk.notifications.dateTimePattern: MM/dd/yyyy hh:mm:ss.SSS a z

# Email configs
studio.monitoring.disk.notifications.email.enabled: true
studio.monitoring.disk.notifications.email.subject: Disk space warning
studio.monitoring.disk.notifications.email.to: admin@example.com
studio.monitoring.disk.notifications.email.template: notification/templates/email/disk-monitor-alarm.ftl
studio.monitoring.disk.notifications.email.html: true
# Webhook configs
studio.monitoring.disk.notifications.webhook.enabled: false
studio.monitoring.disk.notifications.webhook.url: http://example.com/notify
studio.monitoring.disk.notifications.webhook.method: POST
studio.monitoring.disk.notifications.webhook.contentType: application/json
studio.monitoring.disk.notifications.webhook.template: notification/templates/webhook/disk-monitor-alarm.ftl
Where:
studio.monitoring.disk.highWaterMark: The disk utilization percentage level that triggers an action to perform
git gc, then the low watermark threshold is checked after, which determines whether an alarm is set.studio.monitoring.disk.lowWaterMark: The disk utilization percentage level that triggers the low disk space alarm. Once the low disk space alarm is set, it gets cleared when the disk utilization percentage goes below the low watermark. Note that the low watermark value must be less than the high watermark value.
studio.monitoring.disk.cron: The cron expression for scheduling how often disk utilization is checked against the configured thresholds (high and low watermark).
studio.monitoring.disk.notifications.webhook.method: The webhook HTTP request method (verb), e.g. POST, PUT, GET, etc.
studio.monitoring.disk.notifications.email.template: The template used for sending the alarm state email Note also that emails are sent using the email in
studio.mail.from.defaultas the from address. See SMTP Configuration (Email) for more information on configuring the mail client to send emails from Crafter Studio.studio.monitoring.disk.notifications.webhook.template: The default built-in template for webhook notification in
studio.monitoring.disk.notifications.webhook.templateworks for slack. If you wish to change the webhook response, simply add your customized templates toCRAFTER_HOME/bin/apache-tomcat/shared/classes/crafter/studio/extension.
To change the default templates (webhook template or email template) to a custom one, simply add your customized
templates to CRAFTER_HOME/bin/apache-tomcat/shared/classes/crafter/studio/extension.
For example, we have a custom webhook template my-disk-monitor-alarm.ftl that we will now place under
CRAFTER_HOME/bin/apache-tomcat/shared/classes/crafter/studio/extension/my-disk-monitor-alarm.ftl
that we want to use instead of the default. We’ll now configure Studio to use our custom template by modifying the
studio.monitoring.disk.notifications.webhook.template value in the Studio configuration override file:
studio.monitoring.disk.notifications.webhook.template: my-disk-monitor-alarm.ftl
Commit Message
Here are the default commit messages when someone makes content changes and can be customized by overriding them using one of the override files.
 1# Repository commit prologue message
 2studio.repo.commitMessagePrologue:
 3# Repository commit postscript message
 4studio.repo.commitMessagePostscript:
 5# Sandbox repository write commit message
 6studio.repo.sandbox.write.commitMessage: "User {username} wrote content {path}"
 7# Published repository commit message
 8studio.repo.published.commitMessage: "Publish event triggered by {username} on {datetime} via {source}.\n\nPublish note from user: \"{message}\"\n\nCommit ID: {commit_id}\n\nPackage ID: {package_id}"
 9# Commit message to mark commit not to process when syncing database
10studio.repo.syncDB.commitMessage.noProcessing: "STUDIO: NO PROCESSING"
11# Create new repository commit message
12studio.repo.createRepository.commitMessage: "Create new repository."
13# Create sandbox branch commit message
14studio.repo.createSandboxBranch.commitMessage: "Create {sandbox} branch."
15# Initial commit message
16studio.repo.initialCommit.commitMessage: "Initial commit."
17# Create as orphan commit message
18studio.repo.createAsOrphan.commitMessage: "Created as orphan."
19# Blueprints updated commit message
20studio.repo.blueprintsUpdated.commitMessage: "Blueprints updated."
21# Create folder commit message
22studio.repo.createFolder.commitMessage: "Created folder site: {site} path: {path}"
23# Delete content commit message
24studio.repo.deleteContent.commitMessage: "Delete file {path}"
25# Move content commit message
26studio.repo.moveContent.commitMessage: "Moving {fromPath} to {toPath}"
27# Copy content commit message
28studio.repo.copyContent.commitMessage: "Copying {fromPath} to {toPath}"
Audit Log
Since 4.1.3CrafterCMS allows disabling the job for populating the audit log from external git changes. When disabled, the audit table will not log external operations synced from git. Crafter Studio updates and changes are always audited. Disabling this job improves performance for large git pull operations.
To disable populating the audit log, set the studio.clockJob.task.auditLogProcessing.disableAudit property to true.
# Disable the db audit log population
studio.clockJob.task.auditLogProcessing.disableAudit: false
Publishing Blacklist
CrafterCMS allows the creation of a publishing blacklist to prevent certain unwanted items from being published.
A comma-separated list of regexes is used to configure items that should not be published.
To configure the publishing blacklist, using your favorite editor open CRAFTER_HOME/bin/apache-tomcat/shared/classes/crafter/studio/extension/studio-config-override.yaml or open the Global Studio Configuration Override file studio-config-override.yaml located under CRAFTER_HOME/data/repos/global/configuration that can be accessed from Studio from the Main Menu under Global Config.
Add the following lines with the regex for the item you wish not to be published. By default, .keep files are not published by CrafterCMS. Just add a , then your regex after .*/\.keep:
# Publishing blacklist configuration, items matching regexes on this list will never be published
studio.configuration.publishing.blacklist.regex: >-
    .*/\.keep
Items in the publishing blacklist will not be published but will instead be marked as published and logged (debug level) in the tomcat log, why the item was not published.
[DEBUG] 2021-04-22T08:16:01,023 [studio.clockTaskExecutor-42] [deployment.PublishingManagerImpl] | File /static-assets/css/.keep of the site mysite will not be published because it matches the configured publishing blacklist regex patterns.
Example
Let’s take a look at an example.
Create a site using the website editorial blueprint, then create the folder mytempimages under /static-assets/images.
Say, you do not want files under /static-assets/images/mytempimages to be published when a user performs a bulk publish or Approve & Publish of multiple items from the dashboard. We’ll add to the studio.configuration.publishing.blacklist.regex the regex for items under /static-assets/images/mytempimages
# Publishing blacklist configuration, items matching regexes on this list will never be published
studio.configuration.publishing.blacklist.regex: >-
    .*/\.keep,\/static-assets\/images\/mytempimages\/.*
Save your changes and restart Studio.
Upload an image under /static-assets/images/mytempimages
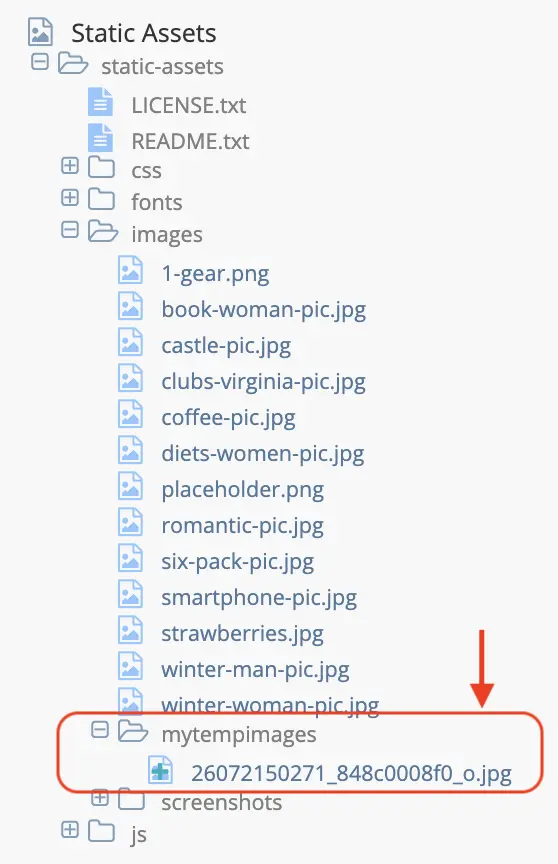
Publish the uploaded image by right-clicking on the image, then select Approve & Publish. The Approve for Publish dialog will open up. Select Items should be published now, then click on the Submit button.
After publishing, open the Sidebar again and navigate to /static-assets/images/mytempimages. Notice that your file has been marked published.

Let’s take a look at the tomcat log, notice that it was logged that the file we uploaded will not be published because it is in the publishing blacklist:
[INFO] 2021-04-22T12:48:24,903 [studio.clockTaskExecutor-36] [job.StudioPublisherTask] | Starting publishing on environment live for site mysite
[DEBUG] 2021-04-22T12:48:28,990 [studio.clockTaskExecutor-36] [deployment.PublishingManagerImpl] | Environment is live, transition item to LIVE state mysite:/static-assets/images/mytempimages/26072150271_848c0008f0_o.jpg
[DEBUG] 2021-04-22T12:48:28,992 [studio.clockTaskExecutor-36] [deployment.PublishingManagerImpl] | File /static-assets/images/mytempimages/26072150271_848c0008f0_o.jpg of the site mysite will not be published because it matches the configured publishing blacklist regex patterns.
[INFO] 2021-04-22T12:48:29,014 [studio.clockTaskExecutor-36] [job.StudioPublisherTask] | Finished publishing environment live for site mysite
Configuration Files Maximum
Since 4.1.4To set the maximum size of a project/site configuration file for the write_configuration API, set the following property:
# The maximum length of configuration content for the configuration service. Default to 512kB -> 512 * 1024
studio.configuration.maxContentSize: 524288
Git Configuration
Since 4.4.3To enable updating the Git properties listed below, set the following to true:
##################################################
##        Git configuration properties          ##
##################################################
# Git config update to following properties is performed on global configuration and might
# affect unintended repositories. Opt-out of this by setting this property to false.
studio.repo.git.global.update.enabled: true
To configure the git gc options prune expire and auto pack limit, set the following properties:
# git gc --auto will consolidate into one the packs older than this value
# Notice that this property works when the number of packs is greater than gc.autoPackLimit.
# See https://git-scm.com/docs/git-gc#Documentation/git-gc.txt-gcautoPackLimit
# This value is used to configure "gc.prunePackExpire" property, leave empty to skip property setting
studio.repo.gc.prunePackExpire: 1.hour.ago
# Set global gc.autoPackLimit property
studio.repo.gc.autoPackLimit: 50
where:
studio.repo.gc.prunePackExpire: This maps to Git’s “gc.pruneExpire”. Unreachable objects older than this value are pruned when running
git gc. Example values accepted are:1.hour.ago,2.weeks.ago,now, ornever. See Prune expire in the Git docs for valid values for the option.studio.repo.gc.autoPackLimit: This maps to Git’s “gc.autoPackLimit”. Packs are consolidated when the number of packs exceeds the value in this property. See Auto pack limit in the Git docs for valid values for the option.
These properties are configured on Studio startup as git global properties. Values configured are just passed to git. Remember that you need to restart Studio for the changes you make to the above properties to take effect.
Important
The studio.repo.git.global.update.enabled property allows you to opt-out of the git config update.
Note the importance of disabling this property for local developer deployment since it’s a global change
of Git’s default behavior and may affect unintended repositories.
Content Type Editor Config
The Content Type Editor Config configuration file defines what tools are available in the Content Type Editor.
This configuration is unique in that a configuration file exists in the following location of
each project: SITENAME/config/studio/administration/site-config-tools.xml
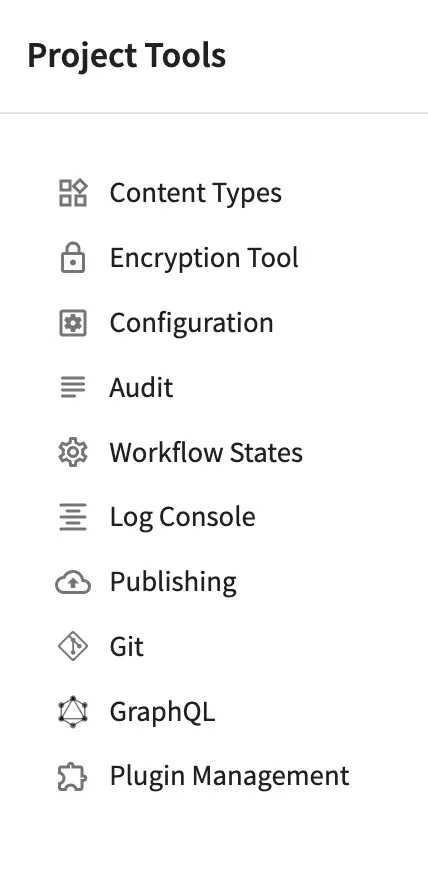
To modify the Content Type Editor Config configuration, click on ![]() from the bottom of the Sidebar,
then click on Configuration and select Content Type Editor Config from the list.
from the bottom of the Sidebar,
then click on Configuration and select Content Type Editor Config from the list.
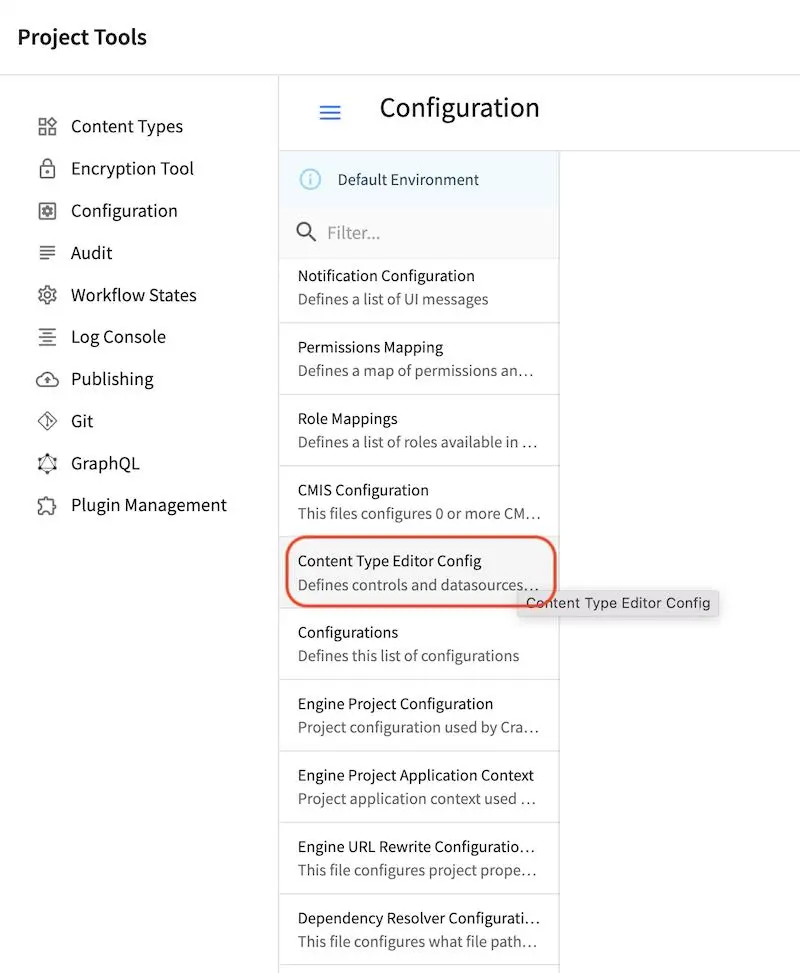
Sample
Here is a sample Content Type Editor Config configuration file (click on the triangle on the left to expand/collapse):
Sample Content Type Editor Config configuration file
1<?xml version="1.0" encoding="UTF-8"?>
2<!--
3 ~ Copyright (C) 2007-2022 Crafter Software Corporation. All Rights Reserved.
4 ~
5 ~ This program is free software: you can redistribute it and/or modify
6 ~ it under the terms of the GNU General Public License version 3 as published by
7 ~ the Free Software Foundation.
8 ~
9 ~ This program is distributed in the hope that it will be useful,
10 ~ but WITHOUT ANY WARRANTY; without even the implied warranty of
11 ~ MERCHANTABILITY or FITNESS FOR A PARTICULAR PURPOSE. See the
12 ~ GNU General Public License for more details.
13 ~
14 ~ You should have received a copy of the GNU General Public License
15 ~ along with this program. If not, see <http://www.gnu.org/licenses/>.
16 -->
17
18<!--
19 Site Configuration Tools
20
21 This file helps configure the Site Config section with tools. The tools specified here appear on the left-
22 hand-side of the Site Config section.
23
24 The file has the the following structure:
25 <config>
26 <tools>
27 <tool>
28 <name>sync-from-repository</name>
29 <label>Sync From Repository</label>
30 <icon> (Optional icon configuration)
31 <styles> ( Change default icon styles - using css rules )
32 <color>#409a00</color>
33 <font-size>16px</font-size>
34 <font-width>bold</font-width>
35 </styles>
36 </icon>
37 <... tool specific configuration ../>
38 </tool>
39 </tools>
40 </config>
41-->
42<config>
43 <version>4.0.6</version>
44 <tools>
45 <tool>
46 <name>content-types</name>
47 <label>Content Types</label>
48 <formSection>
49 <icon>
50 <class>fa-object-group</class>
51 </icon>
52 </formSection>
53 <repeatSection>
54 <icon>
55 <class>fa-repeat</class>
56 </icon>
57 </repeatSection>
58 <controls>
59 <control>
60 <name>input</name>
61 <icon>
62 <class>fa-pencil-square-o</class>
63 </icon>
64 </control>
65 <control>
66 <name>numeric-input</name>
67 <icon>
68 <class>fa-pencil-square</class>
69 </icon>
70 </control>
71 <control>
72 <name>textarea</name>
73 <icon>
74 <class>fa-paragraph</class>
75 </icon>
76 </control>
77 <control>
78 <name>rte</name>
79 <icon>
80 <class>fa-code</class>
81 </icon>
82 </control>
83 <control>
84 <name>dropdown</name>
85 <icon>
86 <class>fa-sort-desc</class>
87 </icon>
88 </control>
89 <control>
90 <name>time</name>
91 <icon>
92 <class>fa-clock-o</class>
93 </icon>
94 </control>
95 <control>
96 <name>date-time</name>
97 <icon>
98 <class>fa-calendar</class>
99 <stackedclass>fa-clock-o</stackedclass>
100 </icon>
101 </control>
102 <control>
103 <name>checkbox</name>
104 <icon>
105 <class>fa-check-square-o</class>
106 </icon>
107 </control>
108 <control>
109 <name>checkbox-group</name>
110 <icon>
111 <class>fa-check-square-o</class>
112 </icon>
113 </control>
114 <control>
115 <name>node-selector</name>
116 <icon>
117 <class>fa-crosshairs</class>
118 </icon>
119 </control>
120 <control>
121 <name>image-picker</name>
122 <icon>
123 <class>fa-picture-o</class>
124 </icon>
125 </control>
126 <control>
127 <name>video-picker</name>
128 <icon>
129 <class>fa-video-camera</class>
130 </icon>
131 </control>
132 <control>
133 <name>transcoded-video-picker</name>
134 <icon>
135 <class>fa-video-camera</class>
136 </icon>
137 </control>
138 <control>
139 <name>label</name>
140 <icon>
141 <class>fa-tag</class>
142 </icon>
143 </control>
144 <control>
145 <name>page-nav-order</name>
146 <icon>
147 <class>fa-sort</class>
148 </icon>
149 </control>
150 <control>
151 <name>file-name</name>
152 <icon>
153 <class>fa-file-o</class>
154 </icon>
155 </control>
156 <control>
157 <name>auto-filename</name>
158 <icon>
159 <class>fa-file-o</class>
160 <stackedclass>fa-magic</stackedclass>
161 </icon>
162 </control>
163 <control>
164 <name>internal-name</name>
165 <icon>
166 <class>fa-font</class>
167 </icon>
168 </control>
169 <control>
170 <name>locale-selector</name>
171 <icon>
172 <class>fa-globe</class>
173 </icon>
174 </control>
175 </controls>
176 <datasources>
177 <datasource>
178 <name>components</name>
179 <icon>
180 <class>fa-puzzle-piece</class>
181 </icon>
182 </datasource>
183 <datasource>
184 <name>shared-content</name>
185 <icon>
186 <class>fa-share-alt</class>
187 </icon>
188 </datasource>
189 <datasource>
190 <name>embedded-content</name>
191 <icon>
192 <class>fa-dot-circle-o</class>
193 </icon>
194 </datasource>
195 <datasource>
196 <name>img-desktop-upload</name>
197 <icon>
198 <class>fa-picture-o</class>
199 </icon>
200 </datasource>
201 <datasource>
202 <name>img-repository-upload</name>
203 <icon>
204 <class>fa-file-image-o</class>
205 </icon>
206 </datasource>
207 <datasource>
208 <name>file-desktop-upload</name>
209 <icon>
210 <class>fa-upload</class>
211 </icon>
212 </datasource>
213 <datasource>
214 <name>file-browse-repo</name>
215 <icon>
216 <class>fa-hand-o-up</class>
217 </icon>
218 </datasource>
219 <datasource>
220 <name>WebDAV-repo</name>
221 <icon>
222 <class>fa-square-o fa-server</class>
223 </icon>
224 </datasource>
225 <datasource>
226 <name>img-WebDAV-repo</name>
227 <icon>
228 <class>fa-square-o fa-server</class>
229 </icon>
230 </datasource>
231 <datasource>
232 <name>video-WebDAV-repo</name>
233 <icon>
234 <class>fa-square-o fa-server</class>
235 </icon>
236 </datasource>
237 <datasource>
238 <name>WebDAV-upload</name>
239 <icon>
240 <class>fa-square-o fa-server</class>
241 </icon>
242 </datasource>
243 <datasource>
244 <name>img-WebDAV-upload</name>
245 <icon>
246 <class>fa-square-o fa-server</class>
247 </icon>
248 </datasource>
249 <datasource>
250 <name>video-WebDAV-upload</name>
251 <icon>
252 <class>fa-square-o fa-server</class>
253 </icon>
254 </datasource>
255 <datasource>
256 <name>S3-repo</name>
257 <icon>
258 <class>fa-file-o</class>
259 <stackedclass>fa-amazon</stackedclass>
260 </icon>
261 </datasource>
262 <datasource>
263 <name>img-S3-repo</name>
264 <icon>
265 <class>fa-square</class>
266 <stackedclass>fa-amazon fa-inverse</stackedclass>
267 </icon>
268 </datasource>
269 <datasource>
270 <name>video-S3-repo</name>
271 <icon>
272 <class>fa-film</class>
273 <stackedclass>fa-amazon</stackedclass>
274 </icon>
275 </datasource>
276 <datasource>
277 <name>S3-upload</name>
278 <icon>
279 <class>fa-file-o</class>
280 <stackedclass>fa-amazon</stackedclass>
281 </icon>
282 </datasource>
283 <datasource>
284 <name>img-S3-upload</name>
285 <icon>
286 <class>fa-square</class>
287 <stackedclass>fa-amazon fa-inverse</stackedclass>
288 </icon>
289 </datasource>
290 <datasource>
291 <name>video-S3-upload</name>
292 <icon>
293 <class>fa-film</class>
294 <stackedclass>fa-amazon</stackedclass>
295 </icon>
296 </datasource>
297 <datasource>
298 <name>video-S3-transcoding</name>
299 <icon>
300 <class>fa-film</class>
301 <stackedclass>fa-amazon</stackedclass>
302 </icon>
303 </datasource>
304 <datasource>
305 <name>video-desktop-upload</name>
306 <icon>
307 <class>fa-video-camera</class>
308 </icon>
309 </datasource>
310 <datasource>
311 <name>video-browse-repo</name>
312 <icon>
313 <class>fa-file-video-o</class>
314 </icon>
315 </datasource>
316 <datasource>
317 <name>key-value-list</name>
318 <icon>
319 <class>fa-key</class>
320 </icon>
321 </datasource>
322 <datasource>
323 <name>simpleTaxonomy</name>
324 <icon>
325 <class>fa-tags</class>
326 </icon>
327 </datasource>
328 <datasource>
329 <name>audio-desktop-upload</name>
330 <icon>
331 <class>fa-volume-up</class>
332 </icon>
333 </datasource>
334 <datasource>
335 <name>audio-browse-repo</name>
336 <icon>
337 <class>fa-file-audio-o</class>
338 </icon>
339 </datasource>
340 </datasources>
341 <objectTypes>
342 <type>
343 <label>Page</label>
344 <name>page</name>
345 <properties>
346 <property>
347 <name>display-template</name>
348 <label>Display Template</label>
349 <value></value>
350 <type>template</type>
351 </property>
352 <property>
353 <name>no-template-required</name>
354 <label>No Template Required</label>
355 <value></value>
356 <type>boolean</type>
357 </property>
358 <property>
359 <name>merge-strategy</name>
360 <label>Merge Strategy</label>
361 <value>inherit-levels</value>
362 <type>string</type>
363 </property>
364 </properties>
365 </type>
366 <type>
367 <label>Component</label>
368 <name>component</name>
369 <properties>
370 <property>
371 <name>display-template</name>
372 <label>Display Template</label>
373 <value></value>
374 <type>template</type>
375 </property>
376 <property>
377 <name>no-template-required</name>
378 <label>No Template Required</label>
379 <value></value>
380 <type>boolean</type>
381 </property>
382 <property>
383 <name>merge-strategy</name>
384 <label>Merge Strategy</label>
385 <value>inherit-levels</value>
386 <type>string</type>
387 </property>
388 </properties>
389 </type>
390
391 </objectTypes>
392 </tool>
393 <tool>
394 <name>encrypt-tool</name>
395 <label>Encryption Tool</label>
396 <icon>
397 <class>fa-lock</class>
398 </icon>
399 </tool>
400 <tool>
401 <name>admin-configurations</name>
402 <label>Configuration</label>
403 </tool>
404 <tool>
405 <name>audit</name>
406 <label>Audit</label>
407 </tool>
408 <tool>
409 <name>workflow-states</name>
410 <label>Workflow States</label>
411 </tool>
412 <tool>
413 <name>log-view</name>
414 <label>Log Console</label>
415 </tool>
416 <tool>
417 <name>status-view</name>
418 <label>Publishing</label>
419 <icon>
420 <class>fa-cloud-upload</class>
421 </icon>
422 </tool>
423 <tool>
424 <name>repository</name>
425 <label>Remote Repositories</label>
426 <icon>
427 <class>fa-database</class>
428 </icon>
429 </tool>
430 <tool>
431 <name>graphiql</name>
432 <label>GraphiQL</label>
433 <icon>
434 <class>fa-line-chart</class>
435 </icon>
436 </tool>
437 <tool>
438 <name>plugin-management</name>
439 <label>Plugin Management</label>
440 <icon>
441 <class>fa-puzzle-piece</class>
442 </icon>
443 </tool>
444 </tools>
445</config>
Description
Content Type Specific tool configuration
/config/tools/tool/controlsList of available content type form controls
/config/tools/tool/controls/controlControl name (JavaScript control module name)
/config/tools/tool/datasourcesList of available datasources for content type form controls
/config/tools/tool/datasources/datasourceDatasource name (JavaScript datasource module name)
/config/tools/tool/objectTypesList of available object types
/config/tools/tool/objectTypes/typeType configuration (Page or Component) - name, label, properties
List of available content type form controls
Control |
Description |
|---|---|
|
Create a new section in the form, this is to help the content authors by segmenting a form into sections of similar concern. Details are in the Form Section Control page. |
|
Repeating groups are used when the form has one or several controls that repeat to capture the same data as records. For example: a list of images in a carousel, or a list of widgets on a page. Details are in the Repeating Group Control page. |
|
A simple textual input line. Details are in the Input Control page. |
|
A simple numeric input line. Details are in the Numeric Input Control page. |
|
A simple block of plain text. Details are in the Text Area Control page. |
|
A block of HTML. Details are in the Rich Text Editor Control page. |
|
Dropdown list of items to pick from. Details are in the Dropdown Control page. |
|
Date and Time field with a picker. Details are in the Date/Time Control page. |
|
Time field with a picker. Details are in the Time Control page. |
|
True/False checkbox. Details are in the Checkbox Control page. |
|
Several checkboxes (true/false). Details are in the Grouped Checkboxes Control page. |
|
Item selector from a Data Source. Details are in the Item Selector Control page. |
|
Image selector from a Data Source. Details are in the Image Control page. |
|
Video selector from a Data Source. Details are in the Video Control page. |
|
Transcoded Video selector from Video Transcoding Data Source. Details are in the Transcoded Video Control page. |
|
Displays text. Details are in the Label Control page. |
|
Allows changing the page order. Details are in the Page Order Control page. |
|
A simple text filename. Details are in the Filename Control page. |
|
Details are in the Auto Filename Control page. |
|
Details are in the Internal Name Control page. |
|
Details are in the Locale Selector Control page. |


List of available content type data sources


Dependency Resolver Configuration
Crafter Studio extracts and tracks dependencies between content items to assist authors with publishing, workflow and core content operations like copy and delete. This file configures what file paths Crafter considers a dependency and how they should be extracted.
To modify the Dependency Resolver configuration, click on ![]() from the bottom of the Sidebar, then click on Configuration and select Dependency Resolver from the list.
from the bottom of the Sidebar, then click on Configuration and select Dependency Resolver from the list.
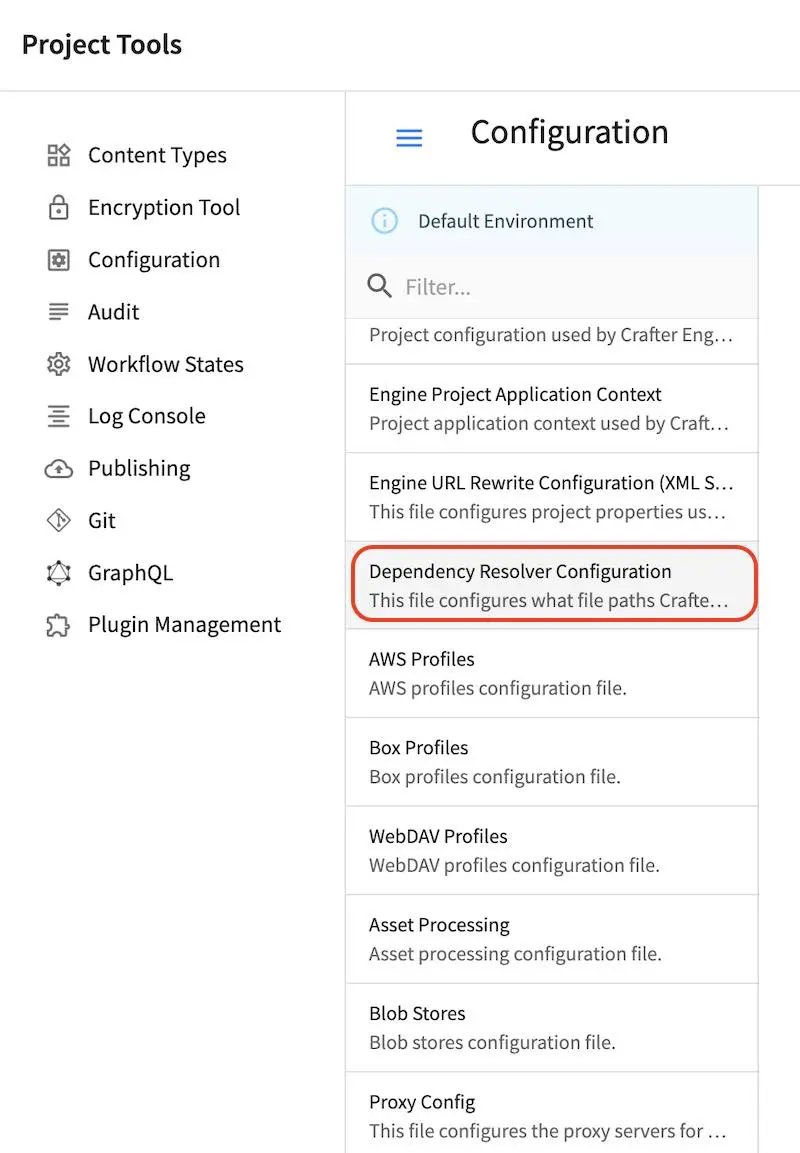
Sample
Here’s a sample Dependency Resolver Configuration file (click on the triangle on the left to expand/collapse):
Sample dependency resolver configuration
1<?xml version="1.0" encoding="UTF-8"?>
2<!--
3 ~ Copyright (C) 2007-2026 Crafter Software Corporation. All Rights Reserved.
4 ~
5 ~ This program is free software: you can redistribute it and/or modify
6 ~ it under the terms of the GNU General Public License version 3 as published by
7 ~ the Free Software Foundation.
8 ~
9 ~ This program is distributed in the hope that it will be useful,
10 ~ but WITHOUT ANY WARRANTY; without even the implied warranty of
11 ~ MERCHANTABILITY or FITNESS FOR A PARTICULAR PURPOSE. See the
12 ~ GNU General Public License for more details.
13 ~
14 ~ You should have received a copy of the GNU General Public License
15 ~ along with this program. If not, see <http://www.gnu.org/licenses/>.
16 -->
17
18<!-- resolver-config.xml
19
20 This file configures what file paths Crafter considers a dependency and how they should be extracted
21
22-->
23
24<dependency-resolver>
25 <item-types>
26 <item-type>
27 <!-- name of type -->
28 <name>page</name>
29 <!-- how to identify items of this type -->
30 <includes>
31 <!-- path pattern regexes (multiple) -->
32 <path-pattern>/site/website/.*\.xml</path-pattern>
33 </includes>
34 <!-- how to find dependencies in these items -->
35 <dependency-types>
36 <dependency-type>
37 <name>page</name>
38 <includes>
39 <pattern>
40 <find-regex>/site/website/([^<]+)\.xml</find-regex>
41 </pattern>
42 </includes>
43 </dependency-type>
44 <dependency-type>
45 <name>component</name>
46 <includes>
47 <pattern>
48 <find-regex>/site/components/([^<]+)\.xml</find-regex>
49 </pattern>
50 </includes>
51 </dependency-type>
52 <dependency-type>
53 <name>item</name>
54 <includes>
55 <pattern>
56 <find-regex>/site/(?!website/|components/)([^<]+)\.xml</find-regex>
57 </pattern>
58 </includes>
59 </dependency-type>
60 <dependency-type>
61 <name>asset</name>
62 <includes>
63 <!-- path patterns to look for (multiple) -->
64 <pattern>
65 <find-regex>/static-assets/([^<"'\)\?\]\#]+)</find-regex>
66 </pattern>
67 </includes>
68 </dependency-type>
69 <dependency-type>
70 <name>rendering-template</name>
71 <includes>
72 <pattern>
73 <find-regex>/templates/([^<"]+)\.ftl</find-regex>
74 </pattern>
75 </includes>
76 </dependency-type>
77 <dependency-type>
78 <name>script</name>
79 <includes>
80 <pattern>
81 <find-regex>/scripts/([^<"]+)\.groovy</find-regex>
82 </pattern>
83 <pattern>
84 <find-regex><content-type>/(.*)/(.*)</content-type></find-regex>
85 <transforms>
86 <transform>
87 <match><content-type>/(.*)/(.*)</content-type></match>
88 <replace>/scripts/$1s/$2.groovy</replace>
89 </transform>
90 </transforms>
91 </pattern>
92 </includes>
93 </dependency-type>
94 <dependency-type>
95 <name>form-definition</name>
96 <includes>
97 <pattern>
98 <find-regex><component.+>[\s\S]*?<\/component></find-regex>
99 <transforms>
100 <transform>
101 <match>[\s\S]*?<content-type>([^<]+)<\/content-type>[\s\S]*</match>
102 <replace>/config/studio/content-types$1/form-definition.xml</replace>
103 </transform>
104 </transforms>
105 </pattern>
106 </includes>
107 </dependency-type>
108 </dependency-types>
109 </item-type>
110 <item-type>
111 <!-- name of type -->
112 <name>component</name>
113 <!-- how to identify items of this type -->
114 <includes>
115 <!-- path pattern regexes (multiple) -->
116 <path-pattern>/site/components/([^<]+)\.xml</path-pattern>
117 </includes>
118 <!-- how to find dependencies in these items -->
119 <dependency-types>
120 <dependency-type>
121 <name>page</name>
122 <includes>
123 <pattern>
124 <find-regex>/site/website/([^<]+)\.xml</find-regex>
125 </pattern>
126 </includes>
127 </dependency-type>
128 <dependency-type>
129 <name>component</name>
130 <includes>
131 <pattern>
132 <find-regex>/site/components/([^<]+)\.xml</find-regex>
133 </pattern>
134 </includes>
135 </dependency-type>
136 <dependency-type>
137 <name>item</name>
138 <includes>
139 <pattern>
140 <find-regex>/site/(?!website/|components/)([^<]+)\.xml</find-regex>
141 </pattern>
142 </includes>
143 </dependency-type>
144 <dependency-type>
145 <name>asset</name>
146 <includes>
147 <pattern>
148 <find-regex>/static-assets/([^<"'\)\?\]\#]+)</find-regex>
149 </pattern>
150 </includes>
151 </dependency-type>
152 <dependency-type>
153 <name>rendering-template</name>
154 <includes>
155 <pattern>
156 <find-regex>/templates/([^<"]+)\.ftl</find-regex>
157 </pattern>
158 </includes>
159 </dependency-type>
160 <dependency-type>
161 <name>script</name>
162 <includes>
163 <pattern>
164 <find-regex>/scripts/([^<"]+)\.groovy</find-regex>
165 </pattern>
166 <pattern>
167 <find-regex><content-type>/(.*)/(.*)</content-type></find-regex>
168 <transforms>
169 <transform>
170 <match><content-type>/(.*)/(.*)</content-type></match>
171 <replace>/scripts/$1s/$2.groovy</replace>
172 </transform>
173 </transforms>
174 </pattern>
175 </includes>
176 </dependency-type>
177 <dependency-type>
178 <name>form-definition</name>
179 <includes>
180 <pattern>
181 <find-regex><component.+>[\s\S]*?<\/component></find-regex>
182 <transforms>
183 <transform>
184 <match>[\s\S]*?<content-type>([^<]+)<\/content-type>[\s\S]*</match>
185 <replace>/config/studio/content-types$1/form-definition.xml</replace>
186 </transform>
187 </transforms>
188 </pattern>
189 </includes>
190 </dependency-type>
191 </dependency-types>
192 </item-type>
193 <item-type>
194 <!-- an item is content that is not a page nor a component -->
195 <name>item</name>
196 <!-- how to identify items of this type -->
197 <includes>
198 <!-- path pattern regexes (multiple) -->
199 <path-pattern>/site/(?!website/|components/).*\.xml</path-pattern>
200 </includes>
201 <!-- how to find dependencies in these items -->
202 <dependency-types>
203 <dependency-type>
204 <name>page</name>
205 <includes>
206 <pattern>
207 <find-regex>/site/website/([^<]+)\.xml</find-regex>
208 </pattern>
209 </includes>
210 </dependency-type>
211 <dependency-type>
212 <name>item</name>
213 <includes>
214 <pattern>
215 <find-regex>/site/(?!website/|components/)([^<]+)\.xml</find-regex>
216 </pattern>
217 </includes>
218 </dependency-type>
219 <dependency-type>
220 <name>component</name>
221 <includes>
222 <pattern>
223 <find-regex>/site/components/([^<]+)\.xml</find-regex>
224 </pattern>
225 </includes>
226 </dependency-type>
227 <dependency-type>
228 <name>asset</name>
229 <includes>
230 <pattern>
231 <find-regex>/static-assets/([^<"'\)\?\]\#]+)</find-regex>
232 </pattern>
233 </includes>
234 </dependency-type>
235 <dependency-type>
236 <name>rendering-template</name>
237 <includes>
238 <pattern>
239 <find-regex>/templates/([^<"]+)\.ftl</find-regex>
240 </pattern>
241 </includes>
242 </dependency-type>
243 <dependency-type>
244 <name>script</name>
245 <includes>
246 <pattern>
247 <find-regex>/scripts/([^<"]+)\.groovy</find-regex>
248 </pattern>
249 <pattern>
250 <find-regex><content-type>/(.*)/(.*)</content-type></find-regex>
251 <transforms>
252 <transform>
253 <match><content-type>/(.*)/(.*)</content-type></match>
254 <replace>/scripts/$1s/$2.groovy</replace>
255 </transform>
256 </transforms>
257 </pattern>
258 </includes>
259 </dependency-type>
260 <dependency-type>
261 <name>form-definition</name>
262 <includes>
263 <pattern>
264 <find-regex><component.+>[\s\S]*?<\/component></find-regex>
265 <transforms>
266 <transform>
267 <match>[\s\S]*?<content-type>([^<]+)<\/content-type>[\s\S]*</match>
268 <replace>/config/studio/content-types$1/form-definition.xml</replace>
269 </transform>
270 </transforms>
271 </pattern>
272 </includes>
273 </dependency-type>
274 </dependency-types>
275 </item-type>
276 <item-type>
277 <!-- name of type -->
278 <name>asset</name>
279 <!-- how to identify items of this type -->
280 <includes>
281 <!-- path pattern regexes (multiple) -->
282 <!-- include only textual files that can be scanned -->
283 <path-pattern>/static-assets/([^<"'\)]+)\.css</path-pattern>
284 <path-pattern>/static-assets/([^<"'\)]+)\.js</path-pattern>
285 <path-pattern>/static-assets/([^<"'\)]+)\.html</path-pattern>
286 <path-pattern>/static-assets/([^<"'\)]+)\.xml</path-pattern>
287 <path-pattern>/static-assets/([^<"'\)]+)\.json</path-pattern>
288 <path-pattern>/static-assets/([^<"'\)]+)\.scss</path-pattern>
289 <path-pattern>/static-assets/([^<"'\)]+)\.sass</path-pattern>
290 <path-pattern>/static-assets/([^<"'\)]+)\.hbs</path-pattern>
291 </includes>
292 <!-- how to find dependencies in these items -->
293 <dependency-types>
294 <dependency-type>
295 <name>asset</name>
296 <includes>
297 <!-- path patterns to look for (multiple) -->
298 <pattern>
299 <find-regex>/static-assets/([^<"'\)\?\\\]\#]+)</find-regex>
300 </pattern>
301 </includes>
302 </dependency-type>
303 </dependency-types>
304 </item-type>
305 <item-type>
306 <!-- name of type -->
307 <name>rendering-template</name>
308 <!-- how to identify items of this type -->
309 <includes>
310 <!-- path pattern regexes (multiple) -->
311 <path-pattern>/templates/([^<"]+)\.ftl</path-pattern>
312 </includes>
313 <excludes>
314 <path-pattern>/templates/system/plugins/.+</path-pattern>
315 </excludes>
316 <!-- how to find dependencies in these items -->
317 <dependency-types>
318 <dependency-type>
319 <name>asset</name>
320 <includes>
321 <!-- path patterns to look for (multiple) -->
322 <pattern>
323 <find-regex>/static-assets/([^<"'\)\?\]\#]+)</find-regex>
324 </pattern>
325 </includes>
326 </dependency-type>
327 <dependency-type>
328 <name>rendering-template</name>
329 <includes>
330 <pattern>
331 <find-regex>/templates/([^<"]+)\.ftl</find-regex>
332 </pattern>
333 </includes>
334 </dependency-type>
335 </dependency-types>
336 </item-type>
337 <item-type>
338 <!-- name of type -->
339 <name>script</name>
340 <!-- how to identify items of this type -->
341 <includes>
342 <!-- path pattern regexes (multiple) -->
343 <path-pattern>/scripts/([^<"]+)\.groovy</path-pattern>
344 </includes>
345 <!-- how to find dependencies in these items -->
346 <dependency-types>
347 <dependency-type>
348 <name>script</name>
349 <includes>
350 <!-- path patterns to look for (multiple) -->
351 <pattern>
352 <find-regex>import scripts.(.*)</find-regex>
353 <transforms>
354 <transform>
355 <match>(.*)</match>
356 <replace>$1</replace>
357 </transform>
358 </transforms>
359 </pattern>
360 </includes>
361 </dependency-type>
362 </dependency-types>
363 </item-type>
364 <item-type>
365 <name>content-type</name>
366 <includes>
367 <path-pattern>/config/studio/content-types/.*?/form-definition\.xml</path-pattern>
368 </includes>
369 <dependency-types>
370 <dependency-type>
371 <name>form-definition</name>
372 <includes>
373 <pattern>
374 <find-regex><value>\/(?:component|page).+?<\/value></find-regex>
375 <transforms>
376 <transform>
377 <split>true</split>
378 <match><value>(\/(?:component|page).+?)<\/value></match>
379 <replace>/config/studio/content-types$1/form-definition.xml</replace>
380 </transform>
381 </transforms>
382 </pattern>
383 </includes>
384 </dependency-type>
385 <dependency-type>
386 <name>rendering-template</name>
387 <includes>
388 <pattern>
389 <find-regex>/templates/([^<"]+)\.ftl</find-regex>
390 </pattern>
391 </includes>
392 </dependency-type>
393 <dependency-type>
394 <name>script</name>
395 <includes>
396 <pattern>
397 <find-regex><content-type>/(.*)/(.*)</content-type></find-regex>
398 <transforms>
399 <transform>
400 <match><content-type>/(.*)/(.*)</content-type></match>
401 <replace>/scripts/$1s/$2.groovy</replace>
402 </transform>
403 </transforms>
404 </pattern>
405 </includes>
406 </dependency-type>
407 </dependency-types>
408 </item-type>
409 </item-types>
410</dependency-resolver>
Soft Dependencies Configuration
Since 4.2.0Soft dependencies are referenced items that are in a modified state and are optional. When calculating soft
dependencies, CrafterCMS follows dependencies recursively. To set the depth of soft dependencies calculated, configure
the maximum recursion iterations property studio.db.maxRecursiveIterations with a value between 0 and 20.
The default value is 10.
# DB max_recursive_iterations value. This property should be set to a value between 0 and 20 (hard limit)
studio.db.maxRecursiveIterations: 10
Project Tools Configuration
Studio’s Project Tools can be configured to list/de-list configuration files.
The Configurations configuration file allows you to specify which items can be accessed from the list in
Project Tools -> Configuration.
To find this configuration XML through Studio follow the next instructions:
Click on
located in the Sidebar.Choose Configuration from the menu.
Select Configurations.
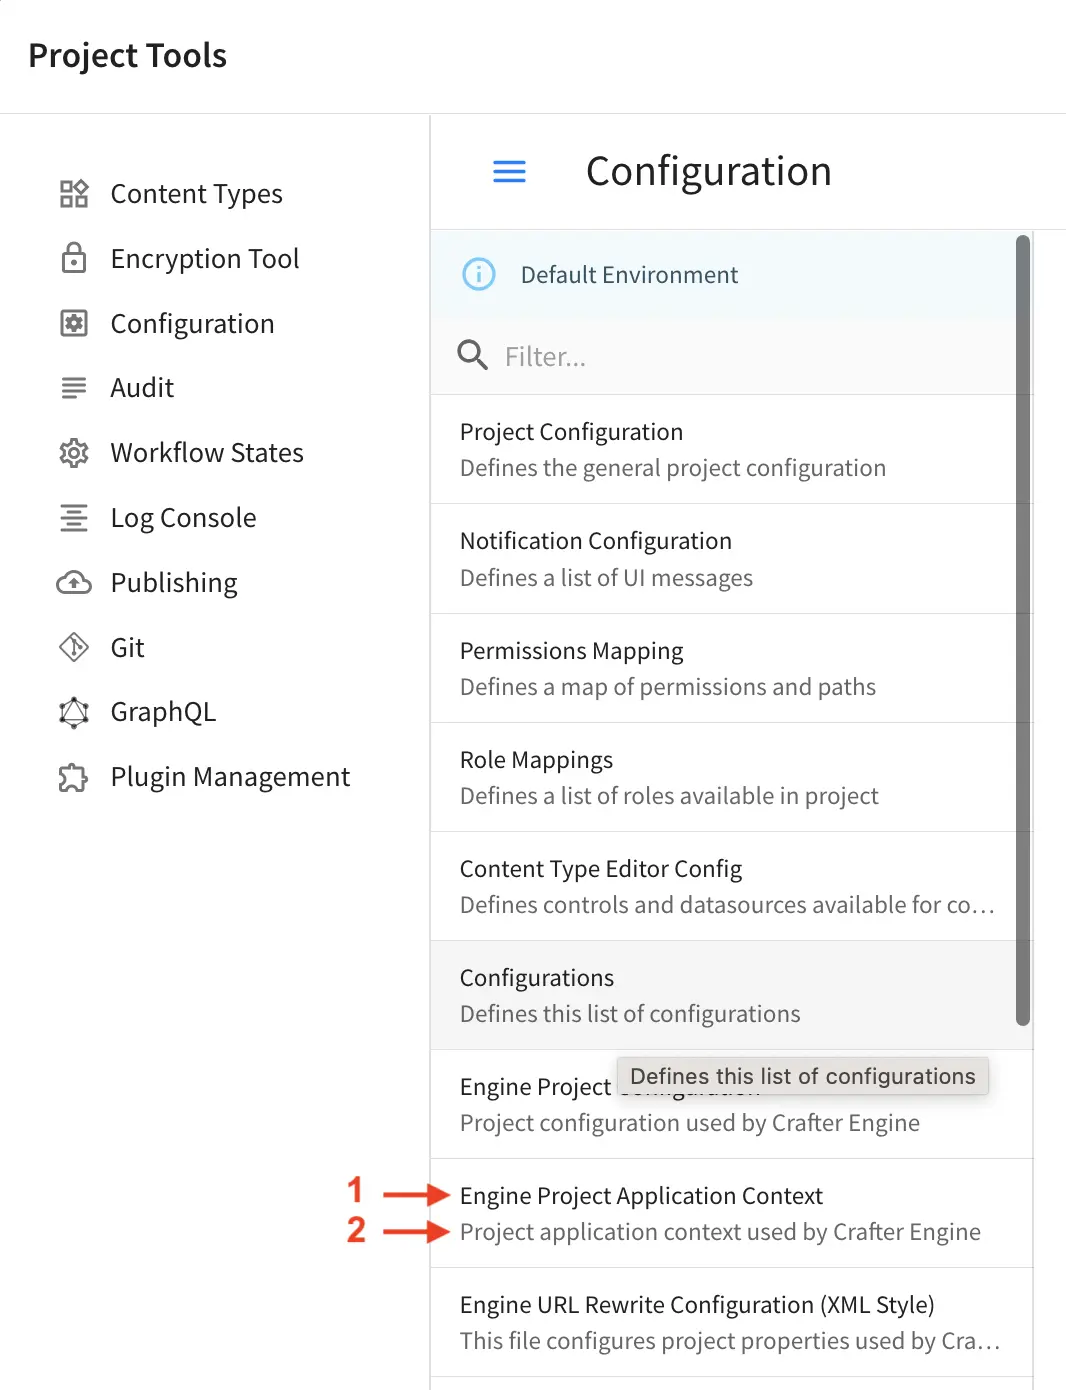
Sample
Here’s a sample config-list.xml file (click on the triangle on the left to expand/collapse):
Sample "config-list.xml"
  1<?xml version="1.0" encoding="UTF-8"?>
  2<!--
  3  * Copyright (C) 2007-2025 Crafter Software Corporation. All Rights Reserved.
  4  *
  5  * This program is free software: you can redistribute it and/or modify
  6  * it under the terms of the GNU General Public License version 3 as published by
  7  * the Free Software Foundation.
  8  *
  9  * This program is distributed in the hope that it will be useful,
 10  * but WITHOUT ANY WARRANTY; without even the implied warranty of
 11  * MERCHANTABILITY or FITNESS FOR A PARTICULAR PURPOSE.  See the
 12  * GNU General Public License for more details.
 13  *
 14  * You should have received a copy of the GNU General Public License
 15  * along with this program.  If not, see <http://www.gnu.org/licenses/>.
 16  -->
 17
 18<!--
 19    This file configures the list of configurations available in the SiteConfig section for this site/blueprint.
 20
 21    For every configuration you'd like to make editable, you need:
 22        <file>
 23            <module />
 24            <path />
 25            <title />
 26            <description />
 27            <samplePath />
 28        </file>
 29
 30    The elements are:
 31    - module: CrafterCMS module
 32    - path: the path to the file. This path is rooted in /config/<module> off the base of the site/blueprint
 33    - title: the title of this file. This should be a key into the string-table in Studio's localization string table
 34        "base.js", if no entry is found, Studio will use the string you have here as is
 35    - description: the description of this file.  This should be a key into the string-table in Studio's localization
 36        string table "base.js", if no entry is found, Studio will use the string you have here as is
 37    - samplePath: the path to a sample file to help the user update the file
 38-->
 39<config>
 40    <version>4.2.0.0</version>
 41    <files>
 42        <file>
 43            <module>studio</module>
 44            <path>site-config.xml</path>
 45            <title>confTabSiteConfiguration</title>
 46            <description>confTabSiteConfigurationDesc</description>
 47            <samplePath>sample-site-config.xml</samplePath>
 48        </file>
 49        <file>
 50            <module>studio</module>
 51            <path>workflow/notification-config.xml</path>
 52            <title>confTabNotificationConf</title>
 53            <description>confTabNotificationConfDesc</description>
 54            <samplePath>sample-notification-config.xml</samplePath>
 55        </file>
 56        <file>
 57            <module>studio</module>
 58            <path>permission-mappings-config.xml</path>
 59            <title>confTabPermissionsMappings</title>
 60            <description>confTabPermissionsMappingsDesc</description>
 61            <samplePath>sample-permission-mappings-config.xml</samplePath>
 62        </file>
 63        <file>
 64            <module>studio</module>
 65            <path>role-mappings-config.xml</path>
 66            <title>confTabRoleMappings</title>
 67            <description>confTabRoleMappingsDesc</description>
 68            <samplePath>sample-role-mappings-config.xml</samplePath>
 69        </file>
 70        <file>
 71            <module>studio</module>
 72            <path>administration/site-config-tools.xml</path>
 73            <title>confTabSiteConf</title>
 74            <description>confTabSiteConfDesc</description>
 75            <samplePath>sample-site-config-tools.xml</samplePath>
 76        </file>
 77        <file>
 78            <module>studio</module>
 79            <path>administration/config-list.xml</path>
 80            <title>confTabConfigurations</title>
 81            <description>confTabConfDesc</description>
 82            <samplePath>sample-config-list.xml</samplePath>
 83        </file>
 84        <file>
 85            <module>engine</module>
 86            <path>site-config.xml</path>
 87            <title>confTabEngineSiteConfiguration</title>
 88            <description>confTabEngineSiteConfigurationDesc</description>
 89            <samplePath>sample-engine-site-config.xml</samplePath>
 90        </file>
 91        <file>
 92            <module>engine</module>
 93            <path>application-context.xml</path>
 94            <title>confTabEngineSiteAppContextConfiguration</title>
 95            <description>confTabEngineSiteAppContextConfigurationDesc</description>
 96            <samplePath>sample-engine-application-context.xml</samplePath>
 97        </file>
 98        <file>
 99            <module>engine</module>
100            <path>urlrewrite.xml</path>
101            <title>confTabEngineUrlRewriteConf</title>
102            <description>confTabEngineUrlRewriteConfDesc</description>
103            <samplePath>sample-urlrewrite.xml</samplePath>
104        </file>
105        <file>
106            <module>studio</module>
107            <path>dependency/resolver-config.xml</path>
108            <title>confTabDependencyResolverConf</title>
109            <description>confTabDependencyResolverConfDesc</description>
110            <samplePath>sample-resolver-config.xml</samplePath>
111        </file>
112        <file>
113            <module>studio</module>
114            <path>aws/aws.xml</path>
115            <title>confTabAWSProfiles</title>
116            <description>confTabAWSProfilesDesc</description>
117            <samplePath>sample-aws.xml</samplePath>
118        </file>
119        <file>
120            <module>studio</module>
121            <path>webdav/webdav.xml</path>
122            <title>confTabWebDAVProfiles</title>
123            <description>confTabWebDAVProfilesDesc</description>
124            <samplePath>sample-webdav.xml</samplePath>
125        </file>
126        <file>
127            <module>studio</module>
128            <path>asset-processing/asset-processing-config.xml</path>
129            <title>confTabAssetProcessing</title>
130            <description>confTabAssetProcessingDesc</description>
131            <samplePath>sample-asset-processing-config.xml</samplePath>
132        </file>
133        <file>
134            <module>studio</module>
135            <path>blob-stores-config.xml</path>
136            <title>confTabBlobStores</title>
137            <description>confTabBlobStoresDesc</description>
138            <samplePath>sample-blob-stores-config.xml</samplePath>
139        </file>
140        <file>
141            <module>engine</module>
142            <path>proxy-config.xml</path>
143            <title>confTabProxyConfig</title>
144            <description>confTabProxyConfigDesc</description>
145            <samplePath>sample-proxy-config.xml</samplePath>
146        </file>
147        <file>
148            <module>studio</module>
149            <path>translation-config.xml</path>
150            <title>confTabTranslationConf</title>
151            <description>confTabTranslationConfDesc</description>
152            <samplePath>sample-translation-config.xml</samplePath>
153        </file>
154        <file>
155            <module>studio</module>
156            <path>site-policy-config.xml</path>
157            <title>confTabSitePolicyConf</title>
158            <description>confTabSitePolicyConfDesc</description>
159            <samplePath>sample-site-policy-config.xml</samplePath>
160        </file>
161        <file>
162            <module>studio</module>
163            <path>ui.xml</path>
164            <title>confTabUiConf</title>
165            <description>confTabUiConfDesc</description>
166            <samplePath>sample-ui.xml</samplePath>
167        </file>
168    </files>
169</config>
Description
List of available configuration tags
Tag
|
Description
|
|---|---|
files
|
This tag contains each file.
|
file
|
This tag contains the configuration of each file.
|
module
|
CrafterCMS module
|
path
|
Path where the system will find the specific xml file
|
title
|
This tag refers to file title. It will be shown in the configuration
list on the left side of the page. See #1 in the image above
|
description
|
This tag refers to file description. It will be shown to explain the file
functionality. See #2 in the image above
|
samplePath
|
Path where the system will find an example of the specific xml.
|
Sample File
You can click on the View Sample button to see a configuration file example.
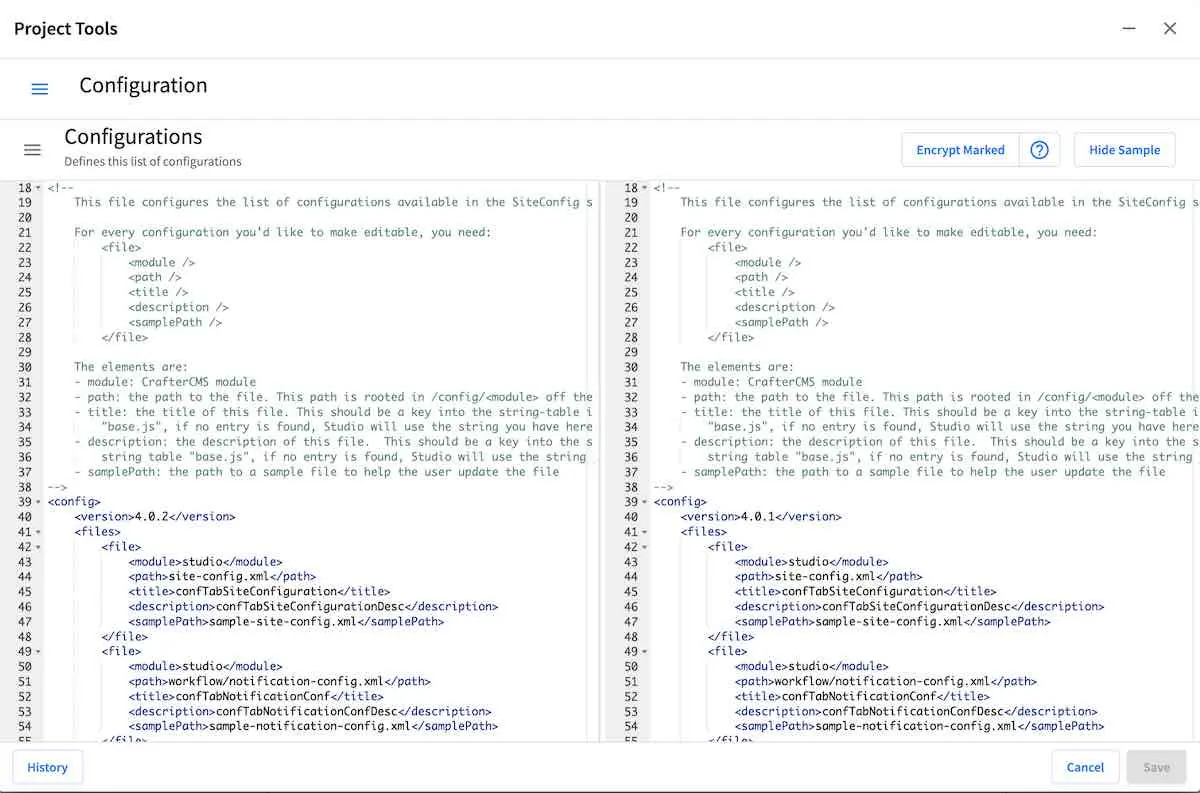
Asset Processing Configuration
Asset processing allows you to define transformations for static assets (currently only images), through a series of processor pipelines that are executed when the assets are uploaded to Studio.
To modify the Asset Processing configuration, click on ![]() from the bottom of the Sidebar, then click on Configuration and select Asset Processing from the dropdown list.
from the bottom of the Sidebar, then click on Configuration and select Asset Processing from the dropdown list.
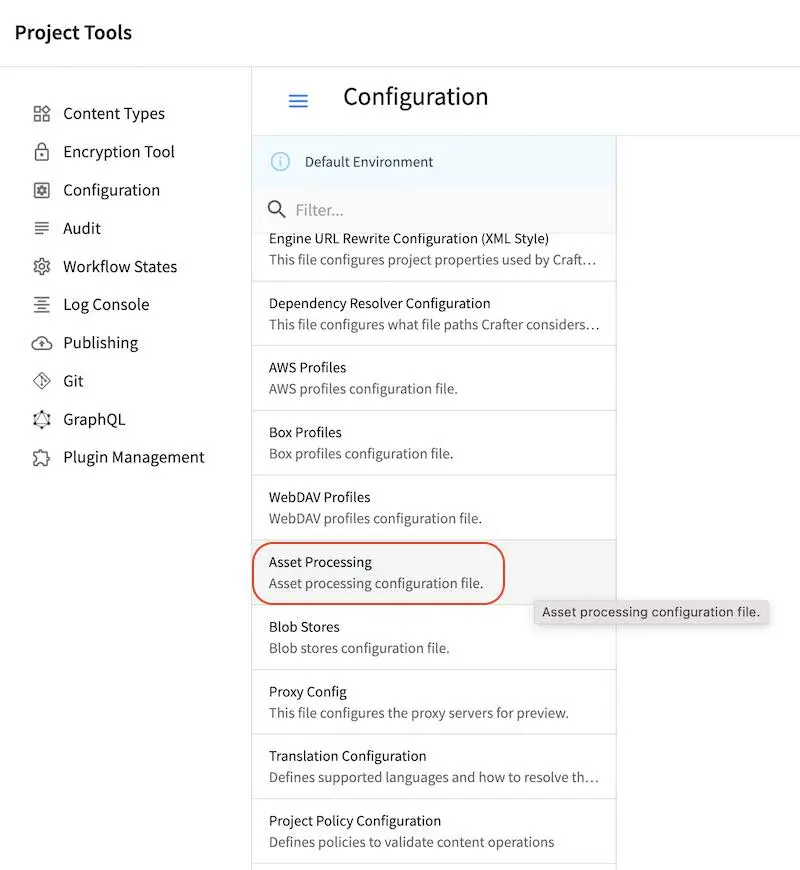
Sample
Here’s a sample Asset Processing Configuration file (click on the triangle on the left to expand/collapse):
Sample "asset-processing-config.xml"
 1<!--
 2  ~ Copyright (C) 2007-2022 Crafter Software Corporation. All Rights Reserved.
 3  ~
 4  ~ This program is free software: you can redistribute it and/or modify
 5  ~ it under the terms of the GNU General Public License version 3 as published by
 6  ~ the Free Software Foundation.
 7  ~
 8  ~ This program is distributed in the hope that it will be useful,
 9  ~ but WITHOUT ANY WARRANTY; without even the implied warranty of
10  ~ MERCHANTABILITY or FITNESS FOR A PARTICULAR PURPOSE.  See the
11  ~ GNU General Public License for more details.
12  ~
13  ~ You should have received a copy of the GNU General Public License
14  ~ along with this program.  If not, see <http://www.gnu.org/licenses/>.
15  -->
16
17<!--
18
19	Asset processing configuration file. You can define in this file one or multiple pipelines to process static assets when they're
20	uploaded. A pipeline configuration supports the following elements:
21
22	<pipeline>
23		<inputPathPattern/>
24		<keepOriginal/>
25		<processors>
26			<processor>
27				<type/>
28				<params/>
29				<outputPathFormat/>
30			</processor>
31		</processors>
32	</pipeline>
33
34    - inputPathPattern: regex that the assets need to match in order to be processed by the pipeline. Groups that are captured by this
35    regex are available later to the outputPathFormat.
36    - keepOriginal (optional): if the original asset (without changes) should be saved.
37    - type: the type of the processor. Right now 2 types are supported: ImageMagickTransformer and TinifyTransformer.
38		- ImageMagickTransformer: runs ImageMagick from the command line, with params.options as the command line params.
39		- TinifyTransformer: uses the Java client of TinyPNG to compress JPEG/PNG images (see https://tinypng.com/developers/reference).
40		The Tinify API key must be specified in the studio-config-overrides.yaml.
41	- outputPathFormat (optional): the format of the output path. Variables that have a dollar sign ($) and an index are later replaced
42	by groups that resulted during input path matching, to form the final output path. If not specified, then the same input path is used
43	as the output path.
44
45-->
46<assetProcessing>
47    <pipelines>
48
49        <!-- Web transformer pipeline -->
50        <pipeline>
51            <inputPathPattern>^/static-assets/images/upload/(.+)\.jpg$</inputPathPattern>
52            <keepOriginal>false</keepOriginal>
53            <processors>
54                <processor>
55                    <type>ImageMagickTransformer</type>
56                    <params>
57                        <options>-level 0,100%,1.3 -gaussian-blur 0.05 -quality 20% -strip</options>
58                    </params>
59                    <outputPathFormat>/static-assets/images/compressed/web/$1-compressed.jpg</outputPathFormat>
60                </processor>
61            </processors>
62        </pipeline>
63
64        <!-- Mobile transformer pipeline -->
65        <pipeline>
66            <inputPathPattern>^/static-assets/images/upload/(.+)\.jpg$</inputPathPattern>
67            <keepOriginal>false</keepOriginal>
68            <processors>
69                <processor>
70                    <type>ImageMagickTransformer</type>
71                    <params>
72                        <options>-level 0,100%,1.3 -gaussian-blur 0.05 -quality 20% -strip -resize 226x164</options>
73                    </params>
74                    <outputPathFormat>/static-assets/images/compressed/mobile/$1-compressed.png</outputPathFormat>
75                </processor>
76                <processor>
77                    <type>TinifyTransformer</type>
78                </processor>
79            </processors>
80        </pipeline>
81
82    </pipelines>
83</assetProcessing>
For more details on asset processing, see Asset Processing
AWS Profiles Configuration
The AWS Profiles configuration file allows you to configure 0 or more AWS profiles with the information required by AWS services.
To modify the AWS Profiles configuration, click on ![]() from the bottom of the Sidebar, then click on Configuration and select AWS Profiles from the dropdown list.
from the bottom of the Sidebar, then click on Configuration and select AWS Profiles from the dropdown list.
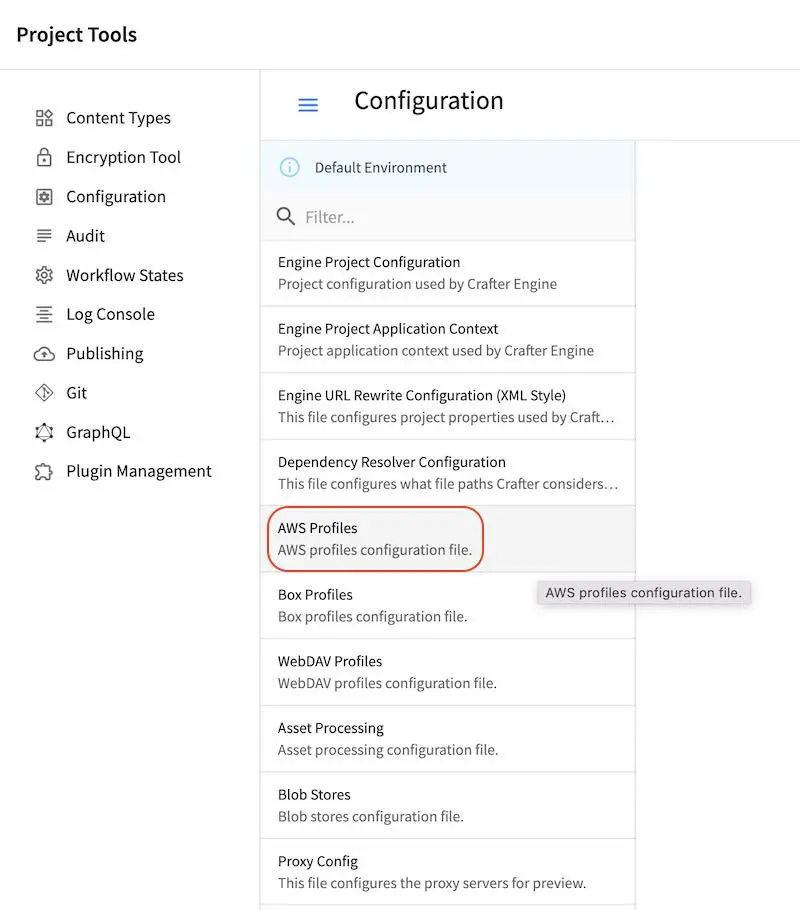
Sample
Here’s a sample AWS Profiles Configuration file (click on the triangle on the left to expand/collapse):
Sample "aws.xml"
  1<?xml version="1.0" encoding="UTF-8"?>
  2<!--
  3  ~ Copyright (C) 2007-2022 Crafter Software Corporation. All Rights Reserved.
  4  ~
  5  ~ This program is free software: you can redistribute it and/or modify
  6  ~ it under the terms of the GNU General Public License version 3 as published by
  7  ~ the Free Software Foundation.
  8  ~
  9  ~ This program is distributed in the hope that it will be useful,
 10  ~ but WITHOUT ANY WARRANTY; without even the implied warranty of
 11  ~ MERCHANTABILITY or FITNESS FOR A PARTICULAR PURPOSE.  See the
 12  ~ GNU General Public License for more details.
 13  ~
 14  ~ You should have received a copy of the GNU General Public License
 15  ~ along with this program.  If not, see <http://www.gnu.org/licenses/>.
 16  -->
 17
 18<!--
 19    AWS profiles configuration file. This files configures 0 or more
 20    AWS profiles with the information required by AWS services.
 21
 22    For every profile you need to specify at least:
 23    <profile>
 24        <id/>
 25        <credentials>
 26            <accessKey/>
 27            <secretKey/>
 28        </credentials>
 29        <region/>
 30    </profile>
 31
 32    id:	a unique id for this profile, this will be referenced in the
 33        control defined in the content type
 34    accessKey: AWS access key
 35    secretKey: AWS secret key
 36    region: AWS region for the service
 37
 38   Every service can require additional properties.
 39-->
 40<aws>
 41    <s3>
 42        <!--
 43
 44        AWS S3 Profile
 45
 46        Additional properties:
 47
 48        <bucketName/>
 49        <prefix/>
 50        <pathStyleAccess/>
 51
 52        bucketName: name of the bucket where files will be uploaded
 53        prefix: optional prefix to prepend to all keys
 54        pathStyleAccess: indicates if path style access should be used for all requests (defaults to false)
 55
 56        -->
 57        <profile>
 58            <id>s3-default</id>
 59            <credentials>
 60                <accessKey>xxxxxxxxx</accessKey>
 61                <secretKey>xxxxxxxxx</secretKey>
 62            </credentials>
 63            <region>us-west-1</region>
 64            <bucketName>sample-input-bucket</bucketName>
 65            <prefix>preview</prefix>
 66            <pathStyleAccess>true</pathStyleAccess>
 67        </profile>
 68    </s3>
 69
 70    <elasticTranscoder>
 71        <!--
 72
 73        AWS Elastic Transcoder Profile
 74
 75        Additional properties:
 76
 77        <pipelineId/>
 78        <outputs>
 79            <output>
 80                <presetId/>
 81                <outputKeySuffix/>
 82            </output>
 83
 84            ...
 85
 86        </outputs>
 87
 88        pipelineId: id of the pipeline that will be used for transcoding jobs
 89        outputs: list of outputs for the transcoding jobs
 90        presetId: id of the preset for a particular output, can use AWS default presets for common formats
 91        outputKeySuffix: suffix added to a particular output
 92
 93        -->
 94        <profile>
 95            <id>elastic-transcoder-default</id>
 96            <credentials>
 97                <accessKey>xxxxxxxxx</accessKey>
 98                <secretKey>xxxxxxxxx</secretKey>
 99            </credentials>
100            <region>us-east-1</region>
101            <pipelineId>xxxxxxxx</pipelineId>
102            <outputs>
103                <output>
104                    <presetId>xxxxxxxxxx</presetId>
105                    <outputKeySuffix>-small.mp4</outputKeySuffix>
106                </output>
107                <output>
108                    <presetId>xxxxxxxxxxx</presetId>
109                    <outputKeySuffix>-medium.mp4</outputKeySuffix>
110                </output>
111                <output>
112                    <presetId>xxxxxxxxxxxx</presetId>
113                    <outputKeySuffix>-large.mp4</outputKeySuffix>
114                </output>
115            </outputs>
116        </profile>
117    </elasticTranscoder>
118
119    <mediaConvert>
120        <!--
121
122        AWS MediaConvert Profile
123
124        Additional properties:
125
126        <endpoint/>
127        <role/>
128        <queue/>
129        <inputPath/>
130        <template/>
131
132        endpoint: URL specific for the account, can be found in the AWS MediaConvert dashboard
133        role: ARN of the role used to create transcoding jobs
134        queue: ARN of the queue used to create transcoding jobs
135        inputPath: Name of the S3 bucket and optional path to upload files
136        template: Name of the Job Template used to create transcoding jobs
137
138        -->
139        <profile>
140            <id>mediaconvert-default</id>
141            <credentials>
142                <accessKey>xxxxxxxxx</accessKey>
143                <secretKey>xxxxxxxxx</secretKey>
144            </credentials>
145            <region>us-west-1</region>
146            <endpoint>https://XXXXXXXX.mediaconvert.us-east-1.amazonaws.com</endpoint>
147            <role>arn:aws:iam::XXXXXXXXXXXX:role/...</role>
148            <queue>arn:aws:mediaconvert:us-east-1:XXXXXXXXXXXX:queues/...</queue>
149            <inputPath>example-bucket/folder/videos</inputPath>
150            <template>Example Template</template>
151        </profile>
152    </mediaConvert>
153</aws>
For more information on Amazon S3, please see: https://docs.aws.amazon.com/AmazonS3/latest/dev/Introduction.html
For more information on the AWS elastic transcoder, please see: https://docs.aws.amazon.com/elastictranscoder/latest/developerguide/introduction.html
For more information on the AWS mediaconvert, please see: https://docs.aws.amazon.com/mediaconvert/latest/ug/what-is.html
Box Profiles Configuration
Until 4.2CrafterCMS integrates with Box. The Box Profiles configuration file allows you to configure Box profiles with the
information required by Box services. To modify the Box Profiles configuration, click on ![]() from the bottom
of the Sidebar, then click on Configuration and select Box Profiles from the list.
from the bottom
of the Sidebar, then click on Configuration and select Box Profiles from the list.
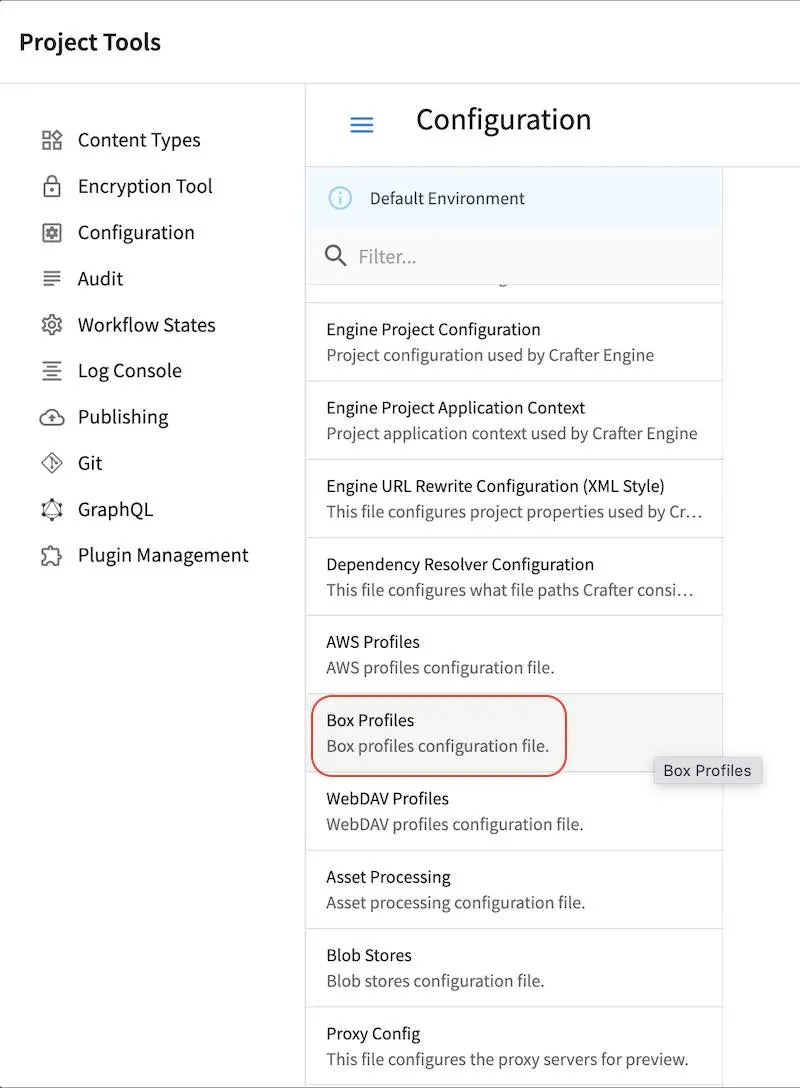
Sample
Here’s a sample Box Profiles Configuration file (click on the triangle on the left to expand/collapse):
Sample "box.xml"
 1<?xml version="1.0" encoding="UTF-8"?>
 2<!--
 3  ~ Copyright (C) 2007-2022 Crafter Software Corporation. All Rights Reserved.
 4  ~
 5  ~ This program is free software: you can redistribute it and/or modify
 6  ~ it under the terms of the GNU General Public License version 3 as published by
 7  ~ the Free Software Foundation.
 8  ~
 9  ~ This program is distributed in the hope that it will be useful,
10  ~ but WITHOUT ANY WARRANTY; without even the implied warranty of
11  ~ MERCHANTABILITY or FITNESS FOR A PARTICULAR PURPOSE.  See the
12  ~ GNU General Public License for more details.
13  ~
14  ~ You should have received a copy of the GNU General Public License
15  ~ along with this program.  If not, see <http://www.gnu.org/licenses/>.
16  -->
17
18<!--
19    Box profiles configuration file. This files configures 0 or more
20    profiles with the information required by the Box API.
21
22    For every profile you need to specify:
23    <profile>
24        <id/>
25        <clientId/>
26        <clientSecret/>
27        <enterpriseId/>
28        <publicKeyId/>
29        <privateKeyPath/>
30        <privateKeyPassword/>
31        <uploadFolder/>
32    </profile>
33
34    id:	a unique id for this profile, this will be referenced in the
35        control defined in the content type
36    clientId: Box client id
37    clientSecret: Box client secret
38    enterpriseId: Box enterprise id
39    publicKeyId: Box public key id
40    privateKeyPath: Full path for the private key file
41    privateKeyPassword: Password used to decrypt the private key
42    uploadFolder: Name of the folder where files will be uploaded
43
44-->
45<box>
46    <box>
47        <profile>
48            <id>box-default</id>
49            <clientId>...</clientId>
50            <clientSecret>...</clientSecret>
51            <enterpriseId>...</enterpriseId>
52            <publicKeyId>...</publicKeyId>
53            <privateKeyPath>...</privateKeyPath>
54            <privateKeyPassword>...</privateKeyPassword>
55            <uploadFolder>videos</uploadFolder>
56        </profile>
57    </box>
58</box>
Box Configuration
To obtain the clientId, clientSecret, enterpriseId, publicKeyId, privateKey and privateKeyPassword you need to use a Box Developer Account to create a new App and configure it to use OAuth 2.0 with JWT.
For more details you can follow the official documentation.
Note
If you are using a JRE older than 1.8.0_151 you need to install the JCE Unlimited Strength
Jurisdiction Policy Files. For newer versions you only need to enable the unlimited strength setting.
For more information on how to manage/encode your secrets such as your Box credentials, please see Managing Secrets
Example
For an example of configuring Studio to use Box, see Box Asset Access
WebDAV Profiles Configuration
CrafterCMS integrates with WebDAV. The WebDAV Profiles configuration file allows you to configure profiles with the
information required to connect to a WebDAV server. To modify the WebDAV Profiles configuration, click on ![]() from the bottom of the Sidebar, then click on Configuration and select WebDAV Profiles from the dropdown list.
from the bottom of the Sidebar, then click on Configuration and select WebDAV Profiles from the dropdown list.
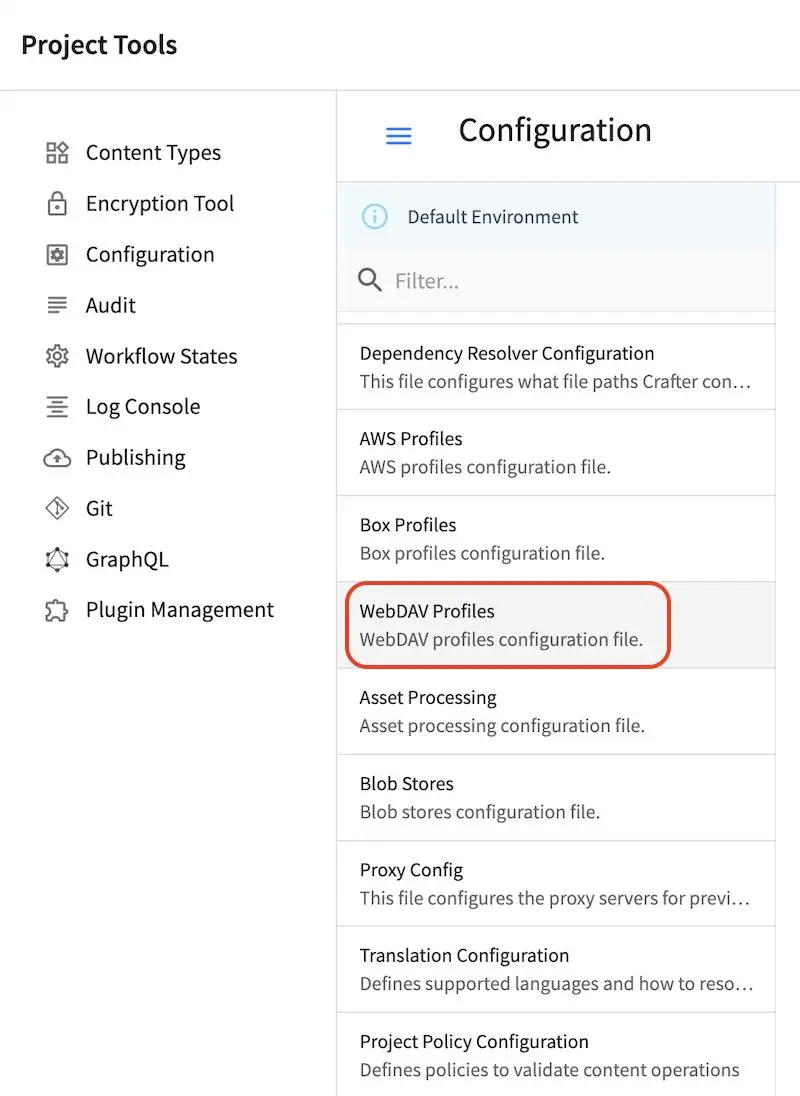
Sample
Here’s a sample WebDAV Profiles Configuration file (click on the triangle on the left to expand/collapse):
Sample WebDAV profiles configuration
 1<?xml version="1.0" encoding="UTF-8"?>
 2<!--
 3  ~ Copyright (C) 2007-2022 Crafter Software Corporation. All Rights Reserved.
 4  ~
 5  ~ This program is free software: you can redistribute it and/or modify
 6  ~ it under the terms of the GNU General Public License version 3 as published by
 7  ~ the Free Software Foundation.
 8  ~
 9  ~ This program is distributed in the hope that it will be useful,
10  ~ but WITHOUT ANY WARRANTY; without even the implied warranty of
11  ~ MERCHANTABILITY or FITNESS FOR A PARTICULAR PURPOSE.  See the
12  ~ GNU General Public License for more details.
13  ~
14  ~ You should have received a copy of the GNU General Public License
15  ~ along with this program.  If not, see <http://www.gnu.org/licenses/>.
16  -->
17
18<!--
19    WebDAV profiles configuration file. This files configures 0 or more
20    profiles with the information required to connect to a WebDAV server.
21
22    For every profile you need to specify:
23    <profile>
24        <id/>
25        <baseUrl/>
26        <deliveryBaseUrl/> (deprecated)
27        <username/>
28        <password/>
29        <preemptiveAuth/>
30    </profile>
31
32    id:	a unique id for this profile, this will be referenced in the
33        control defined in the content type
34    baseUrl: Full URL of the WebDAV server
35    deliveryBaseUrl: Full URL of the delivery server to override for files, deprecated and will be ignored
36    username: WebDAV account username
37    password: WebDAV account password
38    preemptiveAuth: Indicates if the client should use preemptiveAuth, defaults to false
39-->
40<webdav>
41    <webdav>
42        <profile>
43            <id>webdav-default</id>
44            <baseUrl>...</baseUrl>
45            <username>...</username>
46            <password>...</password>
47            <preemptiveAuth>...</preemptiveAuth>
48        </profile>
49    </webdav>
50</webdav>
Note
Preemptive authentication may be needed if network timeouts are happening during uploads. To enable preemptive authentication, simply set the option preemptiveAuth to true in the configuration file.
Studio Multi-environment Support
To set up a Studio environment, do the following:
Create a folder under
CRAFTER_HOME/data/repos/sites/${site}/sandbox/config/studiocalledenvInside the folder, create a directory called
myenv(or whatever you want to call the environment)Copy the configuration file you want to override in the new environment you are setting up, inside your
myenvfolder following the folder structure underconfig/studio.Remember to commit the files copied so Studio will pick it up.
In the
crafter-setenv.shfile inTOMCAT/binset the following property to desired environment:CRAFTER_HOME/bin/crafter-setenv.sh¶# -------------------- Configuration variables -------------------- export CRAFTER_ENVIRONMENT=${CRAFTER_ENVIRONMENT:=myenv}
Restart Studio
Note
All configuration files under CRAFTER_HOME/data/repos/sites/${site}/sandbox/config/studio can be overridden by environment, except for the Project Policy Configuration (site-policy-config.xml) and Content Types (items under the content-types folder).
Example
Let’s take a look at an example of creating a new environment, called mycustomenv with the rte-setup-tinymce5.xml file overridden in the new environment:
We’ll create a folder called
envunderCRAFTER_HOME/data/repos/site/my-awesome-editorial/sandbox/config/studio1data/ 2 repos/ 3 sites/ 4 my-awesome-editorial/ 5 sandbox/ 6 config/ 7 studio/ 8 administration/ 9 content-types/ 10 data-sources/ 11 dependency/ 12 env/ 13 permission-mappings-config.xml 14 role-mappings-config.xml 15 site-config.xml 16 studio_version.xml 17 translation-config.xml 18 ui.xml 19 workflow/
Inside the
envfolder, create a directory calledmycustomenvWe will now copy the configuration file for the
ui.xmlthat we want to override in the new environment we are setting up, inside ourmycustomenvfolder, following the folder structure underconfig/studio. For our example, theui.xmlfile is underconfig/studio/:env/ mycustomenv/ ui.xmlRemember to commit the files copied so Studio will pick it up.
➜  sandbox git:(master) ✗ git add .
➜  sandbox git:(master) ✗ git commit -m "Add updated ui.xml file for mycustomenv"
Open the
crafter-setenv.shfile inTOMCAT/binand set the value ofCRAFTER_ENVIRONMENTto the environment we setup above to make it the active environment:CRAFTER_HOME/bin/crafter-setenv.sh¶# -------------------- Configuration variables -------------------- export CRAFTER_ENVIRONMENT=${CRAFTER_ENVIRONMENT:=mycustomenv}
Restart Studio. To verify our newly setup environment, open the
Sidebarand click on, then select Configuration. Notice that the active environmentmycustomenvwill be displayed on top of the configurations list: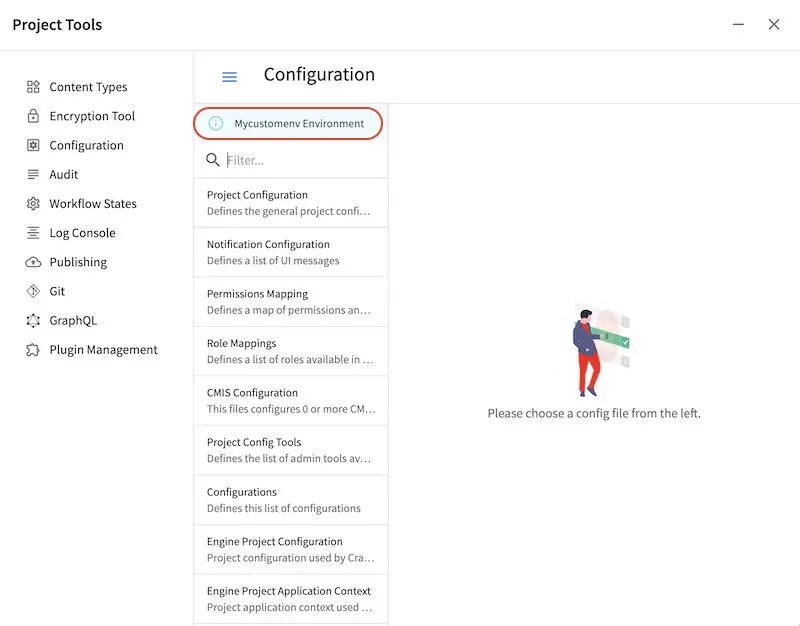
Access and Permissions
To configure access to Crafter Studio beyond adding groups and users, you’ll need to configure the system-wide configuration files:
Global Role Mappings Config
The global role mappings configuration file maps user groups to one or more roles and serves as the base for every project in your CrafterCMS installation. All role mappings configured here are in addition to what is configured in the project role mappings.
Role mappings per project are managed within Crafter Studio’s UI. See Role Mappings for more information.
To access the global role mappings config file, using your favorite editor, navigate to CRAFTER_HOME/data/repos/global/configuration/
then open the file global-role-mappings-config.xml. Remember to restart Crafter so your changes to the file will take effect.
Here’s the default global role mappings configuration (click on the triangle on the left to expand/collapse):
Sample "global-role-mappings-config.xml"
 1<?xml version="1.0" encoding="UTF-8"?>
 2<!--
 3  * Copyright (C) 2007-2025 Crafter Software Corporation. All Rights Reserved.
 4  *
 5  * This program is free software: you can redistribute it and/or modify
 6  * it under the terms of the GNU General Public License version 3 as published by
 7  * the Free Software Foundation.
 8  *
 9  * This program is distributed in the hope that it will be useful,
10  * but WITHOUT ANY WARRANTY; without even the implied warranty of
11  * MERCHANTABILITY or FITNESS FOR A PARTICULAR PURPOSE.  See the
12  * GNU General Public License for more details.
13  *
14  * You should have received a copy of the GNU General Public License
15  * along with this program.  If not, see <http://www.gnu.org/licenses/>.
16  -->
17
18<!--
19
20
21-->
22
23<role-mappings>
24    <groups>
25        <group name="system_admin">
26            <role>system_admin</role>
27        </group>
28        <group name="site_admin">
29            <role>site_admin</role>
30        </group>
31		<group name="site_developer">
32			<role>site_developer</role>
33		</group>
34    </groups>
35</role-mappings>
Default Global Role
CrafterCMS comes with a predefined global role system_admin out of the box.
Users with the system_admin role have access to everything in the CMS such as all the modules in the Main Menu for managing users, groups, etc., all the sites and configuration files, creating/editing layouts, templates, taxonomies, content types, scripts, etc. in addition to creating and editing content, as well as the ability to approve and reject workflow.
See Global Permission Mappings Config for more information on all items accessible for the system_admin role.
Global Permission Mappings Config
The global permission mappings configuration file lets you configure the permissions to a role globally for the entire application.
Permissions per project are managed within Crafter Studio’s UI. See Permission Mappings for more information on project permissions.
Here’s the default global permissions configuration (click on the triangle on the left to expand/collapse). It contains the permissions mappings for the roles defined in the global role mappings configuration file. To access the file, using your favorite editor, navigate to CRAFTER_HOME/data/repos/global/configuration/ then open the file global-permission-mappings-config.xml. Remember to restart CrafterCMS so your changes to the file will take effect.
Sample "global-permission-mappings-config.xml"
  1<?xml version="1.0" encoding="UTF-8"?>
  2<!--
  3  * Copyright (C) 2007-2025 Crafter Software Corporation. All Rights Reserved.
  4  *
  5  * This program is free software: you can redistribute it and/or modify
  6  * it under the terms of the GNU General Public License version 3 as published by
  7  * the Free Software Foundation.
  8  *
  9  * This program is distributed in the hope that it will be useful,
 10  * but WITHOUT ANY WARRANTY; without even the implied warranty of
 11  * MERCHANTABILITY or FITNESS FOR A PARTICULAR PURPOSE.  See the
 12  * GNU General Public License for more details.
 13  *
 14  * You should have received a copy of the GNU General Public License
 15  * along with this program.  If not, see <http://www.gnu.org/licenses/>.
 16  -->
 17
 18<!--
 19    This file contains global permissions configuration for Crafter Studio. Permissions per site are managed
 20    within Crafter Studio's UI.
 21
 22    The structure of this file is:
 23    <permissions>
 24        <site id="###GLOBAL###"> (global management)
 25            <role name="">
 26                <rule regex="/.*">
 27                    <allowed-permissions>
 28                        <permission>content_read</permission>
 29                        <permission>content_write</permission>
 30                        <permission>content_delete</permission>
 31                        <permission>folder_create</permission>
 32                         <permission>publish</permission>
 33                    </allowed-permissions>
 34                </rule>
 35            </role>
 36        </site>
 37    </permissions>
 38
 39    This binds a set of permissions to a role globally for the entire application.
 40-->
 41<permissions>
 42    <role name="system_admin">
 43        <rule regex="/.*">
 44            <allowed-permissions>
 45                <permission>content_read</permission>
 46                <permission>content_copy</permission>
 47                <permission>content_write</permission>
 48                <permission>folder_create</permission>
 49                <permission>publish</permission>
 50                <permission>create_site</permission>
 51                <permission>duplicate_site</permission>
 52                <permission>read_groups</permission>
 53                <permission>create_groups</permission>
 54                <permission>update_groups</permission>
 55                <permission>delete_groups</permission>
 56                <permission>read_users</permission>
 57                <permission>create_users</permission>
 58                <permission>update_users</permission>
 59                <permission>delete_users</permission>
 60                <permission>read_cluster</permission>
 61                <permission>audit_log</permission>
 62                <permission>read_logs</permission>
 63                <permission>add_remote</permission>
 64                <permission>list_remotes</permission>
 65                <permission>pull_from_remote</permission>
 66                <permission>push_to_remote</permission>
 67                <permission>remove_remote</permission>
 68                <permission>s3_read</permission>
 69                <permission>s3_write</permission>
 70                <permission>content_delete</permission>
 71                <permission>webdav_read</permission>
 72                <permission>webdav_write</permission>
 73                <permission>write_configuration</permission>
 74                <permission>write_global_configuration</permission>
 75                <permission>encryption_tool</permission>
 76                <permission>get_children</permission>
 77                <permission>edit_site</permission>
 78                <permission>manage_access_token</permission>
 79                <permission>search_plugins</permission>
 80                <permission>list_plugins</permission>
 81                <permission>install_plugins</permission>
 82                <permission>remove_plugins</permission>
 83                <permission>delete_site</permission>
 84                <permission>unlock_repository</permission>
 85                <permission>item_unlock</permission>
 86                <permission>publish_status</permission>
 87                <permission>repair_repository</permission>
 88                <permission>content_search</permission>
 89                <permission>view_logs</permission>
 90                <permission>view_log_levels</permission>
 91                <permission>configure_log_levels</permission>
 92                <permission>content_create</permission>
 93                <permission>get_publishing_queue</permission>
 94                <permission>cancel_publish</permission>
 95                <permission>site_status</permission>
 96                <permission>resolve_conflict</permission>
 97                <permission>site_diff_conflicted_file</permission>
 98                <permission>commit_resolution</permission>
 99                <permission>cancel_failed_pull</permission>
100				<permission>system_properties_read</permission>
101				<permission>system_properties_manage</permission>
102            </allowed-permissions>
103        </rule>
104    </role>
105    <role name="site_admin">
106        <rule regex="/.*">
107            <allowed-permissions>
108                <permission>search_plugins</permission>
109				<permission>audit_log</permission>
110				<permission>read_users</permission>
111            </allowed-permissions>
112        </rule>
113    </role>
114	<role name="site_developer">
115		<rule regex="/.*">
116			<allowed-permissions>
117				<permission>audit_log</permission>
118				<permission>read_users</permission>
119			</allowed-permissions>
120		</rule>
121	</role>
122</permissions>
Permission Descriptions
The system level (global) permissions are defined in the file global-permission-mappings-config.xml.
Permission |
Description |
|---|---|
configure_log_levels |
User is permitted to configure log levels from the UI or via the API Loggers update level |
view_logs |
User is permitted to view logs from the project tools UI or Main Menu UI depending on where the permission is configured (project or global/system) |
view_log_levels |
User is permitted to view log levels from the Main Menu UI or via the API Loggers get all |
audit_log |
User is permitted to access the audit logs in the UI from the main menu or the project tools via the API Get audit log |
duplicate_site |
User is permitted to duplicate a project |
create_site |
User is permitted to create projects |
delete_site |
User is permitted to delete projects |
edit_site |
User is permitted to edit sites |
create_groups |
User is permitted to create new groups |
read_groups |
User is permitted to read groups |
update_groups |
User is permitted to update groups |
delete_groups |
User is permitted to delete groups |
create_users |
User is permitted to create new users |
delete_users |
User is permitted to delete users |
encryption_tool |
User is permitted to access the encryption tool |
install_plugins |
User is permitted to install plugins |
list_plugins |
User is permitted to list installed plugins |
manage_access_token |
User is permitted to manage the access tokens |
read_users |
User is permitted to read users. Used in the Users Management Console |
update_users |
User is permitted to update users. Used in the Users Management Console |
search_plugins |
User is permitted to search for plugins |
read_cluster |
User is allowed to list the cluster members and the cluster mode (PRIMARY vs REPLICA) |
write_global_configuration |
User is permitted to write global configuration content for Studio |
system_properties_manage |
User is allowed to update, write or delete system properties. |
system_properties_read |
User is allowed to read system properties. |
allowed_in_maintenance |
User is allowed to access the system APIs during maintenance mode |
Security
Authentication
Users are authenticated by Studio through the internal database by default. CrafterCMS can be configured so that users are authenticated using an external authentication protocol such as Lightweight Directory Access Protocol (LDAP), Security Assertion Markup Language (SAML), or integrate with any Single-Sign-On (SSO) solution that can provide headers to Studio to indicate successful authentication.
Here’s a list of security providers supported by CrafterCMS for accessing the repository:
Internal database (users are stored in database)
To configure an external authentication method, please follow one of the guides below:
When using an external authentication method, user accounts are automatically created in the internal database upon each user’s first successful login, using the attributes from the responses received. Users added to the internal database after the user’s first successful login through external authentication are marked as Externally Managed.
Configure Authentication Chain
CrafterCMS supports multiple security providers and allows configuration of multiple authentication providers in a chain that are then iterated through until either the user is authenticated and granted access or authentication fails and an HTTP 401 Unauthorized is returned to the user. This allows Studio to support multiple security providers that appears like a single authentication module to users.
The following authentication providers can be configured in a chain:
Headers
LDAP
Internal database
Note
SAML2 authentication cannot be configured in a chain. SAML2 authentication is a standalone authentication provider.
When an authentication chain is configured when a user logs in, Studio will try to authenticate the user using the first security provider in the chain as defined in the studio-config-override.yaml file. If authentication fails, it will then move on to the next authentication provider in the list and try to authenticate the user again. It will continue moving on to the next security provider in the chain until the user is authenticated or the authentication fails.
To set up the authentication chain, open the file studio-config-override.yaml under CRAFTER_HOME/bin/apache-tomcat/shared/classes/crafter/studio/extension. Another way to access the studio-config-override.yaml file is by clicking on the  Navigation Menu from the context nav in Studio, then clicking on
 Global Config.
Below is a sample configuration for the authentication chain. There are four authentication providers in the example below: (1) Headers Authentication, (2) LDAP1, (3) LDAP2 (4) Internal Database.
 1# Studio authentication chain configuration
 2studio.authentication.chain:
 3# Authentication provider type
 4- provider: HEADERS
 5# Authentication via headers enabled
 6  enabled: true
 7  # Authentication header for secure key
 8  secureKeyHeader: secure_key
 9  # Authentication headers secure key that is expected to match secure key value from headers
10  # Typically this is placed in the header by the authentication agent
11  secureKeyHeaderValue: secure
12  # Authentication header for username
13  usernameHeader: username
14  # Authentication header for first name
15  firstNameHeader: firstname
16  # Authentication header for last name
17  lastNameHeader: lastname
18  # Authentication header for email
19  emailHeader: email
20  # Authentication header for groups: comma separated list of groups
21  #   Example:
22  #   site_author,site_xyz_developer
23  groupsHeader: groups
24  # Enable/disable logout for headers authenticated users (SSO)
25  # logoutEnabled: false
26  # If logout is enabled for headers authenticated users (SSO), set the endpoint of the SP or IdP logout, which should
27  # be called after local logout. The {baseUrl} macro is provided so that the browser is redirected back to Studio
28  # after logout (https://STUDIO_SERVER:STUDIO_PORT/studio)
29  # logoutUrl: /YOUR_DOMAIN/logout?ReturnTo={baseUrl}
30# Authentication provider type
31- provider: LDAP
32  # Authentication via LDAP enabled
33  enabled: false
34  # LDAP Server url
35  ldapUrl: ldap://localhost:389
36  # LDAP bind DN (user)
37  ldapUsername: cn=Manager,dc=my-domain,dc=com
38  # LDAP bind password
39  ldapPassword: secret
40  # LDAP base context (directory root)
41  ldapBaseContext: dc=my-domain,dc=com
42  # LDAP username attribute
43  usernameLdapAttribute: uid
44  # LDAP first name attribute
45  firstNameLdapAttribute: cn
46  # LDAP last name attribute
47  lastNameLdapAttribute: sn
48  # Authentication header for email
49  emailLdapAttribute: mail
50  # LDAP groups attribute
51  groupNameLdapAttribute: crafterGroup
52  # LDAP groups attribute name regex
53  groupNameLdapAttributeRegex: .*
54  # LDAP groups attribute match index
55  groupNameLdapAttributeMatchIndex: 0
56# Authentication provider type
57- provider: LDAP
58  # Authentication via LDAP enabled
59  enabled: false
60  # LDAP Server url
61  ldapUrl: ldap://localhost:390
62  # LDAP bind DN (user)
63  ldapUsername: cn=Manager,dc=my-domain,dc=com
64  # LDAP bind password
65  ldapPassword: secret
66  # LDAP base context (directory root)
67  ldapBaseContext: dc=my-domain,dc=com
68  # LDAP username attribute
69  usernameLdapAttribute: uid
70  # LDAP first name attribute
71  firstNameLdapAttribute: cn
72  # LDAP last name attribute
73  lastNameLdapAttribute: sn
74  # Authentication header for email
75  emailLdapAttribute: mail
76  # LDAP groups attribute
77  groupNameLdapAttribute: crafterGroup
78  # LDAP groups attribute name regex
79  groupNameLdapAttributeRegex: .*
80  # LDAP groups attribute match index
81  groupNameLdapAttributeMatchIndex: 0
82# Authentication provider type
83- provider: DB
84  # Authentication via DB enabled
85  enabled: true
In the configuration above, when a user tries to authenticate, the user’s credentials will be passed first to the headers authentication provider. If the authentication succeeds, the processing in the chain is done and the user is allowed to proceed. If the authentication fails, the user credentials will then be passed to LDAP1. If authentication is successful, processing in the chain is done, otherwise, the user credentials are then passed on to LDAP2. LDAP2 will then try to authenticate user. If successful, processing in the chain is done, otherwise, the user credentials are then passed to the final provider in the chain, the internal database. The final provider in the chain then determines whether the user is successfully authenticated or rejected and sent an HTTP 401 Unauthorized message. Below is a diagram showing the authentication chain process using the above configuration:
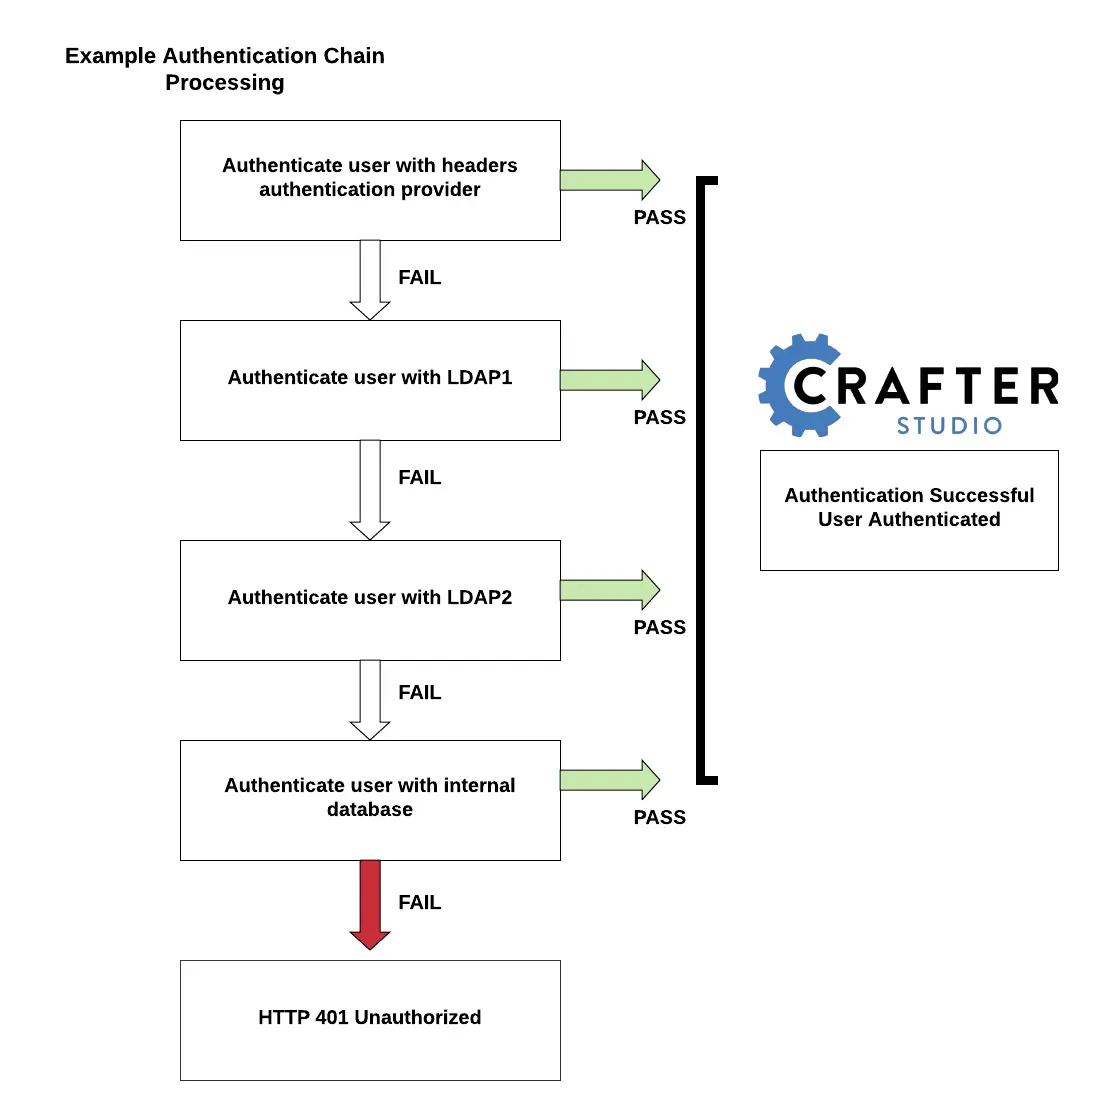
Studio SAML2 Configuration  
Since
4.0.3
Crafter Studio can be configured to support SAML2 SSO out of the box without using any additional plugins.
Important
This document only applies to CrafterCMS version 4.0.3 and later
Please see here for version 4.0.2 and earlier.
Requirements
A SAML2-compatible Identity Provider (IdP) properly configured; this configuration will not be covered here
A private key and certificate. This can be generated like so:
openssl req -newkey rsa:2048 -nodes -keyout rp-private.key -x509 -days 365 -out rp-certificate.crtTake note of the values of the following options used to generate your key and certificate that will be used later for configuring Studio:
keyout: The value used for this option wil be used in the
studio.security.saml.rp.privateKey.locationpropertyout: The value used for this option will be used in the
studio.security.saml.rp.certificate.locationproperty
Note
IdP is the asserting party and SP is the relying party (Studio)
Configure
To configure Studio SAML2, in your Authoring installation, we need to enable SAML security then we’ll setup the required SAML configuration properties.
To enable SAML security, go to CRAFTER_HOME/bin, open the crafter-setenv.sh file, and uncomment the line export SPRING_PROFILES_ACTIVE=crafter_studio_samlSecurity:
# -------------------- Spring Profiles --------------------
...
# Uncomment to enable Crafter Studio SAML2 security
export SPRING_PROFILES_ACTIVE=crafter_studio_samlSecurity
# For multiple active spring profiles, create comma separated list
Next, we’ll set up SAML configuration properties. Go to CRAFTER_HOME/bin/apache-tomcat/shared/classes/crafter/studio/extension and add/uncomment the following lines to studio-config-override.yaml (of course, make any appropriate configuration changes according to your system):
 1###############################################################
 2##               SAML Security                               ##
 3###############################################################
 4# SAML attribute name for email
 5# studio.security.saml.attributeName.email: email
 6# SAML attribute name for first name
 7# studio.security.saml.attributeName.firstName: givenName
 8# SAML attribute name for last name
 9# studio.security.saml.attributeName.lastName: surname
10# SAML attribute name for group
11# studio.security.saml.attributeName.group: Role
12###############################################################
13##         SAML Security Relying Party (SP) configuration    ##
14###############################################################
15# {baseUrl} and {registrationId} are pre-defined macros and should not be modified
16# SAML relying party (SP) registration ID. {registrationId} macro will be replaced with this value
17# studio.security.saml.rp.registration.id: SSO
18# SAML relying party (SP) entity ID
19# studio.security.saml.rp.entity.id: "{baseUrl}/saml/metadata"
20# SAML relying party (SP) login processing url. Must end with {registrationId}
21# studio.security.saml.rp.loginProcessingUrl: "/saml/{registrationId}"
22# SAML relying party (SP) assertion consumer service location. Must end with {registrationId}
23# studio.security.saml.rp.assertion.consumer.service.location: "{baseUrl}/saml/{registrationId}"
24# SAML relying party (SP) assertion consumer service biding (POST or REDIRECT)
25# studio.security.saml.rp.assertion.consumer.service.binding: POST
26# SAML logout URL without prefix /studio
27# studio.security.saml.rp.logoutUrl: /saml/logout
28# SAML relying party (SP) single logout service location
29# studio.security.saml.rp.logout.service.location: "{baseUrl}/saml/logout"
30# SAML relying party (SP) logout service binding (POST or REDIRECT)
31# studio.security.saml.rp.logout.service.binding: POST
32# SAML relying party (SP) metadata endpoint
33# studio.security.saml.rp.metadata.endpoint: /saml/metadata
34# SAML relying party (SP) private key location
35# studio.security.saml.rp.privateKey.location: classpath:crafter/studio/extension/saml/rp-private.key
36# SAML relying party (SP) certificate location
37# studio.security.saml.rp.certificate.location: classpath:crafter/studio/extension/saml/rp-certificate.crt
38###############################################################
39##      SAML Security Asserting Party (IdP) configuration    ##
40###############################################################
41# SAML asserting party (IdP) entity ID:
42# studio.security.saml.ap.entityId: https://ap.example.org/ap-entity-id
43# SAML asserting party (IdP) single sign on service location
44# studio.security.saml.ap.single.signOn.service.location: https://ap.example.org/sso/saml
45# SAML asserting party (IdP) single sign on service binding (POST or REDIRECT)
46# studio.security.saml.ap.single.signOn.service.binding: POST
47# SAML asserting party (IdP) logout service location
48# studio.security.saml.ap.single.logout.service.location: https://ap.example.org/slo/saml
49# SAML asserting party (IdP) logout service binding (POST or REDIRECT)
50# studio.security.saml.ap.single.logout.service.binding: POST
51# SAML asserting party (IdP) want authn request signed
52# studio.security.saml.ap.want.authn.request.signed: false
53# SAML asserting party (IdP) certificate location
54# studio.security.saml.ap.certificate.location: classpath:crafter/studio/extension/saml/idp-certificate.crt
55###############################################################
56##            SAML Security other configuration              ##
57###############################################################
58# SAML Web SSO profile options: authenticate the user silently
59# studio.security.saml.webSSOProfileOptions.passive: false
60# SAML Web SSO profile options: force user to re-authenticate
61# studio.security.saml.webSSOProfileOptions.forceAuthn: false
where
studio.security.saml.enabled: Indicates if SAML2 is enabled or notThe following are attributes that Studio expects from the Identity Provider:
studio.security.saml.attributeName.emailstudio.security.saml.attributeName.firstNamestudio.security.saml.attributeName.lastNamestudio.security.saml.attributeName.group
studio.security.saml.rp.privateKey.location: The path of the relying party (SP) private key in the classpathstudio.security.saml.rp.certificate.location: The path of the relying party (SP) certificate in the classpathstudio.security.saml.ap.entityId: The asserting party (IdP) entity IDstudio.security.saml.ap.single.signOn.service.location: The asserting party (IdP) single sign on URLstudio.security.saml.ap.single.logout.service.location: The asserting party (IdP) single logout URLstudio.security.saml.ap.certificate.location: The path of the asserting party (IdP) certificate in the classpathstudio.security.saml.webSSOProfileOptions.passive: Indicates if user is authenticated silentlystudio.security.saml.webSSOProfileOptions.forceAuthn: Indicates if user will be forced to re-authenticate
The classpath is located in your Authoring installation, under CRAFTER_HOME/bin/apache-tomcat/shared/classes. As shown in the example above, the relying party private key is located in your Authoring installation under CRAFTER_HOME/bin/apache-tomcat/shared/classes/crafter/studio/extension/saml folder.
# SAML relying party (SP) private key location
studio.security.saml.rp.privateKey.location: classpath:crafter/studio/extension/saml/rp-private.key
Restart your Authoring installation after configuring the above.
Configure Header-Based Authentication 
Crafter Studio can integrate with any authentication system that sends custom HTTP headers containing information that will be used to authenticate the user in Studio. This section details how to set up Studio for header-based authentication.
Configure Studio for Header-Based Authentication
Configuring Studio for header-based authentication is very simple: in your Authoring installation, go to CRAFTER_HOME/bin/apache-tomcat/shared/classes/crafter/studio/extension and add the following lines to studio-config-override.yaml (of course, make any appropriate configuration changes according to your system):
 1# Studio authentication chain configuration
 2# studio.authentication.chain:
 3  # Authentication provider type
 4  # - provider: HEADERS
 5    # Authentication via headers enabled
 6    # enabled: true
 7    # Authentication header for secure key
 8    # secureKeyHeader: secure_key
 9    # Authentication headers secure key that is expected to match secure key value from headers
10    # Typically this is placed in the header by the authentication agent
11    # secureKeyHeaderValue: secure
12    # Authentication header for username
13    # usernameHeader: username
14    # Authentication header for first name
15    # firstNameHeader: firstname
16    # Authentication header for last name
17    # lastNameHeader: lastname
18    # Authentication header for email
19    # emailHeader: email
20    # Authentication header for groups: comma separated list of sites and groups
21    #   Example:
22    #   site_author,site_xyz_developer
23    # groupsHeader: groups
24    # (Optional) All authentication header values are in this JWT header's claims.
25    # jwtAuthTokenHeader: x-crafter-oidc-data
26    # Enable/disable logout for headers authenticated users (SSO)
27    # logoutEnabled: false
28    # If logout is enabled for headers authenticated users (SSO), set the endpoint of the SP or IdP logout, which should
29    # be called after local logout. The {baseUrl} macro is provided so that the browser is redirected back to Studio
30    # after logout (https://STUDIO_SERVER:STUDIO_PORT/studio)
31    # logoutUrl: /YOUR_DOMAIN/logout?ReturnTo={baseUrl}
The attribute enabled enables/disables headers authentication; make sure this is set to true for header-based authentication
The secure_key attribute is a secret shared between the authentication agent and Studio via this header. Note that this secure_key is
required and header-based authentication will not proceed unless the secure_key sent to Studio matches this configuration.
Upon matching the secure_key header, Studio will then look for the principal. This can come in one of two formats:
A set of loose headers indicate the principal’s attributes:
username,firstname,lastname,email, andgroups; orA JWT-wrapped principal’s attributes as specified by
x-crafter-oidc-data
Depending on your authentication agent, configure Studio to look for either the loose attributes or JWT.
Configuring Logout
The Sign out button link is disabled/hidden by default when header-based authentication is enabled.
To enable Sign out for users signed in using header-based authentication, change the following lines (as described from the above configuration) in your studio-config-override.yaml file (of course, make any appropriate configuration changes according to your system):
# Enable/disable logout for headers authenticated users (SSO)
# logoutEnabled: false
# If logout is enabled for headers authenticated users (SSO), set the endpoint of the SP or IdP logout, which should
# be called after local logout. The {baseUrl} macro is provided so that the browser is redirected back to Studio
# after logout (https://STUDIO_SERVER:STUDIO_PORT/studio)
# logoutUrl: /YOUR_DOMAIN/logout?ReturnTo={baseUrl}
Configure LDAP Authentication 
To configure LDAP authentication, in your Authoring installation, go to CRAFTER_HOME/bin/apache-tomcat/shared/classes/crafter/studio/extension and uncomment the
following lines to the studio-config-override.yaml file.
Note
The values for the parameters listed below are just examples. Remember to make any appropriate configuration changes according to your directory service in use.
 1# Studio authentication chain configuration
 2studio.authentication.chain:
 3  # Authentication provider type
 4  - provider: LDAP
 5    # Authentication via LDAP enabled
 6    enabled: true
 7    # LDAP Server url
 8    ldapUrl: ldap://localhost:389
 9    # LDAP bind DN (user)
10    ldapUsername: cn=Manager,dc=my-domain,dc=com
11    # LDAP bind password
12    ldapPassword: secret
13    # LDAP base context (directory root)
14    ldapBaseContext: dc=my-domain,dc=com
15    # LDAP username attribute
16    usernameLdapAttribute: uid
17    # LDAP first name attribute
18    firstNameLdapAttribute: cn
19    # LDAP last name attribute
20    lastNameLdapAttribute: sn
21    # LDAP email attribute
22    emailLdapAttribute: mail
23    # LDAP groups attribute
24    groupNameLdapAttribute: crafterGroup
25    # LDAP groups attribute name regex
26    groupNameLdapAttributeRegex: .*
27    # LDAP groups attribute match index
28    groupNameLdapAttributeMatchIndex: 0
Some notes on the properties above:
enabledenables/disables LDAP authentication, make sure this is set to true for LDAP authenticationserverUrlis just the URL where the LDAP server is listening for requests.bindDNandbindPasswordare basically the credentials used to connect initially to the LDAP server.baseContextis the LDAP tree root where the user entries can be located.username,firstName,lastNameandemailare basic user attributes.groupNameindicates the groups the user belongs to (can have multiple values). You can specify a regex to extract the group name of a user.
Studio will then do a query against the LDAP server whenever a user attempts to log in and the user is not yet in the DB. If there’s a match in LDAP, the user is created in the database with the imported LDAP attributes, and finally added to the groups specified in LDAP.
Also, please note that Studio needs all the attributes listed in the config to be present in the LDAP user’s attributes, otherwise, Studio is not able to authenticate the user. When an attribute is missing, an error message will be displayed in the login screen: A system error has occurred. Please wait a few minutes or contact an administrator. Please look at the tomcat log to check which attribute was not found. Here’s an example log:
[WARN] 2017-10-11 12:42:57,487 [http-nio-8080-exec-2] [security.DbWithLdapExtensionSecurityProvider] | No LDAP attribute crafterGroup found for username jbloggs
Here are a few things to take note of when configuring LDAP authentication in Studio:
Make sure that at least one of the groupName attribute of the LDAP user exists in Studio and has Roles and Permission setup. If there is no groupName attribute setup in Studio with Roles and Permissions, please make sure that the system administrator assigns a role to at least one group in Studio so the user can access the site, otherwise, once the user gets into the Sites screen and tries to Preview the site or view the dashboard, the user will get a notification that the site is invalid.
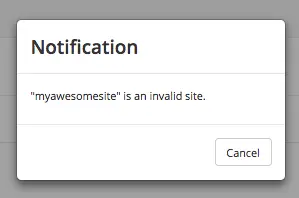
To assign a role to a group, please follow the guide Role Mappings. To assign permissions to a role, please see Permission Mappings
For an example of setting up LDAP, see Setting up a Simple LDAP Server using Apache Directory Studio
Authorization
Role Mappings
Users are allowed to perform actions on the items that they have been granted access to based on the permissions granted to the role they have been assigned to. Note that site members have read permission to the entire project/site regardless of the role that they are assigned.
The role mappings configuration file maps user groups to one or more roles which then get a set of permissions within a project.
To modify the role mappings, click on ![]() from the bottom of the Sidebar, then click on Configuration
and select Role Mappings from the list.
from the bottom of the Sidebar, then click on Configuration
and select Role Mappings from the list.
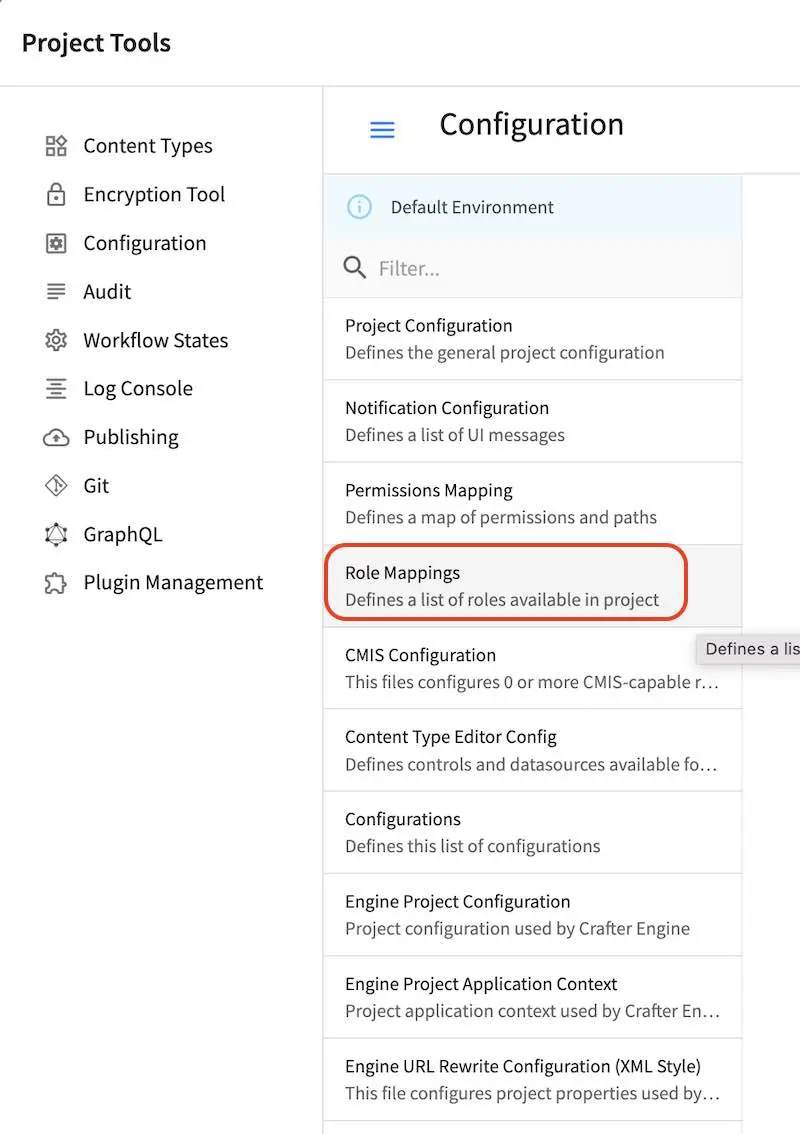
To configure the role mappings for groups created in CrafterCMS that need global permissions see Global Role Mappings Config
Sample
Here’s a sample Role Mappings Configuration file (click on the triangle on the left to expand/collapse):
Sample role mappings configuration
 1<?xml version="1.0" encoding="UTF-8"?>
 2<!--
 3  ~ Copyright (C) 2007-2022 Crafter Software Corporation. All Rights Reserved.
 4  ~
 5  ~ This program is free software: you can redistribute it and/or modify
 6  ~ it under the terms of the GNU General Public License version 3 as published by
 7  ~ the Free Software Foundation.
 8  ~
 9  ~ This program is distributed in the hope that it will be useful,
10  ~ but WITHOUT ANY WARRANTY; without even the implied warranty of
11  ~ MERCHANTABILITY or FITNESS FOR A PARTICULAR PURPOSE.  See the
12  ~ GNU General Public License for more details.
13  ~
14  ~ You should have received a copy of the GNU General Public License
15  ~ along with this program.  If not, see <http://www.gnu.org/licenses/>.
16  -->
17
18<role-mappings>
19    <groups>
20        <group name="site_admin">
21            <role>admin</role>
22        </group>
23        <group name="site_developer">
24            <role>developer</role>
25        </group>
26        <group name="site_author">
27            <role>author</role>
28        </group>
29        <group name="site_publisher">
30            <role>publisher</role>
31        </group>
32        <group name="site_reviewer">
33            <role>reviewer</role>
34        </group>
35    </groups>
36</role-mappings>
Description
/role-mappings/groups/group@nameName of the user group
/role-mappings/groups/roleName of authoring role that the group will map to
Default Project Roles
CrafterCMS comes with predefined roles out of the box for projects. Here’s a list of predefined roles for projects:
admin: Users with the
adminrole have access to project configuration files, creating/editing layouts, templates, taxonomies, content types, scripts, etc. in addition to creating and editing content, as well as the ability to approve and reject workflowdeveloper: Users with the
developerrole have access to project configuration files, creating/editing layouts, templates, taxonomies, content types, scripts, etc. in addition to creating and editing content, as well as the ability to approve and reject workflowreviewer: Users with the
reviewerrole have the ability to approve and reject workflow. They also have access to a number of actions in the dashboard that are not available to content contributors (users with the roleauthor), includingPending ApprovalandScheduled Publish. They do not have access to edit content.publisher: Users with the
publisherrole have the ability to approve and reject workflow. They also have access to a number of actions in the dashboard that are not available to content contributors (users with the roleauthor), includingPending ApprovalandScheduled Publish. In addition, they also have access to create, edit, and submit content like theauthorrole.author: Users with the role
authorhave access to create, edit and submit content
See Permission Mappings for more information on all items accessible for each role in a project.
Permission Mappings
The permission mappings configuration file allows you to assign permissions to folders and objects in a project/site giving specific Roles rights to the object. The permission mappings config file contains the permissions mappings for the roles defined in the role mappings config file. When applying permissions to Roles, rights are granted by adding permissions inside the tag <allowed-permissions>. The absence of permissions means the permission is denied. Rules have a regex expression that governs the scope of the permissions assigned. A list of available permissions that can be granted to Roles is available after the sample configuration file.
- Permissions are defined per:
project/site > role > rule
For example, to grant the role component_author the ability to read/write components and read-only to everything else:
 1<role name="component_author">
 2  <rule regex="/site/website/.*">
 3    <allowed-permissions>
 4      <permission>content_read</permission>
 5    </allowed-permissions>
 6  </rule>
 7  <rule regex="/site/components/.*">
 8    <allowed-permissions>
 9      <permission>content_read</permission>
10      <permission>content_write</permission>
11      <permission>content_create</permission>
12      <permission>folder_create</permission>
13    </allowed-permissions>
14  </rule>
15  <rule regex="/static-assets/.*">
16    <allowed-permissions>
17      <permission>content_read</permission>
18    </allowed-permissions>
19  </rule>
20</role>
To modify/view the permission mappings for your project/site in Studio, click on ![]() at the bottom of the Sidebar, then click on Configurations and select Permissions Mapping from the list.
at the bottom of the Sidebar, then click on Configurations and select Permissions Mapping from the list.
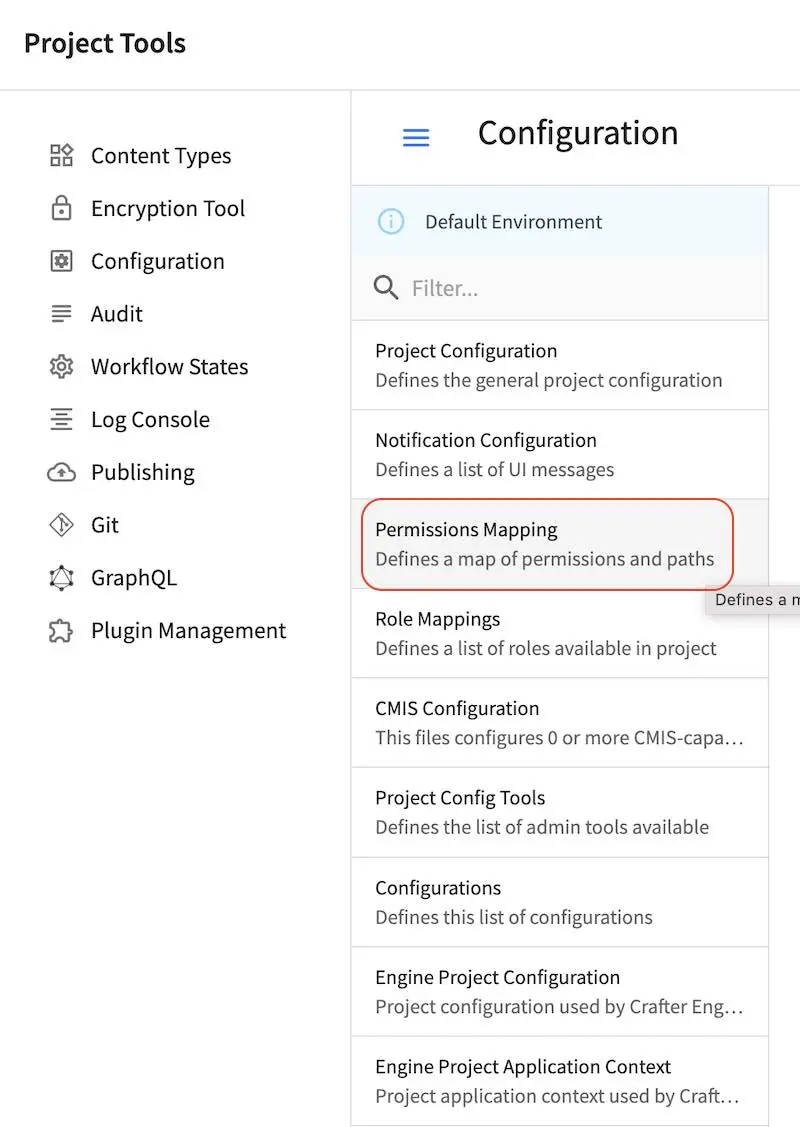
Note that permissions assigned is a union, so a user can perform the action as long as:
The list of permissions contains the requested ACTION.
OR the list of permissions contains “*”
To configure the permissions to a role globally for the entire application, see Global Permission Mappings Config.
Sample
Here’s a sample Permission Mappings Configuration file (click on the triangle on the left to expand/collapse):
Sample "permission-mappings-config.xml"
  1<?xml version="1.0" encoding="UTF-8"?>
  2<!--
  3  ~ Copyright (C) 2007-2025 Crafter Software Corporation. All Rights Reserved.
  4  ~
  5  ~ This program is free software: you can redistribute it and/or modify
  6  ~ it under the terms of the GNU General Public License version 3 as published by
  7  ~ the Free Software Foundation.
  8  ~
  9  ~ This program is distributed in the hope that it will be useful,
 10  ~ but WITHOUT ANY WARRANTY; without even the implied warranty of
 11  ~ MERCHANTABILITY or FITNESS FOR A PARTICULAR PURPOSE.  See the
 12  ~ GNU General Public License for more details.
 13  ~
 14  ~ You should have received a copy of the GNU General Public License
 15  ~ along with this program.  If not, see <http://www.gnu.org/licenses/>.
 16  -->
 17<!-- permission-mappings-config.xml
 18
 19  This files contains the permissions mappings for the roles defined in
 20  role-mappings-config.xml.
 21
 22  Permissions are defined per:
 23  site > role > rule
 24
 25  Rules have a regex expression that govern the scope of the permissions assigned.
 26
 27  Absence of permissions means the permission is denied.
 28
 29  View the sample for a good starting point.
 30-->
 31<permissions>
 32    <version>4.3.0.0</version>
 33    <role name="author">
 34        <rule regex="/site/website/.*|/site/components(/.*)?|/static-assets(/.*)?">
 35            <allowed-permissions>
 36                <permission>content_write</permission>
 37                <permission>content_create</permission>
 38                <permission>folder_create</permission>
 39                <permission>content_copy</permission>
 40            </allowed-permissions>
 41        </rule>
 42        <rule regex=".*">
 43            <allowed-permissions>
 44                <permission>s3_read</permission>
 45                <permission>s3_write</permission>
 46                <permission>webdav_read</permission>
 47                <permission>webdav_write</permission>
 48                <permission>list_plugins</permission>
 49                <permission>get_children</permission>
 50                <permission>publish_status</permission>
 51                <permission>content_read</permission>
 52                <permission>content_search</permission>
 53                <permission>read_configuration</permission>
 54                <permission>get_publishing_queue</permission>
 55            </allowed-permissions>
 56        </rule>
 57    </role>
 58    <role name="publisher">
 59        <rule regex="/site/.*|/static-assets.*">
 60            <allowed-permissions>
 61                <permission>content_write</permission>
 62                <permission>content_create</permission>
 63                <permission>folder_create</permission>
 64                <permission>publish</permission>
 65                <permission>cancel_publish</permission>
 66                <permission>content_copy</permission>
 67            </allowed-permissions>
 68        </rule>
 69        <rule regex="^/site/(?!website/index\.xml)(.*)|/static-assets.*">
 70            <allowed-permissions>
 71                <permission>content_delete</permission>
 72            </allowed-permissions>
 73        </rule>
 74        <rule regex=".*">
 75            <allowed-permissions>
 76                <permission>s3_read</permission>
 77                <permission>s3_write</permission>
 78                <permission>webdav_read</permission>
 79                <permission>webdav_write</permission>
 80                <permission>list_plugins</permission>
 81                <permission>get_children</permission>
 82                <permission>publish_status</permission>
 83                <permission>content_read</permission>
 84                <permission>content_search</permission>
 85                <permission>read_configuration</permission>
 86                <permission>get_publishing_queue</permission>
 87                <permission>publish_by_commits</permission>
 88            </allowed-permissions>
 89        </rule>
 90    </role>
 91    <role name="developer">
 92        <rule regex="^/(?!site/website/index\.xml)(.*)">
 93            <allowed-permissions>
 94                <permission>content_delete</permission>
 95            </allowed-permissions>
 96        </rule>
 97        <rule regex=".*">
 98            <allowed-permissions>
 99                <permission>content_write</permission>
100                <permission>publish</permission>
101                <permission>cancel_publish</permission>
102                <permission>folder_create</permission>
103                <permission>content_create</permission>
104                <permission>add_remote</permission>
105                <permission>list_remotes</permission>
106                <permission>pull_from_remote</permission>
107                <permission>push_to_remote</permission>
108                <permission>remove_remote</permission>
109                <permission>site_status</permission>
110                <permission>resolve_conflict</permission>
111                <permission>site_diff_conflicted_file</permission>
112                <permission>commit_resolution</permission>
113                <permission>cancel_failed_pull</permission>
114                <permission>encryption_tool</permission>
115                <permission>content_copy</permission>
116                <permission>s3_read</permission>
117                <permission>s3_write</permission>
118                <permission>webdav_read</permission>
119                <permission>webdav_write</permission>
120                <permission>list_plugins</permission>
121                <permission>install_plugins</permission>
122                <permission>get_children</permission>
123                <permission>publish_status</permission>
124                <permission>remove_plugins</permission>
125                <permission>content_read</permission>
126                <permission>content_search</permission>
127                <permission>view_logs</permission>
128                <permission>audit_log</permission>
129                <permission>read_configuration</permission>
130                <permission>write_configuration</permission>
131                <permission>set_item_states</permission>
132                <permission>publish_by_commits</permission>
133                <permission>get_publishing_queue</permission>
134            </allowed-permissions>
135        </rule>
136    </role>
137    <role name="admin">
138        <rule regex="^/(?!site/website/index\.xml)(.*)">
139            <allowed-permissions>
140                <permission>content_delete</permission>
141            </allowed-permissions>
142        </rule>
143        <rule regex=".*">
144            <allowed-permissions>
145                <permission>content_write</permission>
146                <permission>publish</permission>
147                <permission>cancel_publish</permission>
148                <permission>folder_create</permission>
149                <permission>content_create</permission>
150                <permission>add_remote</permission>
151                <permission>list_remotes</permission>
152                <permission>pull_from_remote</permission>
153                <permission>push_to_remote</permission>
154                <permission>remove_remote</permission>
155                <permission>site_status</permission>
156                <permission>resolve_conflict</permission>
157                <permission>site_diff_conflicted_file</permission>
158                <permission>commit_resolution</permission>
159                <permission>cancel_failed_pull</permission>
160                <permission>encryption_tool</permission>
161                <permission>unlock_repository</permission>
162                <permission>content_copy</permission>
163                <permission>repair_repository</permission>
164                <permission>s3_read</permission>
165                <permission>s3_write</permission>
166                <permission>webdav_read</permission>
167                <permission>webdav_write</permission>
168                <permission>edit_site</permission>
169                <permission>list_plugins</permission>
170                <permission>install_plugins</permission>
171                <permission>get_children</permission>
172                <permission>publish_status</permission>
173                <permission>item_unlock</permission>
174                <permission>remove_plugins</permission>
175                <permission>content_read</permission>
176                <permission>content_search</permission>
177                <permission>view_logs</permission>
178                <permission>start_stop_publisher</permission>
179                <permission>read_configuration</permission>
180                <permission>write_configuration</permission>
181                <permission>set_item_states</permission>
182                <permission>publish_by_commits</permission>
183                <permission>get_publishing_queue</permission>
184            </allowed-permissions>
185        </rule>
186    </role>
187    <role name="reviewer">
188        <rule regex=".*">
189            <allowed-permissions>
190                <permission>publish</permission>
191                <permission>cancel_publish</permission>
192                <permission>s3_read</permission>
193                <permission>webdav_read</permission>
194                <permission>list_plugins</permission>
195                <permission>get_children</permission>
196                <permission>publish_status</permission>
197                <permission>content_read</permission>
198                <permission>content_search</permission>
199                <permission>read_configuration</permission>
200                <permission>publish_by_commits</permission>
201                <permission>get_publishing_queue</permission>
202            </allowed-permissions>
203        </rule>
204    </role>
205    <role name="*">
206        <rule regex=".*">
207            <allowed-permissions>
208                <permission>s3_read</permission>
209                <permission>webdav_read</permission>
210                <permission>list_plugins</permission>
211                <permission>get_children</permission>
212                <permission>publish_status</permission>
213                <permission>content_read</permission>
214                <permission>content_search</permission>
215            </allowed-permissions>
216        </rule>
217    </role>
218</permissions>
where:
/permissions/site/role@nameRole name/permissions/site/role/rule@regexRegular expression to filter paths where permission is applied./permissions/site/role/rule/allowed-permissions/permissionAllowed permission for role and rule (possible values given in the table above)
System (Global) Scope Permissions
The system level (global) permissions are defined in the file global-permission-mappings-config.xml.
Permission |
Description |
|---|---|
configure_log_levels |
User is permitted to configure log levels from the UI or via the API Loggers update level |
view_logs |
User is permitted to view logs from the project tools UI or Main Menu UI depending on where the permission is configured (project or global/system) |
view_log_levels |
User is permitted to view log levels from the Main Menu UI or via the API Loggers get all |
audit_log |
User is permitted to access the audit logs in the UI from the main menu or the project tools via the API Get audit log |
duplicate_site |
User is permitted to duplicate a project |
create_site |
User is permitted to create projects |
delete_site |
User is permitted to delete projects |
edit_site |
User is permitted to edit sites |
create_groups |
User is permitted to create new groups |
read_groups |
User is permitted to read groups |
update_groups |
User is permitted to update groups |
delete_groups |
User is permitted to delete groups |
create_users |
User is permitted to create new users |
delete_users |
User is permitted to delete users |
encryption_tool |
User is permitted to access the encryption tool |
install_plugins |
User is permitted to install plugins |
list_plugins |
User is permitted to list installed plugins |
manage_access_token |
User is permitted to manage the access tokens |
read_users |
User is permitted to read users. Used in the Users Management Console |
update_users |
User is permitted to update users. Used in the Users Management Console |
search_plugins |
User is permitted to search for plugins |
read_cluster |
User is allowed to list the cluster members and the cluster mode (PRIMARY vs REPLICA) |
write_global_configuration |
User is permitted to write global configuration content for Studio |
system_properties_manage |
User is allowed to update, write or delete system properties. |
system_properties_read |
User is allowed to read system properties. |
allowed_in_maintenance |
User is allowed to access the system APIs during maintenance mode |
Project Scope Permissions
The project level permissions are defined in the file permission-mappings-config.xml within a project/site. These are defined under a role and use the match-all <rule regex=".*">.
Permission |
Description |
|---|---|
add_remote |
User is permitted to add a remote repository to the project. |
cancel_failed_pull |
User is permitted to cancel a failed pull from a repository. |
commit_resolution |
User is permitted to commit resolution |
list_remotes |
User is permitted to list remote repositories for a project |
pull_from_remote |
User is permitted to pull content from remote repository to project content repository |
push_to_remote |
User is permitted to push content to remote repository from project content repository |
remove_remote |
User is permitted to remove remote repository from project content repository |
repair_repository |
User is permitted to repair the repository |
cancel_publish |
User is permitted to cancel a publish request from the UI or via the API Cancel publishing packages |
get_publishing_queue |
User is permitted to get the list of packages in the publishing queue from the UI
or via the API Publishing packages |
publish_status |
User is permitted to get the publishing status from the UI or via the API Get publishing status |
publish_by_commits |
User is permitted to publish commits from sandbox repository by commit id from the UI or via the API Publish commits |
start_stop_publisher |
User is permitted to start/stop the publisher from the UI |
view_logs |
User is permitted to view logs from the project tools UI or Main Menu UI depending on where the permission is configured (project or global/system) |
audit_log |
User is permitted to access the audit logs in the UI from the main menu or the project tools via the API Get audit log |
content_search |
User is permitted to search for content from the UI |
s3_read |
User is permitted to get a list of items from an S3 bucket defined in the AWS S3 profile configured.|br| This is required when using the API to Get a list of items from an S3 bucket |
s3_write |
User is permitted to upload a file to an S3 bucket defined in the AWS S3 profile configured.|br| This is required when using the API to Upload a file to an S3 bucket, etc. |
webdav_read |
User is permitted to get a list of items from a WebDAV server configured in the WebDAV profiles
configuration file. |
webdav_write |
User is permitted to upload a file to a WebDAV server configured in the WebDAV profiles
configuration file. |
encryption_tool |
User is permitted to access the encryption tool |
get_children |
User is permitted to call getChildren* APIs for browsing project content |
install_plugins |
User is permitted to install plugins |
list_plugins |
User is permitted to list installed plugins |
remove_plugins |
User is permitted to remove installed plugins |
set_item_states |
User is permitted to set item states |
site_status |
User is permitted to get status of repository for a project |
unlock_repository |
User is permitted to unlock the repository |
read_configuration |
User is permitted to read configuration content for project |
write_configuration |
User is permitted to write configuration content for project |
Path Scope Permissions
The path level permissions are defined in the file permission-mappings-config.xml within a project/site. These are defined under a role and use a regex rule to match a specific path pattern.
Permission |
Description |
|---|---|
resolve_conflict |
User is permitted to resolve a conflict for a file by accepting ours or theirs |
site_diff_conflicted_file |
User is permitted to get the difference between |
publish |
User is permitted to approve submitted content for publishing or publish content from the UI or via the API Publish items |
content_copy |
User is permitted to copy content from the UI Sidebar or the Toolbar options |
content_create |
User is permitted to create new content from the UI Sidebar or the Toolbar options |
content_delete |
User is permitted to delete content from the UI Sidebar or the Toolbar options or via the API Delete content |
content_read |
User is permitted to read content from the UI or use various APIs e.g. getting the history for a content item via the API Get item history, getting the preview image of a given content type via the API Get content type preview image, etc. |
content_write |
User is permitted to edit content in the UI or use various APIs e.g. renaming content via the API Rename content, etc. |
folder_create |
User is permitted to create new folder |
item_unlock |
User is permitted to unlock items |
Other Security Configuration
Configure Studio Password Requirements
Password requirements validation allows the admin to setup rules that ensures users create passwords based on an organization’s password security policy.
Crafter Studio uses zxcvbn for password strength management.
Since 4.0.3The password strength configured here is displayed to the user when resetting a password or creating a user.
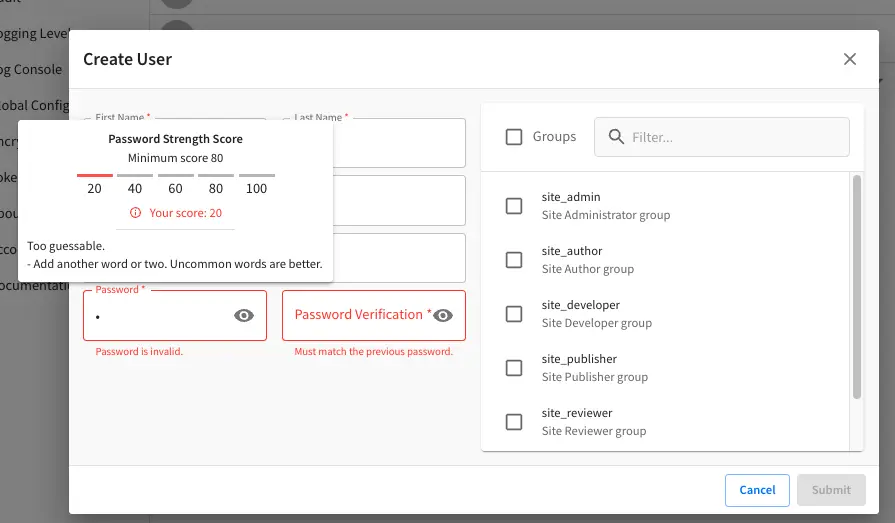
To configure the password strength, click on Main Menu then click on Global Config.
Scroll to the section Security and change the value of studio.security.passwordRequirements.minimumComplexity
to desired minimum password complexity required:
 1# Password requirements minimum complexity
 2# This is based on https://github.com/dropbox/zxcvbn
 3# The minimum complexity corresponds to the password score
 4# You can try this out here https://lowe.github.io/tryzxcvbn/
 5#  score      # Integer from 0-4 (useful for implementing a strength bar)
 6#  0 # too guessable: risky password. (guesses < 10^3)
 7#  1 # very guessable: protection from throttled online attacks. (guesses < 10^6)
 8#  2 # somewhat guessable: protection from unthrottled online attacks. (guesses < 10^8)
 9#  3 # safely unguessable: moderate protection from offline slow-hash scenario. (guesses < 10^10)
10#  4 # very unguessable: strong protection from offline slow-hash scenario. (guesses >= 10^10)
11# The default value is 3
12studio.security.passwordRequirements.minimumComplexity: 3
Crafter Studio’s default minimum password complexity required is set to 3 (which translate to a score
of 80 in the UI), and until the user setting/changing the password has met the minimum required,
the Submit button will not be enabled. Also, once the minimum password strength score has been
reached, the score will be displayed in green.
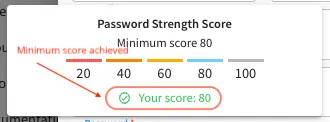
Below, are some of the messages displayed as a user is inputting a new password:
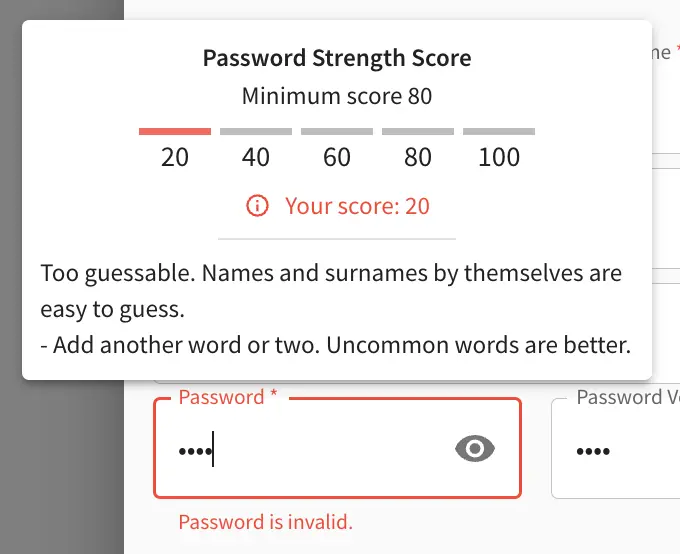
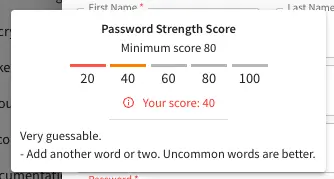
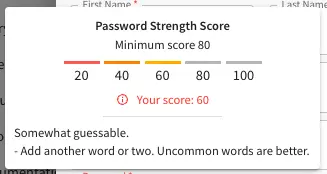
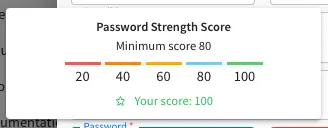
Studio Timeouts
Changing the Session Timeout
CrafterCMS has configurable timeouts for session lifetime and session inactivity.
Session lifetime timeout is the amount of time a session is valid before requiring the user to re-authenticate.
Session inactivity timeout is the amount of time of user inactivity before requiring the user to re-authenticate.
In some cases, some operations in CrafterCMS may last longer than the user session inactivity timeout settings. For this scenario, the session inactivity timeout will need to be modified to allow the operation to finish without the session timing out. Also, you may want to change the timeouts from the default settings.
Here’s a summary of the session timeouts available in CrafterCMS:
Timeout Name |
Default Value |
Description |
|---|---|---|
|
480 |
Studio session lifetime timeout |
|
30 |
Studio session inactivity timeout |
|
30 |
Tomcat session timeout |
Change Session Lifetime Timeout
To change the session lifetime timeout, in your
CRAFTER_HOME/bin/apache-tomcat/shared/classes/crafter/studio/extension/studio-config-override.yaml,
change the value for studio.security.sessionTimeout to desired amount of time the session is valid
in minutes for users.
# Time in minutes after which active users will be required to login again
# studio.security.sessionTimeout: 480
Make sure to stop and restart Studio after making your changes.
Change Session Inactivity Timeout
There are two timeouts you can configure for the session inactivity timeout as described in the above table.
session-timeoutin the Tomcatweb.xmlfile This is the default Tomcat timeout for handling idle connections (inactive)inactivityTimeoutin the Studio override configuration file This is the Studio session inactivity timeout
To change the session inactivity timeout, follow the instructions below:
In your
CRAFTER_HOME/bin/apache-tomcat/shared/classes/crafter/studio/extension/studio-config-override.yaml, change the value forstudio.security.inactivityTimeoutto set the amount of time in minutes the amount of time a user can be inactive before the user’s session times out.# Time in minutes after which inactive users will be required to login again # studio.security.inactivityTimeout: 30
In your
CRAFTER_HOME/bin/apache-tomcat/webapps/studio/WEB-INF/web.xmlfile, change the value in between thesession-timeouttags to desired amount of time the session will exist in minutes:<session-config> <session-timeout>30</session-timeout> <tracking-mode>COOKIE</tracking-mode> </session-config>
Remember to keep the Studio session inactivity timeout inactivityTimeout from the studio-config-override.yaml file less than the Tomcat session-timeout from the CRAFTER_HOME/bin/apache-tomcat/webapps/studio/WEB-INF/web.xml file.
Make sure to stop and restart Studio after making your changes.
You can also change the Studio session timeouts from the Main Menu in Studio under Global Config
Cipher Configuration
 1##################################################
 2##                   Security                   ##
 3##################################################
 4# Time in minutes after which active users will be required to login again
 5# studio.security.sessionTimeout: 480
 6# Time in minutes after which inactive users will be required to login again
 7# studio.security.inactivityTimeout: 30
 8#
 9# Salt for encrypting
10studio.security.cipher.salt: ${env:CRAFTER_SYSTEM_ENCRYPTION_SALT}
11# Key for encrypting
12studio.security.cipher.key: ${env:CRAFTER_SYSTEM_ENCRYPTION_KEY}
13
14# The key used for encryption of configuration properties
15studio.security.encryption.key: ${env:CRAFTER_ENCRYPTION_KEY}
16# The salt used for encryption of configuration properties
17studio.security.encryption.salt: ${env:CRAFTER_ENCRYPTION_SALT}
18
19# The path of the folder used for the SSH configuration
20studio.security.ssh.config: ${env:CRAFTER_SSH_CONFIG}
21
22# Defines name used for environment specific configuration. It is used for environment overrides in studio. Default value is default.
23studio.configuration.environment.active: ${env:CRAFTER_ENVIRONMENT}
Access Tokens
Since 4.0.0The following section of Studio’s configuration overrides allows you to configure settings for the Studio access tokens. Access tokens can then be used to invoke Crafter Studio’s REST APIs from the out of the box UI as well as any customized JavaScript, CURL commands, or used in Crafter CLI to perform operations on Studio.
Studio access tokens uses JWT tokens for authentication. The following environment variables are used to customize the default behavior of the JWT token that is used.
 1##################################################
 2##               Access Tokens                  ##
 3##################################################
 4
 5# Issuer for the generated access tokens
 6studio.security.token.issuer: ${env:STUDIO_TOKEN_ISSUER}
 7# List of accepted issuers for validation of access tokens (separated by commas)
 8studio.security.token.validIssuers: ${env:STUDIO_TOKEN_VALID_ISSUERS}
 9# The audience for generation and validation of access tokens (if empty the instance id will be used)
10studio.security.token.audience: ${env:STUDIO_TOKEN_AUDIENCE}
11# Time in minutes for the expiration of the access tokens
12studio.security.token.timeout: ${env:STUDIO_TOKEN_TIMEOUT}
13# Password for signing the access tokens (needs to be equal or greater than 512 bits in length)
14studio.security.token.password.sign: ${env:STUDIO_TOKEN_SIGN_PASSWORD}
15# Password for encrypting the access tokens
16studio.security.token.password.encrypt: ${env:STUDIO_TOKEN_ENCRYPT_PASSWORD}
17# Name of the cookie to store the refresh token
18studio.security.token.cookie.name: ${env:STUDIO_REFRESH_TOKEN_NAME}
19# Time in seconds for the expiration of the refresh token cookie
20studio.security.token.cookie.maxAge: ${env:STUDIO_REFRESH_TOKEN_MAX_AGE}
21# Indicates if the refresh token cookie should be secure (should be true for production environments behind HTTPS)
22studio.security.token.cookie.secure: ${env:STUDIO_REFRESH_TOKEN_SECURE}
where:
STUDIO_TOKEN_ISSUER,STUDIO_TOKEN_VALID_ISSUERS,STUDIO_TOKEN_AUDIENCE
These variables are used in the JWT claims set. See https://datatracker.ietf.org/doc/html/rfc7519#section-4.1 for more information on JWT claims set.STUDIO_TOKEN_TIMEOUT
This variable sets the expiration of the JWT token in minutes (default is 5 minutes). The expiration value is also injected into the JWT claims when a token is published. This cannot be changed after the token is published. After the expiration time, the token is invalid and a new token must be published to use for API calls. (This can be done automatically with therefresh_tokenin the UI)STUDIO_TOKEN_SIGN_PASSWORD
This variable is used for the Signature part of the JWT token. The signature is used to verify the message wasn’t changed along the way, and, in the case of tokens signed with a private key, it can also verify that the sender of the JWT is who it says it is. For Studio, we use HMAC_SHA512 algorithm for the signature.STUDIO_TOKEN_ENCRYPT_PASSWORD
This variable is used for encrypting the JWT token itself so that it won’t be decrypted without a password.STUDIO_REFRESH_TOKEN_NAME,STUDIO_REFRESH_TOKEN_MAX_AGE,STUDIO_REFRESH_TOKEN_SECURE
These variables are used for customizing the refresh token cookie. JWT token is short lived in general and we use a refresh token to exchange for a new JWT token when the old one is expired. By default the cookie name isrefresh_token. When creating a new access token, the backend will validate if the refresh token cookie is valid. You should find this from the cookies in the browser while logging in with Studio.
For more information on JWT tokens in general, see https://jwt.io/introduction. For information on creating access tokens in Studio, see here.
Groovy Sandbox Configuration
When a Groovy script is executed, all code is validated to prevent operations that could compromise the system. Depending on your installation, validation may use a whitelist (allowed expressions), a blacklist (blocked expressions), or both. If both are enabled, an expression must be allowed by the whitelist and must not match the blacklist.
When you try to execute a script that contains an expression not included in the whitelist, or an expression blocked by the blacklist, whichever is enabled, you’ll see an error similar to the following:
UnsupportedOperationException: Insecure call to staticMethod java.lang.Runtime getRuntime ...
It is recommended to keep the default configuration. However, if access to one or more of the blacklisted expressions is required, or access to one or more expressions not in the whitelist is required, it is possible to override the blacklist and/or whitelist configuration. Configuration is global and affects all scripts on the server.
Warning
When you allow a script to make an insecure call you should make sure it can only be executed with known arguments and never with unverified user input.
Groovy Sandbox Properties
The following allows you to configure the Groovy sandbox.
The Groovy sandbox is enabled by default and can be disabled by changing the property studio.scripting.sandbox.enable to false.
 1# Indicates if the sandbox should be enabled
 2studio.scripting.sandbox.enable: true
 3# Indicates if the blacklist should be enabled (this will have no effect if the sandbox is disabled)
 4studio.scripting.sandbox.blacklist.enable: true
 5# The location of the default blacklist to use (this will have no effect if the sandbox is disabled)
 6studio.scripting.sandbox.blacklist.path: classpath:crafter/studio/groovy/blacklist
 7# Indicates if the whitelist should be enabled (this will have no effect if the sandbox is disabled)
 8studio.scripting.sandbox.whitelist.enable: false
 9# The location of the default whitelist to use (this will have no effect if the sandbox is disabled)
10studio.scripting.sandbox.whitelist.path: classpath:crafter/studio/groovy/whitelist
Using a Custom Blacklist
Crafter Studio includes a default blacklist that you can find here. Make sure you review the branch/tag you’re using.
To use a custom blacklist follow these steps:
Copy the default blacklist file to your classpath, for example:
CRAFTER_HOME/bin/apache-tomcat/shared/classes/crafter/studio/extension/groovy/blacklistRemove or comment (adding a
#at the beginning of the line) the expressions that your scripts requireUpdate the
studio-config-override.yamlconfiguration file to load the custom blacklist:CRAFTER_HOME/bin/apache-tomcat/shared/classes/crafter/studio/extension/studio-config-override.yaml¶# The location of the default blacklist to use (this will have no effect if the sandbox is disabled) studio.scripting.sandbox.blacklist.path: classpath:crafter/studio/extension/groovy/blacklist
Restart CrafterCMS
Now you can execute the same script without any issues.
Disabling the Sandbox Blacklist
It is possible to disable the blacklist to allow the execution of most expressions, in case you need to use a
considerable number of the expression included in the blacklist while keeping some basic restrictions. To disable
the blacklist for all projects/sites update the studio-config-override.yaml configuration file:
# Indicates if the blacklist should be enabled (this will have no effect if the sandbox is disabled)
studio.scripting.sandbox.blacklist.enable: false
Using a Custom Whitelist
Since 4.5.0Crafter Studio includes a default whitelist that you can find here. Make sure you review the branch/tag you’re using.
To use a custom whitelist follow these steps:
Copy the default whitelist file to your classpath, for example:
CRAFTER_HOME/bin/apache-tomcat/shared/classes/crafter/studio/extension/groovy/whitelistAdd, remove or comment (adding a
#at the beginning of the line) the expressions that your scripts requireUpdate the
studio-config-override.yamlconfiguration file to load the custom whitelist:CRAFTER_HOME/bin/apache-tomcat/shared/classes/crafter/studio/extension/studio-config-override.yaml¶# The location of the default whitelist to use (this will have no effect if the sandbox is disabled) studio.scripting.sandbox.whitelist.path: classpath:crafter/studio/extension/groovy/whitelist
Restart CrafterCMS
Now you can execute the same script without any issues.
Enabling the Sandbox Whitelist
Since 4.5.0It is possible to only allow the execution of approved expressions included in a list to prevent operations that could compromise the system, by using the sandbox whitelist. To create your custom sandbox whitelist, see above.
The sandbox whitelist is disabled by default. To enable the whitelist for all projects/sites update the
studio-config-override.yaml configuration file:
# Indicates if the whitelist should be enabled (this will have no effect if the sandbox is disabled)
studio.scripting.sandbox.whitelist.enable: true
Grape Configuration
Grape can be customized via the Ivy settings that it uses. To configure the Ivy settings that Grape uses, simply edit
the CRAFTER_HOME/bin/grapeConfig.xml configuration file. Below is an example configuration that blocks a package
from downloading by redirecting the package download to a non-existing domain:
 1<?xml version="1.0"?>
 2<ivysettings>
 3  <settings defaultResolver="downloadGrapes"/>
 4  <resolvers>
 5    <chain name="downloadGrapes" returnFirst="true">
 6      <ibiblio name="ibiblio" m2compatible="true"/>
 7      <!-- Non-exists resolver for blocked packages -->
 8      <url name="blocked">
 9        <ivy pattern="https://blockedpackages.local/repo/[organisation]/[module]/[revision]/ivy.xml" />
10        <artifact pattern="https://blockedpackages.local/repo/[organisation]/[module]/[revision]/[artifact]-[revision].[ext]" />
11      </url>
12    </chain>
13  </resolvers>
14  <!-- Module-specific resolver configuration to block (redirect to non-exists domain) -->
15  <modules>
16    <module organisation="org.to.block" name="name.to.block" resolver="blocked"/>
17  </modules>
18</ivysettings>
For more information on customizing settings, see the Ivy documentation
Grapes Download
Since 4.5.0The following allows you to enable or disable automatic Groovy dependency (grapes) downloads for scripts (@grab):
# Indicates if @Grab annotations should download grapes
# If false, only already downloaded grapes will be available
studio.scripting.grapes.download.enabled: false
Automatic grapes download is disabled by default. Set studio.scripting.grapes.download.enabled to true to enable
automatic grapes download.
Installing Grapes from the Command Line
Administrators can install new grapes from the command line.
To install, go to the CRAFTER_HOME/bin directory, then run the following command:
./groovy/bin/grape -Dgrape.root=. install <GROUP ID> <ARTIFACT ID> <VERSION>
For example, to install Semver4j version 3.1.0 from the command line, we’ll use the following values:
<GROUP ID>:
com.vdurmont<ARTIFACT ID>:
semver4j<VERSION>:
3.1.0
./groovy/bin/grape -Dgrape.root=. install com.vdurmont semver4j 3.1.0
Important Notes
There are some limitations that should be noted when working with the Groovy Sandbox.
One limitation is that an exception is thrown during execution when a Groovy class has a property and a getter method for the property. Here’s an example code that throws an exception during execution:
class Test {
  private String message

  public String getMessage() {
     return this.message
  }
}

def t = new Test()
t.message = "this is a test"

return t.getMessage()
Here’s the error thrown in the logs by the code above:
Caused by: java.lang.StackOverflowError
     at groovy.lang.GroovyClassLoader.loadClass(GroovyClassLoader.java:693)
     at groovy.lang.GroovyClassLoader$InnerLoader.loadClass(GroovyClassLoader.java:450)
     at groovy.lang.GroovyClassLoader.loadClass(GroovyClassLoader.java:812)
     at groovy.lang.GroovyClassLoader.loadClass(GroovyClassLoader.java:800)
     at sun.reflect.GeneratedMethodAccessor340.invoke(Unknown Source)
     at sun.reflect.DelegatingMethodAccessorImpl.invoke(DelegatingMethodAccessorImpl.java:43)
     at java.lang.reflect.Method.invoke(Method.java:498)
     at org.codehaus.groovy.reflection.CachedMethod.invoke(CachedMethod.java:98)
     at groovy.lang.MetaMethod.doMethodInvoke(MetaMethod.java:325)
     at groovy.lang.MetaClassImpl.getProperty(MetaClassImpl.java:1845)
     at groovy.lang.MetaClassImpl.getProperty(MetaClassImpl.java:3773)
     at Test.getProperty(test.get.groovy)
     at org.codehaus.groovy.runtime.InvokerHelper.getProperty(InvokerHelper.java:190)
     at org.codehaus.groovy.runtime.ScriptBytecodeAdapter.getProperty(ScriptBytecodeAdapter.java:469)
     at org.kohsuke.groovy.sandbox.impl.Checker$7.call(Checker.java:392)
     at org.kohsuke.groovy.sandbox.GroovyInterceptor.onGetProperty(GroovyInterceptor.java:68)
     at org.jenkinsci.plugins.scriptsecurity.sandbox.groovy.SandboxInterceptor.onGetProperty(SandboxInterceptor.java:297)
     at org.kohsuke.groovy.sandbox.impl.Checker$7.call(Checker.java:390)
     at org.kohsuke.groovy.sandbox.impl.Checker.checkedGetProperty(Checker.java:394)
     at org.kohsuke.groovy.sandbox.impl.Checker$checkedGetProperty$1.callStatic(Unknown Source)
     at Test.getMessage(test.get.groovy:5)
Workarounds
There are a couple of things you can do to get around the exception being thrown:
Do not use getter methods and instead access the property directly
Using the example above, we’ll access the property directly:class Test { private String message } def t = new Test() t.message = "this is a test" return t.message
Use a different name for the property and the getter method
Again, using the example above, we’ll use a different name from the property for the getter method:class Test { private String theMessage public String getMessage() { return this.theMessage } } def t = new Test() t.theMessage = "this is a test" return t.getMessage()
HTTP Security Response Headers
Properly configured HTTP response headers help prevent security vulnerabilities like cross-site scripting (XSS), clickjacking, and other common types of attacks.
HTTP security response headers for Crafter Studio are configured in the studio-config-override.yaml under
CRAFTER_HOME/bin/apache-tomcat/shared/classes/crafter/studio/extension/studio-config-override.yaml
See Policy Headers and Cross-Origin Resource Sharing (CORS) for more information on how to configure HTTP security response headers.
Administration
Much of the administration of Crafter Studio can be done via the UI. This section describes how to perform these basic tasks.
Navigating the Navigation Menu
In this section, we discuss the Navigation Menu tools available in Studio. To access, click the Navigation Menu icon from the top right of the browser

Here are the list of tools available when using an out of the box blueprint. The Navigation Menu tools described below are available to users belonging to the system_admin group.
The configuration files for the Navigation Menu is located in CRAFTER_HOME/data/repos/global/configuration/ where:
global-menu-config.xml lets you setup the list of tools available from the Navigation Menu sidebar
global-permission-mappings-config.xml lets you configure the permissions to a role globally for the entire application
global-role-mappings-config.xml lets you configure the mapping between the group and the role
The tools available in the Navigation Menu is configured similar to how the Project Tools Sidebar is configured here using the global menu config configuration file mentioned above.
Projects
Projects contains a list of all the projects the logged in user has access to. The section Author Screens in Content Authors contains descriptions on some of the actions that can be performed from the Projects screen. This also allows users with the system admin role to create new projects either from a blueprint, a remote repository or an existing project.
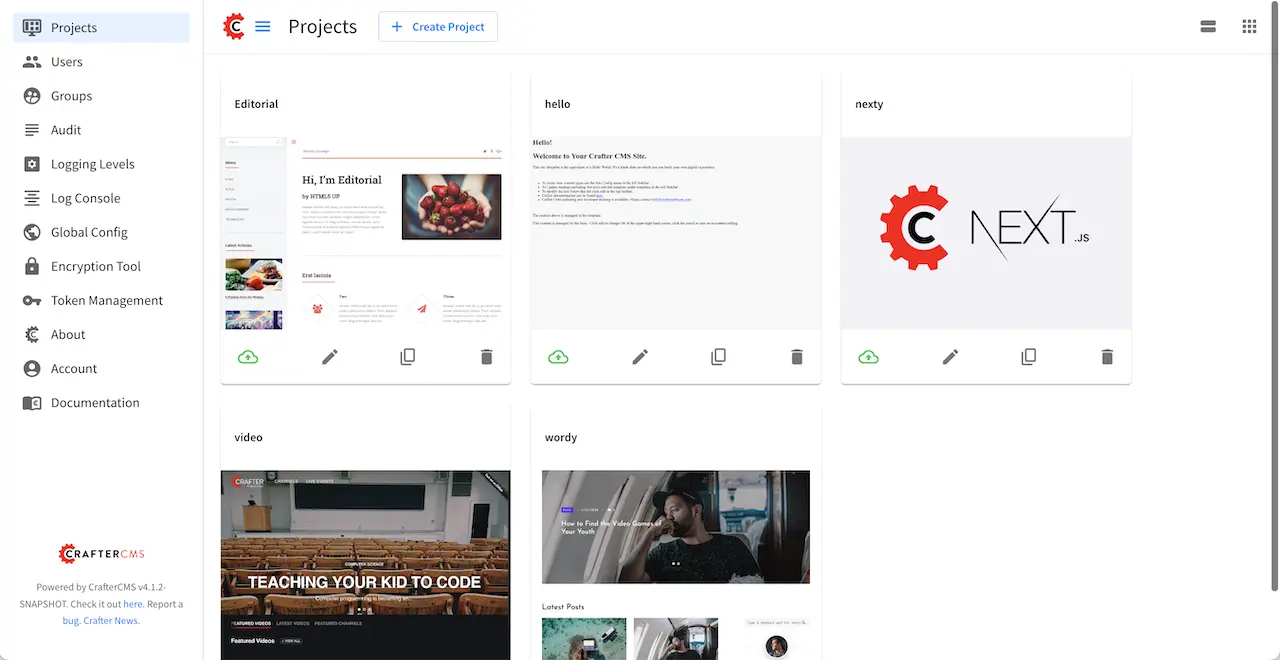
Users
A user is anybody who uses CrafterCMS. The Users management console lets the administrator manage who has access to
Crafter Studio.
For information on managing users and groups, see User/Group Management.
Description
The Users management console allows you to control and set up who can access and manage the sites. All users are listed on
this console.
To find the Users management console follow the next instructions:
Click on the Navigation Menu
option located at the top right of the browser, then click on
Users in the sidebar located on the left side of the browser: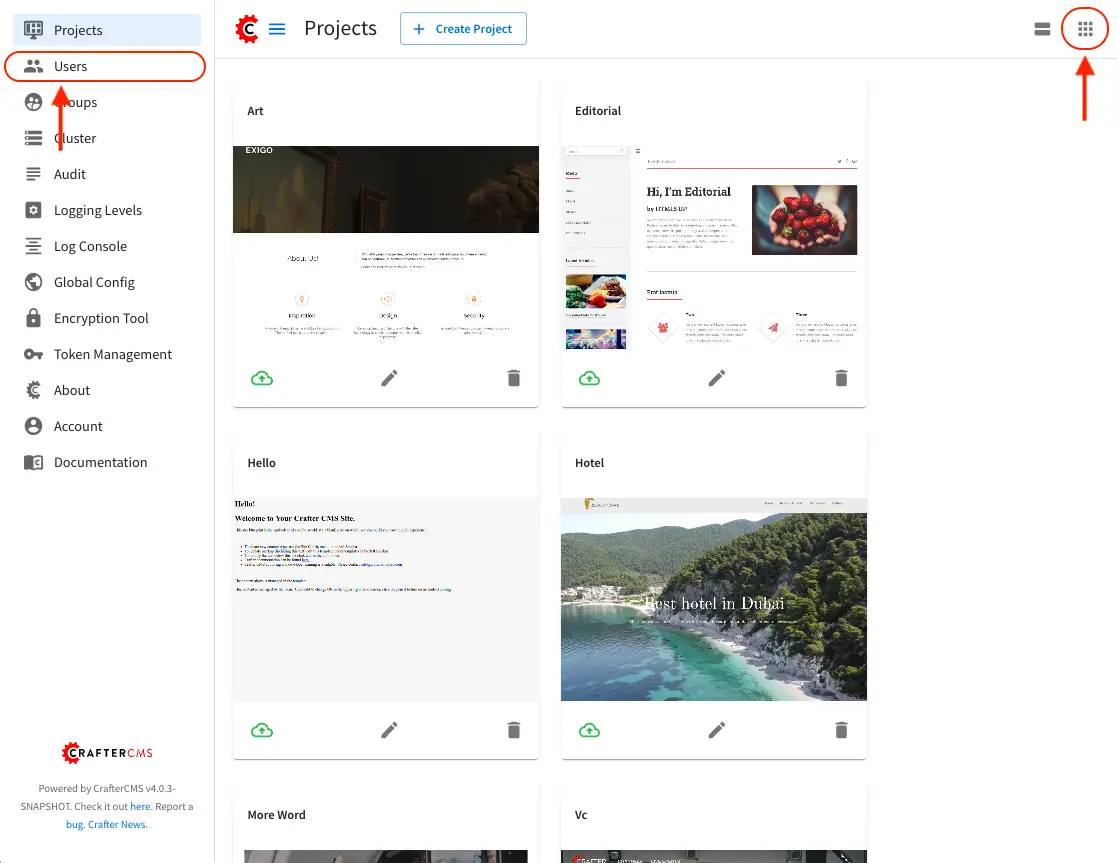
Here’s the screen that will appear after clicking on Users
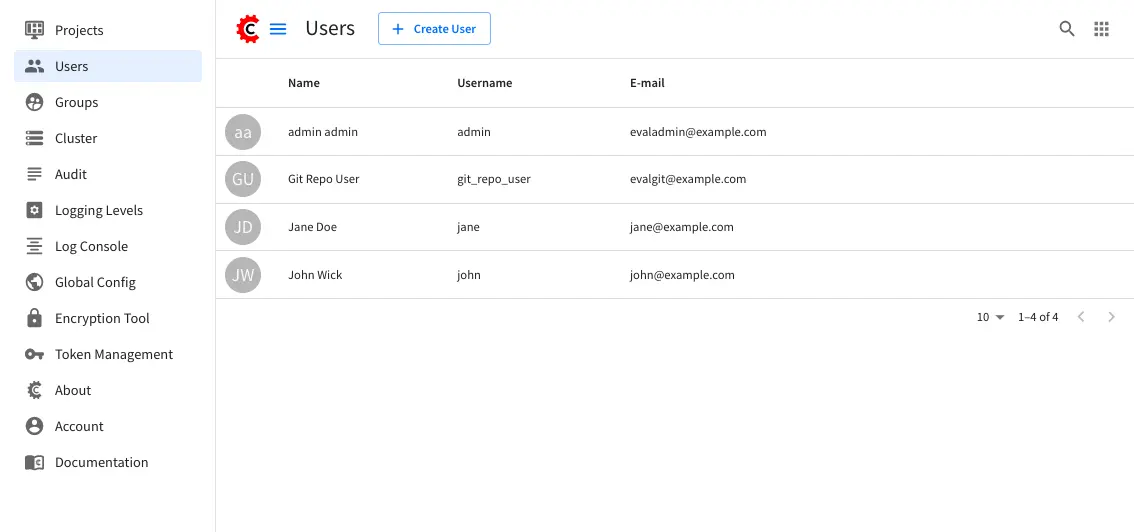
Actions
You can list, search, add or delete users, as well as view specific information.
Listing Users
To see a list of all existing users, make sure that there are no search terms entered in the search bar. You can also change the number of users listed per page by selecting a different number in the dropdown box at the bottom right of the screen
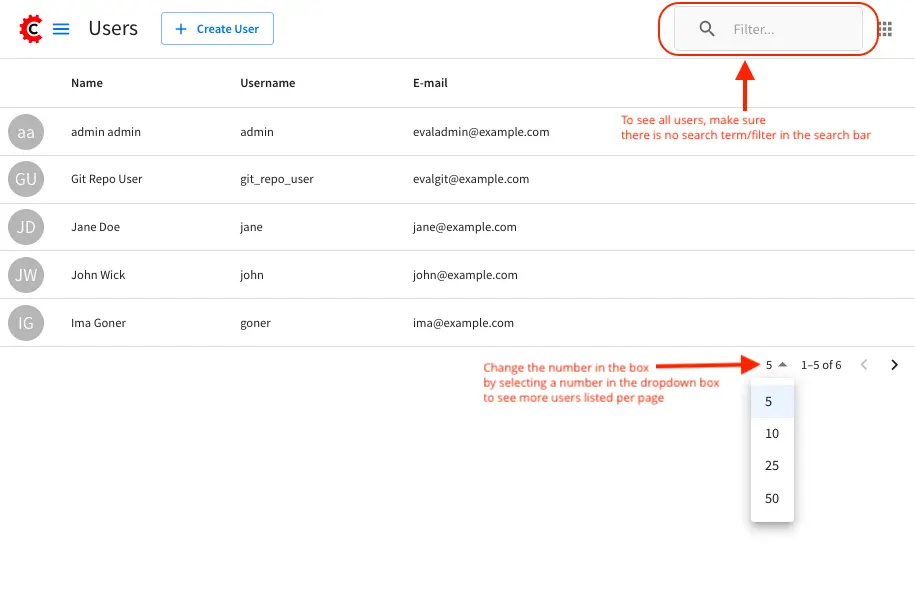
Searching Users
You can search for a specific user. To search users, click on the magnifying glass icon on the top right then go to the search field and type user name, last name, user name or mail. In the following example we typed “jane”, we obtained only one related user: “Jane”.
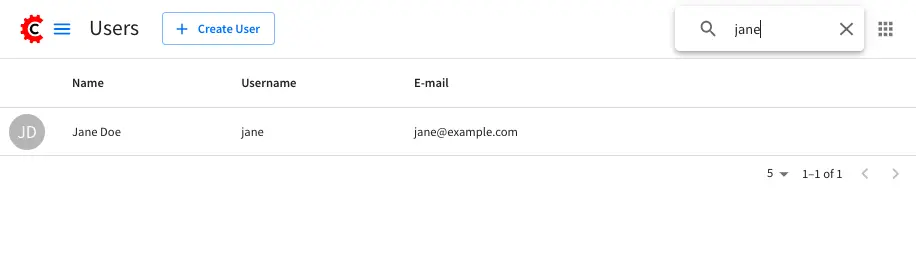
Creating a New User
To create a new user, please click on the “Create User” button at the top of the page.
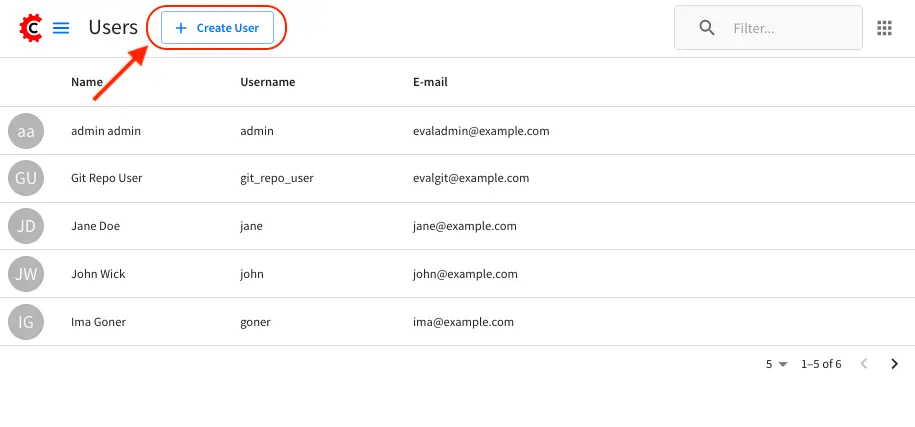
A modal dialog will be displayed, please fill out all the fields and finally click on the “Submit” button. If you do not want to create a new user, please click on the “Cancel” button.
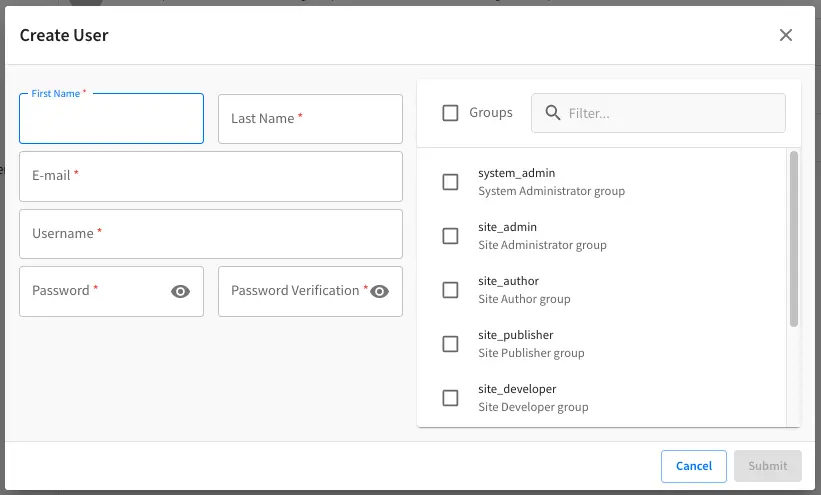
A notification will appear on the screen for a few seconds on successful creation of a new user
Viewing and Editing an Existing User
To view/edit a specific user, please click on the row of the name you want to edit:
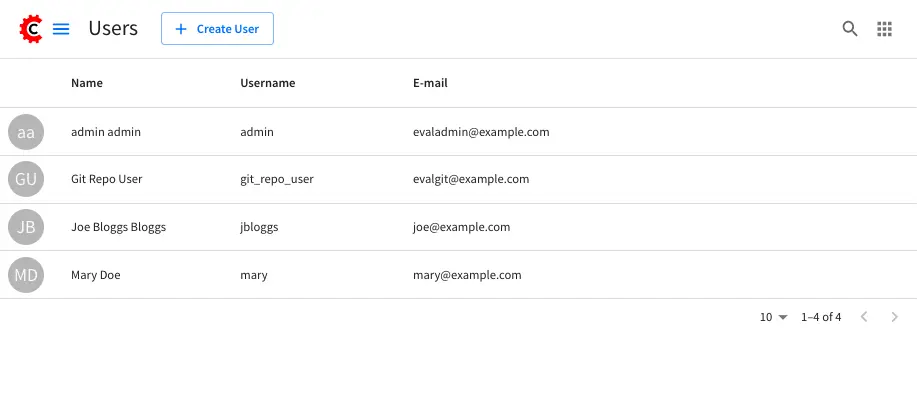
A modal dialog will be displayed with the user information. To finish viewing, click on the “X” (close icon) button.
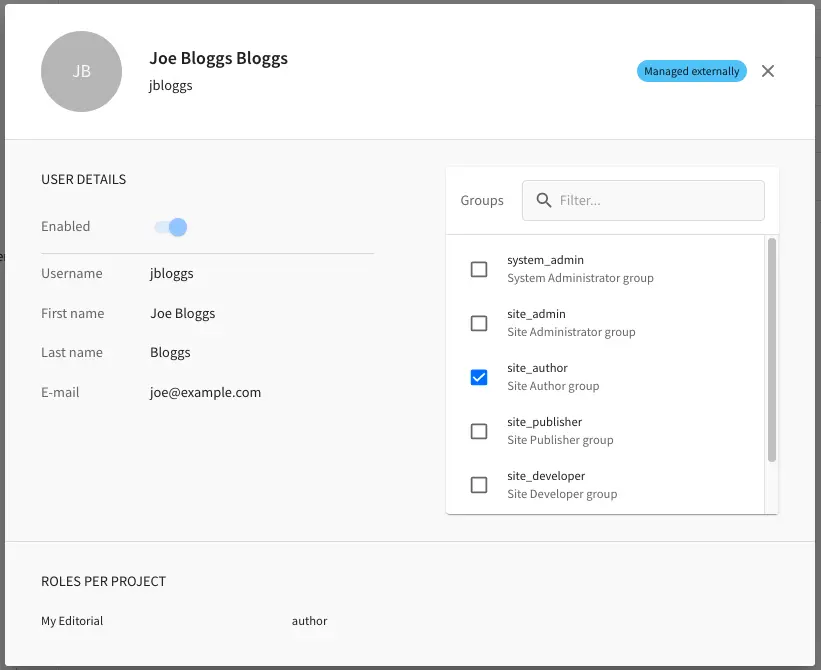
Once the dialog is displayed, to edit a specific user, simply click on the field that you want to change. In the above dialog the Externally Managed label is displayed which indicates that the user is externally managed such as the case in LDAP. Notice that since the user is externally managed, the only change that can be made for the user is the group membership.
For the user dialog displayed below, since the user is not externally managed, all the fields can be changed for the user. In this dialog, you can modify the user information such as email, first name, last name and user name, group membership, reset the user’s password and delete the user. You can also activate/de-activate the user currently being viewed by clicking on the slider labeled Enabled. Edit the fields you want to change and then click on the “Save” button. If you do not want to edit the user, please click on the “Cancel” button.
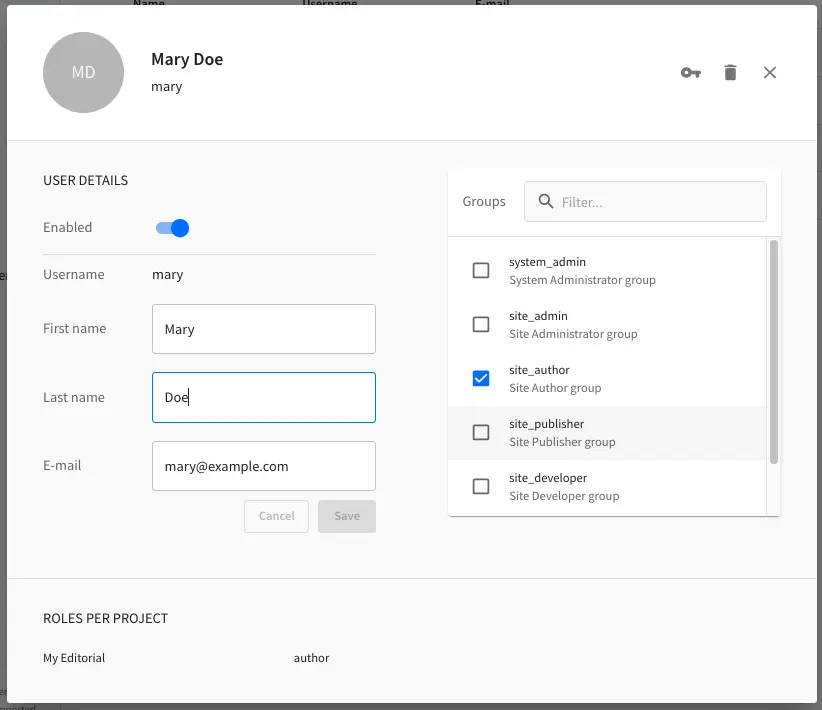
Resetting an Existing User’s Password
To reset the password of a specific user, please click on the key icon in the user modal dialog as shown in the following example.
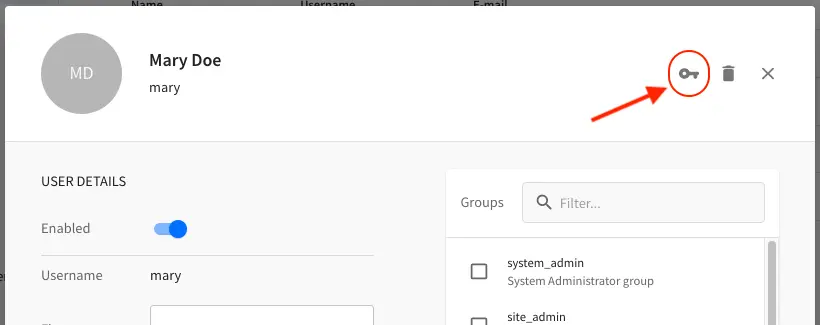
A modal dialog will be displayed, where the admin can reset the users password. Click on Save to reset the password.
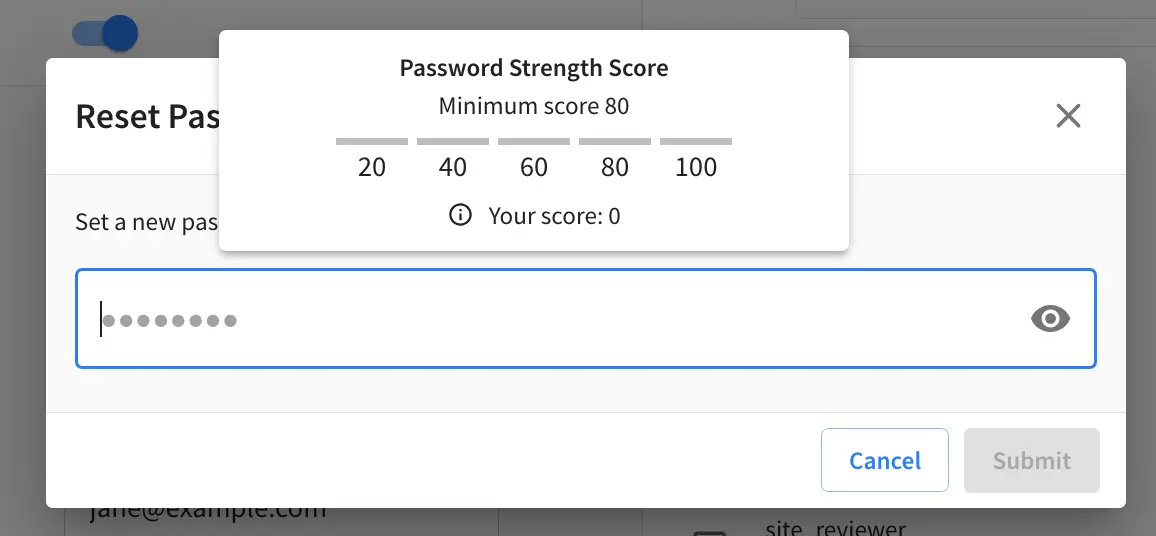
Removing an Existing User
To remove a specific user, please click on the trash can icon located in the user modal dialog as shown in the following example.
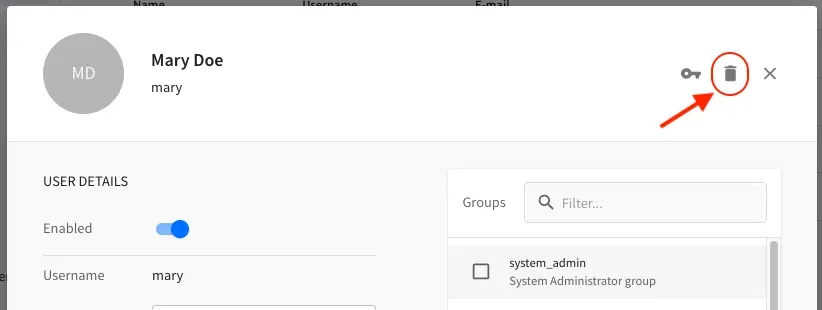
A confirmation pop up will be displayed, please click on “Yes” to remove the user and click on “No” if you do not want to remove it.
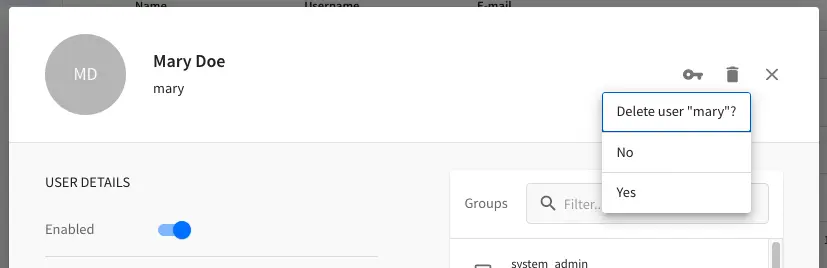
A notification will appear on the screen for a few seconds on successful deletion of a user
Important
When a user is deleted, the deleted user cannot be re-created. Instead of deleting a user, we recommend disabling the user, which prevents them from connecting to the system.
To disable a user, simply click the Enabled slider to turn it off and a notification snack
bar at the bottom will appear informing you that the user has been disabled successfully.
Groups
A group consists of a collection of users. The Groups management console lets the administrator manage groups,
members belonging to a group, etc.
For information on managing users and groups, see User/Group Management.
Description
The Groups management console allows you to administrate the groups created on CrafterCMS. You can add, remove,
edit, and manage the users that will belong to the groups and you can also add and remove groups.
Here’s a list of predefined groups and roles in CrafterCMS:
Group
|
Description
|
Role
|
|---|---|---|
system_admin
|
System administrator
|
system_admin
|
site_admin
|
Site administrator
|
admin
|
site_author
|
Site author
|
author
|
site_developer
|
Site developer
|
developer
|
site_reviewer
|
Site reviewer
|
reviewer
|
site_publisher
|
Site publisher
|
publisher
|
You can add more groups defined whenever needed. The list above is just a starting point for when you first create your project. The following sections will give you more details on users and groups. The next sections, Permission Mappings and Role Mappings describes how to setup/assign permissions and roles.
To find this section through studio follow the next instructions:
Click on
Navigation Menu at the top right of your browser.Click on Groups from the main menu on the left side of your browser.
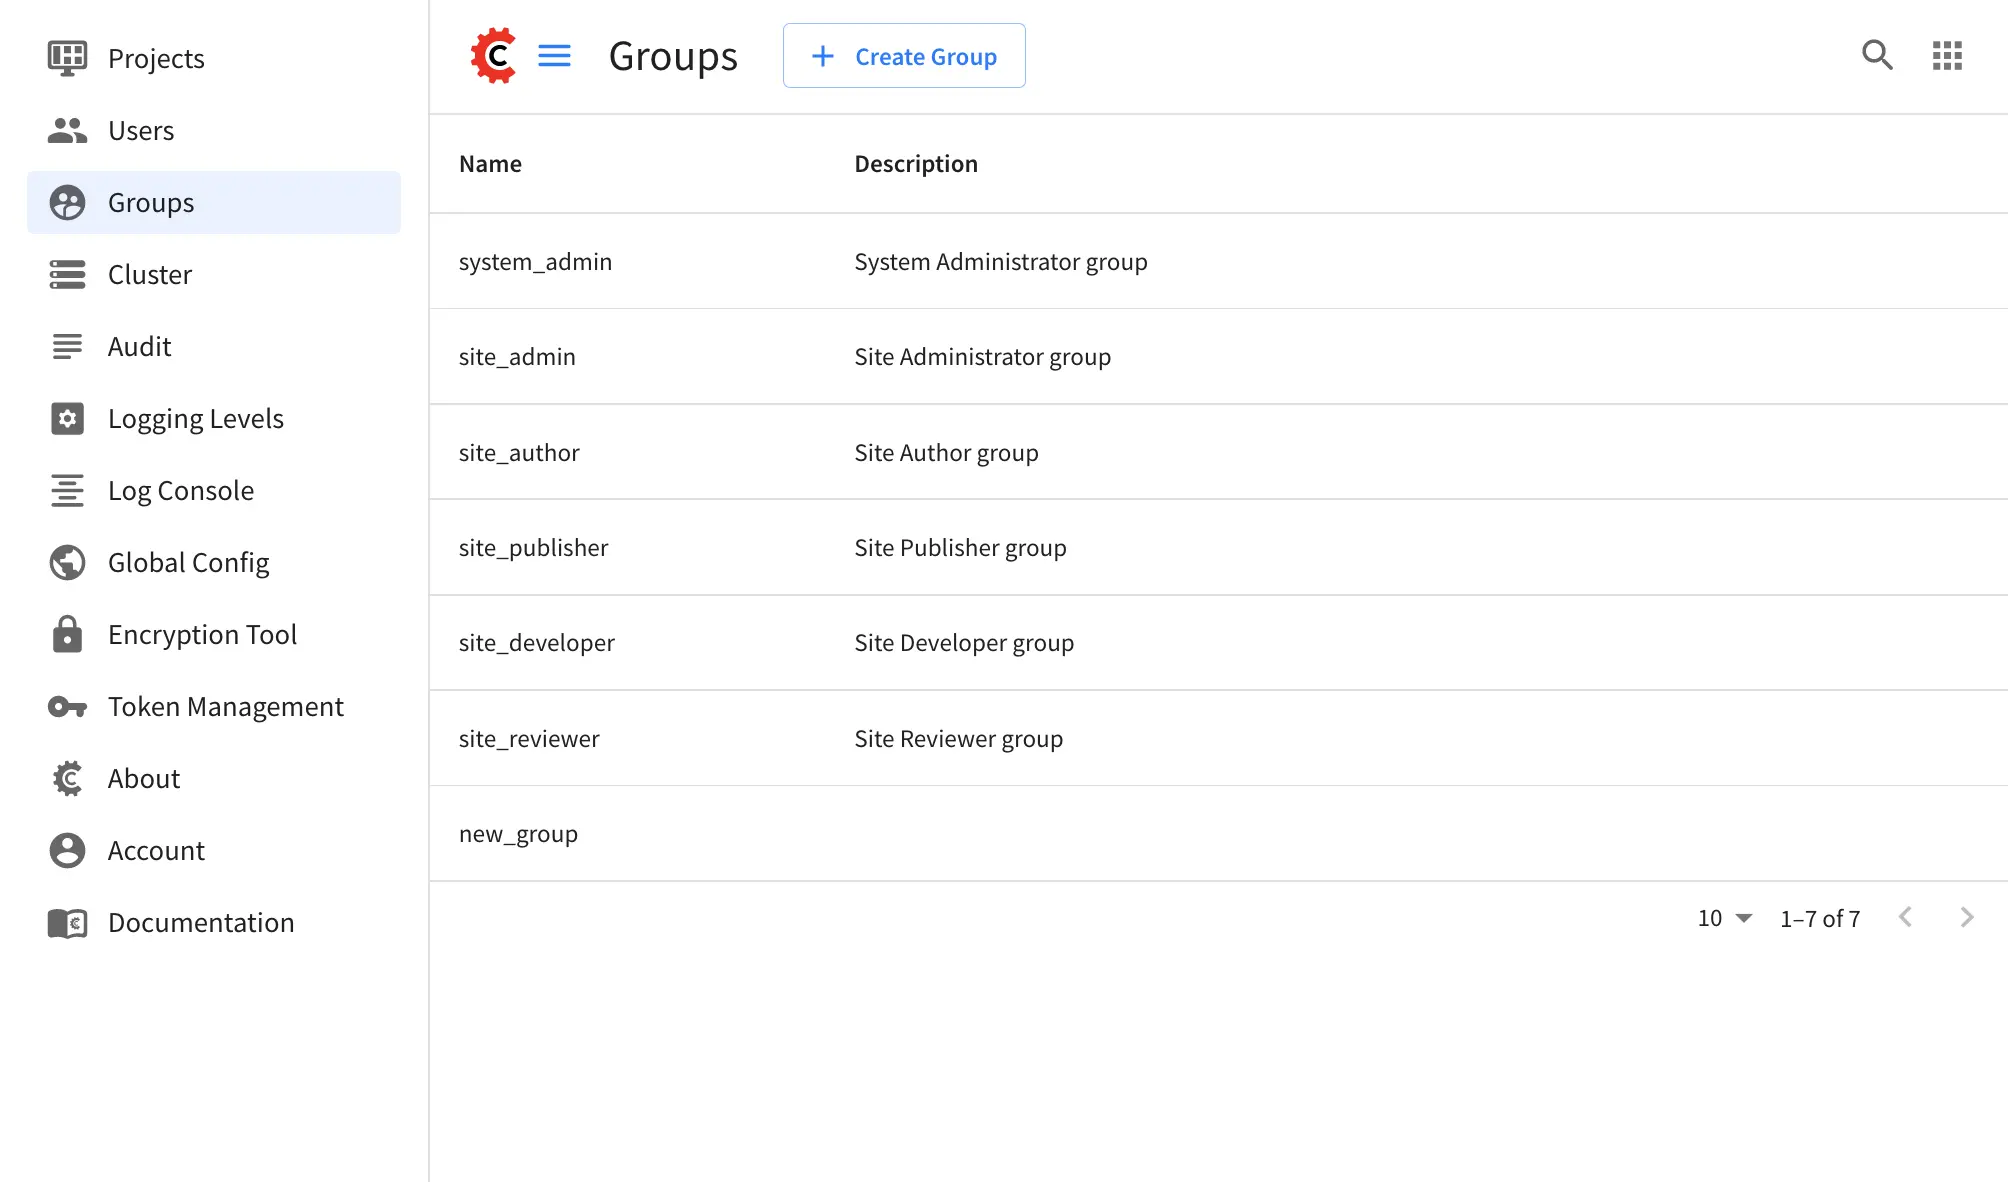
Searching Groups
You can search for groups by their properties (Display Name, Description), simply enter your search term into the search bar by clicking on the magnifying glass icon on the top right and it will show results that match your search term.
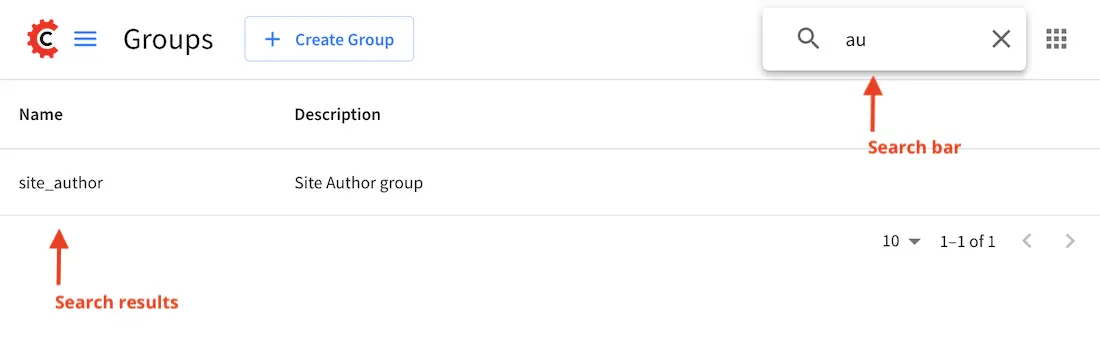
Adding a New Group
To create a new group, you just need to click on the “Create Group” button,
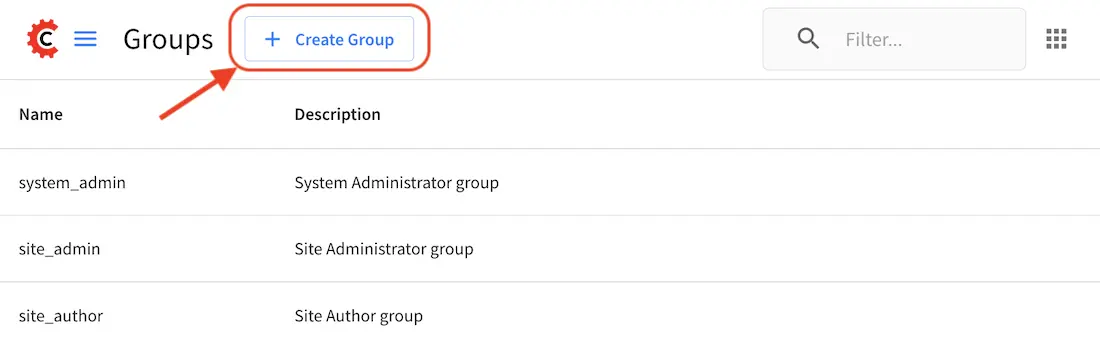
then, a modal dialog will show up with the required fields for the group creation. Enter a display name and a short description for the new group. After filling the form, click on Save, and the new group will show in the groups table.
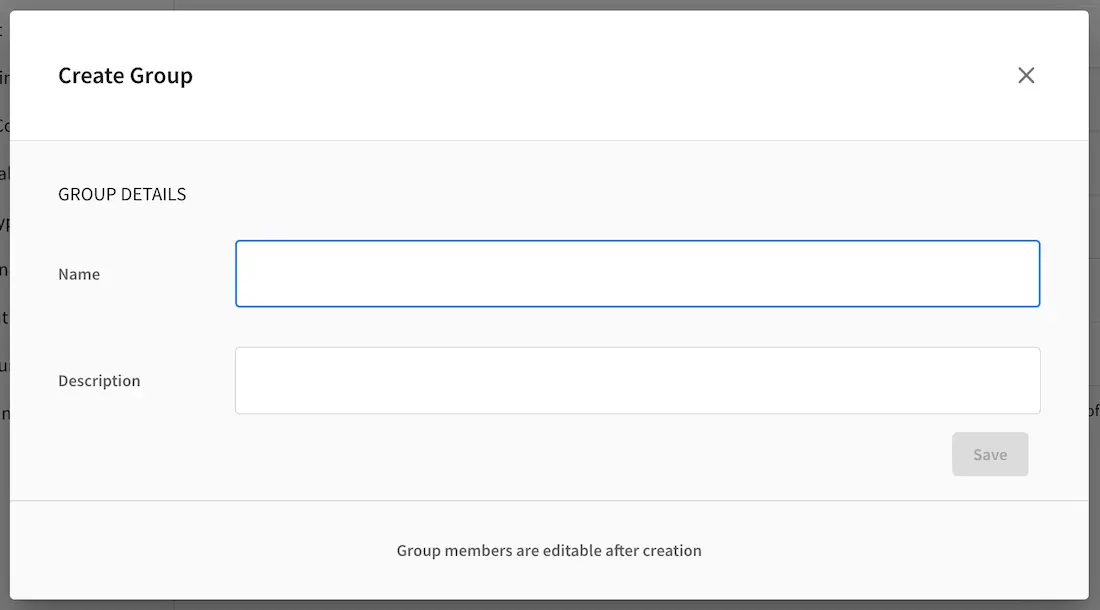
A notification of successful group creation will pop up for a few seconds after clicking on the Create button.
Removing a Group
To remove a group, select a group from the list which will open a dialog for the selected group. Click on the trash can icon on the top right of the group dialog.
A confirmation popup will appear asking you if you want to delete the group, as seen above. Click on Yes to remove the group.
On successful removal of the group, a notification will appear for a few seconds that the group has been deleted.
Editing an Existing Group
To edit a group, select a group from the list which will open a dialog for the selected group. In this dialog, you can modify the group description, just click on the Save button after making your changes. You can also add/remove users from the group. Finally, you’ll see a list of all users that belong to the group. To return to the list of all groups in your project, click on the X at the top right of the dialog.
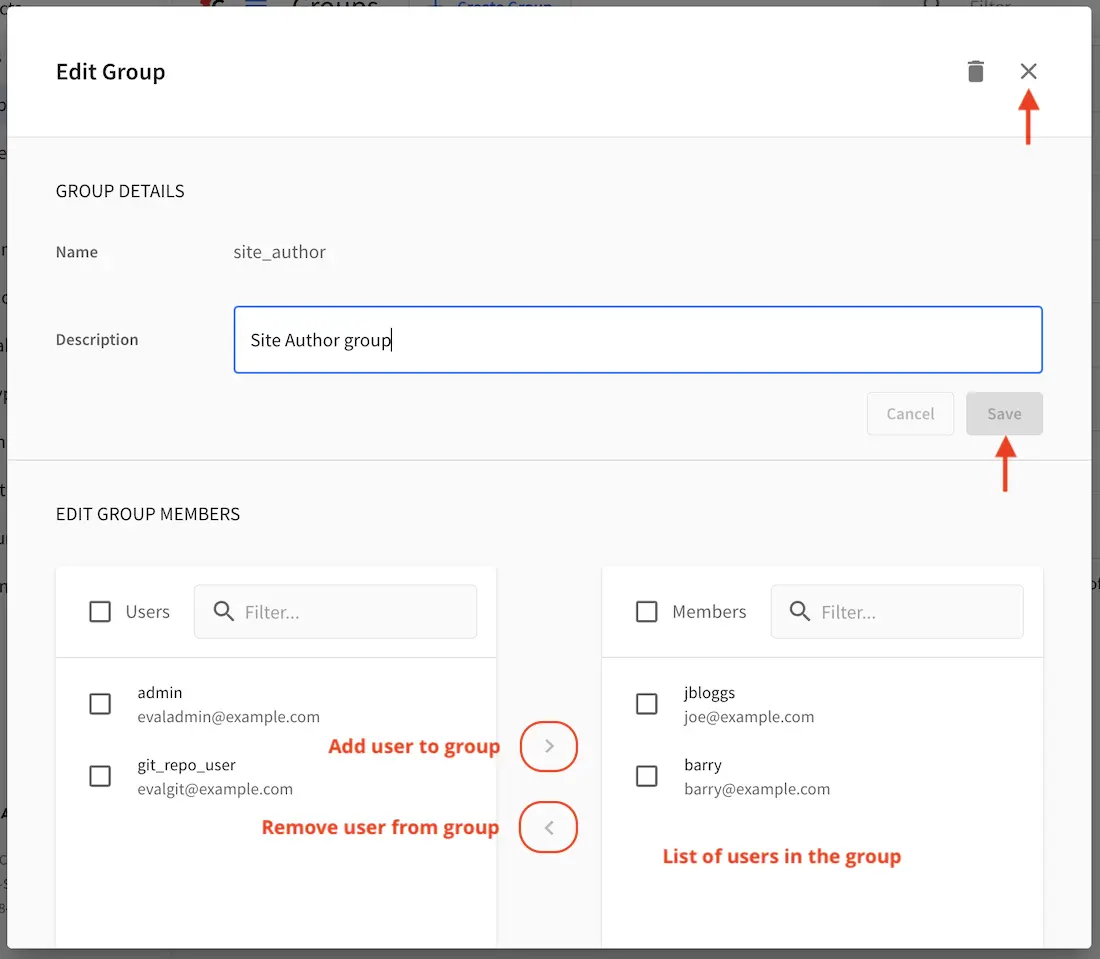
Adding Users to a Group
To add a user to a group, click on the group you want to add users. In the Users column found on the left
in the Edit Group Members section, you can click on the search box then type in the name, username or
email of the user you want to add to the group.
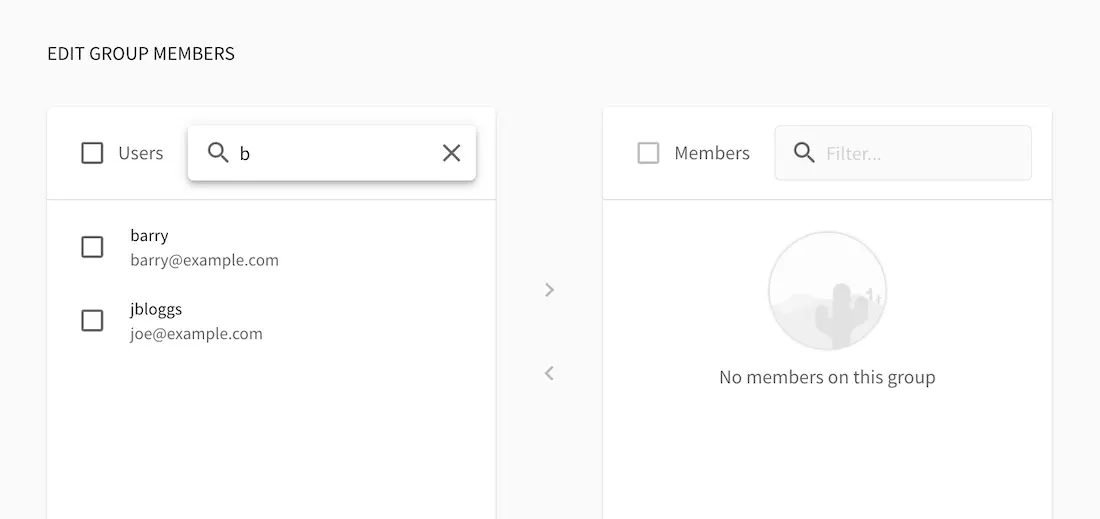
Notice that it will give you a list of matching users, select the user you want to add by clicking on the checkbox next to it, and if you want to add some more users to the group, just type in the names, and put a checkmark next to them, then click on the > (greater than icon) button.
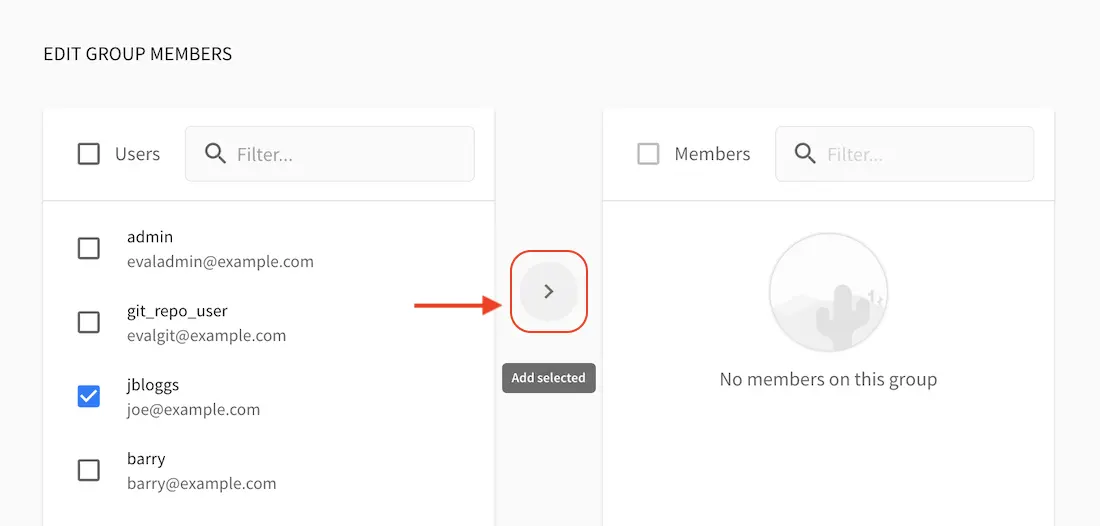
It will then give you a notification that the user(s) has been successfully added to the group.
Removing Users from a Group
To remove a user from a group, click on the group you want to remove users. In the Members column
found on the right in the Edit Group Members section, you can click on the search box then type in
the name, username or email of the user you want to remove from the group. Select the user you want to
remove from the group by clicking on the checkbox next to it, and if you want to remove some more users
from the group, just type in the names and put a checkmark next to them, then click on
the < (less than icon) button.
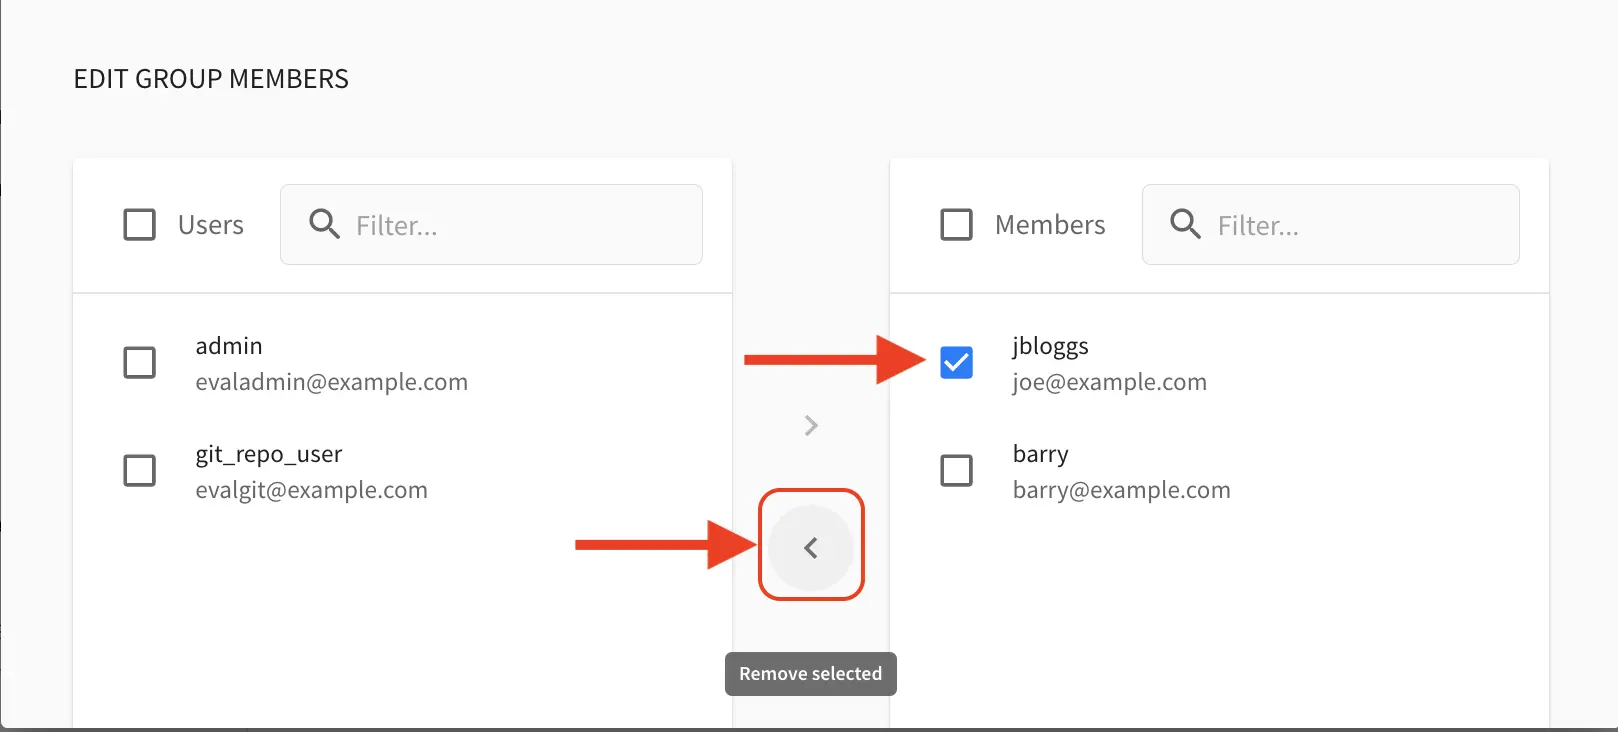
It will then give you a notification that the user(s) has been successfully deleted from the group.

Cluster 
Cluster lets the administrator manage Studio clusters. See Clustering for more information on how to setup clustering and available actions from Cluster from the Main Menu

Audit
Audit logs displays the date, time, user and action performed to content in all the projects available as well as actions performed in Studio such as logins/logouts, user removal, group addition, etc.
Description
CrafterCMS tracks the date, time, user and action performed to content and the system through an audit log.
To view the audit logs, from the top right of your browser, click on the Navigation Menu icon, then click on Audit.
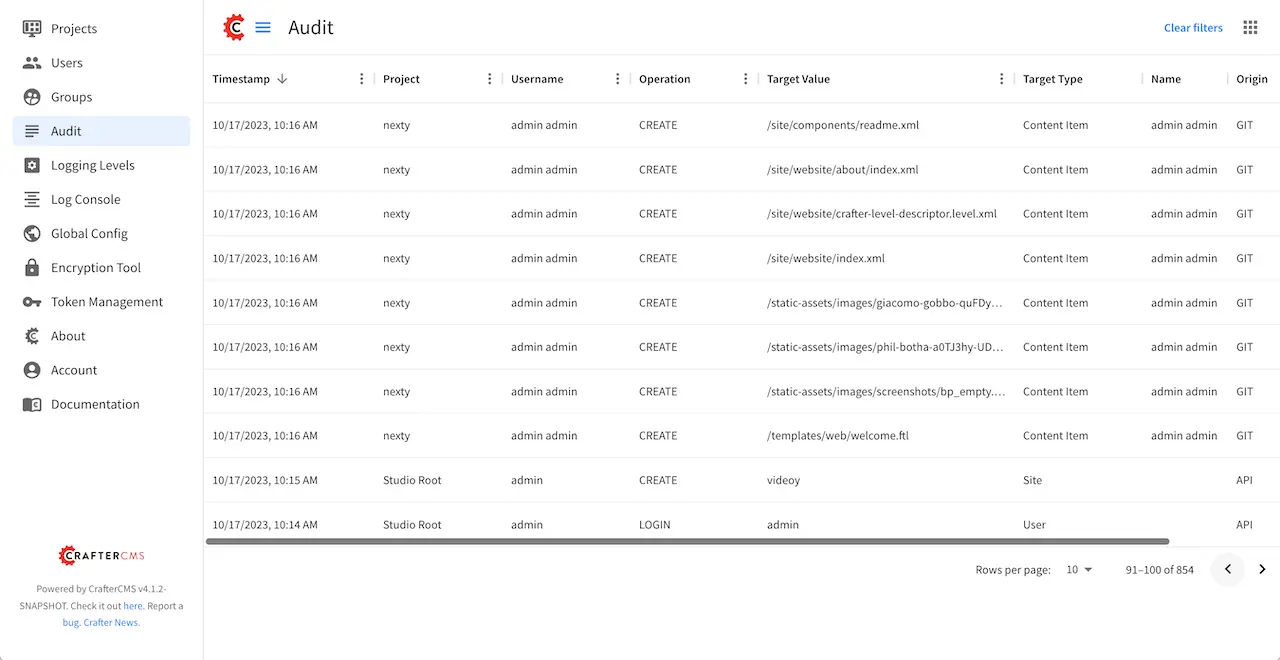
You can filter the logs displayed based on the following:
Audit Logs Project Filter
Project filters the log by project . Clicking on Project gives you a list of all the projects in Studio and the option to see system logs or logs for all the projects.
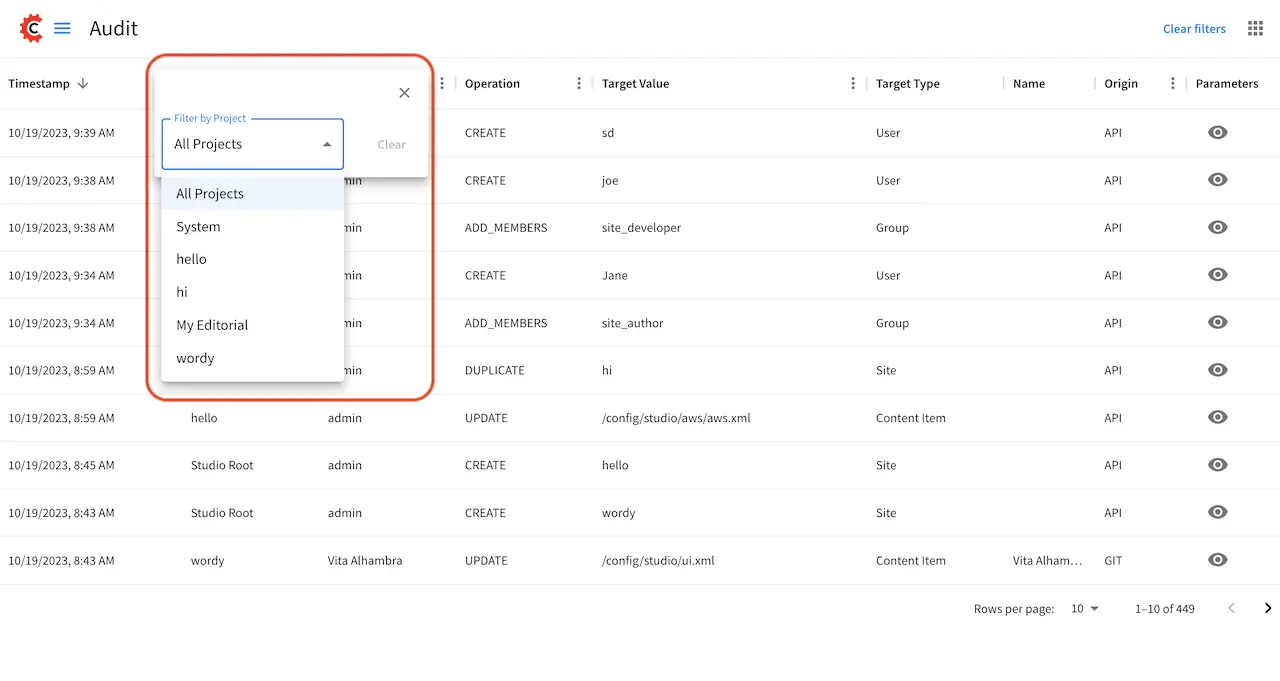
Audit Logs User Filter
Username filters the log by username. Clicking on Username gives you a list of all the users in Studio and the option to see logs for all users.
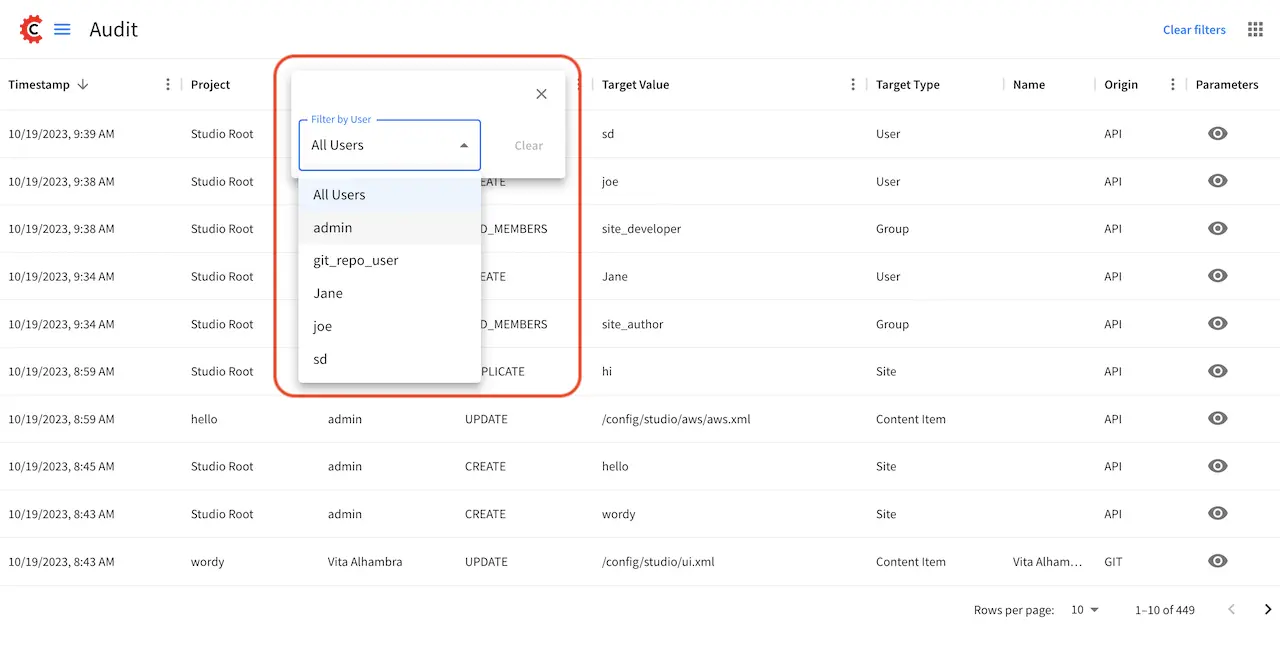
Audit Logs Operations Filter
Operation filters the log by operations. Clicking on Operation gives you a list of all operations logged.
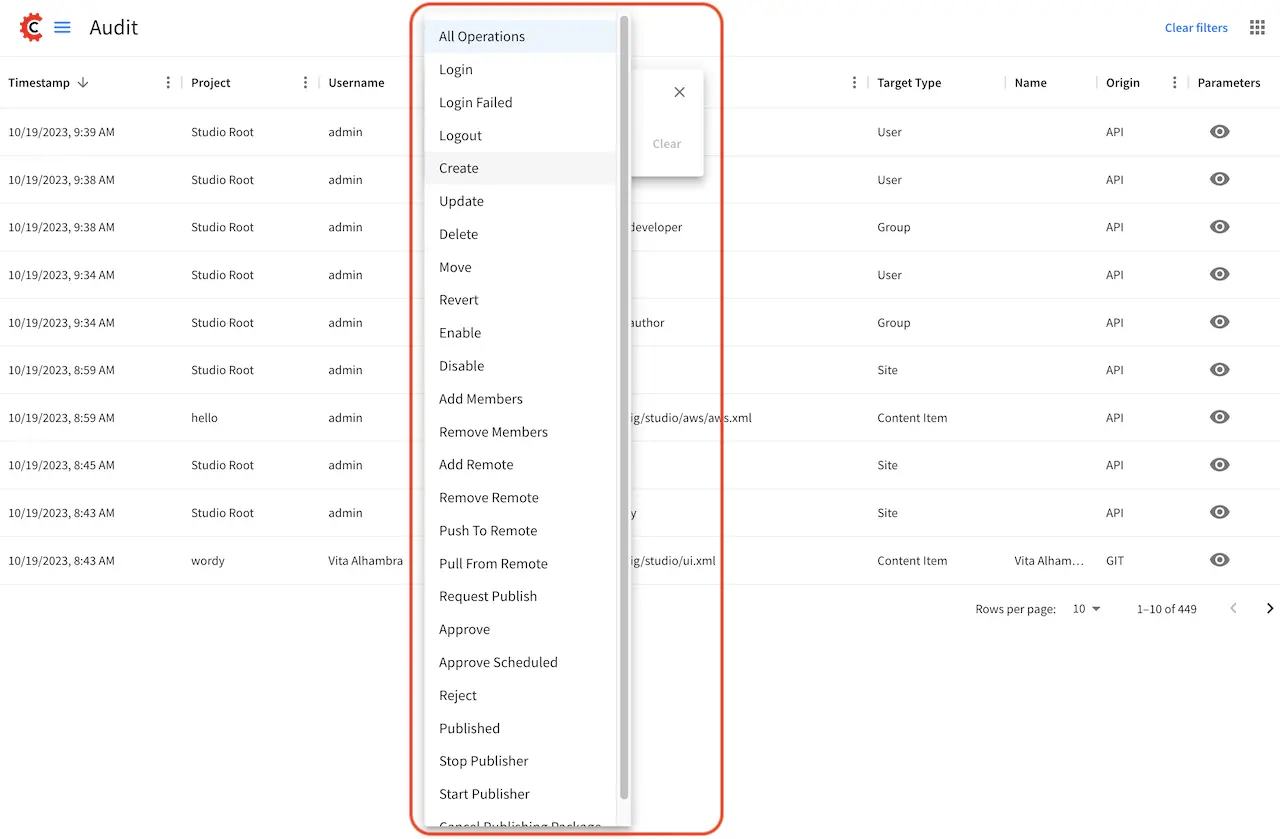
Audit Logs Timestamp Filter
Timestamp filters the log based on date range
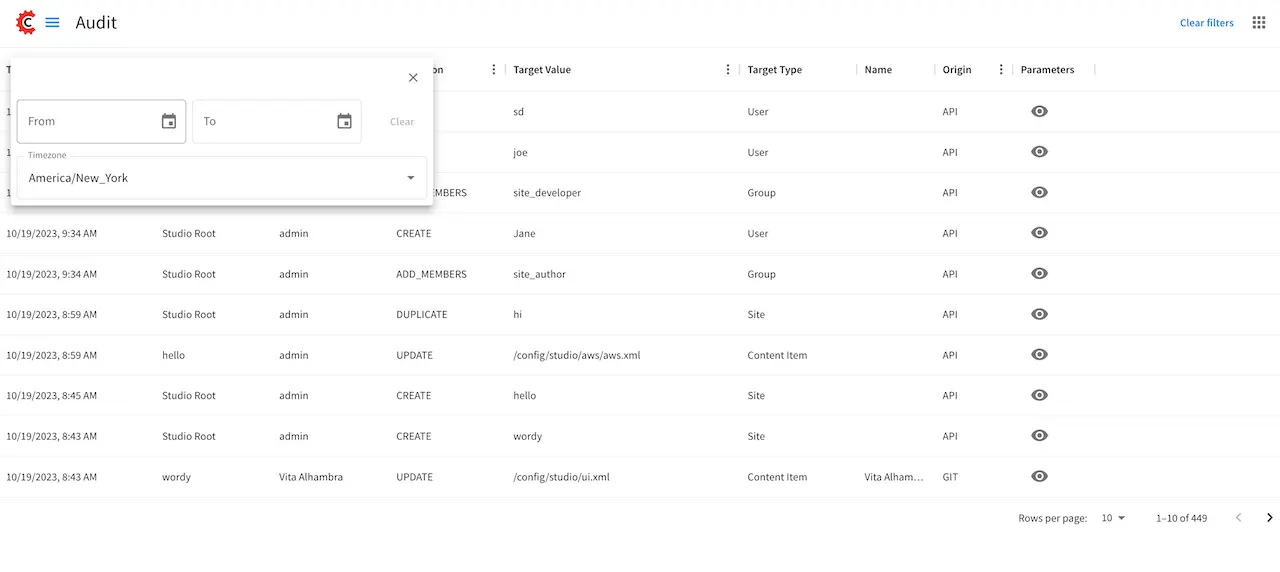
Logging Levels
There are 6 log levels defined in CrafterCMS. These levels determine what messages will be logged and displayed in the Logging Console.
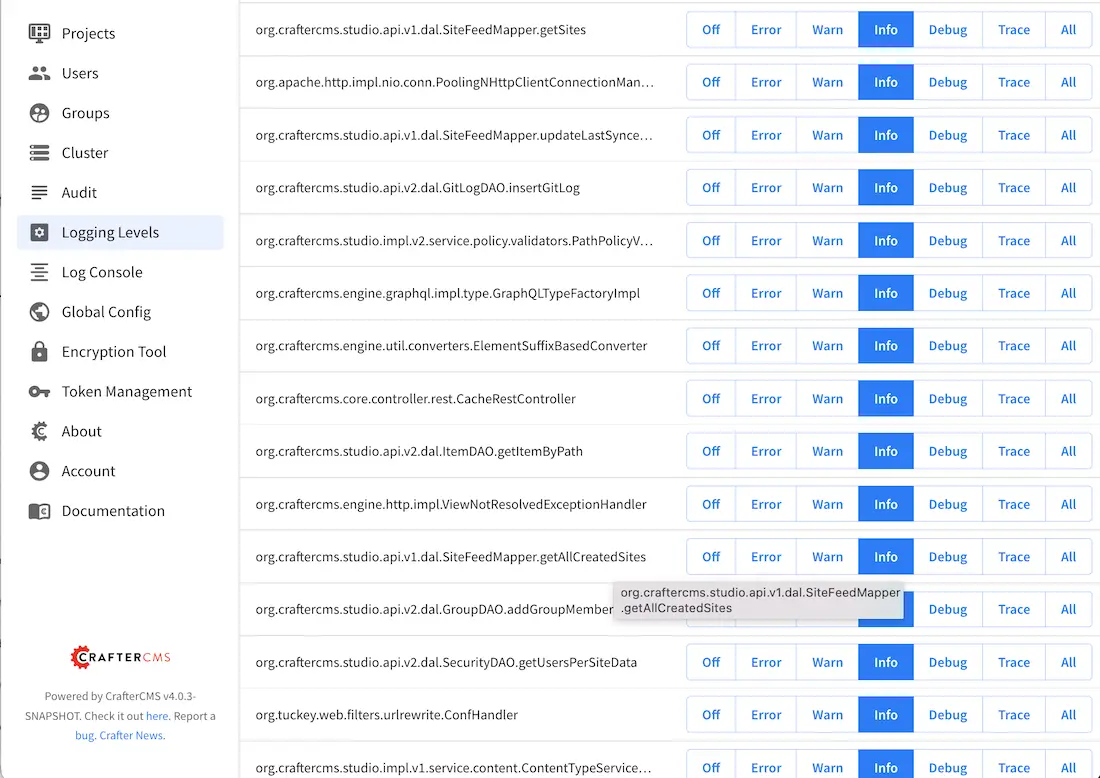
For more information on logging levels, see Overriding Logging Levels
Log Console
The Log Console allows the user to view messages depending on what log levels and what Java packages have been set for tracking.
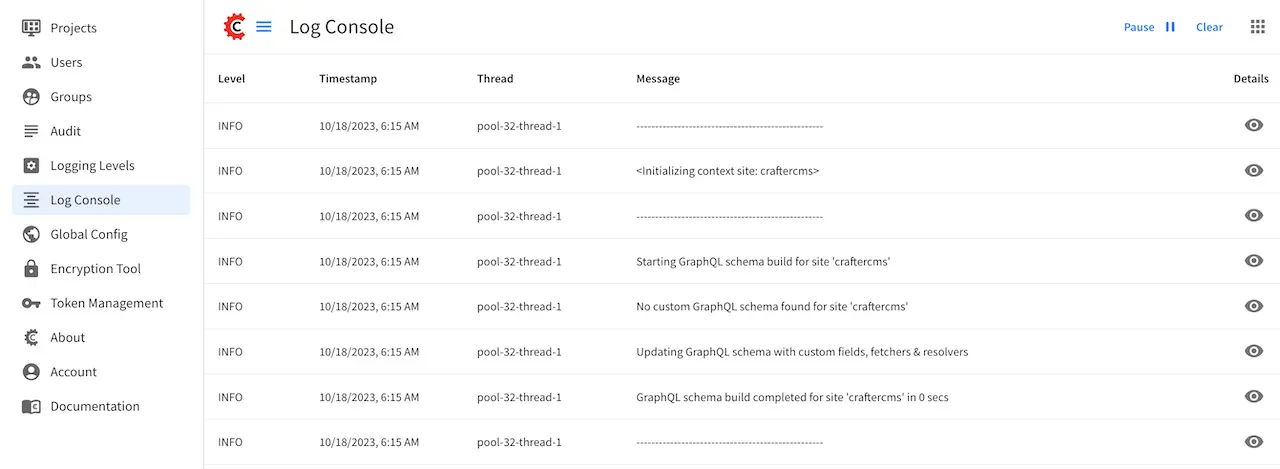
Overriding Logging Levels contains more information on how to track Java packages with the corresponding log levels desired.
The Log Console here in the Main Menu is similar to a project Log Console described here. The difference is the Log Console from the Main Menu can display logs for all the projects inside Studio, not just one project.
Global Config
CrafterCMS allows the user to edit the system settings for Studio without access to the physical server through Global Config under the Navigation Menu in Studio.
This global configuration file overrides the core configuration of Crafter Studio, studio-config.yaml, found in your Authoring installation, under CRAFTER_HOME/bin/apache-tomcat/webapps/studio/WEB-INF/classes/crafter/studio, and the Studio configuration override file studio-config-override.yaml under CRAFTER_HOME/bin/apache-tomcat/shared/classes/crafter/studio/extension in your Authoring installation (for more information on this file, see Configuration.
Changes made to this file will spread to all nodes in a Studio cluster automatically. Please note that not all changes to this file can/will take effect without a restart, so expect to have to restart Studio for most changes to take effect. If in a cluster, you’ll need a rolling restart for all nodes to pick up the changes.
To access the Global Config, click on the Navigation Menu icon at the top right corner, then click on Global Config in the Global panel
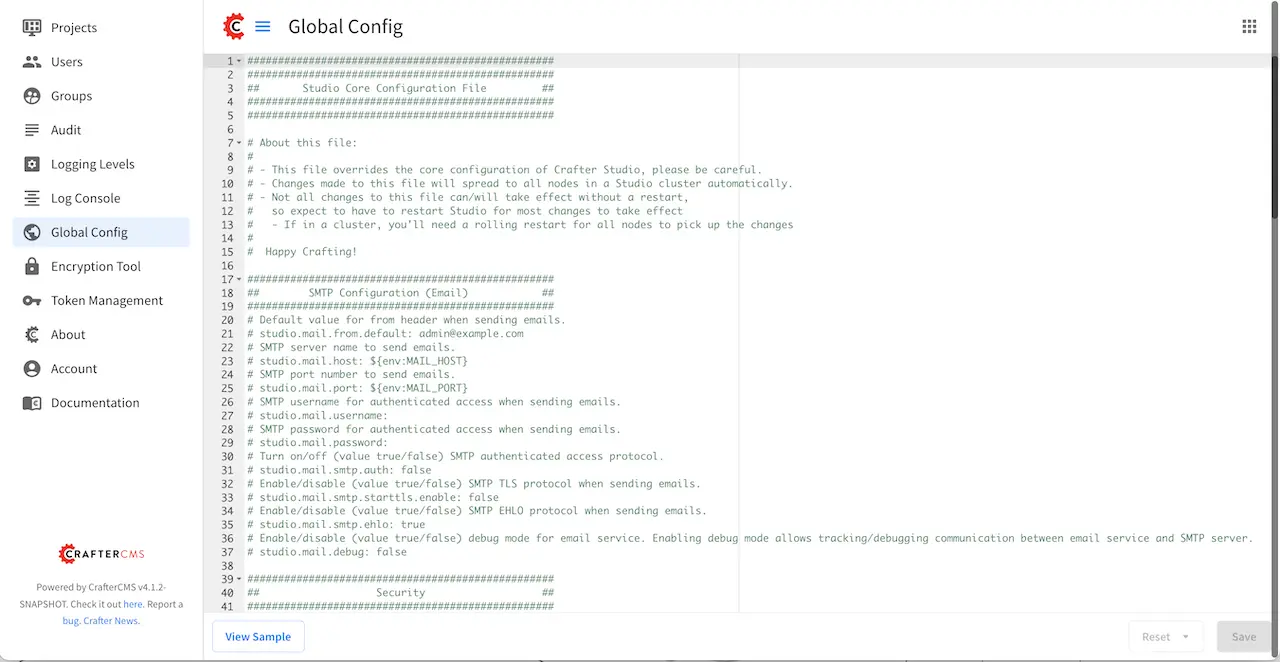
To find out more on what you can configure from the Global Config, see Configuration.
Encryption Tool
The Encryption Tool allows the user to encrypt sensitive data such as access keys and passwords, that shouldn’t be publicly available to anyone but developers and administrators
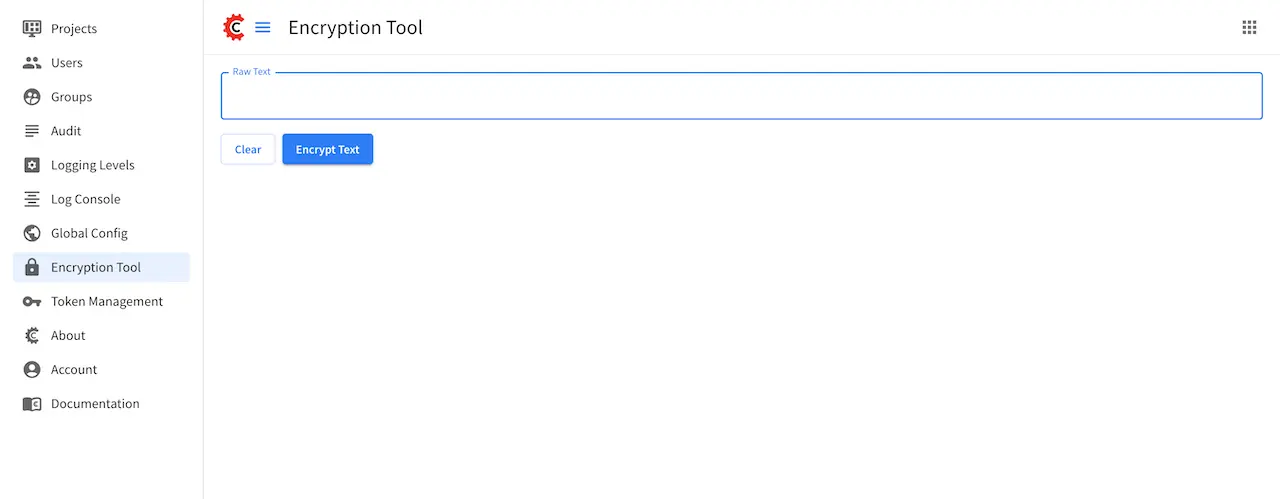
For more information on how to use the encryption tool, see Studio UI Encryption Tool.
Token Management
The Token Management Tool allows the user to manage access tokens used to make API requests on behalf of the user and
create tokens for accessing a project/site in Preview.
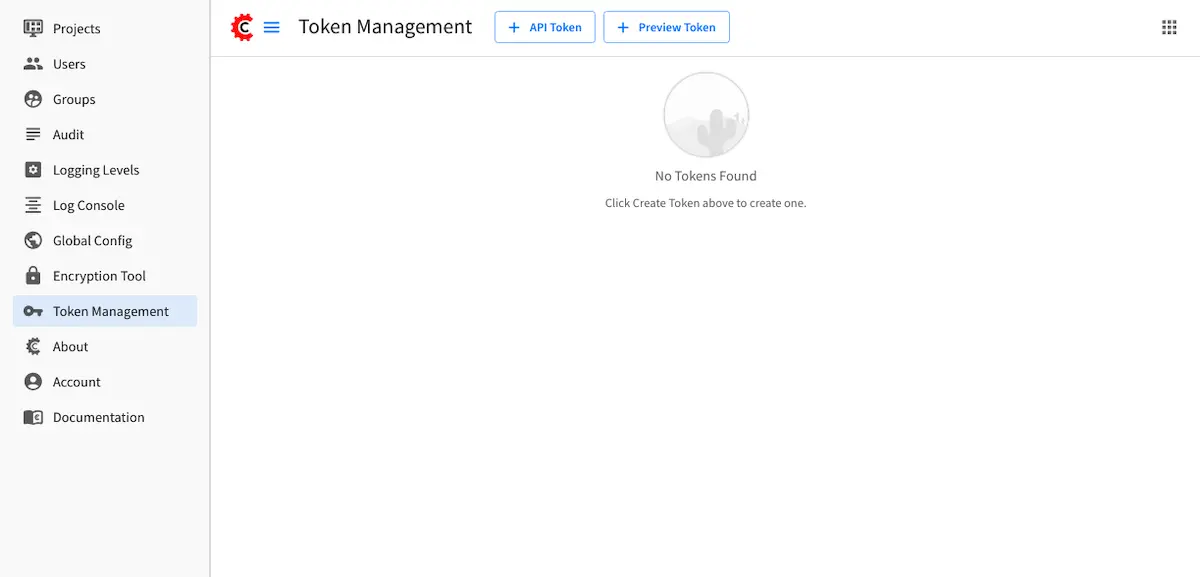
Note that only users with the required permission manage_access_token, such as users with the system_admin role,
have access to the Token Management Tool.
For more information on configuring settings for the Studio access tokens, see Access Tokens
API Token
JWT authentication using API access tokens allows the user to access Studio APIs as a particular user with a particular role.
To create a new API access token, click on Token Management from the Main Menu, then click on the API Token button.
The only required field for the access token is the label to identify it, however, it is also recommended to set
an expiration date to minimize the risk of lost or stolen tokens being used without being noticed.
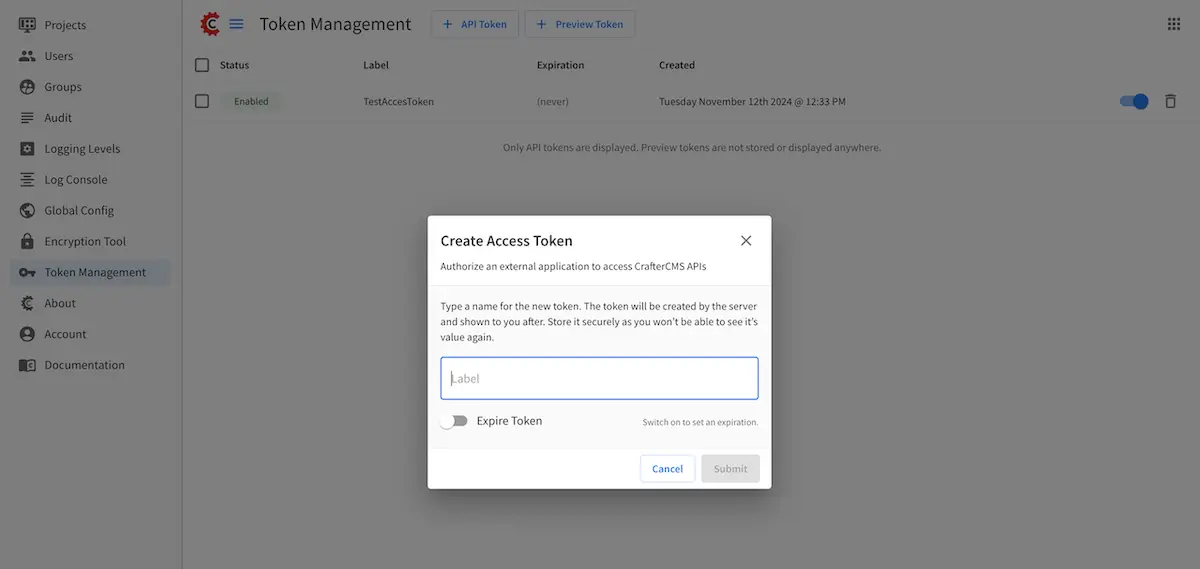
Once the expiration date is reached the access token will stop working automatically. Click on the Submit button to
create the token.
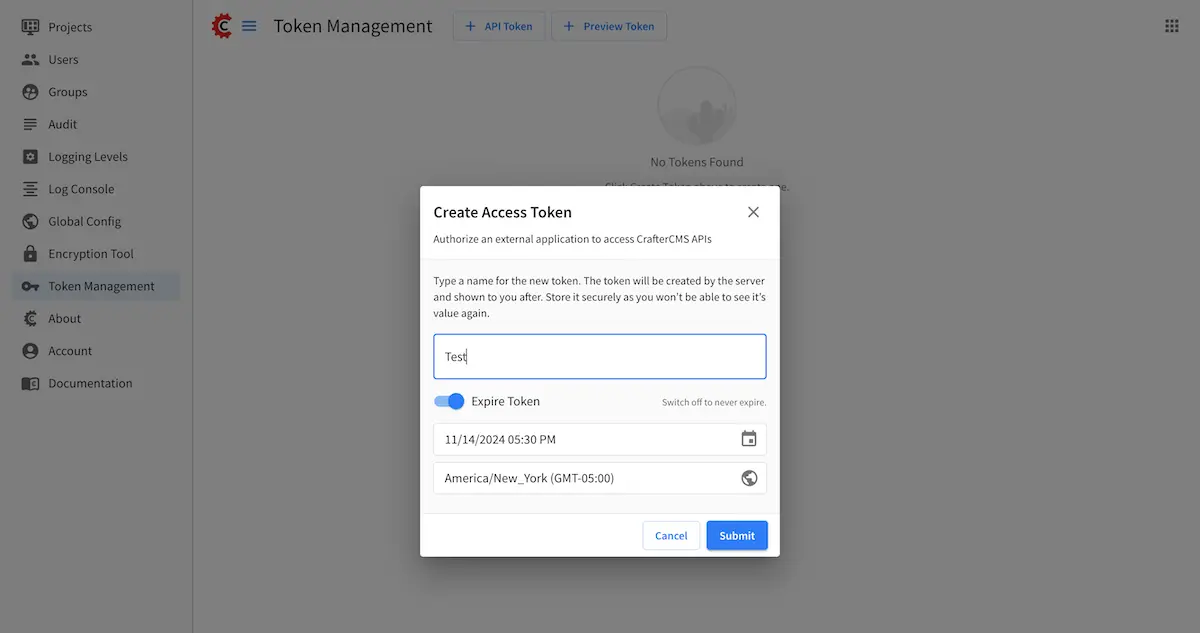
The next step is to copy the value of the access token. The value of the access token will not be stored on the server, so it needs to be stored by the user in a safe place as it is impossible to recover it after it is created.

The access token created from the tool is used for JWT authentication to be able to interact with Crafter Studio APIs. For an example of how to use the generated access token, see Crafter CLI.
If an access token is lost or exposed in any way it should be disabled or completely deleted to avoid any possible use. To delete a token, simply click on the trash can icon to the right of the token you want to delete.

You can also delete multiple tokens at once by placing a checkmark on the tokens you want to delete, then clicking on
Delete Selected.
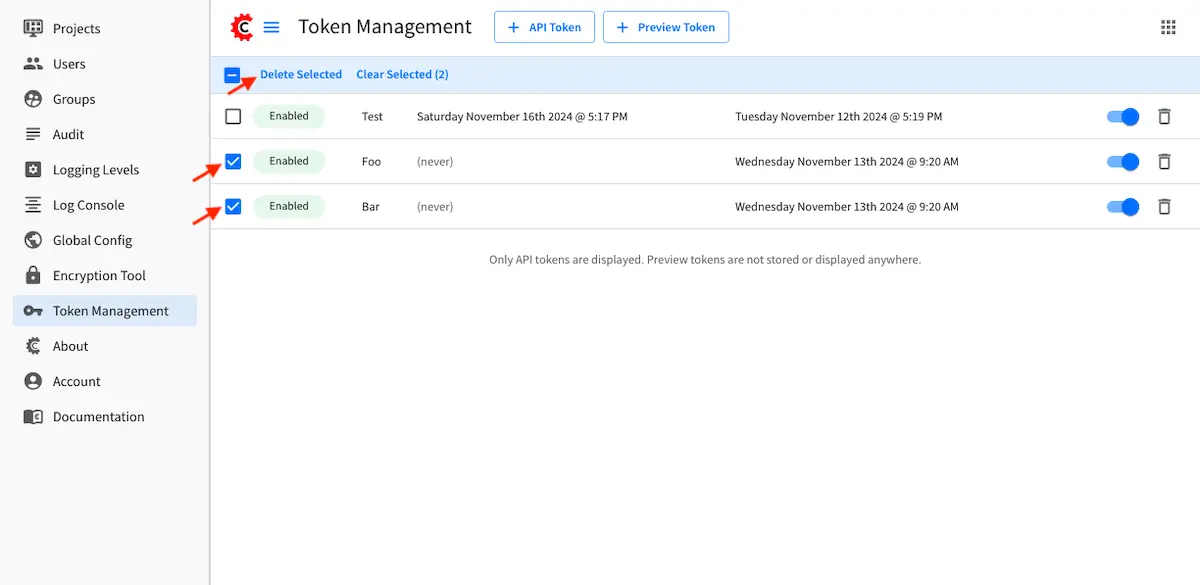
To disable/enable a token, simply click on the slider on the right side of the token next to the trash can icon.
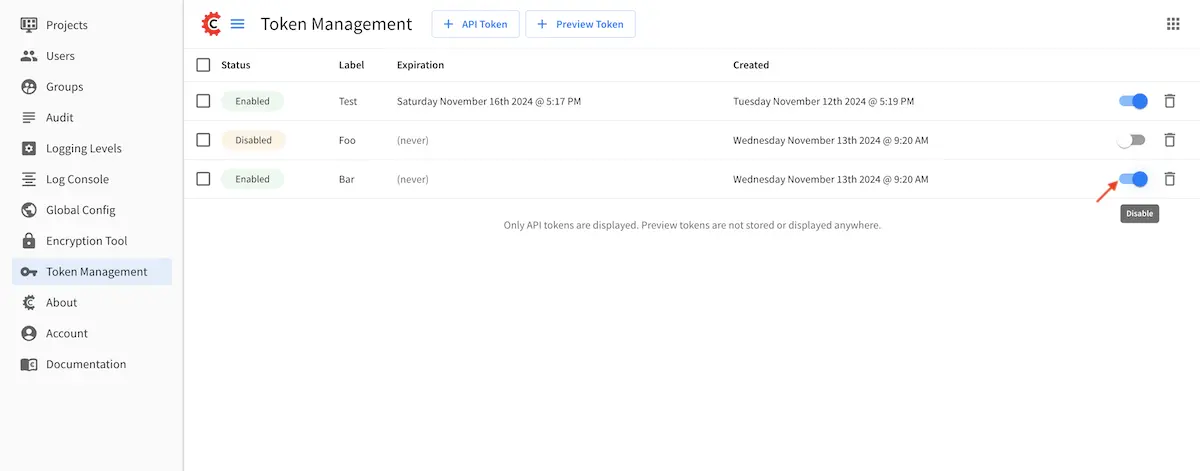
Note
Users needs the manage_access_token permission to create access tokens
Preview Token
Since 4.2.0Preview tokens allow preview applications to access delivery APIs in preview mode from within the authoring environment. This extra layer of security is required in authoring because the environment contains unpublished projects and content.
To create a Preview Token, click on Token Management from the Main Menu, then click on the Preview Token button.
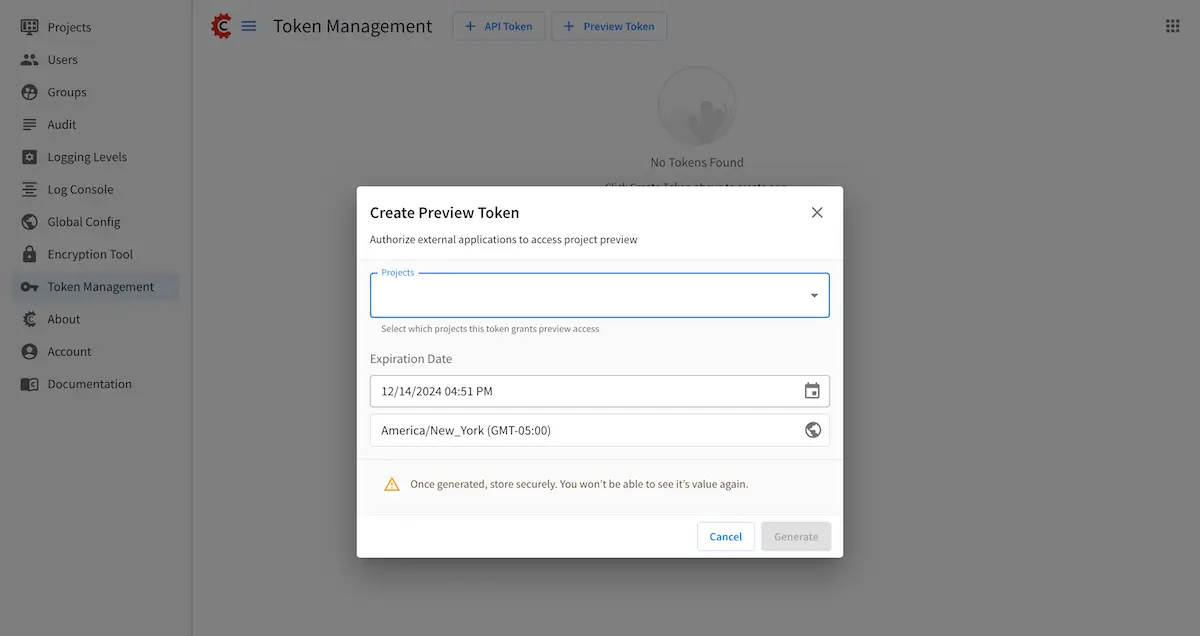
The only required fields for the preview token is the dropdown for selecting projects to grant preview access, and the
date/time fields to set an expiration date for the token, which is pre-populated to a date in the near future. The expiration
date is set to minimize the risk of lost or stolen tokens being used without being noticed. Click on the Generate
button to create the token.
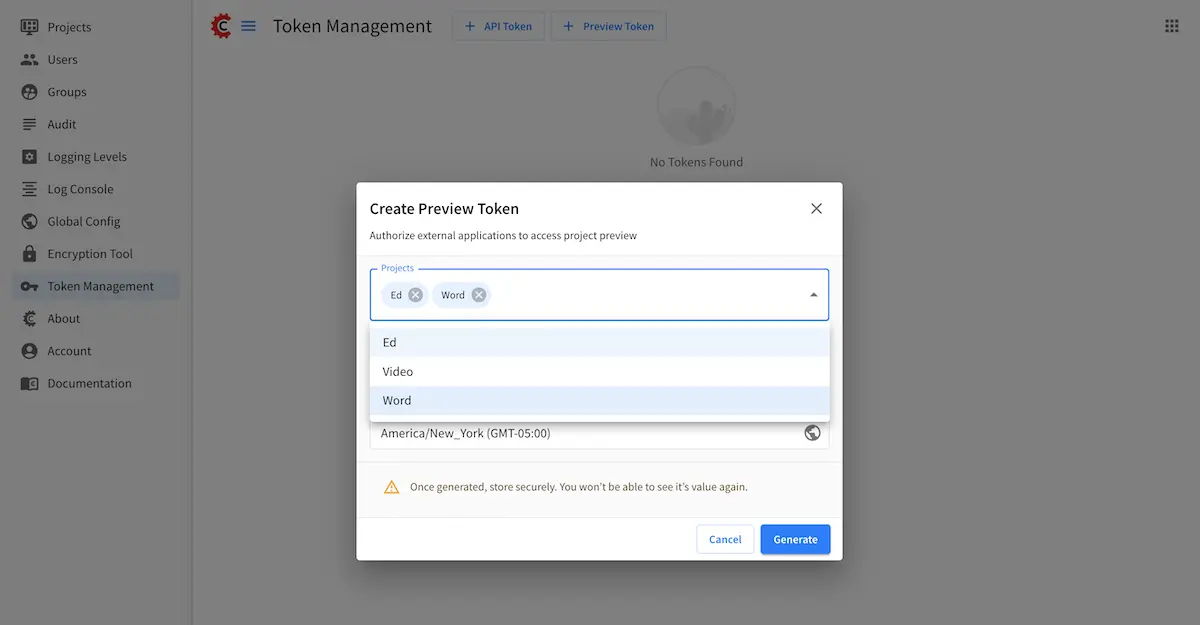
The next step is to copy the value of the preview token. The value of the preview token is not stored on the server, so it needs to be stored by the user in a safe place as it is impossible to recover it after it is created.
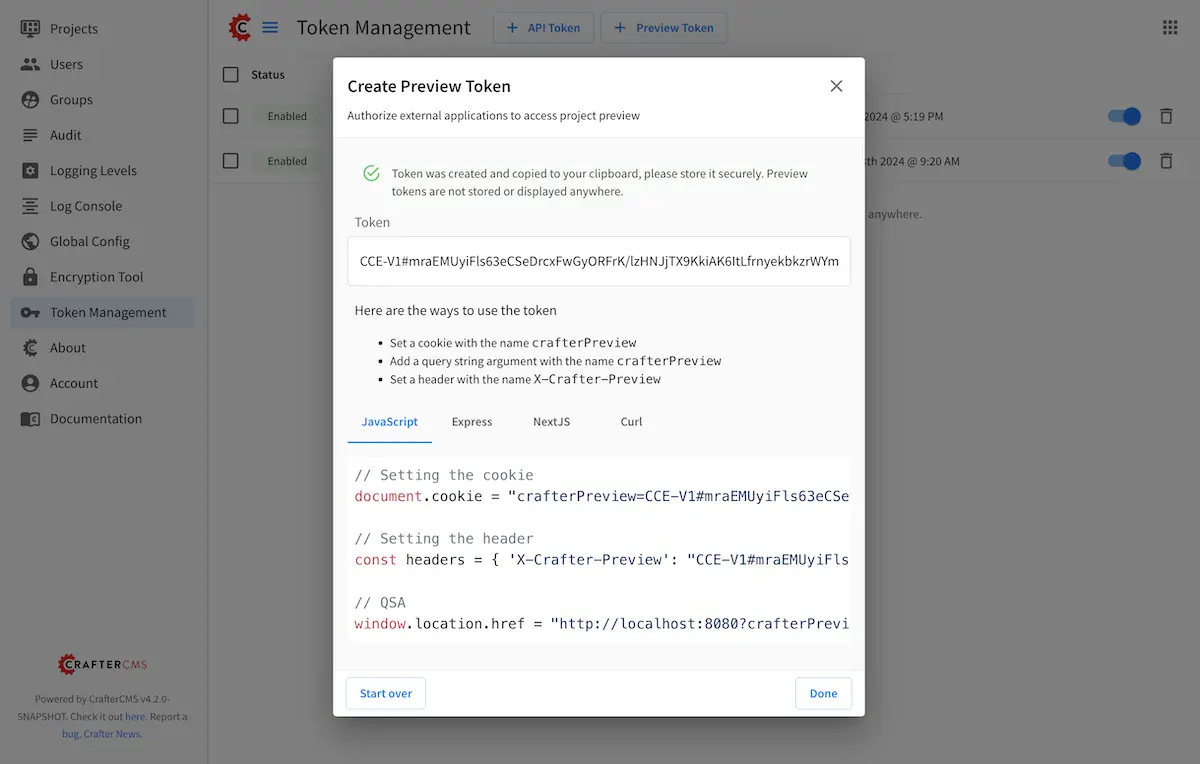
You can now use the preview token in one of the following ways:
Set a header with the name X-Crafter-Preview, or
Add a query string argument with the name crafterPreview, or
Set a cookie with the name crafterPreview
Here’s an example of using the token with Curl, where {Generated-Preview-Token} is the token just created:
curl --header "cookie: crafterPreview={Generated-Preview-Token};" "http://localhost:8080/api/1/site/content_store/item.json?url=/site/website/index.xml&crafterSite=ed"
The dialog above that shows the preview token generated also shows other examples on how to use the preview token.
Sometimes you may need to disable security for accessing delivery APIs in preview mode from within the authoring environment, when working on a feature. To disable the preview API security, you’ll need to set the Engine crafter.security.preview.enabled property to false. See Preview Mode for more information.
Settings 
Since
4.5.0
The Settings Tool allows the user to configure system settings, such as enabling/disabling maintenance mode.
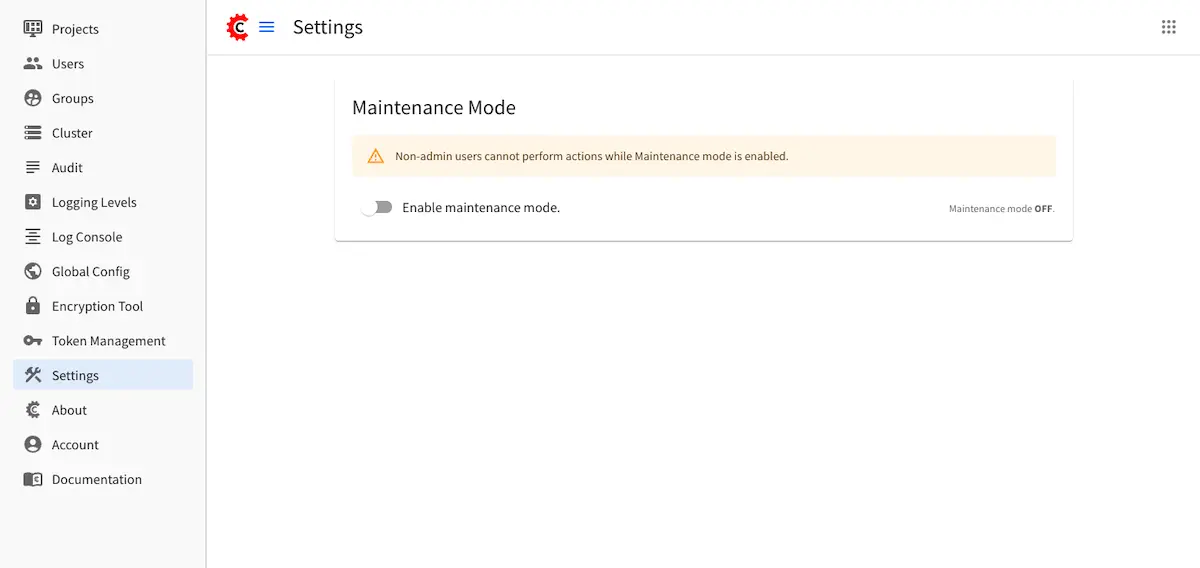
Maintenance Mode
Maintenance mode is a status that tells users that your CrafterCMS install is under maintenance and temporarily unavailable. Turning on maintenance mode when making updates, functionality modifications or design changes to your CrafterCMS install helps prevent errors and issues and allows for a smooth user experience.
To enable/disable maintenance mode, simply toggle the switch to on or off.
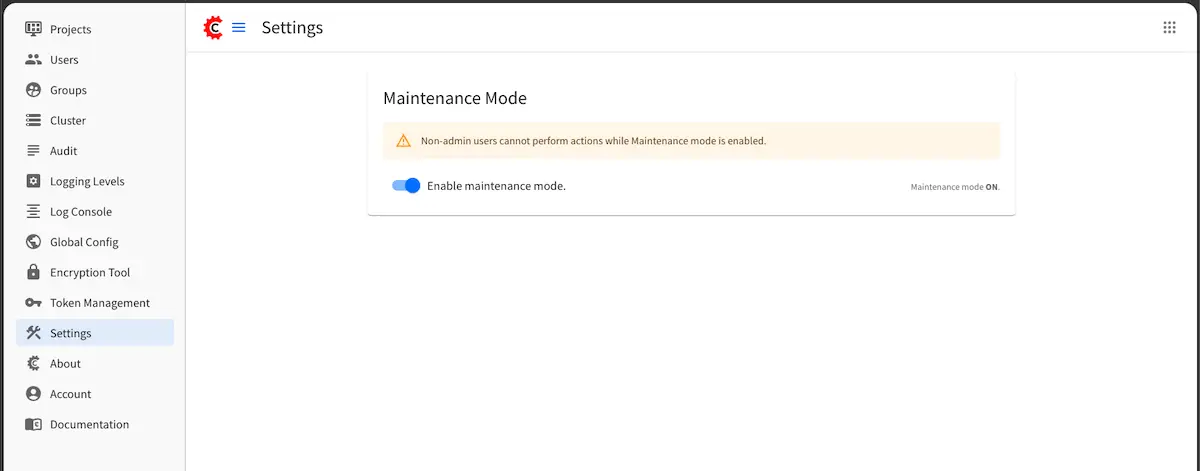
When turning on maintenance mode, a dialog will appear to confirm you want to turn on maintenance mode.
Once maintenance mode is enabled, the UI will show a maintenance mode screen informing users that the system is
temporarily unavailable, as seen here: Maintenance Mode .
For users with the allowed_in_maintenance permission, access to Crafter Studio/system APIs is still available
during maintenance mode.
Account
The Account Tool allows the user to change the user’s personal Crafter Studio settings like language or to change the user’s password or to clear your Studio UI preferences from the browser cache.
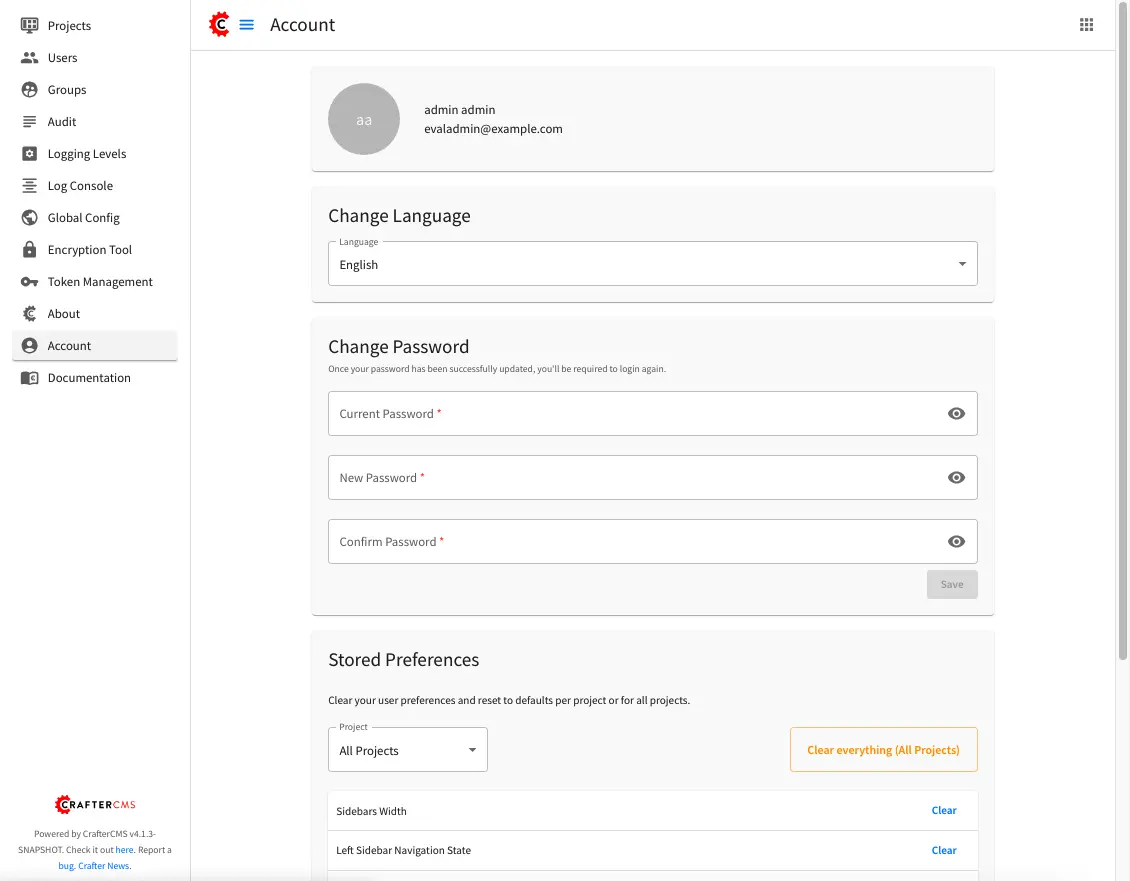
For more information on how to use the Account tool, see Account Management.
User/Group Management
This section describes managing user accounts and groups.
A user is anybody who uses CrafterCMS. A user account holds a user name and password. A group consists of a collection of users. Users can be assigned to a group for a project/site. Through the groups, roles are assigned to users to certain areas of the site (access rights/ permissions). Each role represents a set of activities allowed. Groups are used to simplify management as changes made to the rights of the group applies to all the users belonging to that group.
When you work in Crafter Studio, you need to login as a user. Your CrafterCMS administrator sets up user accounts, group memberships, roles and permissions. The sections below goes into more detail on how users, groups, permissions and roles are administered/setup.
Roles and Permissions
To access CrafterCMS, a user must be allowed access rights to certain areas of the project (access rights/ permissions). For example, if a user wants to create, edit or submit content, the user needs to have those specific permissions. Here, we see that the user requires multiple permissions. For simplicity, permissions are grouped together into roles. A role is a set of allowed actions/activities. An author role, for example, has access to create, edit and submit content.
To define permissions for users, they need to be a member of a group. A group is a collection of users with a role assigned. Groups are used to simplify management as changes made to the rights of the group applies to all the users belonging to that group. For our example above of a user that wants to create, edit or submit content, the user should be assigned to a group with the author role.
Out of the box, CrafterCMS supports the following roles/groups:
Role |
Group |
Description |
|---|---|---|
system_admin |
system_admin |
Has access to everything in the CMS, such as all the projects, users, groups, etc. in addition to the admin role |
admin |
site_admin |
Has access to everything in the project such as project configurations, creating/editing layouts, templates, taxonomies, content types, scripts, etc. in addition to the publisher role |
author |
site_author |
Has access to create, edit or submit content in a project |
developer |
site_developer |
Has access to access to creating/editing layouts, templates, taxonomies, content types, scripts, etc., project configurations in addition to the publisher role in a project |
reviewer |
site_reviewer |
Has the ability to approve and reject workflow, but don’t have access to the author role in a project |
publisher |
site_publisher |
Has the ability to approve and reject workflow, in addition to the author role in a project |
Permissions and roles can be setup for each project, and for the entire application itself. Note that the system_admin role applies to the entire application and the rest of the default roles applies to a project.
See Groups for more information on administrating groups.
Projects
To edit permissions for a project role, in Studio, from the Sidebar, click on ![]() -> Configuration -> Permission Mapping. See Permission Mappings for more information on permissions and the default permissions assigned to roles.
-> Configuration -> Permission Mapping. See Permission Mappings for more information on permissions and the default permissions assigned to roles.
To add/edit a role for a project, in Studio, from the Sidebar, click on ![]() -> Configuration -> Role Mapping. See Role Mappings for more information.
-> Configuration -> Role Mapping. See Role Mappings for more information.
The items for interaction/tools available from the Sidebar depending on the user role can be configured in Studio, from the Sidebar, click on ![]() -> Configuration -> User Interface Configuration. See UI Configuration for more information.
-> Configuration -> User Interface Configuration. See UI Configuration for more information.
Global
To add/edit a global role/group, see Global Role Mappings Config for more information.
To add/edit global permissions for a role, see Global Permission Mappings Config for more information.
The items for interaction/tools available from the Main Menu depending on the user role can be configured by opening the global-menu-config.xml file under CRAFTER_HOME/data/repos/global/configuration using your favorite editor.
Putting it all together - Users, Groups, Roles and Permissions
In this section, we’ll see how users, groups, roles and permissions work together in giving users access to certain folders in a project.
We’ll create a new role, group and user, add permissions for the new role and finally assign the newly created user to the new group setup.
In preparation for our example, we will be using the Website editorial blueprint. We’ll add a news folder under Home, by navigating to Pages -> Home, then right click on Home and select New Folder. Enter news in the Folder Name field. We will be using the news folder for our example in setting up permissions to folders based on roles. Users assigned to the newseditor role will then have access to publish and add/edit content in the news folder.
Create a new group
Let’s begin by creating a new group.
To create a new group, click on
Navigation Menu from the top right, then click on Groups.Click on the Create Group button.
Enter a name for the new group being created in the Display Name field.
Enter a description of the new group being created in the Description field.
Click on the Save button. A notification will appear that your new group has been created.
Below are the information used to create a new group:
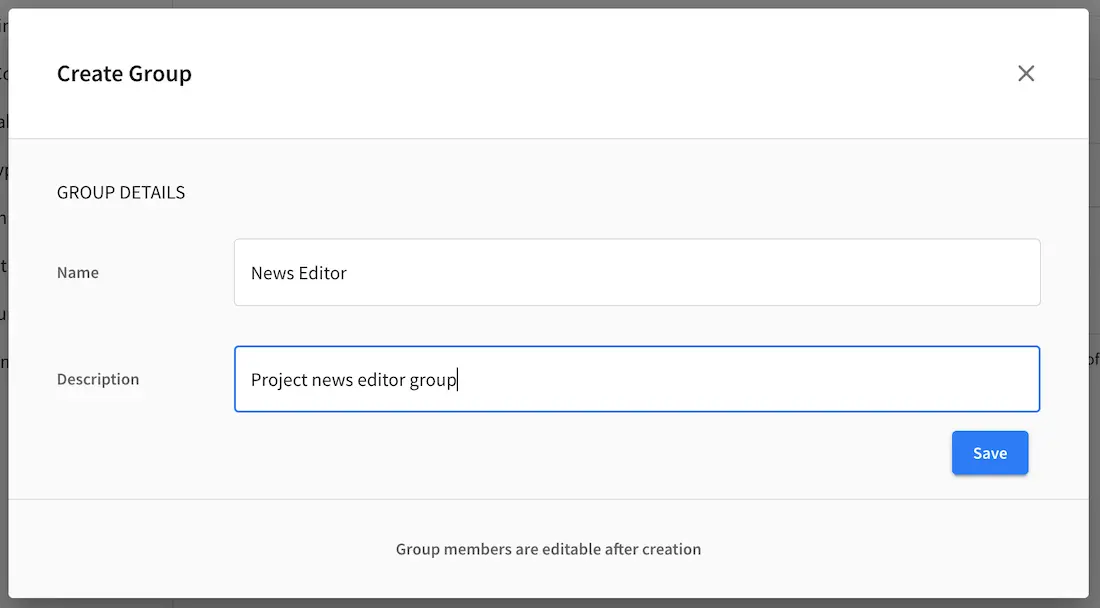
For more information on adding a new group to a project, please see Adding a New Group
Create a new role
We’ll now create a new role for the new group we just created.
To create a new role, click on
from the Sidebar, then click on Configuration.From the list, select Role Mappings
Add your new group and role in the editor
 1<role-mappings>
 2  <groups>
 3    <group name="Admin">
 4        <role>admin</role>
 5    </group>
 6    <group name="Developer">
 7        <role>developer</role>
 8    </group>
 9    <group name="Author">
10        <role>author</role>
11    </group>
12    <group name="Publisher">
13        <role>publisher</role>
14    </group>
15    <group name="Reviewer">
16        <role>reviewer</role>
17    </group>
18    <group name="NewsEditor">
19        <role>newseditor</role>
20    </group>
21  </groups>
22</role-mappings>
Click on the Save button.
For more information about role mappings, please see: Role Mappings
Adding permissions
To add permissions to the new role we just created, click on
from the Sidebar, then click on Configuration.From the dropdown box, select Permissions Mappings
Add in the permissions that you would like to give to the new role that we just created. For our example below, we are giving the role newseditor permission to publish from the dashboard and the following permissions for the news folder and assets folder:
read
write
create content
create folder
publish
 1<role name="newseditor">
 2   <rule regex="/site/website/news/.*">
 3     <allowed-permissions>
 4       <permission>content_read</permission>
 5       <permission>content_write</permission>
 6       <permission>content_create</permission>
 7       <permission>folder_create</permission>
 8       <permission>publish</permission>
 9     </allowed-permissions>
10   </rule>
11   <rule regex="/static-assets/.*">
12     <allowed-permissions>
13       <permission>content_read</permission>
14       <permission>content_write</permission>
15       <permission>content_create</permission>
16       <permission>folder_create</permission>
17       <permission>publish</permission>
18     </allowed-permissions>
19   </rule>
20 </role>
Click on the Save button to save your changes.
For more information about permission mappings, please see: Permission Mappings
Adding users to the role
We can now add users to the role by adding the users to the group mapped to the role. In the role mappings configuration file, we mapped the role newseditor to the group NewsEditor. To add users to the group NewsEditor,
Click on
from the top right of Studio, then select Groups on the left hand sideClick on the pencil (edit icon) next to the group name you want to edit. In our example, the group NewsEditor
Click on the box for the field Add new members, enter the users you’d like to add, then click on the Add members button.
For more information about adding users to a group, please see: Adding Users to a Group
Your new role with users and permissions assigned are now ready!
User passwords
Changing Your Password
Every user logged in to CrafterCMS can change their own password.
To change your own password, click on the Navigation Menu
option at the top right of Studio,
then select Account
In the Change Password section of the dialog, enter your current password in the Current Password field.
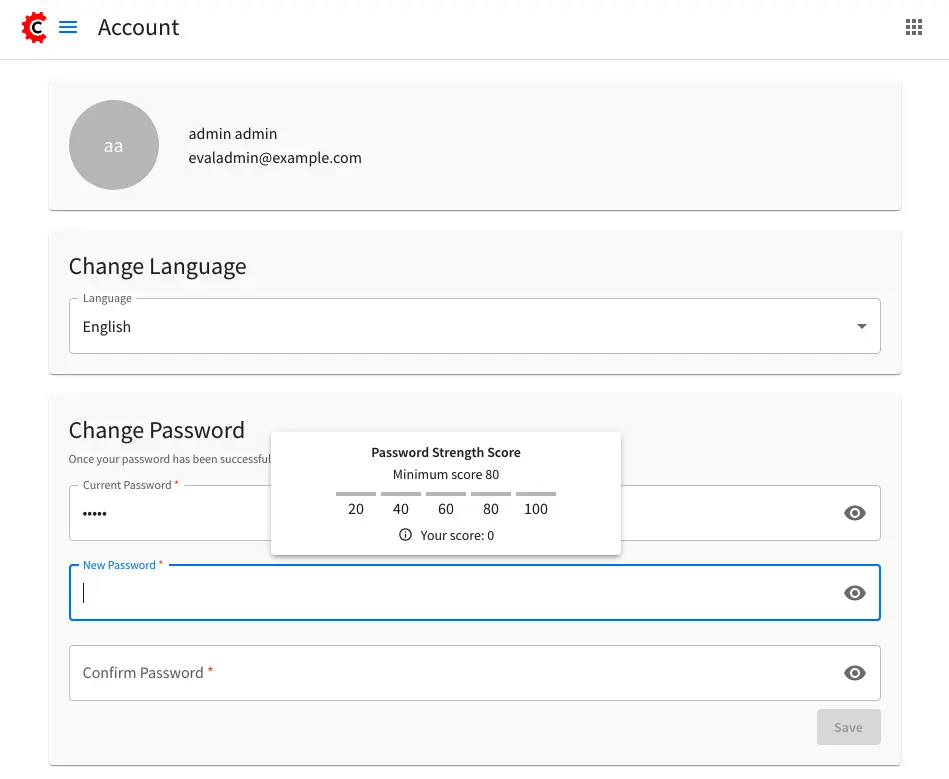
Next, enter the new password into the New Password field.
Re-enter the new password into the Confirm Password field.
Click on the Save button. A notification will appear that the profile has been updated.
After changing your password, you will be logged out of the system and will have to log back in using the new password you set before continuing your work in Studio.
Changing a User Password
The Crafter admin can change passwords for other users.
To change a user’s password, login as crafter admin in Studio.
Click on Users at the top right of Studio
Click on the pencil (edit icon) next to the user you would like to change/reset the password.
Enter a new password in the Reset Password field.
Click on the Save button. A notification will appear that the user has been edited.
For more information on editing a user, see Viewing and Editing an Existing User
Setting a User’s Initial Password
The Crafter admin must set an initial password when creating a new user. To create a new user, please see Creating a New User
Project Creation with Remote Repositories
Crafter Studio supports project creation with remote repositories and provides two options:
Create project based on remote Git repository
Create project based on a blueprint then add a remote Git repository
To start creating a project with a remote repository, from the Projects screen, click on the Create Project button. A Create Project dialog will be launched. For both options, there will be a screen where the Remote Git Repository Name and Remote Git Repository URL needs to be filled out and the rest is optional and only needs to be filled out if required by the remote git repository being used.
Let’s take a look at the fields where the remote repository details needs to be filled in:
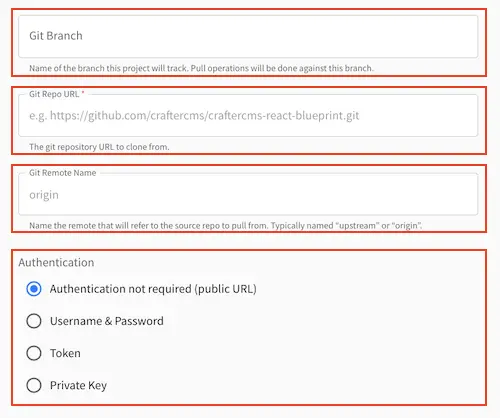
In the Git Repo URL field you must provide the link to the Git repository you would like to use
In the Authentication field you must select the authentication method to be used to access the Git repository in the previous field.
CrafterCMS supports the following authentication types to use to access remote repository:
Authentication not required (Public URL) - no credentials needed to access remote repository
Username & Password - for this method, you will be asked for a Remote Git Repository Username and a Remote Git Repository Password. Supply your username and password
Token - for this method, you will be asked for a Remote Git Repository Username (if required) and a Remote Git Repository Token. This method is usually used when two-factor authentication is configured on the remote repository to be accessed. Supply your username if required and token.
Private Key - for this method, you will be asked for a Remote Git Repository Private Key. This method is a key-based authentication. Supply your private key.
In the Git Branch field, you can supply a branch name, but can be left blank, which in turn would default to the
masterbranch.In the Git Remote Name field you want to provide a repository name that makes sense. It’s common to use “origin” or “upstream.”
Create project based on a blueprint then add a remote bare Git repository
To create a project based on a blueprint then add a remote bare git repository, click on Create Project from Projects, then select the blueprint you would like to use
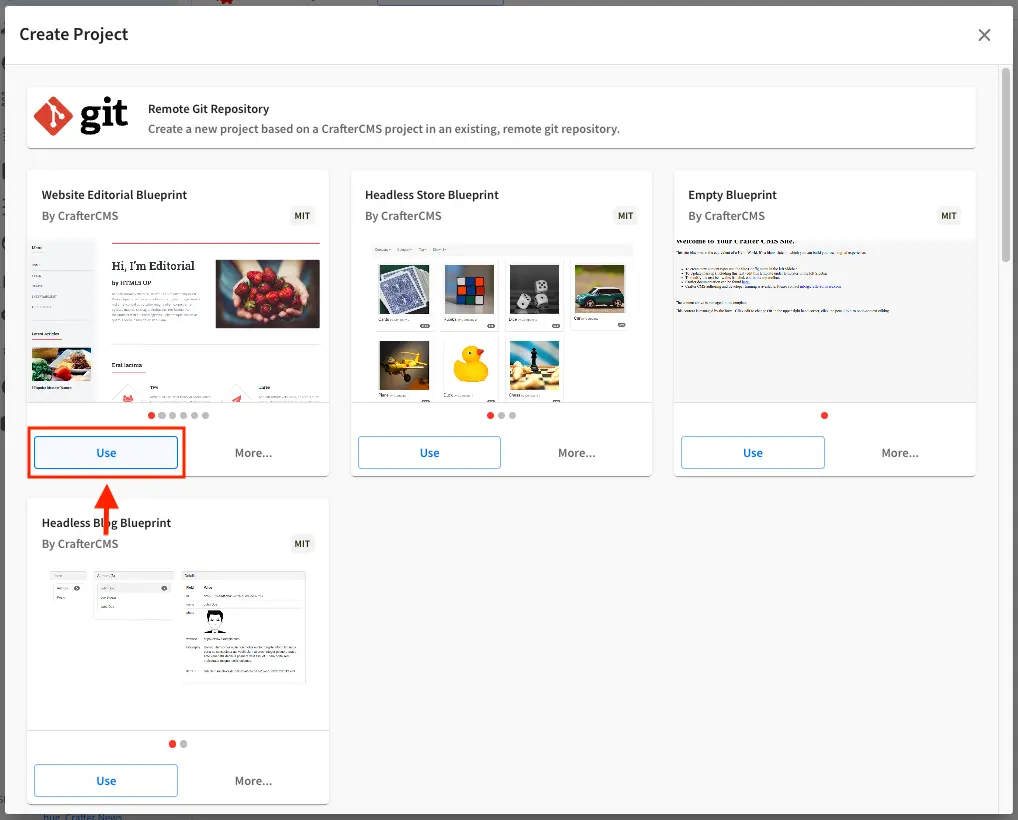
The next step is to fill in the Project ID and Project Name, then click on the Review button, then finally click on the Create Project button to create your project. Your project should be created in a short while.
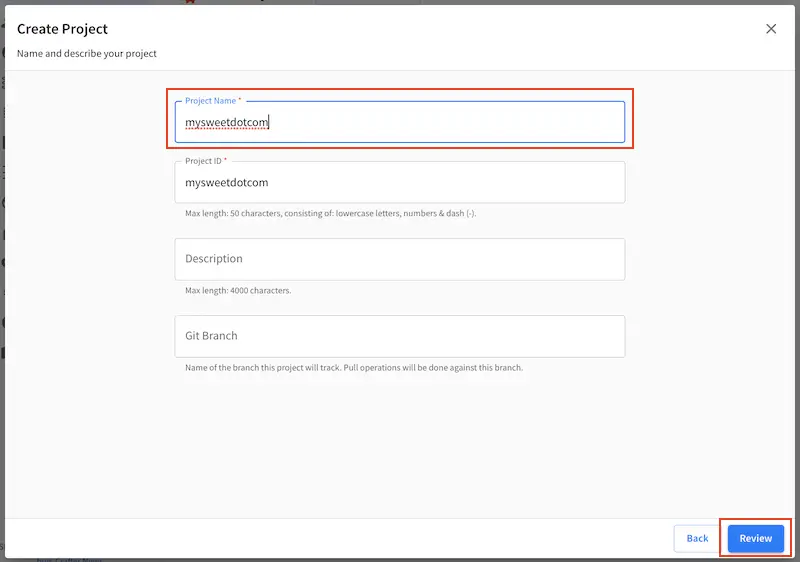
Once your project is created, the next step is to add a remote repository to your newly created project. Open the Sidebar then click on Project Tools -> Git, then click on the New Remote on the top. This will open up a dialog where we can fill in all the information for our remote repository as described above. Click on the Create button after filling in the required information.
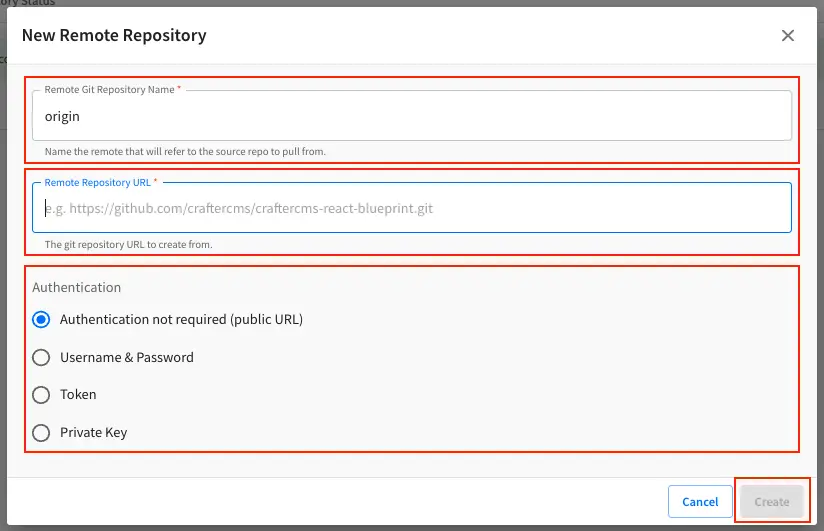
Your project should now have a remote repository listed in the Remote Repositories tab
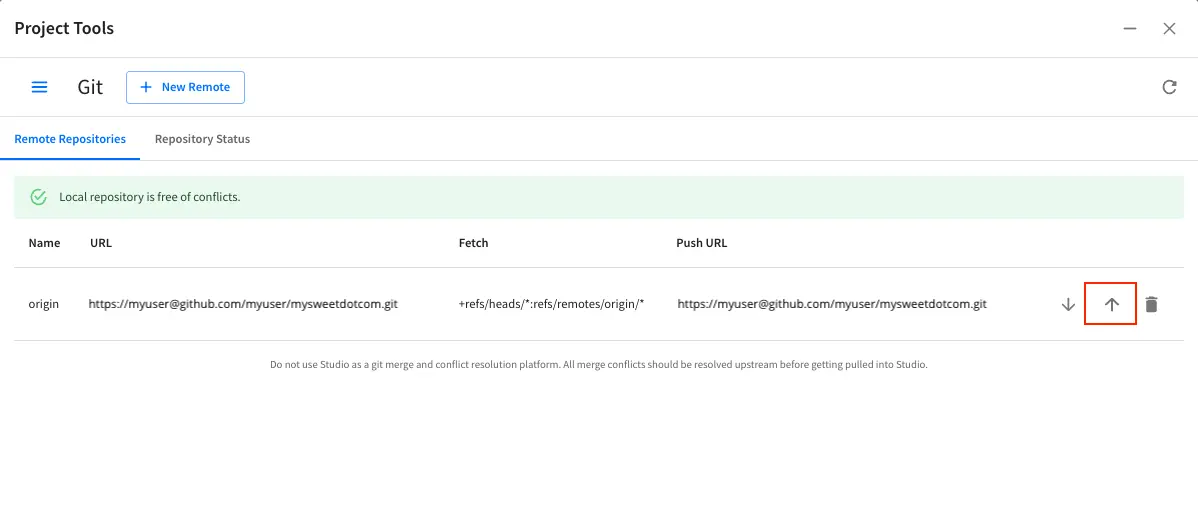
Remember that the remote repository needs to be a bare git repository, since we are pushing our newly created project to the remote repository. To push our newly create project to the remote repository, click on the Push button (button with the up arrow) next to the remote repository
Create project based on a remote Git repository
Creating a project based on a remote Git repository is basically exporting a project from one Studio and importing it into another one.
To create a project based on remote Git repository, after clicking on Create Project, Click on Remote Git Repository in the create project screen
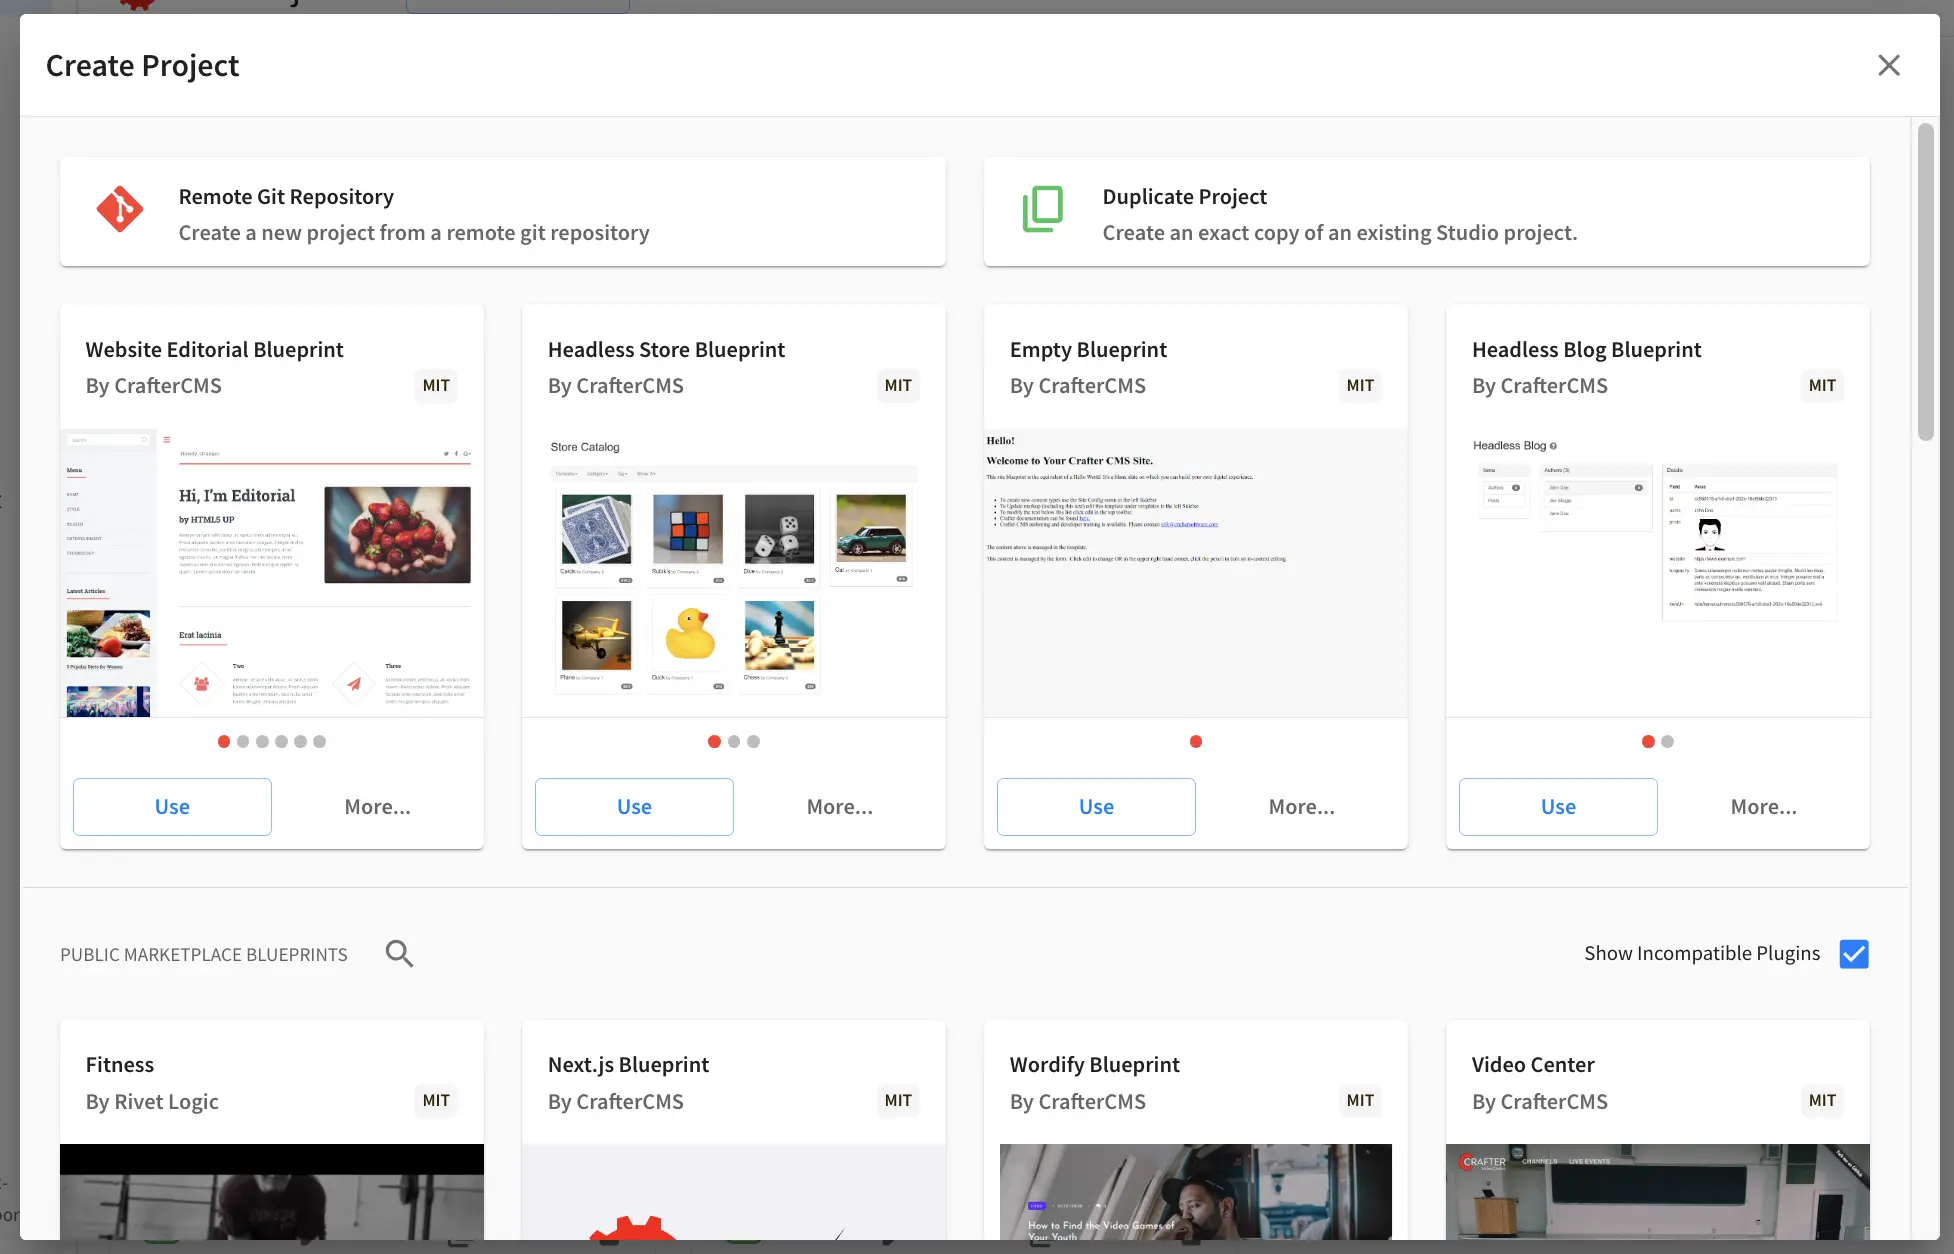
Click on the Site ID field where you’ll need to give your project an ID. Scroll down to see where you can fill in all the information for the remote repository we are importing. The Git Repo URL is the import project’s sandbox repository git url (the project you want to bring over to your Studio). Below are sample urls for the project being imported:
Here is a sample Git url from GitHub: https://github.com/username/hello-test.git Here is a sample Git url using ssh: ssh://[user@]host.xz[:port]/path/to/repo/ or alternatively for ssh: [user@]host.xz:path/to/repo/
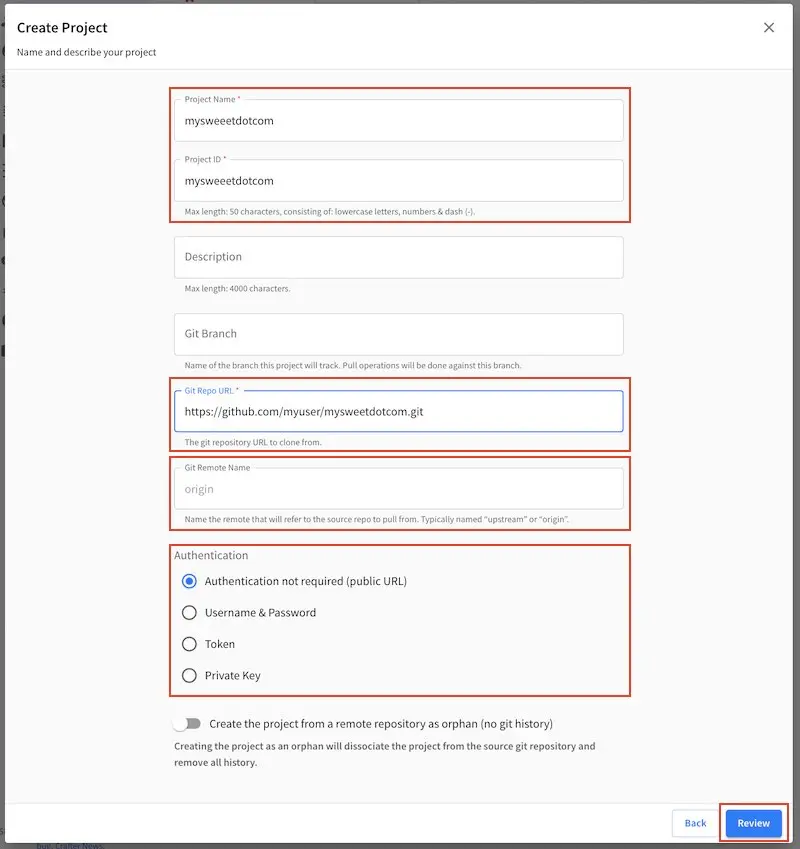
Click on the Review button, then finally, the Create Project button.
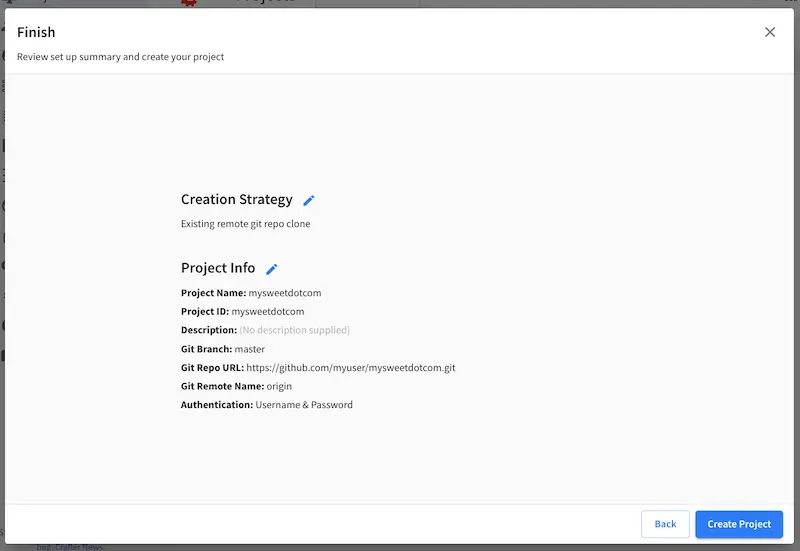
After a short while, your project will be imported.
In case you want to publish the entire project, follow these optional steps:
In the project you just imported, click on Project Tools, then click on Publishing
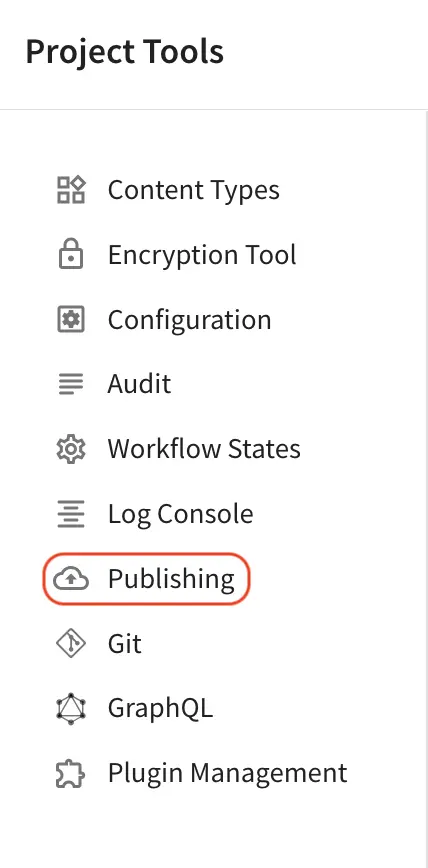
In the Publishing screen, scroll down to
Publish on Demandthen click on the Publish Entire Project button to publish the whole project.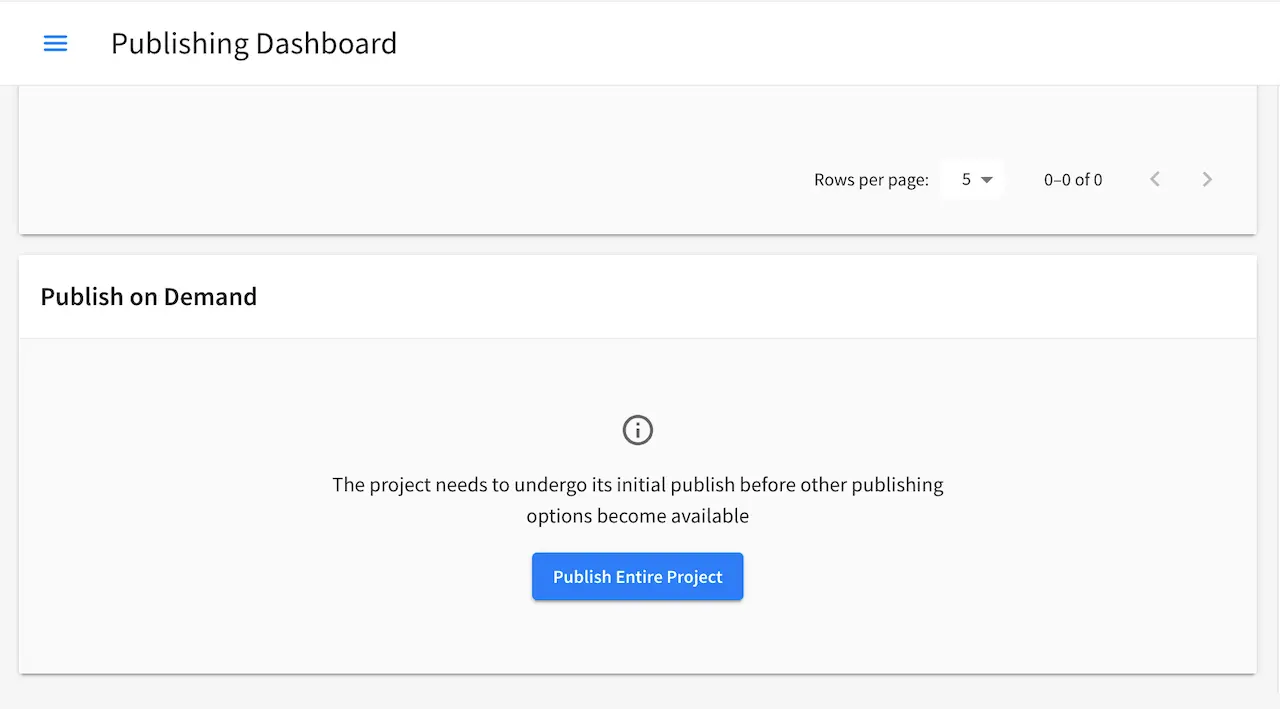
Duplicating a Project
Crafter Studio supports creating a new project by duplicating an existing project.
To duplicate a project, from Projects, click on the Create Project button.
Next, click on Duplicate Project. It will then prompt you to select the project to be duplicated by clicking
on the dropdown arrow in the Project field. Give it a good Project Name and Project ID, then click on the
Review button
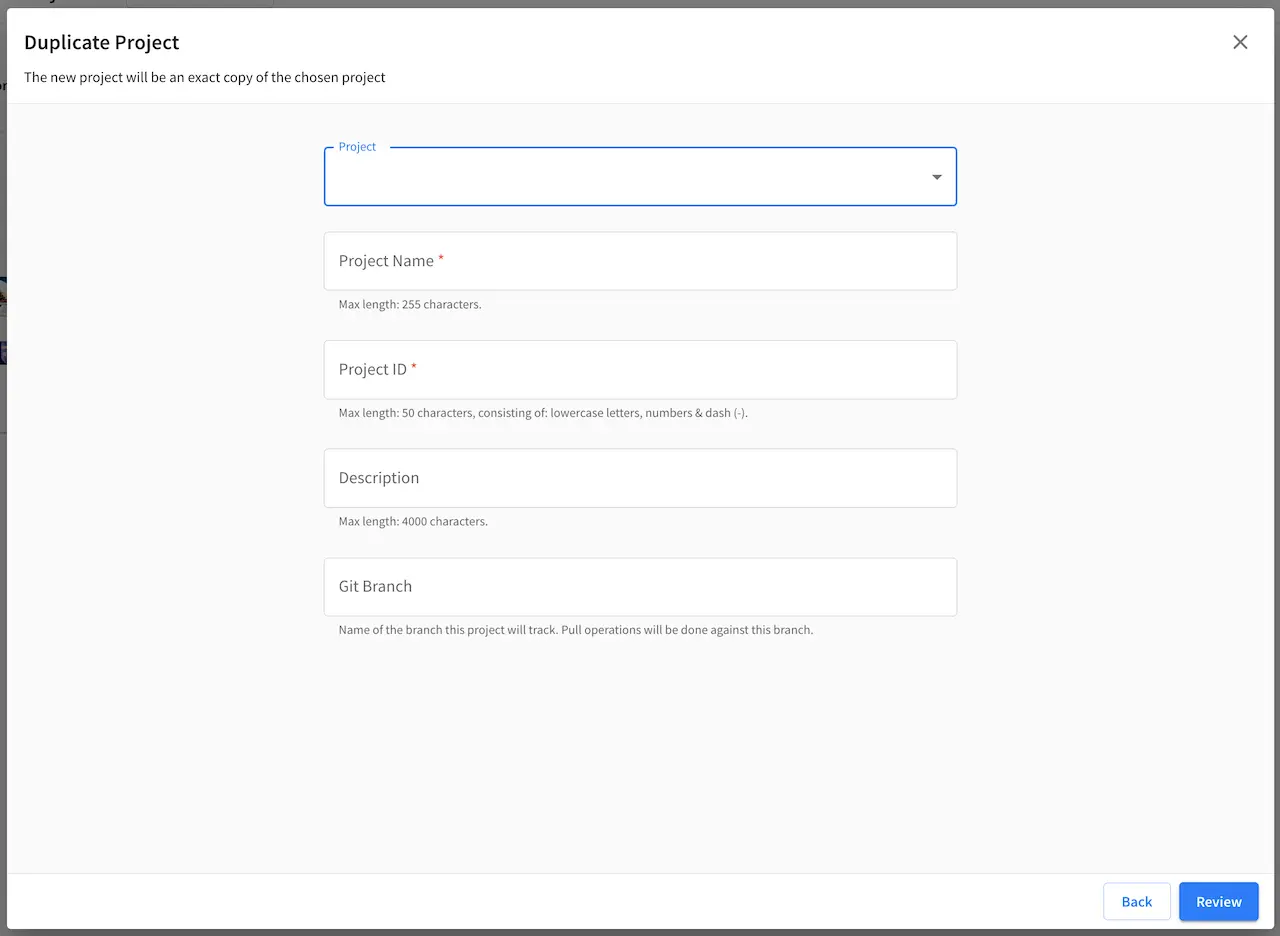
When duplicating a project that uses S3 buckets (blob stores), the S3 buckets may be copied over to the new project and the configuration updated if separate S3 buckets from the source project are required.
Clustering
Learn about clustering Crafter Studio in the Crafter Studio Clustering Guide.
REST API
To view the Crafter Studio REST APIs:
or in a new tabSource Code
Crafter Studio’s source code is managed in GitHub: https://github.com/craftercms/studio