CMS for SPAs: Building Angular Apps with CrafterCMS
Applicable to CrafterCMS 4.0
Phil Nguyen
Introduction
Angular is an open-source platform and web application framework. Angular is used to build single-page web applications with HTML and TypeScript. With the Angular Universal technology, developers can also build server-side rendering web applications as well. Furthermore, we can achieve the maximum speed in websites, as well as, control over scalability. Angular is also provided with incredible building tools that lead developers to build features quickly with declarative templates. The framework is loved by millions of developers all over the world.
CrafterCMS provides a full-featured editing toolset for content authors combined with comprehensive headless CMS capabilities for developers, and this combination is quite unique. In this tutorial, you will learn how to create a content-rich, Angular-based web application with in-context editing and other easy to use content authoring capabilities.
Let’s get started.
Prerequisites
In this tutorial, you will need:
-
A CrafterCMS Studio 4 stable version running in port 8080 on your local machine
-
NodeJS version 16 or later installed in your machine
CrafterCMS projects with Angular integration
For testing purposes, we have created a CrafterCMS project with Angular integrated. You can easily create a new project with this blueprint and check out how it works.
Here is a sample project with Angular integration:
https://github.com/phuongnq/craftercms-example-angular
Let’s take a look at how to create a new project from this repository.
Demo projects with Angular
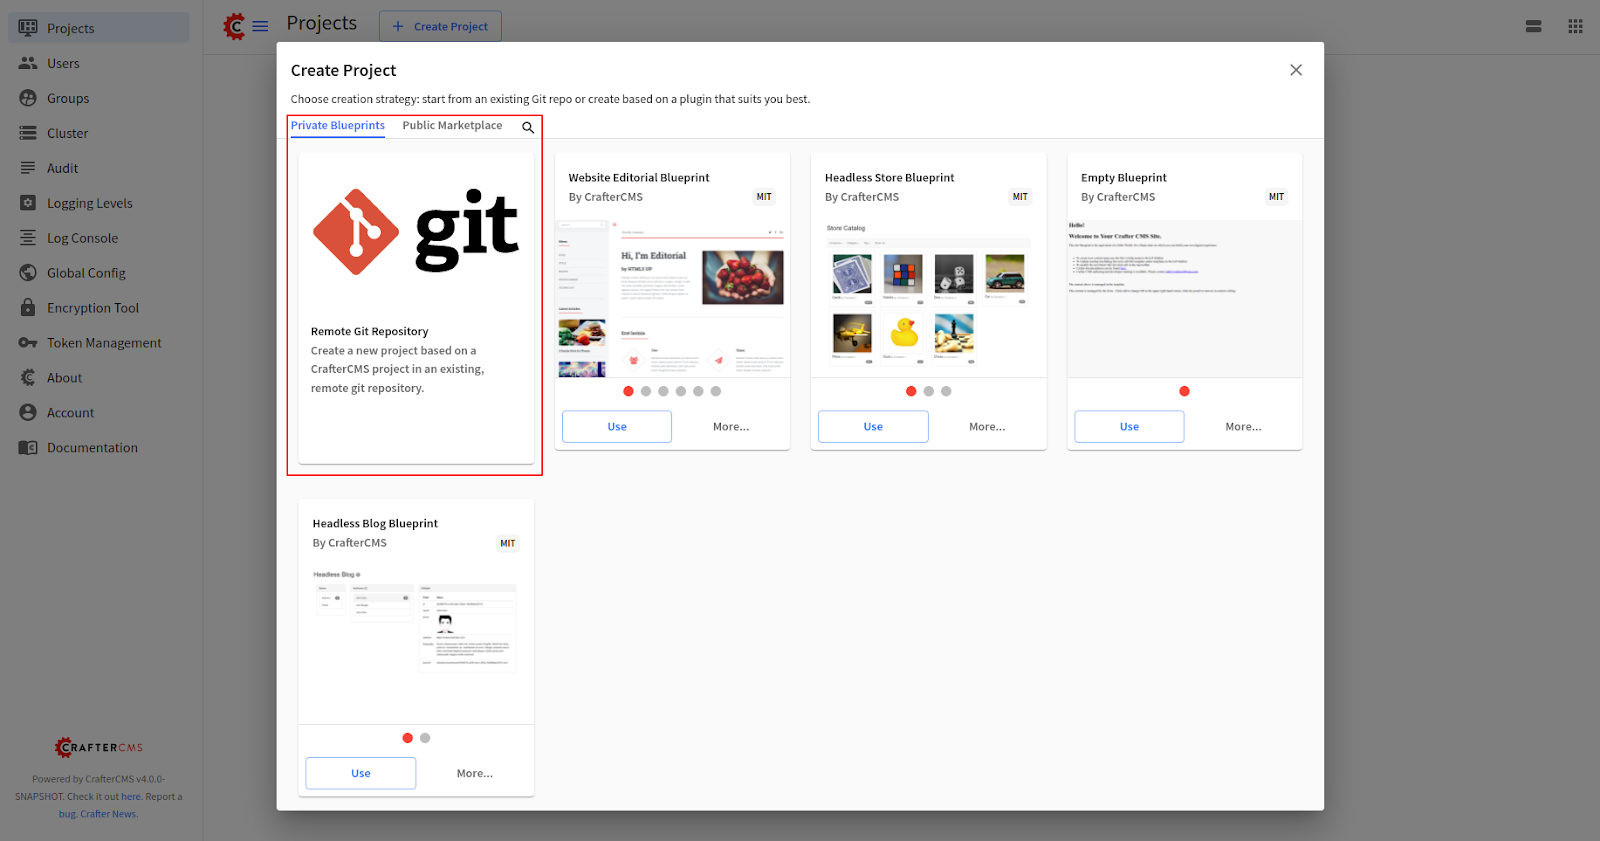
Log in to Studio, from the Projects tab, click Create Project button and select Remote Git Repository.
Input as following in Create Project popup:
-
Project Name: Angular Sample
-
Project ID: angular-sample
-
Git Repo URL: https://github.com/phuongnq/craftercms-example-angular
Note: Project name can be any but inputting “Angular Sample” makes it easier for the setup. Otherwise, you will need to update the project name in the angular application.
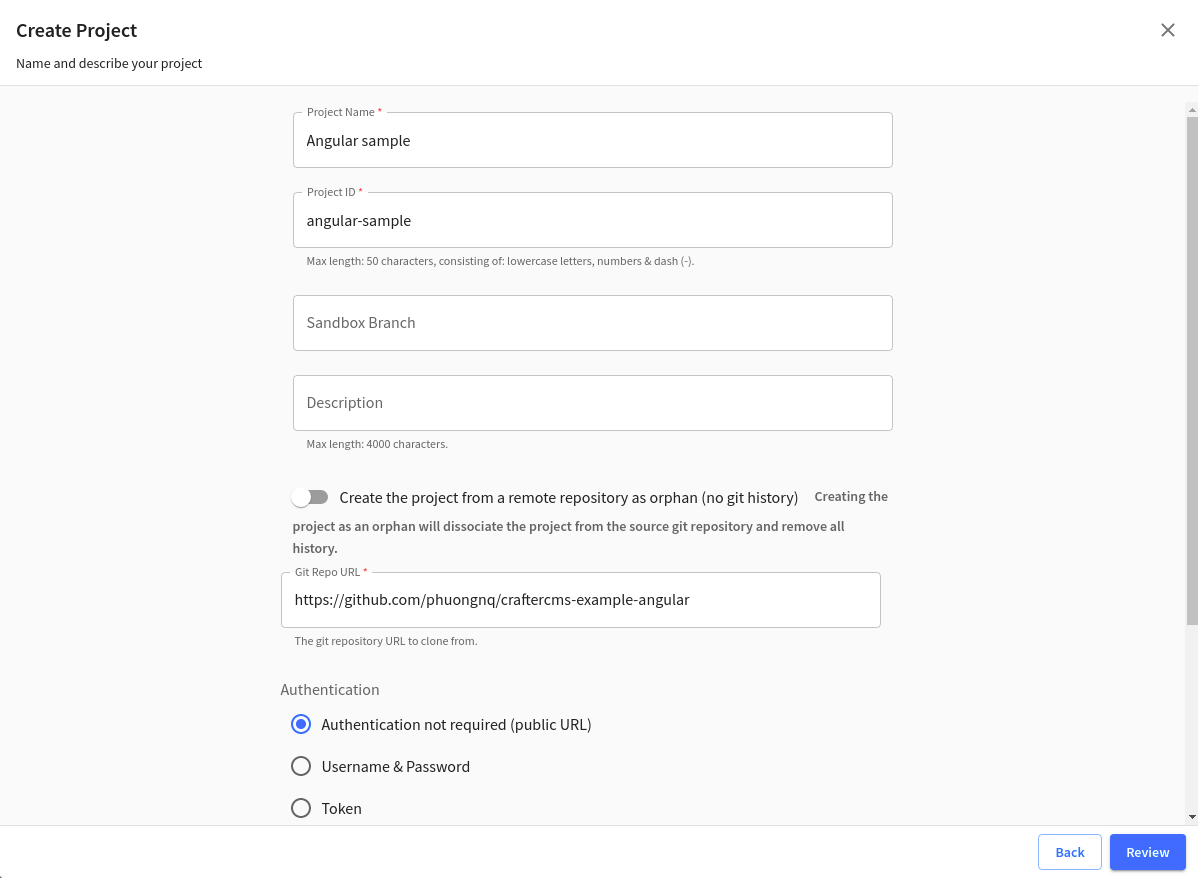
Click Review > Create Project.
When the project “Angular Sample” is created. You should see the following screen:
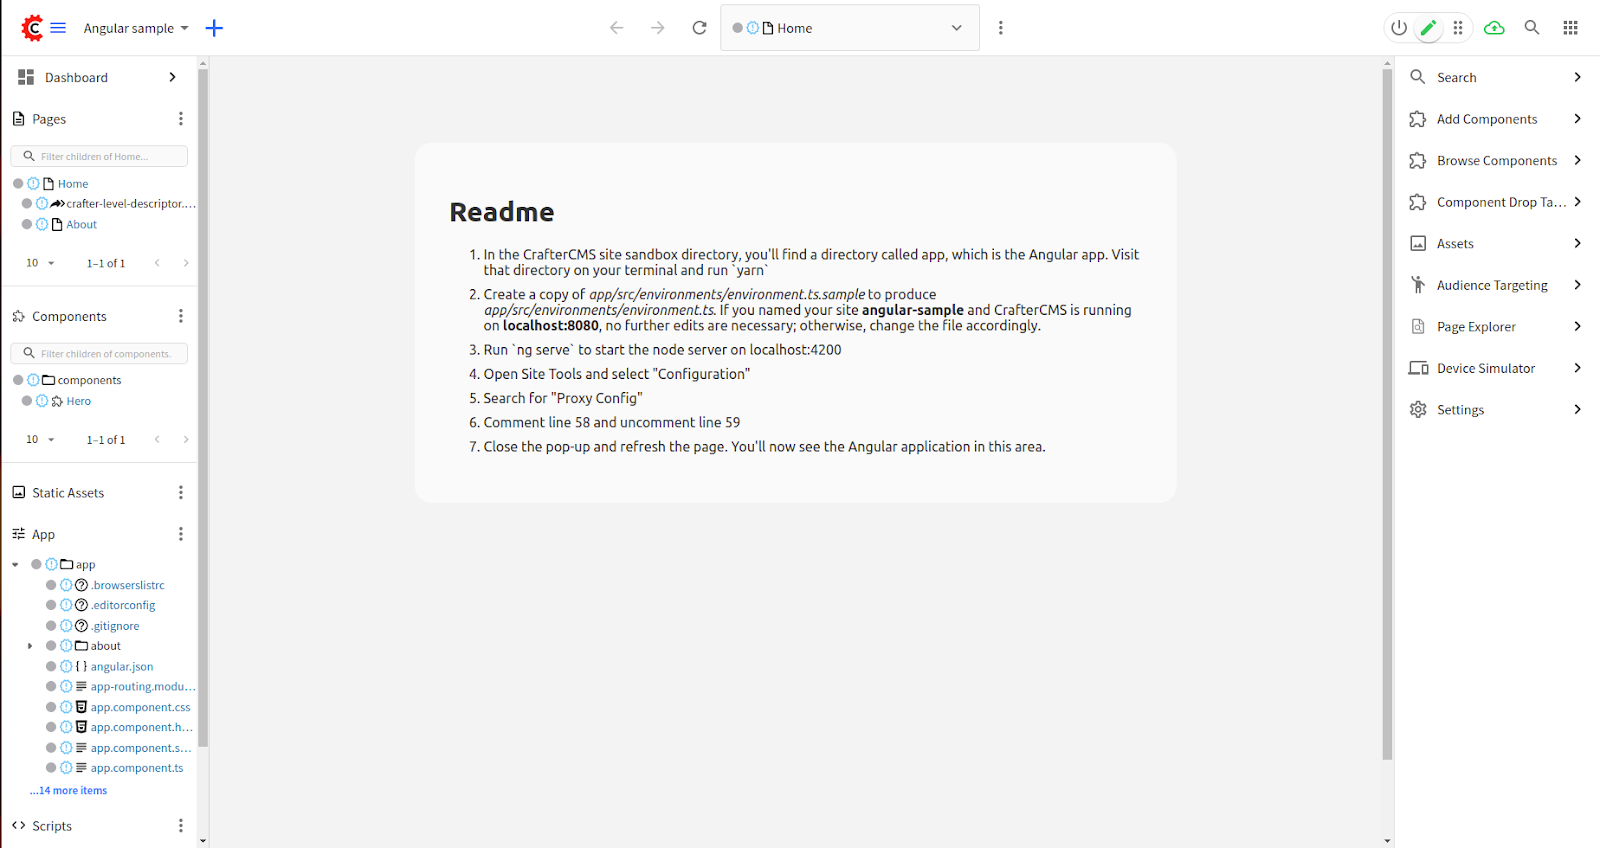
There are instructions on Readme to follow:
-
In the CrafterCMS site sandbox directory, you'll find a directory called app, which is the Angular app. Visit that directory on your terminal and run `yarn`
-
Create a copy of app/src/environments/environment.ts.sample to produce app/src/environments/environment.ts. If you named your site angular-sample and CrafterCMS is running on localhost:8080, no further edits are necessary; otherwise, change the file accordingly.
-
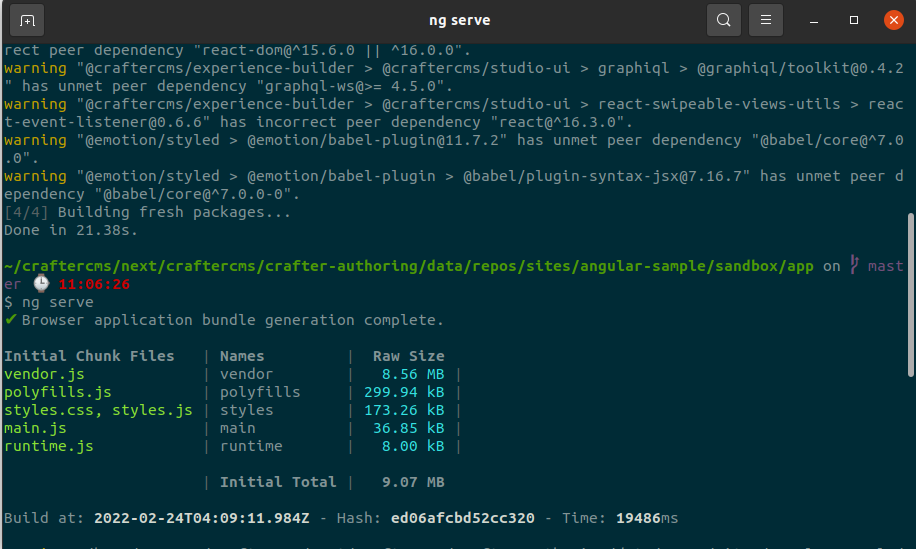
Run `ng serve` to start the node server on localhost:4200
-
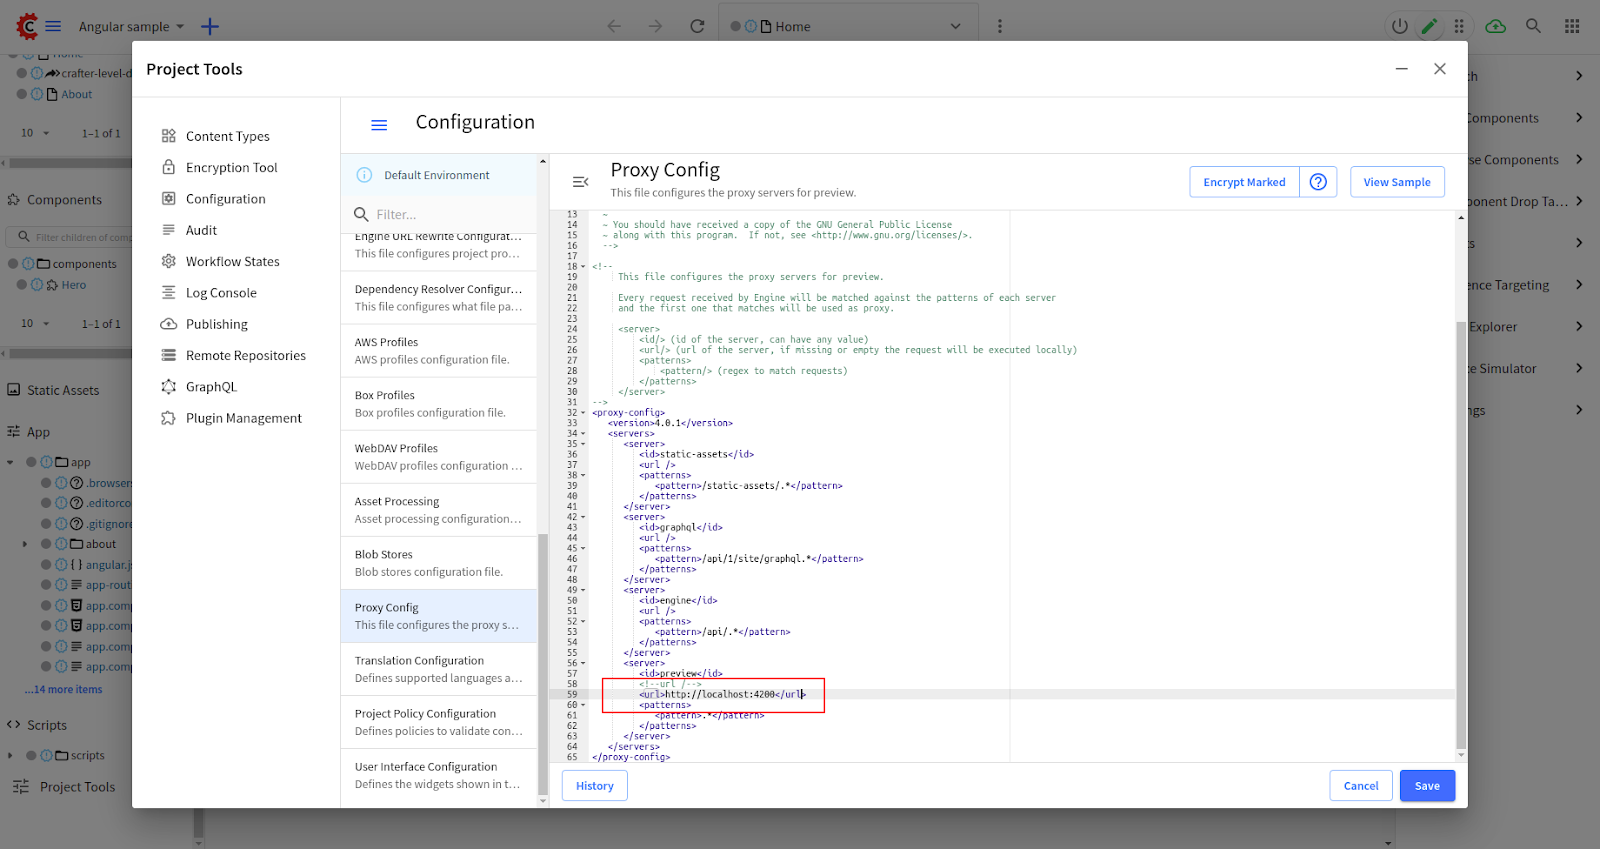
Open Site Tools and select "Configuration"
-
Search for "Proxy Config"
-
Comment line 58 and uncomment line 59
-
Close the pop-up and refresh the page. You'll now see the Angular application in this area.
In file app/src/environments/environments.ts, you should have the following content:
Follow the steps and run your Angular application on port 4200:
Note: we use yarn to manage Angular packages dependencies.
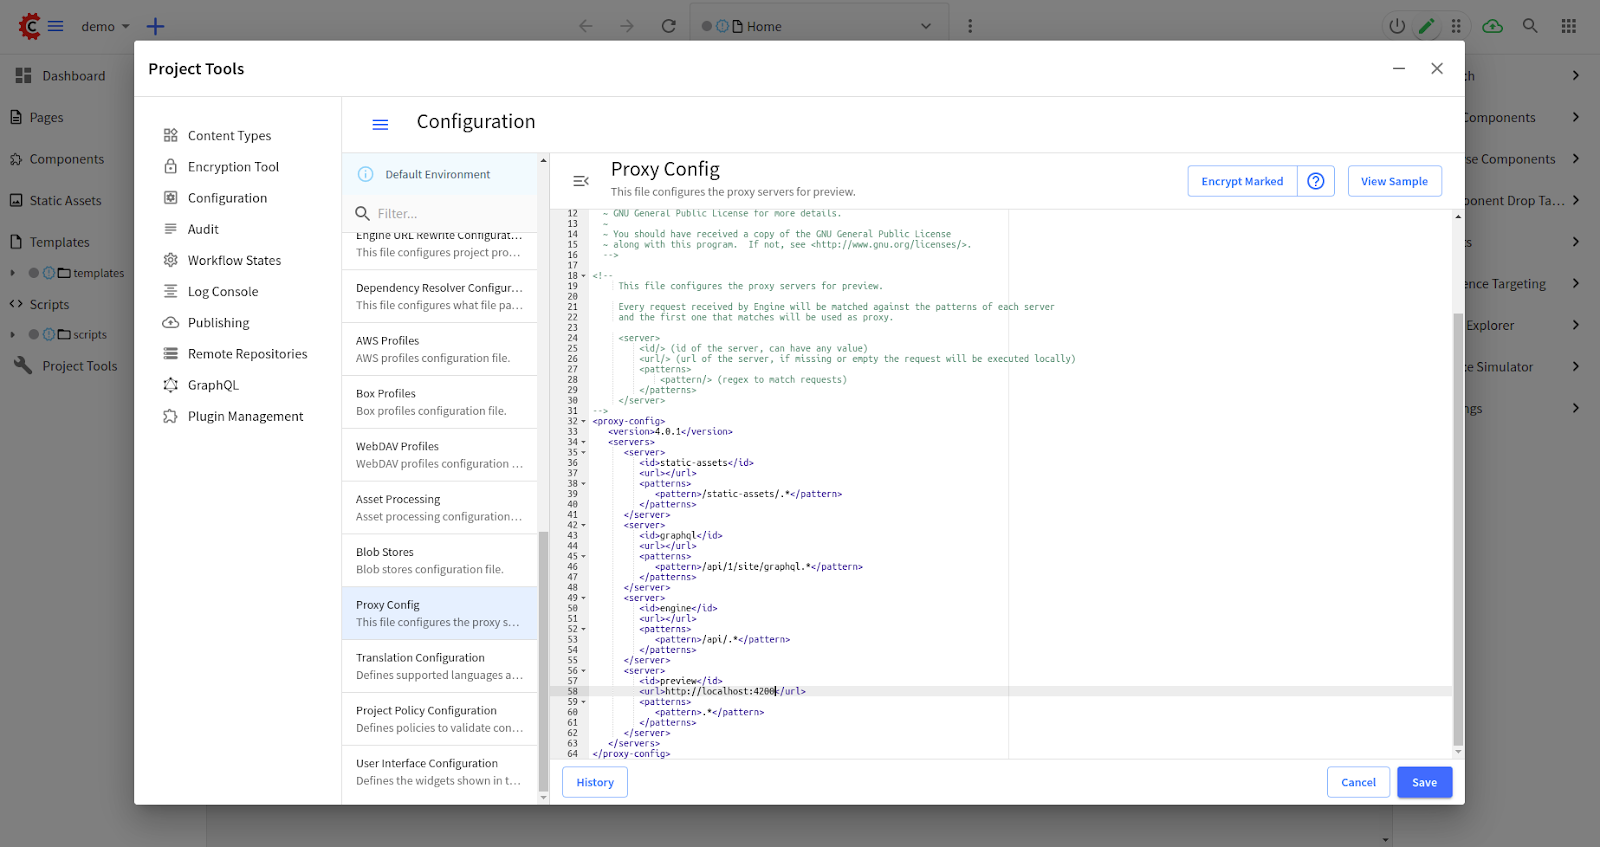
Update proxy configuration:
Project Tools > Configuration > Proxy Config
Do as these instructions, you should be able to see the following screen while previewing your site in port 8080:
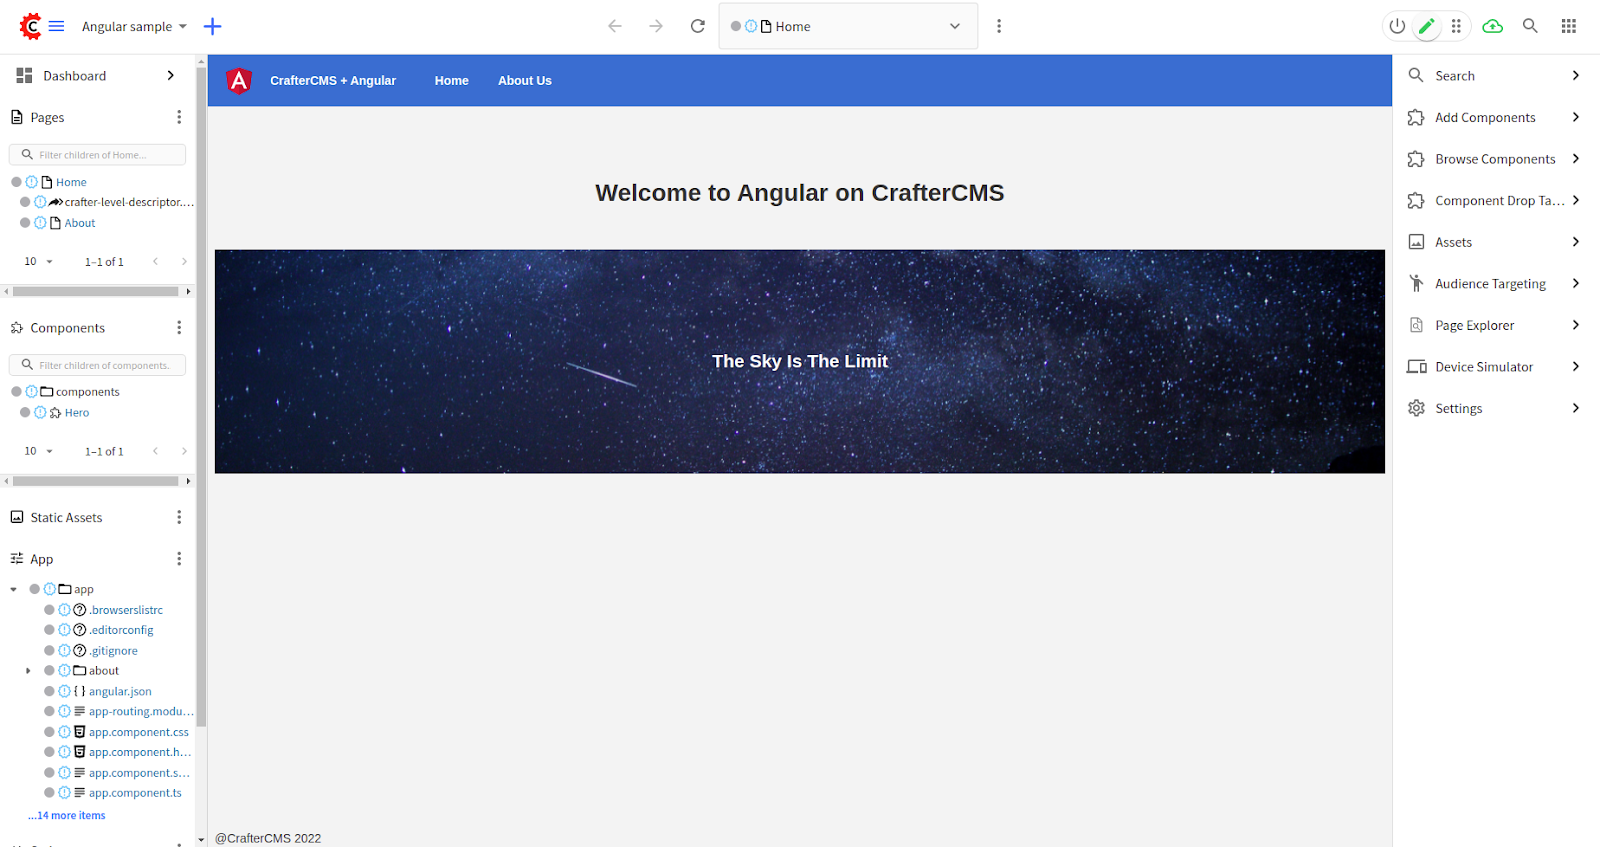
While the green pencil is active, click on components such as the text “Welcome to Angular on CrafterCMS “, you should see a green box appears showing that the text is editable. Click on it and change the text to “Welcome to Angular on CrafterCMS 4“.
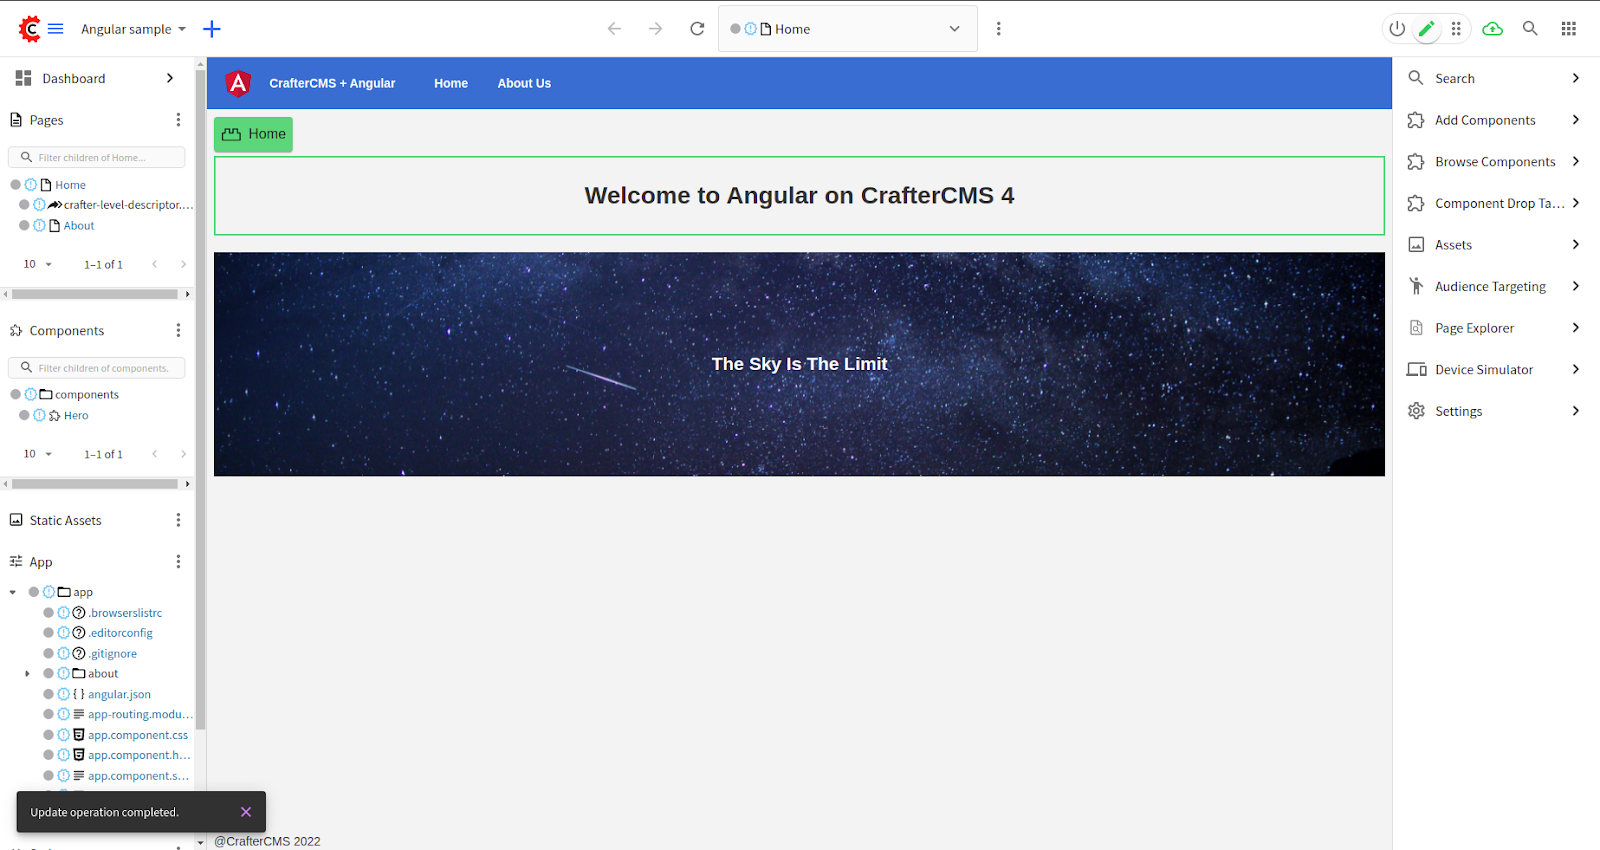
This is the In-Context Editing (ICE) feature of CrafterCMS that enables you to edit the content of your components while in previewing mode. If you open the site in port 4200, ICE is not available because we are opening the site out of Crafter Studio previewing frame.
Note that in order to make a cross API call from the application on port 4200 to Studio, we also need to set up Engine Project Configuration to allow origin http://localhost:4200.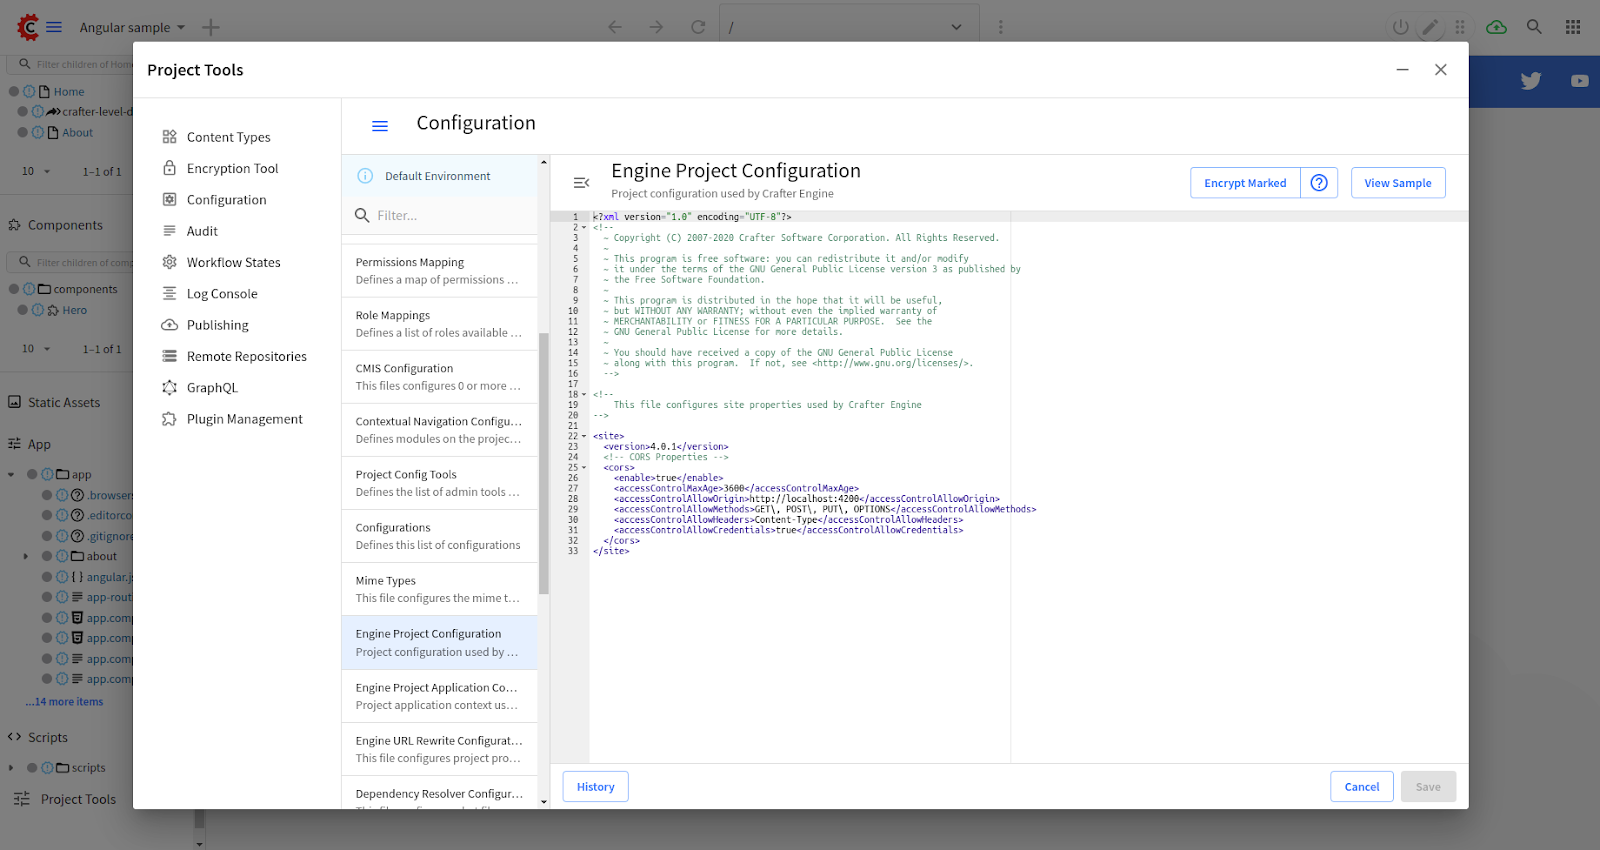
How CrafterCMS works with Angular
CrafterCMS provides craftercms/craftercms-sdk-js and the Experience Builder with built-in libraries to work with content, including In-Context Editing features. This library is tested working well with Angular. Refer to the SDK in the GitHub repository for more information about supported modules and their usages.
Next, let’s take a look at the source code of our site.
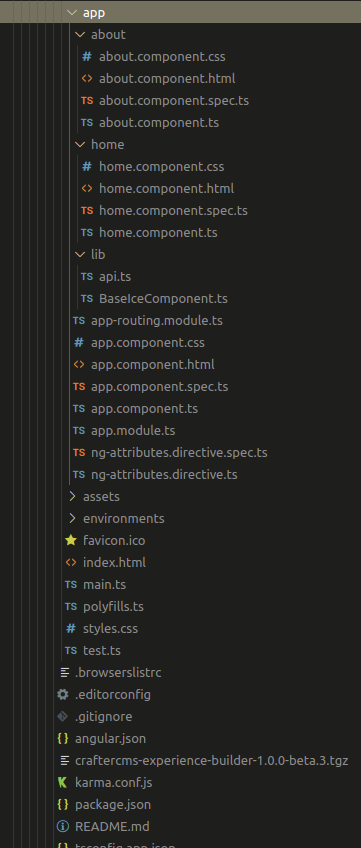
In this Angular application, we additionally include following components:
-
Two routes:
-
/: for home component
-
/about: for about component
-
lib/BaseIceComponent.ts: a based component with In-context editing (ICE) enabled. `home` and `about` extends from this component
-
lib/api.ts: API to get content from CrafterCMS
-
ng-attributes.directive.ts: A customized directive to include ICE attribute to a DOM element.
Other files are just standard Angular file structure. Check out the official documentation here to learn more about this.
Experience Builder
Let’s take a closer look at how we use Experience Builder feature of CrafterCMS with our Angular application.
In the above example, we have 2 pages: A home page with the root route / and an About page with route /about. Each page contains the In-Context Editing feature if you open it in preview mode from Studio.
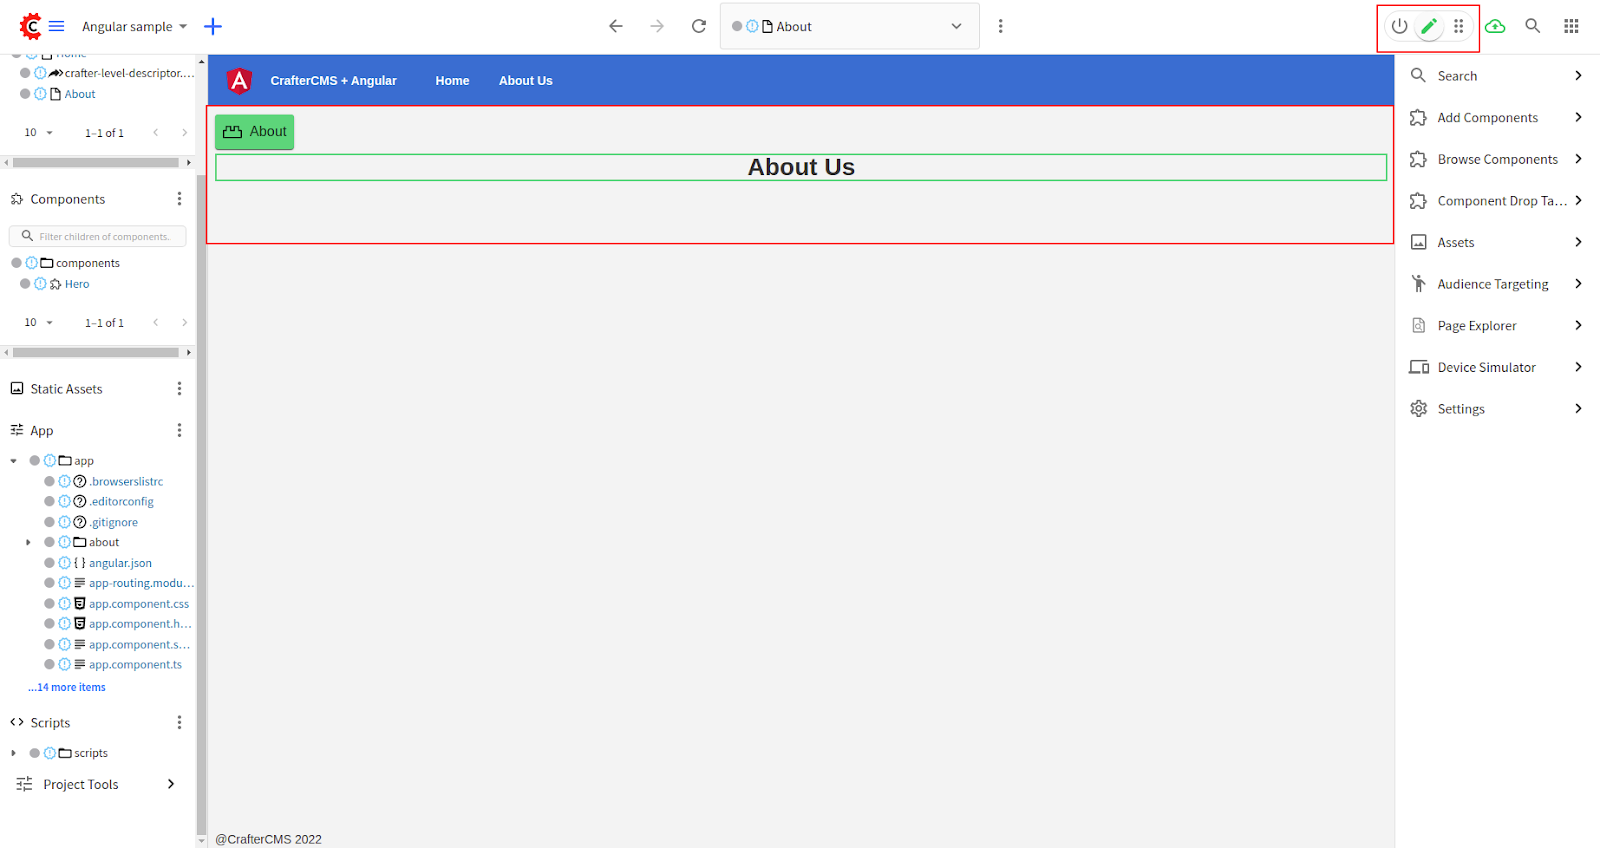
The green pencil active means ICE (In-Context Editing) is enable. Each element within the view which has a green box is enable for editing.
We use @craftercms/experience-builder package to make ICE possibile in CrafterCMS 4. For this sample, we are using version 1.0.0-beta.3 from a local file:
In future versions, you can directly use it from npm.
Let’s take a look at how this is implemented within about page.
Most of our logic is in BaseIceComponent.ts component. On initialization, we check if current context is authoring, then fetch the page model from CrafterCMS. You can refer to file `lib/api.js` on how we implement getModelByUrl() method using the package @craftercms/content.
A sample output of the model could similar to this JavaScript Object:
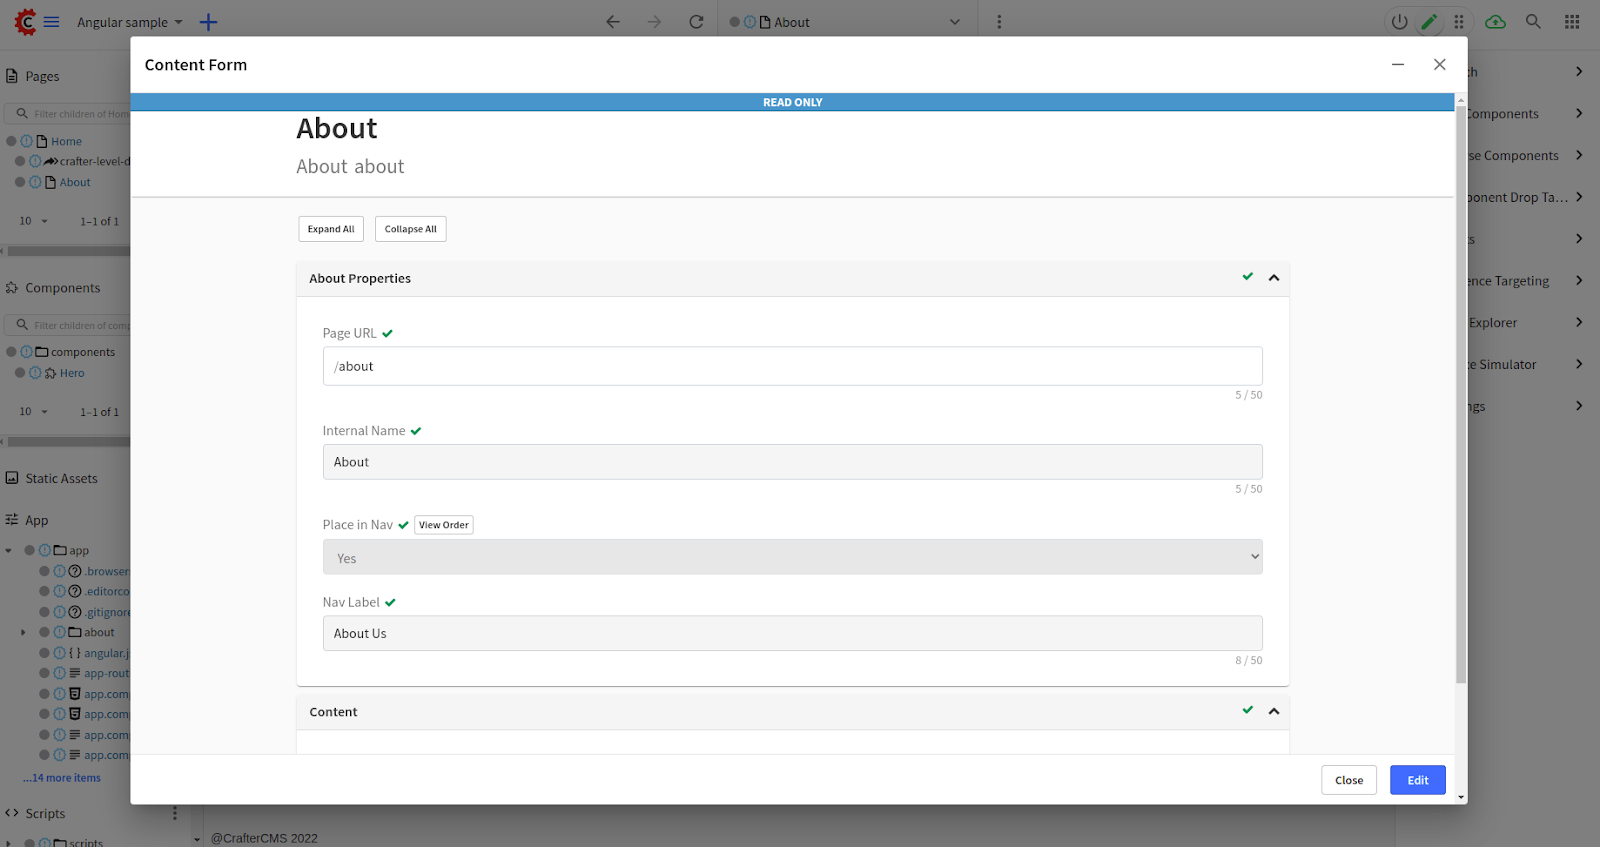
You could see similar content while in Studio by clicking Pages > About (options with 3 dots) > View Form.
Then we use this model information to update DOM element <h1>:
If you open the source code of this DOM, the result should be similar to the following:
ngAttributes directive (which we defined within ng-attributes.directive.ts is used to bind HTML attributes to the DOM. We also use getIce() method to get ICE attributes from getICEAttributes of @craftercms/experience-builder package.
Finally, we enable ICE when the page is loaded with function initInContextEditing():
CrafterCMS’ Experience Builder (XB) provides a UI layer on top of your applications that enables authors with in-context editing (ICE) for all the model fields defined in the content types of pages and components. CrafterCMS developers must integrate their applications with XB, essentially telling XB what field of the model each element on the view represents.
While there is more support with integrated components for React applications, it is proved that the XB works well with an Angular application as in the above example.
To learn more about XB, check out the documentation here.
Create a new project with Angular integration
In the previous session, we create a site from a blueprint that has Angular enabled. So how about working with Angular from scratch?
Let's continue this session on how we can create a CrafterCMS project with Angular integration from scratch.
Go back to the Global Menu, Select Projects > Create Project, this time with an Empty blueprint.
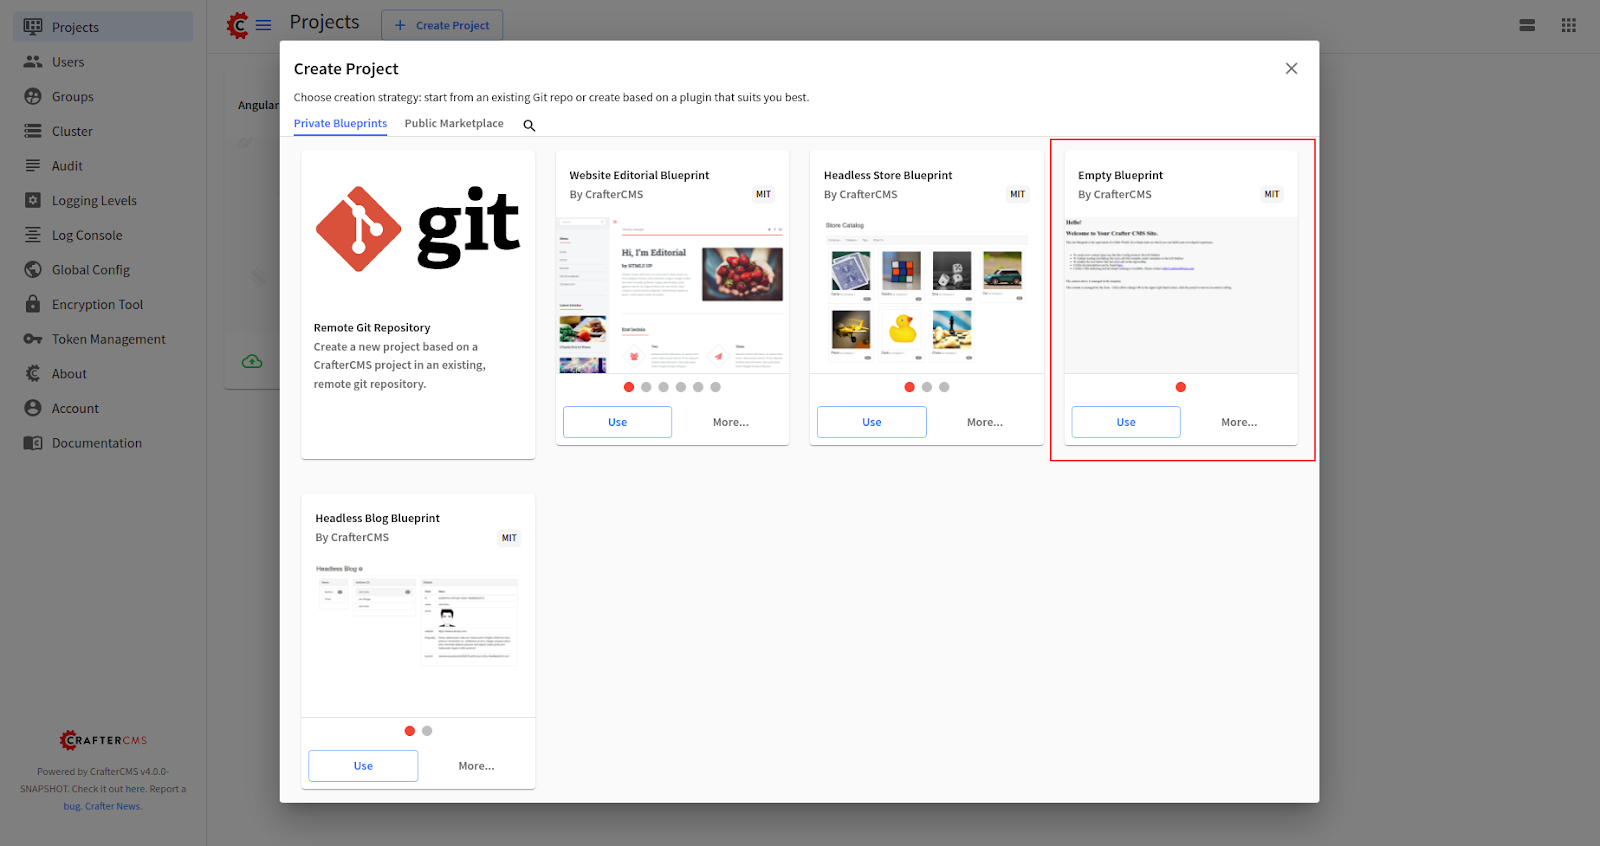
Input as follows and click Review > Create Project:
- Site Name: demo
- Site ID: demo
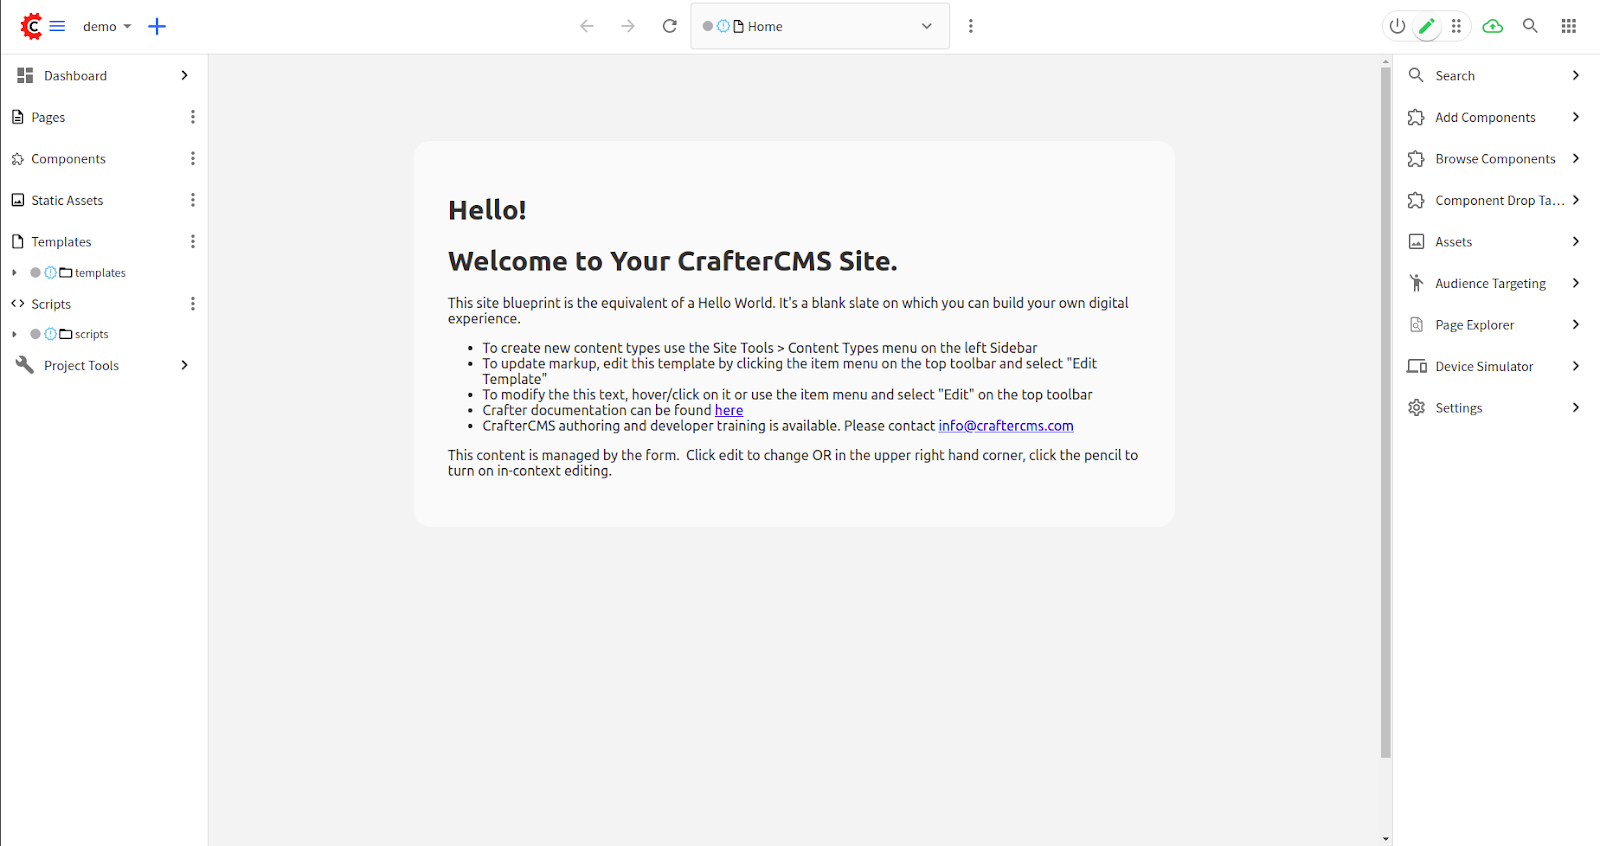
Now let’s create our `app` folder with a branch new Angular application. Thanks to Angular CLI, creating a new Angular application is super easy:
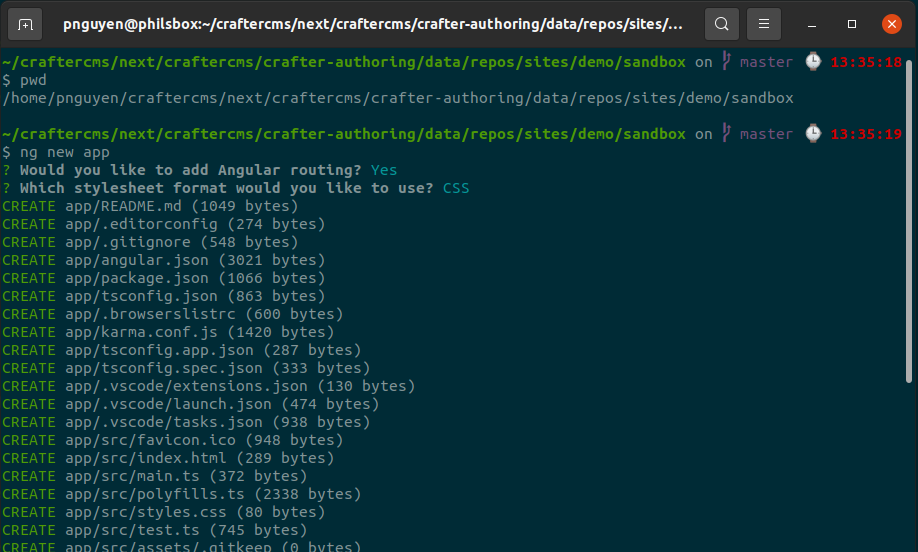
When completed, go to `app` directory then start Angular in port 4200:
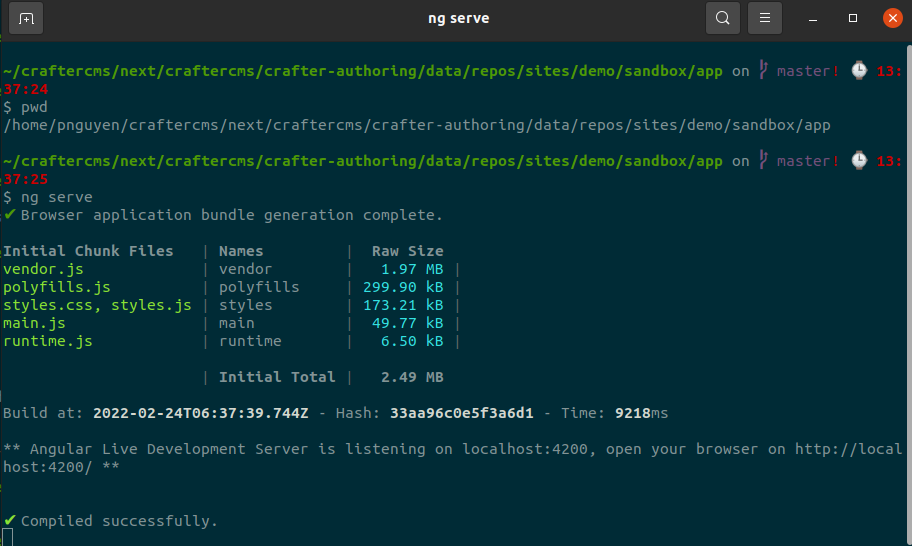
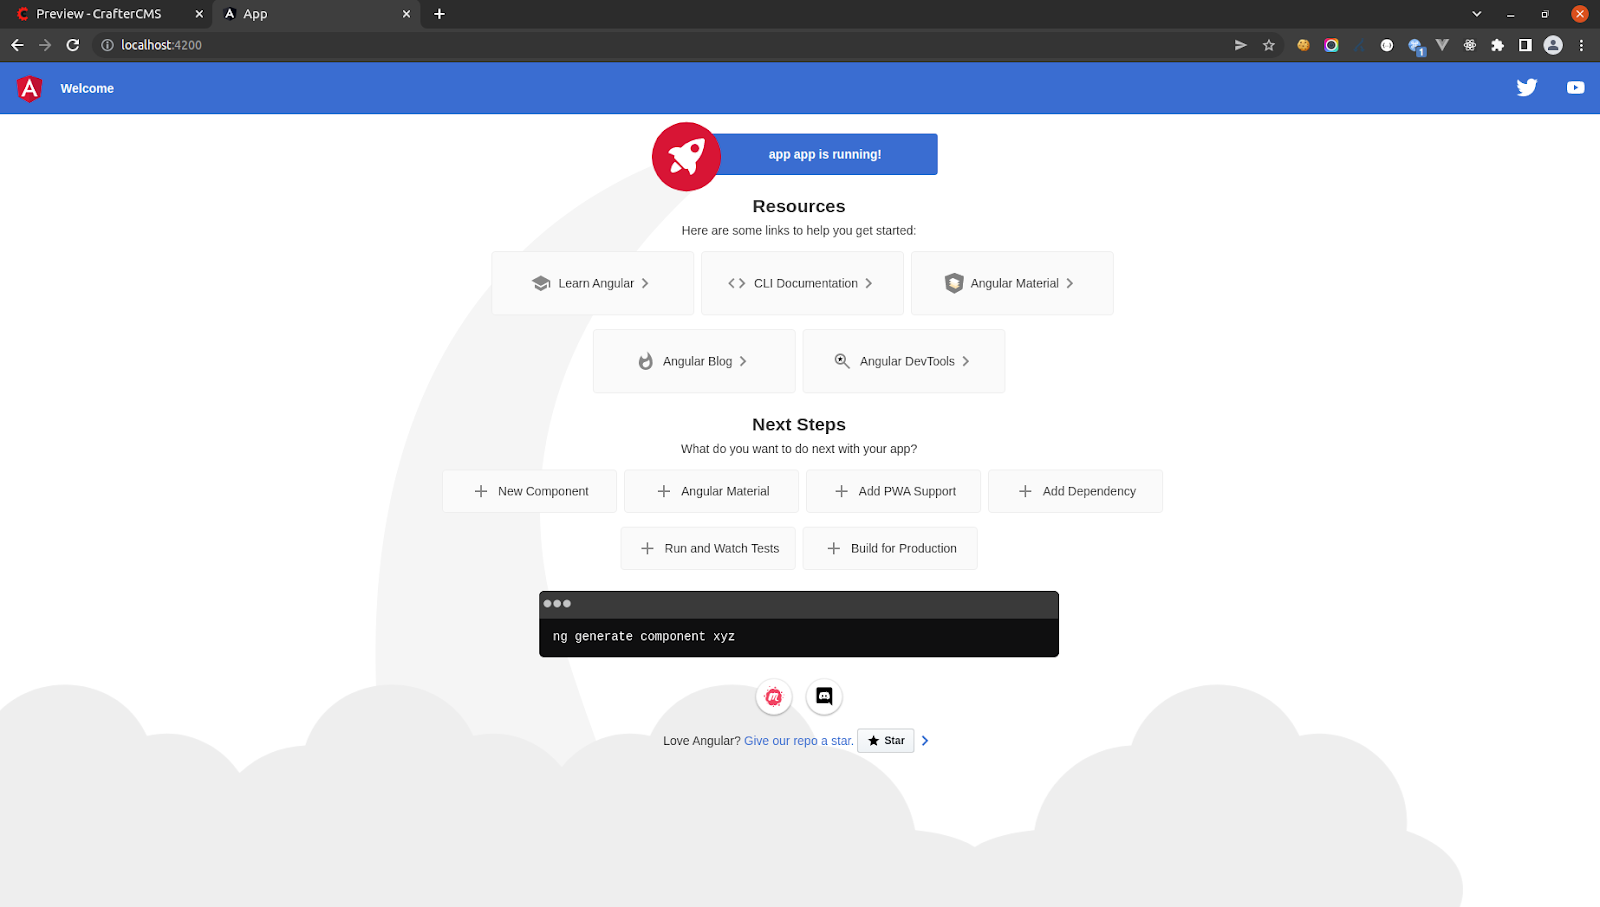
If the application is created successfully, you should see the following screen when browsing http://localhost:4200.
Update Proxy Configuration from demo project in Studio, you will see the same screen while previewing in port 8080:
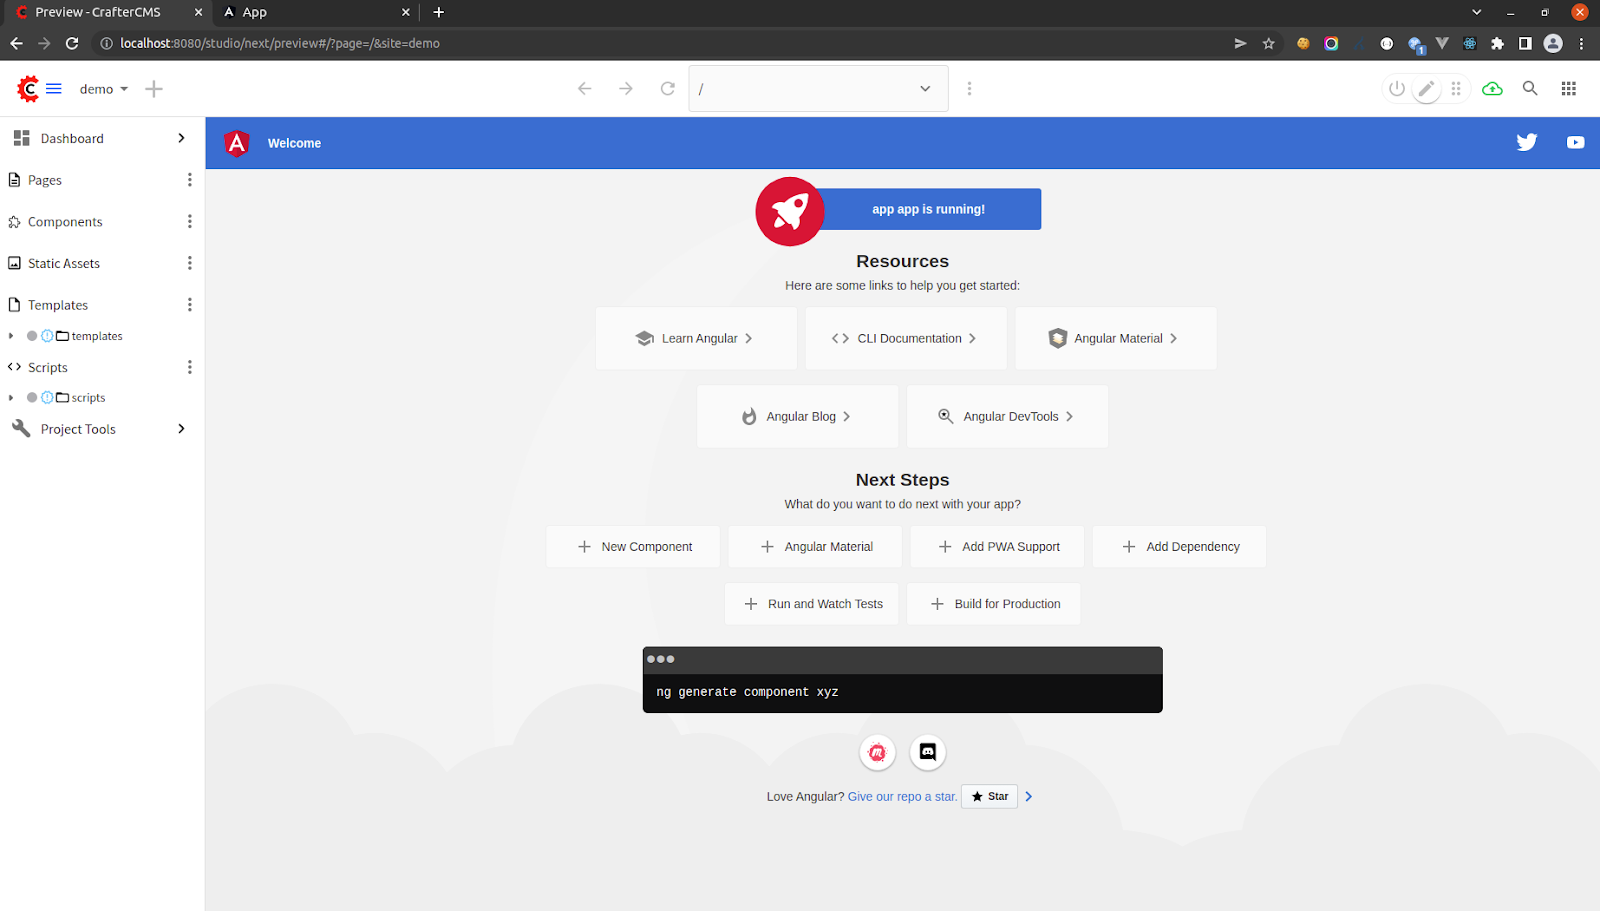
As the Angular web application is up and previewable within Crafter Studio, you can freely implement more logic, including the integration with CrafterCMS using CrafterCMS SDK and the Experience Builder. Take the reference from the above angular-sample project source code on how to do it.
One last thing you must do when modifying a site outside of Studio is to commit the change:
Conclusion
In this tutorial, we have introduced how Angular works with CrafterCMS using CrafterCMS SDK and the Experience Builder.
Are you interested in building Angular applications on a headless CMS platform? Download the open source CrafterCMS project here. Get started by reading about the Crafter Engine APIs. And check out the Crafter Studio APIs to customize your content authoring experience. For commercial support and training, visit https://craftercms.com/pricing.
Related Posts

AI Skills for CMS-Based Web Development

Sara Williams

From HTML Template to Fully Managed Experience in Minutes: CrafterCMS + AI-Powered Workflows

Sara Williams

How Should You Structure a Blog Post So AI Models Actually Cite It?

Amanda Jones

Publishing Content from Crafter Studio to External Systems and Databases

Sara Williams


